• Skip to primary navigation
  • Skip to main content
  • Skip to primary sidebar
  • Skip to secondary sidebar

Plant Based U

Fat-Free and Low Fat Vegan Plant Based Recipes

  • Home
  • Recipes
    • Raw Vegan Recipes
    • Cooked Vegan Recipes
    • Eat to Live Dr. Fuhrman Recipes
  • Products
  • Coaching
  • Videos
  • Articles
  • About
    • What Is Low Fat Vegan/Whole Foods Plant Based
    • Resources
  • Contact

chickpeas

Fb-Button

Slow Cooker – Plant Based Chickpea, Potato, Pea Coconut Curry (Vegan and Dairy Free)

November 23, 2017 by Veronica Grace

Fb-Button

Hey everyone!

Today I have a new recipe for you that I threw together from what I had in the fridge and cupboard as I was craving a warm curry with the cool weather we’re having in Toronto right now. This is one you can make in your slow cooker (I have a Ninja cooking system which can do a few more fancy things than a regular slow cooker) or on the stove if you have time to watch it.

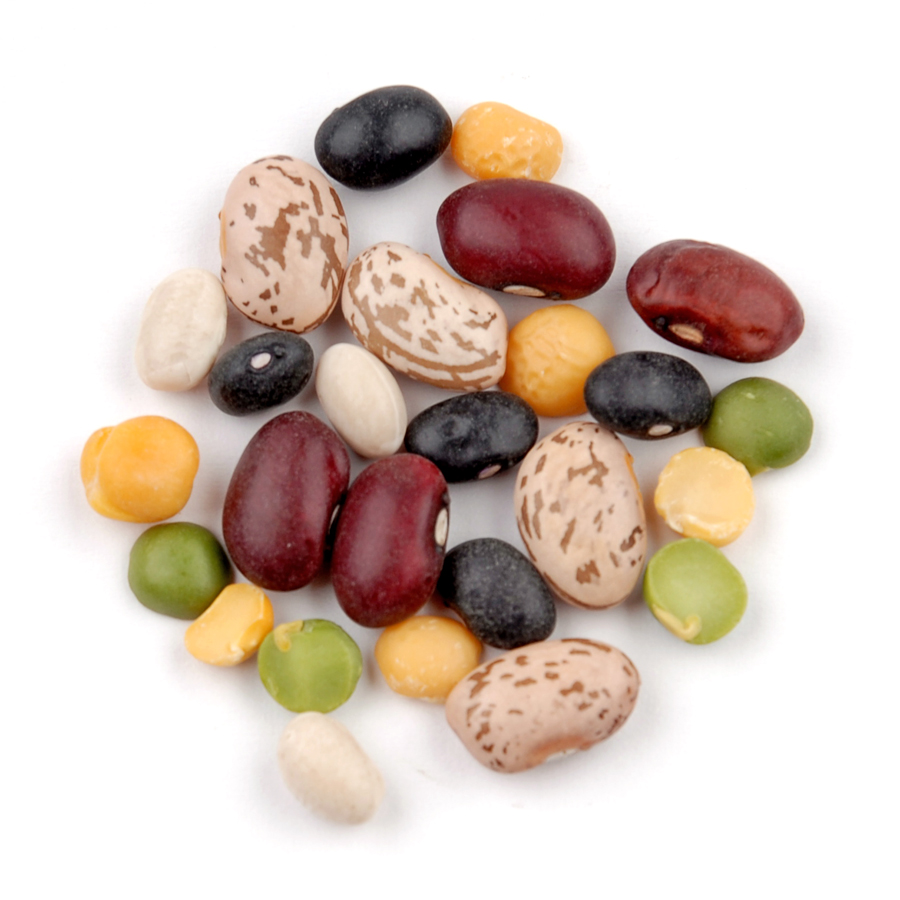
As always it’s oil free and I used dried chickpeas and soaked them overnight before tossing them in the slow cooker. You can use drained canned chickpeas if you like, but be sure to read the label and see if you can find some that are oil free and low in salt if you’re looking for a healthier option. Another note if you’re looking to avoid BPA in canned goods, select ones that say BPA free or that have a metal as opposed to a white plastic lining on the inside of the can (Eden Organics for beans and Muir Glen Organics for tomatoes for example).


This slow cooker curry can either be made the night before and to have it ready in the morning to pack up for lunch or you can start it on a weekend and have a few nights of meals for the next week. For those looking for a meal within the hour you can either use canned chickpeas or pressure cook dried/soaked chickpeas in a pressure cooker and then toss everything else in a large pot and cook over the stove until the potatoes are tender.

I happened to have some sweet potatoes and white potatoes that were getting a little bit soft and salvaged them with this curry, I also love chickpeas in any kind of curry and added the peas for some color and a nice tasty pop. You could also use other root vegetables on hand, or peppers or eggplant to change it up instead of potatoes or chickpeas. If you’re looking for an even lower fat version you can skip the coconut milk altogether or add a touch of almost milk instead if desired.

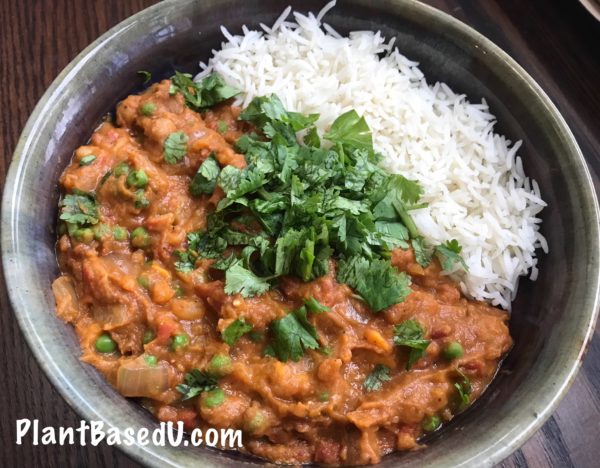
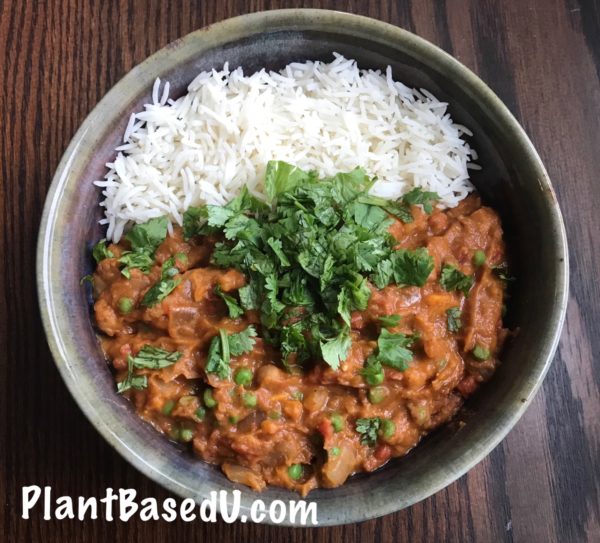
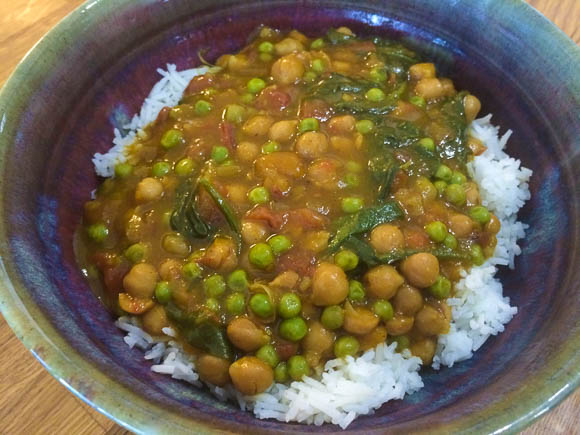
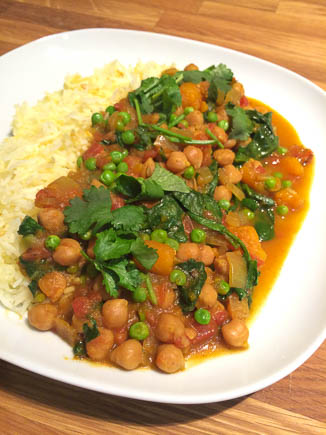
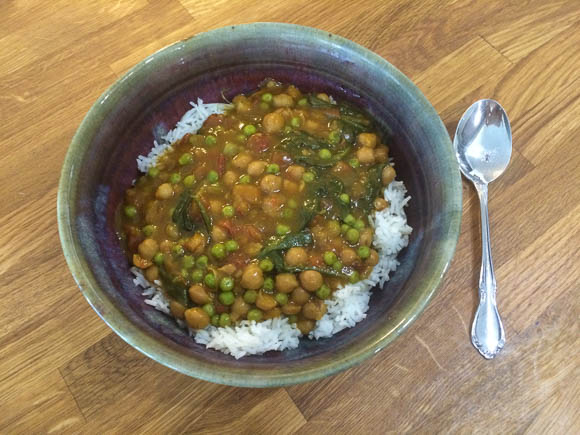
Plant Based Creamy Chickpea Potato Pea Coconut Slow Cooker Curry

Ingredients:
3 15oz/425g cans of chickpeas drained and rinsed or 3-4 cups of dried chickpeas, previously soaked and drained
3 large potatoes, peeled and diced
1-2 sweet potatoes, peeled and diced (optional)
2 large 28oz/793g cans of diced tomatoes
1 15oz can low fat coconut milk
3” of ginger, peeled and minced
8 garlic cloves, minced
1 large onion, diced
2 tsp roasted ground cumin
2 tsp roasted ground coriander
1 tsp turmeric
2 tsp garam masala (Garam masala means hot spices and can vary in flavour in different regions)
1/2 tsp chili
1-2 tsp salt (or to taste)
Ground pepper to taste

Add after cooking:
2 cups frozen sweet peas
1 bunch of fresh cilantro, chopped for garnish

Slow Cooker Instructions:

  1. Layer the ingredients from first to last in your slow cooker so the chickpeas are on the bottom and the spices are on top. You can give it a little stir lightly to get the tomatoes and coconut milk down into the cracks if you want.
  2. Set the slow cooker for 4 hours on high or 6-8 hours on low.
  3. When the potatoes are tender, stir the pot and add in the frozen peas and let sit for a few minutes to warm through.
  4. Adjust for taste if you need more salt, pepper or chilli if desired.
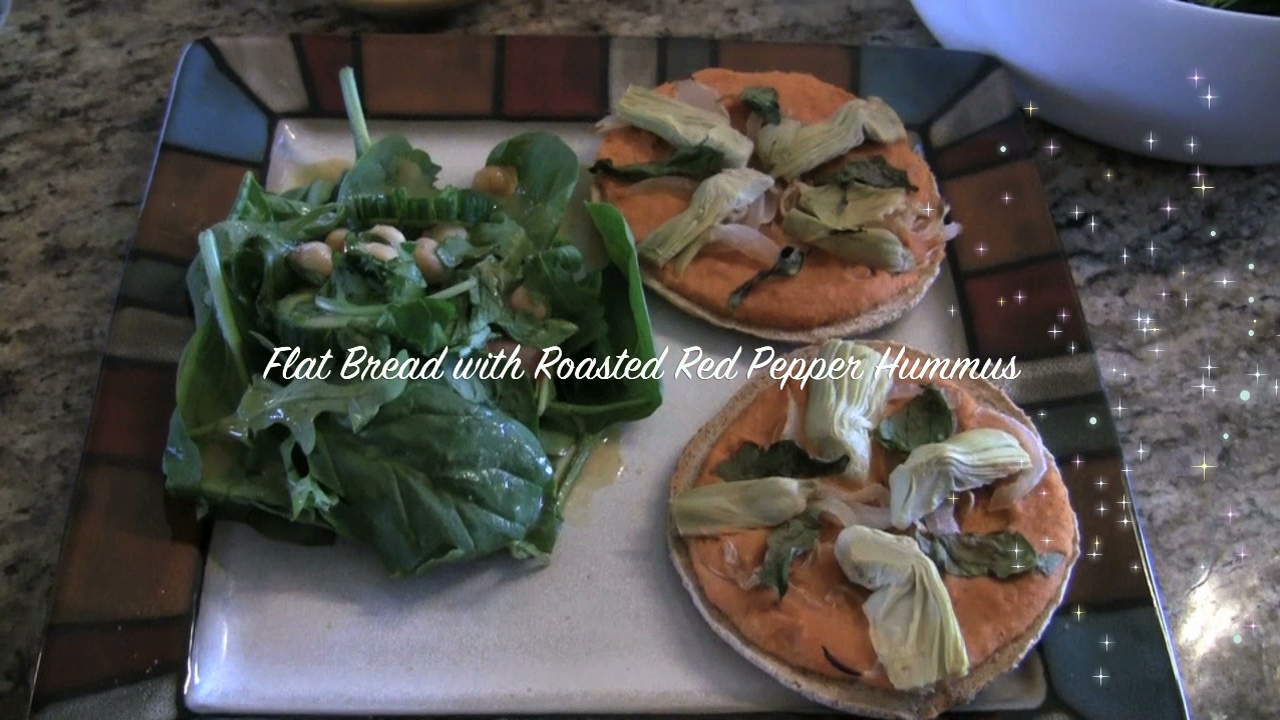
  5. Serve with white or brown basmati rice or flat bread and garnish with cilantro. (I cook my rice in a Zojirushi rice cooker)


Stove Top Instructions:

*If using soaked dried chickpeas you can either pressure cook or stove top cook them beforehand if you want to make this recipe faster, or else you may need to cook this for an hour or two on medium low on the stove until the chickpeas are soft.

  1. Add all of the ingredients except the peas and cilantro to a large pot and bring to a boil.
  2. Reduce heat to medium and stir regularly to ensure nothing sticks to the bottom and burns.
  3. Once the chickpeas and potatoes are tender, adjust seasonings if desired and stir in the frozen peas.
  4. Heat through until the peas are warm.
  5. Service with rice or flat bread and garnish with cilantro.

Have you ever made a slow cooker curry? What was in it?

Filed Under: Casseroles, Cooked Vegan Recipes, Curries, Slow Cooker Recipes Tagged With: chickpeas, cilantro, Curry, Indian Dishes, peas, potatoes, rice, sweet potatoes, tomatoes, yams

Slow Cooker Recipe: Lower Fat Plant-Based Butternut Squash and Chickpea Coconut Curry

November 20, 2015 by Veronica Grace

Fb-Button


ButternutSquashChickpeaCurry-1

Hey guys! I am still working with Iphone photos for now as my professional Canon camera was stolen and I don’t have funds to replace it yet so thank you for bearing with me. Phone pics are not as pretty for sure, but it will do in a pinch and you get the idea. Besides the food is way more delicious anyway, just make it and see.

With fall well underway and my pantry kind of overflowing in dried beans and lentils that I have been hoarding for way too long, I decided I need to start making recipes using up as much of my dried ingredients as possible. You do not want to know how many bags and bags of dried stuff I have. It’s kind of ridiculous for just 1 person, but I used to like having any ingredient at my finger tips when I got a craving for a new recipe.


It’s also extremely affordable to make plant-based/vegan slow cooker recipes using dried, canned and frozen ingredients, especially when a small amount of work can yield such delicious food and have lots of leftovers. So even though it’s just me, i don’t mind having leftovers of super delicious curries because I can just give away a few portions to hungry friends, and freeze some for easy meals when I’m too tired to cook. Plus why spend $5-7 on a single frozen vegan meal, when you can make a big batch of something a few times a month and freeze it yourself, right? Right.

ButternutSquashChickpeaCurry-1-2

Although I don’t have a slow cooker recipe book yet, I know it’s something that a few of you have been asking for. It does take some time since I can’t make several recipes a day using this method and crank them out for recipe testing. It’s a slower process, but convenient for people who are busy and really hate “active cooking time” i.e. standing at the stove and/or making a big mess and fitfully sobbing when you didn’t stir it enough and it ends up burned… I mean that doesn’t happen to me that often, but I understand not everyone WANTS to live in the kitchen making food day in and day out.

Any slow cooker you have laying around that is a standard size (not individual sized) will do for this recipe, I used my Ninja Cooking System because I could sauté the onions, garlic and ginger right in the cooking insert over the medium heat setting. I don’t like having extra dishes to do when I make slow cooker recipes, so I find this convenient for me and the thing I hate most about cooking is dishes honestly. If you haven’t signed up to my newsletter yet to stay up to date on new (and favourite free) recipes you can sign up in the pink box on the upper right hand side of the screen there too.


ButternutSquashChickpeaCurry

Plant-Based Butternut Squash & Chickpea Coconut Curry (Slow Cooker Recipe)

serves 8-10 side portions or a hungry family of 4-5

Ingredients:

1 medium butternut squash (about 5 cups) peeled, de-seeded and cubed
2 cups dried chickpeas, soaked 8 hours or overnight
1 medium onion, diced
2 large cloves of garlic, minced
2 inch chunk of ginger, minced
1 can 13.5 oz fire roasted diced tomatoes
1 can 13.5 ounce light coconut milk
3 cups/1 litre low sodium vegetable broth
2.5 tablespoons yellow curry powder
1 tsp sugar or honey
2 bay leaves
4 large handfuls of baby spinach or 1 bunch of fresh spinach, rinsed and roughly chopped
2 cups frozen sweet peas
1 teaspoon sea salt or to taste
handful of fresh cilantro, roughly chopped

Directions:

1. Carefully cut the skin off the butternut squash, remove the seeds and cut into 1 inch cubes. To make cutting easier you can slice is in half and microwave the squash for 3 minutes and let cool before cutting.

2. *Optional step: sauté the onions, garlic and ginger in a pan with a little water or in the insert of a Ninja Cooking System.* Assemble all of the ingredients in your slow cooker excluding the peas, spinach, salt and cilantro. Cook on low for 8 hours.

3. About 20 minutes before serving, add in the fresh peas and spinach and stir until spinach is wilted.

4. Taste test and add salt as desired. For a slightly thicker sauce you can use a potato masher and mash some of the squash and chickpeas.

5. Serve over basmati rice and garnish with fresh cilantro. (I prepared 3 rice cups of basmati rice in my Zojirushi rice cooker)

Tips:

Dried chickpeas are best as they will absorb the flavor of the curry as they cook. Don’t use canned chickpeas and cook this for 8 hours as that’s completely unnecessary, 4-6 hours maximum as they’re already cooked.

The night before, sort and rinse the dried chickpeas in a strainer, place in a large bowl and cover with at least 6 cups of water. Alternatively you can do the Quick Soak Method: bring the rinsed chickpeas to a boil in a pot of water and cook for 1 minute and let soak for at least an hour. I find slow soaked chickpeas rather than quick soak chickpeas more tender when cooked, but it’s up to you.

For easy frozen meals later, freeze small portions of the curry and rice separately in tupperware containers.

Question: Have you started using your slow cooker yet this season? What’s your favorite recipe?

Filed Under: Cooked Vegan Recipes, Curries, Eat To Live - Dr. Fuhrman Recipes, Indian Dishes, One Pot Meals, Slow Cooker Recipes, Soups and Stews Tagged With: basmati rice, butternut squash, chickpeas, coconut milk, Curry, lower fat, peas, Slow Cooker, spinach

20 Minutes To The Table: Baked Flatbread with Roasted Red Pepper Hummus, Artichokes and Basil

July 28, 2013 by Veronica Grace 10 Comments

Fb-Button

So the other day I was craving something pizza-like, but knew I wanted to put a healthy twist on it. Although you may think I’m apt to put hummus on just about anything (I might! lol) I actually don’t eat hummus all that often. But when I do, I love to make my own from scratch as it’s super simple. In this recipe I wanted to use the creamy hummus to sub for the sauce and cheese of traditional pizza and then top with some delicious veggies. Although you can use store bought hummus, I don’t like that it contains a lot of oil and isn’t as tasty as making your own. In fact there is a world of difference between fresh made roasted red pepper hummus versus the store bought kind.

In this episode of 20 minutes to the Table I’m going to show you how you can make your own roasted red pepper hummus, baked flat bread and a fresh salad with maple dijon dressing all in less than 20 minutes for an easy midweek meal

To subscribe to my Youtube channel please click on the video to open it in a new browser and hit the subscribe button beside LowFatVeganChef just under the video. Likes are always appreciated as well!

Some other toppings for your baked flatbread could be sautéed mushrooms, black olives, pineapple, arugula, tempeh or smoked tofu. Use your imagination! Recipes below:

Oil-Free Roasted Red Pepper Hummus Recipe

This is half the recipe from my version in Vegan Comfort Foods From Around The World

Ingredients:

15 oz. / 425 g can chickpeas (no-salt), drained (reserve a few tbsp of liquid) *OR 1 3/4 cup fresh cooked chickpeas
1 Tbsp. tahini (sesame seed butter)
6 oz. / 170 g (half a jar) roasted red peppers, drained *OR about 1 small fresh roasted red pepper
1/2 large lemon, juiced
2 cloves of garlic
1/8 tsp. fresh ground pepper
1/8 tsp. Herbamare or salt, or to taste

Directions:
1. Combine all ingredients in a food processor and blend until smooth.
2. Taste test and adjust seasonings if desired and blend again. Don’t worry if it’s a little thin, when it baked it will become creamy and thick!
3. Enjoy!

BakedFlatBreadPhoto

Recipe photo

Vegan Baked Flatbread with Roasted Red Pepper Hummus, Artichoke Hearts and Basil

Serves 3-4

Ingredients:

Roasted Red Pepper Hummus (recipe above)
1 package of thin burger/sandwich buns or other flatbread
1 15 oz. can artichoke hearts in water (not oil) *OR 400g of frozen artichoke hearts
1 small Vidalia (sweet) onion, sliced
1 handful of fresh basil

Directions:

1. Preheat oven to 400 degrees. Sauté onion over medium heat for 5-7 minutes in a little bit of water.
2. Slice artichoke hearts and basil into strips.
3. Assemble flatbread by spreading a thick layer of hummus on each piece of bread and topping with cooked onion, artichoke pieces and basil.
4. Bake for 8-10 until crispy and brown on the bottom. (I baked mine for 10 minutes)

Spinach Arugula Salad with Maple Dijon Dressing

Serves 3-4

Salad Ingredients:

1 5 oz package baby spinach & arugula mix
1/2 English cucumber, sliced
1/2 ripe tomato, sliced
1/3 cup chickpeas

Dressing Ingredients:

4 tbsp Dijon mustard
5-6 tbsp maple syrup (or honey if desired)
1 tbsp apple cider vinegar
Pinch of salt
Pinch of pepper

Directions:

1. Assemble salad ingredients into a bowl.
2. Whisk dressing ingredients together in a bowl.
3. Drizzle over salad and store any leftovers in a sealed container in the fridge.

 Have you ever made a vegan flatbread or pizza? What’s your favorite toppings? Let me know what you think of these recipes by posting below. 

Filed Under: 20 Minutes To The Table, Cooked Vegan Recipes, Dinner, Videos Tagged With: 20 Minutes To The Table, artichokes, arugula, basil, chickpeas, cucumber, dijon mustard, dinner, flatbread, garlic, hummus, lemon, low fat vegan, oil-free, onions, pizza, Roasted Red Pepper, spinach, tahini, vegan

How To Cook Dried Beans in an EZ Bean Cooker or Pressure Cooker

July 18, 2013 by Veronica Grace 4 Comments

Fb-Button

DriedBeans

Here I show you how easy it is to use an EZ Bean Cooker or digital pressure cooker to cook dried beans from scratch.

Please like, share and subscribe to my channel for more demos and healthy recipes! I hope you enjoyed my EZ Bean Cooker Tutorial, right now I’m running a contest for a FREE EZ Bean Cooker. Go here for details: http://www.plantbasedu.com/ez-bean-cooker-giveaway

Filed Under: How To, Videos Tagged With: black beans, chickpeas, EZ Bean Cooker, how-to, Pressure Cooker

Vegan Chickpea Quinoa Burgers with Lemon and Thyme (Gluten Free)

July 7, 2013 by Veronica Grace 22 Comments

Fb-Button

Summer is here and it’s the perfect time to be enjoying outdoor barbecues and picnics. Everyone wants to enjoy a freshly grilled hamburger or veggie burger. But making your own is quite easy and insanely tasty without using oils or refined soy products. My chickpea quinoa burgers are soy-free, nut-free and gluten-free so they will work for everyone no matter how they eat. If you’ve ever made homemade hamburgers or wanted to, you can make these.

A simple food processor is such a versatile tool for making your own chickpea quinoa burgers. Mine isn’t anything fancy, just a basic mid sized one and it’s perfect for pulsing various ingredients to use in veggie burgers.

I like to top my veggie burgers with some fresh hummus (see my chickpea hummus here or my yam/sweet potato hummus here), sautéed mushrooms and onions (I use a little soy sauce and maple syrup to flavor them), lettuce, tomatoes and pickles. Cucumbers also work well in place of tomatoes for this chickpea quinoa burger as well as spicy mustard.

Find a nice whole grain bun or roll, toast the insides and top your veggie burger with all your favorite toppings. I also highly recommend some of my Summer salad recipes to go along with it such as Avocado Dill Potato Salad, Strawberry Spinach Salad, Shaved Asparagus Salad, Costa Rican Cabbage Salad, Sweet and Savory Asian Salad, or Rock my Broccoli Salad. So now that your head is spinning with delicious Summer recipes let’s get grillin’! Mmm hmm.

Vegan Chickpea Quinoa Burgers with Lemon and Thyme

 
Makes 10-12 patties (depending on size)

Ingredients:

1 cup mashed yam/sweet potato, cooled (1 medium yam, cooked)
4 cloves garlic
3/4 cup chopped red onion
2 cans chickpeas, drained and patted dry
2 tbsp fresh thyme leaves (stems removed)
2 tbsp lemon zest
2 tbsp lemon juice
1 cup cooked quinoa, cooled (I used 1/2 cup dry mix of white and red)
1 tsp white pepper
1 tsp Herbamare or salt *or to taste

Directions:

1. Poke holes in your yam and bake at 400 F for an hour or until tender inside. Set aside until cool.

2. Cook quinoa with a 1:1 ratio of vegetable broth or water in a pressure cooker or on the stove. (See my directions here)

3. In a food processor, add the garlic and onion and pulse until chopped finely. Add the chickpeas, thyme, lemon zest and juice and pulse until chopped and well combined. Scoop out flesh from yam (discard peel) and to food processor along with quinoa, pepper and salt. Pulse until well combined.

4. Form into equal sized balls and place on a non stick sheet or plate lined with parchment paper. Refrigerate until needed.

5. Pre heat a pan or barbecue and press patties gently until slightly flatted and cook for 4-5 minutes per side, flipping once. Be careful to move gently so they don’t fall apart.

6. Serve on buns or lettuce wraps. (I find using a bun slightly bigger than the patty works best as they will squish a bit when eaten.

7. Store any patties in an air tight container and refrigerate or freeze until needed. (Leaving them uncooked is best).

Variations:

You can also use fresh dill instead of thyme if you wish for variety.

Also check out my Smoky Yam Black Bean Burger Recipe.

Have you ever made your own veggie burgers? What do you like to top your burgers with?

Filed Under: Burgers, Cooked Vegan Recipes, Dinner, McDougall Program, Quinoa Tagged With: chickpea burger, chickpeas, cooked vegan, fat-free, garbanzos, gluten-free, lemon, low fat vegan, nut-free, plant-based, quinoa, quinoa burger, soy-free, sweet potato, thyme, yam

Low Fat Yammus or Sweet Potato Hummus – Mmm Mmm Good!

June 30, 2013 by Veronica Grace 30 Comments

Fb-Button

Low Fat Vegan Oil Free Yammus Yummus Yam Sweet Potato Hummus

Oh my goodness this yammus yam/sweet potato hummus is deeeeeelicious!

Now you may have seen this available at the store before but I have to tell you making your own is absolute heaven! Plus you get about double the amount for half the price and it’s super duper easy to make.

I love making hummus any time of year to eat with fresh crunchy veggies such as celery, cucumber, zucchini, carrots, bell peppers and more. Pretty much anything you love to dip, you can dip into this delectable yammus/sweet potato hummus recipe and I promise you that you will fall in love with it!


Low Fat Vegan Oil Free Yammus Yummus Yam Sweet Potato Hummus

I’ve added some smokey savory spices to kick up the mild yam flavor such as roasted cumin, curry powder and smoked paprika which is a delight mixed with the sweet notes of the yams/sweet potatoes and the apple cider vinegar.

Especially if you are not a fan of traditional lemony/garlicky hummus I know you will like this because it has a lot of flavor without any of the harsh bite. It’s also great to use to slather in vegetable sandwiches, wraps, pitas and more instead of high fat mayonnaise.


Low Fat Vegan Oil Free Yammus Yummus Yam Sweet Potato Hummus

And best of all because it’s low in fat, it’s lower in calories so there’s no guilt if you eat a bowl of it with a plate of veggies for a meal or snack. All you need to make your own yammus/sweet potato hummus is a food processor or high powered blender with a plunger (such as a Vitamix). The natural moisture in baked yams/sweet potatoes makes it easy to cream together with chickpeas and just a touch of tahini.

If you’re looking for something fun yet healthy to serve this summer at potlucks, barbecue or dinner parties, this yammus is sure to be a hit. No need for the standard ranch dip and veggies or bland and oily store bought hummus. Plus when you make your own dips, you can control the amount of fat, salt and spices you put in it and come up with your own perfect combo of deliciousness to dip your veggies into!

Check out the recipe below…


Low Fat Vegan Oil Free Yammus Yummus Yam Sweet Potato Hummus

Low Fat Vegan Yammus or Sweet Potato Hummus

(yields approx 3 cups)

Ingredients:

1 1/4 cups mashed yam/sweet potato (1 lb/454g yam/sweet potato; I used 2 small)
2-3 cloves garlic (roasted garlic is even better, I used previously frozen garlic cloves as its not as strong as raw garlic)
1 15 oz. can sodium free chickpeas/garbanzos, drained (reserve some liquid and set aside)
2-3 tbsp chickpea liquid (or as needed to cream hummus)
3 tsp apple cider vinegar
1 tablespoon tahini
1 teaspoon cumin
1/2 tsp curry powder
1/2 tsp smoked paprika
1/4-1/2 teaspoon Herbamare or salt (or to taste)
Fresh ground pepper to taste

Directions:

1. Poke holes in yam/sweet potato and bake at 400 F/205 C for 45-60 minutes (depending on size). Set aside when cool.

2. Pulse garlic in food processor until chopped and then add remaining ingredients. (Make sure to slice open and peel yam/sweet potato and scoop flesh out, don’t use the peel.)

3. Process until smooth and adjust consistency as desired with reserved chickpea liquid. Adjust seasonings to taste.

Low Fat Vegan Oil Free Yammus Yummus Yam Sweet Potato Hummus


4. Serve with veggie sticks, veggie rounds, pita and more!

Low Fat Vegan Oil Free Yammus Yummus Yam Sweet Potato Hummus

Enjoy 🙂

Have you ever tried yammus or sweet potato hummus? What do you like to eat it with?


Filed Under: Cooked Vegan Recipes, Dips For Veggies Or Chips, Sauces, Snacks Tagged With: apple cider vinegar, chickpeas, cumin, curry powder, hummus, sesame seeds, smoked paprika, sweet potato hummus, tahini, yam hummus, yammus, yummus

Sweet and Savory Asian Salad with Orange Sesame Dressing

March 17, 2013 by Veronica Grace 14 Comments

Fb-Button

Often when I make salads at home I toss whatever I have in the fridge into a bowl and make a homemade dressing for it. This is a giant salad I made one night for dinner and it was so filling I didn’t need anything else! But I kept it lower fat by not adding anymore nuts or avocado to it and added chickpeas instead for calories and protein.

I also like to add apples and dried fruit to salads to give them more flavor and calories as opposed to lots of nuts or seeds. Salads can be much more appetizing when you make a fresh homemade dressing. Store bought dressings often contain a lot of junk and it’s super easy to make your own at home. I usually make my dressing recipes up as I go along and season them to taste. This one is no exception and I think you’ll like it!

Sweet and Savory Salad Ingredients:

6-8 cups of salad greens like spring mix, or baby greens
2 apples, peeled and diced
1 15 oz. can of chickpeas, drained and rinsed
1 cup of sugar snap peas
1/2 English cucumber, sliced
1 cup cherry tomatoes, sliced *optional
2 tbsp dried cranberries

Orange Sesame Dressing Ingredients:

4 tbsp tahini (sesame seed butter)
2 tbsp orange vinegar (or other fruit vinegar)
8 dates, pitted and chopped
1/3-1/2 cup water (as needed for consistency)
Dash of salt

Directions:

1. Arrange salad ingredients into a large bowl.
2. Combine dressing ingredients in a blender or VitaMix and blend until smooth.
3. Serve and drizzle with dressing.

Additional Tips:

Use dressing within 3-4 days and store any leftovers in an airtight container in the fridge.

Mix up your dressings by purchasing a few different types of fruit vinegars. Trader Joe’s makes a few varieties and so does Dr. Fuhrman (sold on his website). Having a little variety makes creating different tasting dressings so easy.

What’s your favorite salad dressing recipe?

Filed Under: Cooked Vegan Recipes, Eat To Live - Dr. Fuhrman Recipes, Raw Dressings, Raw Salads, Raw Vegan Recipes, Salads Tagged With: apple, chickpeas, cucumber, dates, dinner salad, dressing, fuhrman recipes, garbanzo beans, green salad, orange, raw vegan recipe, snap pea, tahini, tomato

Fat Free Vegan Spaghetti Marinara With Chickpeas

November 25, 2012 by Veronica Grace 9 Comments

Fb-Button

So this is a recipe I made one day when I wasn’t sure what to throw into the spaghetti… I thought why not try a bit of chickpea for something to chew on. The results were not bad, but you definitely need a lot of sauce to add some flavour.

I used whole wheat pasta in this recipe, you can use gluten free or another variety if desired as well. Feel free to add some chopped steamed veggies to your marinara sauce as well if desired.

I just thought this vegan spaghetti recipe was too pretty not to share!

Low Fat Vegan Chef's Fat Free Vegan Spaghetti With Chickpeas

Spaghetti and Chickpeas With Marinara Sauce

Marinara Sauce:

Yields 50 oz/1.5 L of sauce

1 large onion, diced
5 cloves of garlic, minced
5 cups canned tomatoes, diced whole or crushed (about 3 14 oz/396 g cans)
1 6 oz./170 g can tomato paste
3 tbsp sugar or sweetener (or as desired)
2 tsp dried oregano
3 tsp dried basil

Spaghetti:

1/2 box whole wheat or gluten free spaghetti
1/2 15 oz. can of chickpeas, drained

Directions:

1. Fill a large pot with cool water and bring to a boil. Add salt if desired and then add pasta and cook until desired tenderness.

2. Meanwhile prepare the pasta sauce. In a large non-stick skillet or saucepan add the onions and sauté for 2-3 minutes. Add the garlic and sauté another minute or two. Add the tomatoes and seasonings and cook for 5-8 minutes until the tomatoes break down a little. Add sauce to a Vita-Mix, food processor or blender and then blend until smooth. Return to pan to keep warm.

3. When pasta is cooked, drain and then combine with the pasta sauce. Use whatever pot is bigger and toss the pasta with the sauce.

4. Plate and then garnish with chickpeas and additional basil if desired.

What’s your favorite addition to vegan spaghetti?

Filed Under: Cooked Vegan Recipes, Dinner, McDougall Program, Pasta Tagged With: basil, chickpeas, fat-free, gluten-free, marinara, noodles, nut-free, pasta, soy-free, spaghetti, tomatoes

Soy Curls With Chickpeas In Tomato Sauce

October 30, 2012 by Veronica Grace 10 Comments

Fb-Button

Soy Curls with Chickpeas and Tomato Sauce

I would say this recipe reminds me a bit of chicken cacciatore and it’s one of my favorite ways to make Soy Curls. I find Soy Curls need to be seasoned well and it’s nice to have a sauce to cook them in for better flavor. Sometimes I add sautéed eggplant to this recipe, but I didn’t have any today, so it’s just onions, soy curls and chickpeas in tomato sauce. I served mine with multigrain rice from Trader Joe’s but you can also serve this over pasta, couscous, quinoa or another rice of your choice.

Soy Curls are a non-GMO product made by Butler Foods and come from Portland, Oregon. So if you’re in Portland you will find them at Food Fight Vegan Grocery, Whole Foods and other health food stores. You can also sample them in dishes at places like Homegrown Smoker Food Cart, A N D Cafe, Blossoming Lotus Restaurant and many more.

There are a lot of different ways you can prepare Soy Curls. I like that they are a dry product that you can keep in the cupboard as opposed to having to refrigerate it or freeze it and it’s unflavored so you can season it however you want.

Here is what the package looks like. One package will make 3-4 recipes for 4 servings.

If you don’t live in Portland you can buy Soy Curls online and have them shipped anywhere in the continental USA (my mom orders these and has them shipped to her place in Texas).

I prefer to not use the chicken style seasoning they sell as it contains hydrolized soy protein which is another term for MSG. (For more info on food ingredient terms that contain or mean MSG check out http://www.truthinlabeling.org/hiddensources.html)

Here is one of my favorite ways to prepare Soy Curls. You can use this recipe or adapt it to contain whatever seasonings you desire. You can even turn it into a curry if you want to add cayenne pepper or hot chilies too.

 Soy Curls With Chickpeas In Tomato Sauce


Serves 4

Ingredients:

1 onion, diced
2-3 cloves of garlic, minced
2 14.5 oz cans fire roasted diced tomatoes (I use Muir Glen Organic)
1 15 oz can chickpeas, drained (I use Eden Organics Salt-Free)
1 – 1 1/2 cups Soy Curls (buy on Amazon here)
Trader Joe’s 21 Seasoning Salute to taste (or other salt free herb seasoning)
Herbamare or salt to taste
Fresh ground pepper to taste

Directions:

1. Soak Soy Curls in a large bowl of warm water and sprinkle in some salt and 21 Seasoning Salute. Adding some salt will help give the soy curls some flavor. Leave for 8-10 minutes while you chop your onion and garlic.

2. In a large non-stick skillet or wok sauté onion and garlic dry for 4-5 minutes until soft.

3. Drain the Soy Curls, season with more 21 Seasoning Salute or salt free seasoning and add to the pan and sauté until the soy curls dry out a bit (4-5 minutes.)

4. Add tomatoes and drained chickpeas, and stir. Break up the tomatoes and season to taste with Herbamare or salt and pepper and any other desired seasonings.

5. Cook until tomatoes are soft.

6. Serve with rice, quinoa or pasta.

Have you ever tried Soy Curls before? What’s your favorite way to cook them?

Filed Under: Casseroles, Cooked Vegan Recipes, Dinner, One Pot Meals Tagged With: chickpeas, fat-free, gluten-free, nut-free, protein, rice, sauce, soy curls, tomatoes

How To Cook Dried Chickpeas On The Stove Or In A Pressure Cooker

September 24, 2012 by Veronica Grace 40 Comments

Fb-Button

How To Cook Dried Chickpeas From Scratch

Tuscan Roasted Tomato and Chickpea Soup from my Comfort Soups ebook

In my recipe books I cook all of my own beans from scratch because it’s less expensive and overall tastes much better. It’s also a good way to control the amount of sodium in your diet and you can cook your beans with or without added salt. For those of you interested in cooking your own chickpeas/garbanzo beans, it’s probably because you’ve gotten hooked on how amazingly delicious (and cheap) it is to make your own.

I recommend making a big batch if you are going to go to the trouble of cooking chickpeas/garbanzos yourself. You can save any leftovers in containers or bags and freeze them for later, or you can just make a double batch of your recipe to use them all up and have meals for the week. The best tip I have for flavorful chickpeas is to use a bay leaf and some seaweed like kombu. When you’re not using salt, (or much at all) beans can taste very bland and these seasonings will greatly enhance the flavor of your chickpeas over the canned versions.

(If you’re looking for directions for cooking non-soaked chickpeas, scroll to the bottom)

Stove Top Directions For Cooking Chickpeas:

Step #1: Pick through your dried chickpeas/garbanzos and remove any bits of rock, broken shells, gross looking chickpeas, random other beans etc.

How To Cook Chickpeas

Step #2: Rinse your chickpeas and place into a large bowl or container. Add 3 cups of water for every 1 cup of beans that you are making. Let the beans soak overnight, or first thing in the morning so you can make them for dinner. I find that chickpeas are fine if they are soaked 5-8 hours, but when I soak them overnight they get overcooked really easily and are disappointing. Try not to soak your beans more than 8 hours if leaving them overnight. If you you do, it’d be better to cook them over the stove as there is less risk of overcooking when you use a pressure cooker.

Step #3: Drain and rinse the chickpeas again in a colander.

How To Cook Chickpeas

Step #4: For cooking the beans on the stovetop add 3 cups of water for each 1 cup of dried chickpeas and bay leaves and/or a kombu seaweed strip for flavour. Bring to a boil and then simmer over medium-medium low heat for 1-2.5 hours until they give to pressure. (it depends on size, small beans cook faster) Make sure they are not crunchy inside and are cooked through. Since each bean has a different size, the cooking times will vary. You can add salt or additional seasonings if desired part way through cooking, but this is optional.

*Non-Soaking Method For Cooking Dried Chickpeas In Pressure Cooker:

If you have an EZ Bean Cooker or digital pressure cooker you DON’T HAVE TO presoak your chickpeas.  You can just rinse them and put them in a pressure cooker and 3 cups of water to every 1 cup of dried chickpeas. Season if desired. Choose the garbanzo (80 min) setting on your EZ Bean Cooker or program for 80 minutes on a digital pressure cooker. Once the timer goes off release the pressure from the valve and let the pressure continue to drop. Drain and use chickpeas as desired.

Regular Pressure Cooker Directions For Cooking Pre-Soaked Chickpeas:

Step #1: Pick through your dried chickpeas/garbanzos and remove any bits of rock, broken shells, gross looking chickpeas, random other beans etc.

Step #2: Rinse your chickpeas and place into a large bowl or container. Add 3 cups of water for every 1 cup of beans that you are making. Let the beans soak overnight, or first thing in the morning so you can make them for dinner. I find that chickpeas are fine if they are soaked 5-8 hours, but when I soak them overnight they get overcooked really easily and are disappointing. Try not to soak your beans more than 8 hours if leaving them overnight. If you you do, it’d be better to cook them over the stove as there is less risk of overcooking when you use a pressure cooker. *Note see below for Non-soaking method for cooking chickpeas.

Step #3: Drain and rinse the chickpeas again in a colander. When using a pressure cooker use enough water to just cover the beans beans and add bay leaves/kombu/a little salt or baking soda if desired and cook for the recommended time on a pressure cooker timing chart. For chickpeas it’s around 5-7 minutes at high pressure in a stove top pressure cooker. (Less if you soaked them 8+ hours) Ultimate Pressure Cooking Chart is a good starting point of reference, but I find their times to be a little high for my gas stove pressure cooker. Always start with a lower time the first time. Once you figure out your perfect time, it’s best to write it down so you remember for next time. (Like the amount of hours you soaked the chickpeas and the number of minutes cooked at high pressure.)

When pressure cooking, keep it on high heat until it reaches full pressure (a steady stream of steam coming out), then reduce it to medium-medium high heat (depending how hot your stove is) and cook for the time indicated in your manual or the pressure cooking chart. I like to play it safe as cook a at least a minute or two less than the charts stipulate. Turn off the heat as soon as the timer goes off. Once the pressure has been reduced and it’s safe to open the lid you can check the beans and see if they are cooked enough.

Note: I do not use oil when cooking my beans with a pressure cooker myself. Most companies recommend that you do so that you don’t get bean foam clogging up the pressure release valve and make a mess. I prefer to cook everything without oil.

To alleviate this foam problem, I use what’s called the “Quick Release Method” by turning off the heat once the timer goes off and then move the pressure cooker into the sink and run cold water on top of the lid until it cools down and the pressurized release opens. This way I do not get any bean foam coming out or making a mess. (This works only for stovetop pressure cookers.)

For the electric pressure cookers it can be a little trickier. You can unplug it and place it in the sink and run cold water on it, or you can put a towel over the top and turn the valve and let out the pressure that way, but there will be bean juice and foam coming out of it and it will soak your towel.

For most things I let the pressure come down naturally, but especially when cooking black beans you need to do the quick release method or else they will be mushy and overcooked. They are very finicky and can only be pressure-cooked 1-2 minutes maximum.

Quick Soak Method For Beans: 

If you forget to soak your chickpeas or beans the night before or in the morning and you want to make a recipe that day you can do the “Quick Soak Method”.

Place your dried beans into a pot and fill with water 3 inches above the beans. Bring to a full boil and then turn off the heat and remove from the stove. Cover and let the beans soak in this hot water for 1 hour. Drain and then cook as above, and your beans should be similar to beans soaked for 8 hours. Please make sure you cook them afterwards, this is just a quick soak method and not a quick cooking method.

Additional Tips For Cooking Chickpeas:

Once your beans are cooked, you can drain them and use them in a recipe, or you can save them in their cooking water and freeze in smaller portions.

Bean cooking liquid is great served over rice or potatoes (if it’s a little seasoned) so don’t just throw it away.

For the best taste in your chickpeas I always recommend using 2 bay leaves, kombu seaweed (if you can find it) and seasoning with a little salt or kelp. If you don’t season the beans at all they will be very bland and probably taste dry and pasty! So I don’t recommend this. Fresh thyme is another delicious suggestion.

Kombu is available at Asian markets and health food stores beside the Nori seaweed. But you probably won’t find this at a regular grocery store though.

Have you ever cooked your own chickpeas before? What’s your favorite chickpea recipe?

Filed Under: Articles, How To Tagged With: chickpeas, how-to

  • Page 1
  • Page 2
  • Go to Next Page »

Primary Sidebar

Follow Us:

Newsletter

Get The Low Fat Vegan Starter Kit

natural organic skin care line

Free Skincare Samples

Earn Free Crypto At Binance

Earn Free Bitcoin on Gemini Exchange

Earn $10 in Bitcoin With Gemini Exchange
Dr. Fuhrman
Dr. Fuhrman
Dr. Fuhrman

Tags

80/10/10 apple avocado banana blueberries breakfast broccoli Carrots celery chickpeas cilantro corn cucumber Curry dill dinner easy Eat To Live fat-free gluten-free how-to Indian Dishes lemon low-fat mango mexican mushrooms nut-free oil-free pasta pineapple plant-based raw raw vegan rice smoothie soup soy-free spinach tofu tomato tomatoes vegan vegetarian vitamix

Secondary Sidebar

Recipes:

  • Cooked Vegan Recipes
  • *My Recipe Books
  • Breads and Baked Goods
  • Breakfast
  • Brunch
  • Burgers
  • Casseroles
  • Curries
  • Desserts
  • Dinner
  • Dips for Veggies or Chips
  • Eat to Live-Dr. Fuhrman Recipes
  • Engine2Diet
  • Ethiopian Dishes
  • Greek
  • Green Dishes
  • Holiday
  • Indian Dishes
  • Mexican
  • One Pot Meals
  • Pasta
  • Pizza
  • Quinoa
  • Salads
  • Sandwiches and Wraps
  • Raw Vegan Recipes
  • 80/10/10
  • Raw Breakfast
  • Raw Desserts
  • Raw Dips
  • Raw Dressings
  • Raw Entrees
  • Raw Juices
  • Raw Salads
  • Raw Smoothies
  • Raw Snacks
  • Raw Soups
  • Sauces
  • Side Dishes
  • Slow Cooker Recipes
  • Snacks
  • Soups and Stews
  • Spices/Seasonings
  • Sushi
  • Thai
  • Vietnamese

Copyright © 2025 · Foodie Pro & The Genesis Framework