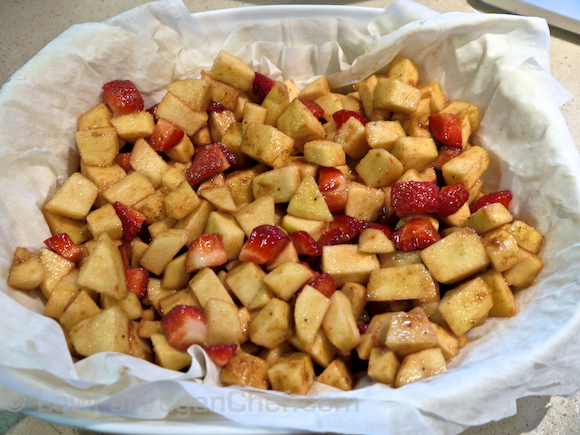
Step #6: Pour in the apple strawberry mixture on top of the 6th sheet (if using a bottom crust). If you’re not using a bottom crust, just pour the apples and strawberries into the bottom of the baking dish.


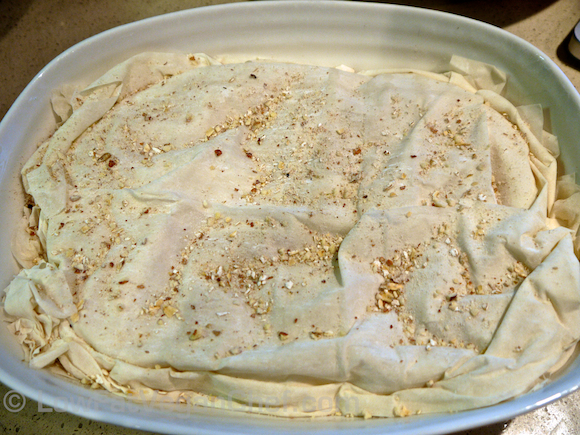
Step #7: Cover the apple strawberry mixture with 2 more sheets of phyllo and push the edges down a little. If they are too giant, you can trim them. If the edges of the layers are all crammed together in a bunch at the top they won’t cook and will be like raw dough. So use your judgement, you want some tucked in, but not too much. Sprinkle another tablespoon of the nut/oats mixture and cover with another 2 sheets of phyllo. Repeat and cover with another 2 layers, another sprinkle of nuts/oats mixture, and another 2 sheets of phyllo.


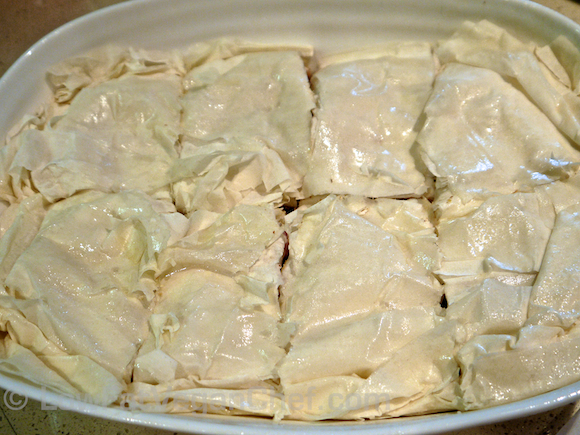
Step #8: Spray just the top layer of phyllo with a 2 second spray of canola oil or non stick spray and with a sharp knife, cut the strudel into 8 pieces. (This is so it doesn’t shred when it’s cooked. It’s better to cut it beforehand.)


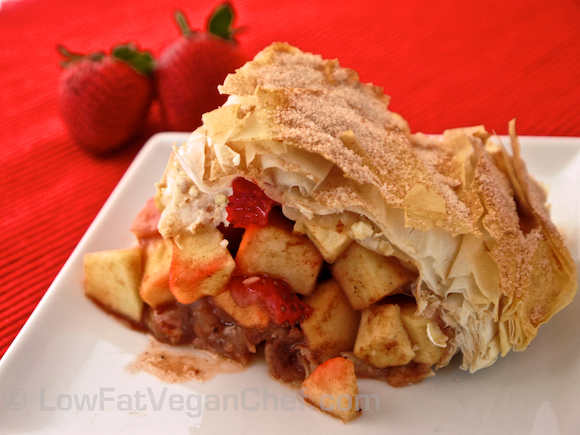
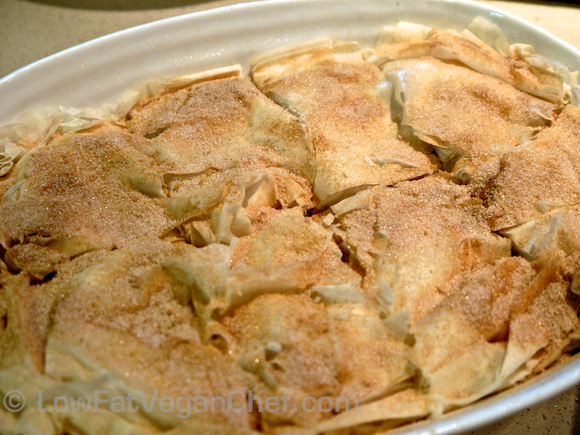
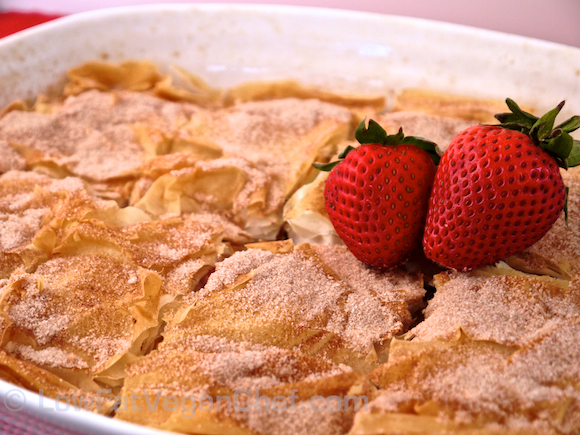
Step #9: Sprinkle it with the cinnamon-sugar topping. Ooh doesn’t that look pretty!

Step #10: Bake for 45-50 minutes until the apples are tender. You can test them with a fork after 45 minutes in the middle.


Step #11: Allow the strudel to cool a bit before serving (20-30 minutes). Serve warm.


Additional Tips:

Use whatever rectangular baking dish you have to make this strudel pie. Mine is like an oval casserole dish, and it worked ok. I could have used a larger dish because the phyllo sheets are a pretty big. I will trim a little of the excess overhang next time. If you use a large lasagna like pan (9″ x 13″), you should be fine and not have so much extra phyllo on the edges.

*To reheat the apple strawberry strudel you have to do it in an oven. You cannot microwave it or the crust will get all soggy and not be flakey anymore.

 Variations:

Use whatever other fruit you like if you don’t want to use strawberries. It’s nice to have two flavours. You could also use some stewed rhubarb. My Nana used to make Apple Rhubarb pie and I loved this combination.

I also made this recipe with apples and Bosc pears. It was quite delicious too!


To Make Traditional Individual Apple Strawberry Strudels

You can also make little strudels with this recipe instead of a giant strudel-like pie.

If you want to make individual strudels, take 3-4 sheet of phyllo pastry per strudel.  Place a large piece of parchment paper (larger than the phyllo) underneath it and fill the bottom side of the phyllo (the long side of the rectangle), but leave a 2″ gap on all sides and then roll the strudel up and away from you until it’s like a burrito. Tuck the short ends of the phyllo under the roll. Spritz with a little cooking spray and top with cinnamon-sugar. Pierce the strudel every 2″ to vent along the top and cover loosely in tinfoil. Bake at 375 F/ 190 C in the centre of the oven for 15 minutes. Take off the foil and bake for another 15 minutes until golden. Remove from the oven and let cool before slicing and serve warm.


The top crust of the Apple Strawberry Strudel Pie is really pretty.  You can barely see the bottom crust, but it is there. It’s pretty flat and soggy so this is why I don’t think it’s essential to be delicious.


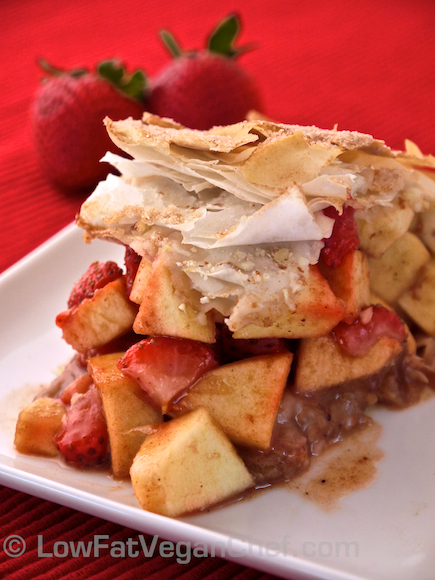
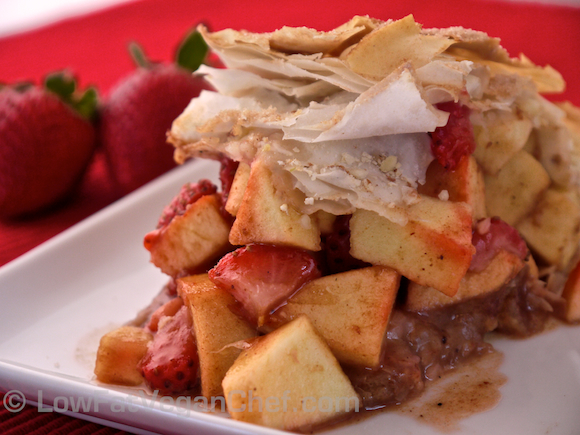
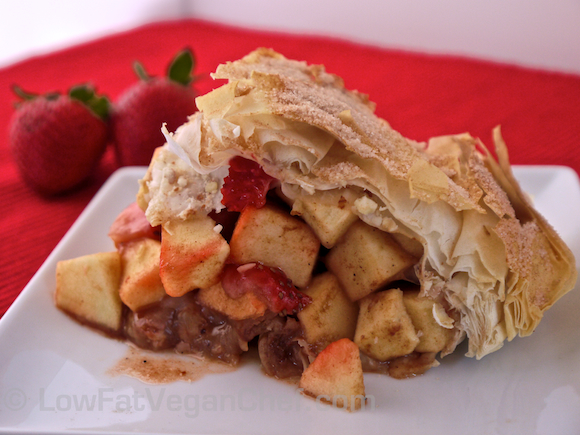
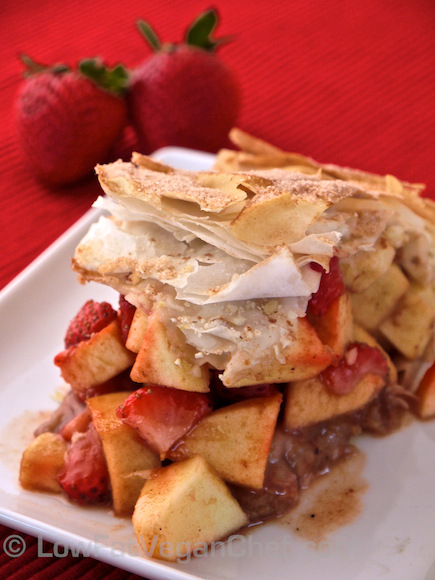
Side view of the apple strawberry strudel. Is your mouth watering yet? Hee hee.

What do you think of my Low Fat Apple Strawberry Strudel Pie recipe?

Also what do you think of the new printer function of the site? Pretty cool huh!


80/10/10 Recipe: Banana Raspberry Pineapple Smoothie


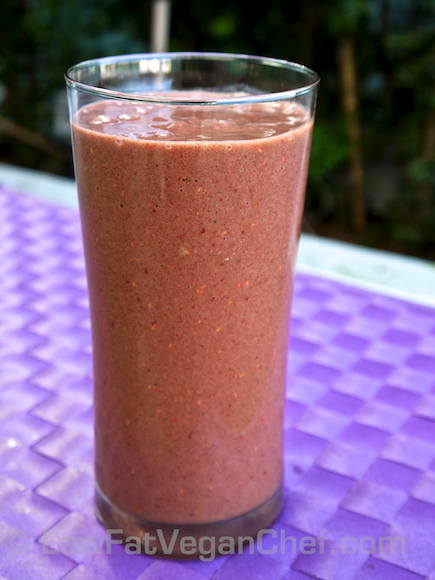
Raw Banana Raspberry Pineapple Smoothie


Spring is coming! I know it! We’re getting a few sunny days in between the rain here in Vancouver. So sometimes I can take my pictures outside. Yay!

I really love pineapple and raspberries in smoothies, I think they make almost as good of a combination as pineapple and black cherries.

This is a smoothie I regularly make as it has creaminess from the bananas, the tartness from raspberries, and a tropical pineapple twist to it. As long as you’re using fully ripe, spotted bananas as the base you can pretty much throw any frozen fruit into the blender with it and make a delicious smoothie.

80/10/10 Banana Raspberry Pineapple Smoothie

Serves 1-2

Ingredients:

2-3 bananas (ripe with lots of brown spots)
1 cup of frozen raspberries
1 cup of frozen pineapple
a little water to blend

Directions:

Add ingredients to blender starting with the bananas at the bottom and the water and frozen fruit on top. Blend until smooth.

Drink and enjoy!

Variations:

You can easily make this a green smoothie by adding a few handfuls of spinach or kale (destemmed of course)

——-

What smoothie combination have you been wanting to try but have never had before? What fruits are you excited about coming into season again?

Is There A Vegan Chocolate Hazelnut Butter? (Like Nutella) Why, Yes There Is!


Justin's Chocolate Hazelnut Butter Blend with Strawberries

Have you ever asked yourself the question, “Is there a chocolate hazelnut butter or spread that is vegan?” I have. And when I previously googled it, I came up with nothing but homemade recipes for chocolate hazelnut butter spread. Hazelnuts are expensive, and I didn’t plan on making it for just a small sample. Plus if it’s fresh it also goes bad within a week and I was not about to eat the whole batch in one week.

I think everyone remembers eating Nutella as a kid, or if you live in Europe, you probably ate it or still eat it regularly. They have this serious OBSESSION with Nutella in crepes filled with fruit. Very decadent indeed… That get’s me thinking I need to make a vegan chocolate hazelnut crepe recipe soon, I’ve never had one… but for now we’re going for chocolate hazelnut butter on toast with strawberries.

Since I’ve traveled in Europe a lot and there are also many creperies in Vancouver, Canada many places I’ve seen serve crepes with Nutella and because it had dairy in it, it’s not vegan. (The crepes are also not vegan as well.) I’ve often wondered if ANY company was going to get up the guts to actually make a healthier chocolate vegan hazelnut spread without the dairy and for the longest time could not find any. I checked the health food stores in Canada and no dice. I checked a bunch in the USA as well, and just recently found 2 different brands that were dairy free! This was a surprise to me because I had been casually reading labels for a while.

Since the dairy industry has been so adept at lobbying for companies and restaurants to put milk and cheese into everything, it can be very hard to find plain chocolate ANYWHERE. Almost every chocolate and chocolate bar EVEN DARK CHOCOLATE that is manufactured in the USA contains milk fat solids.  They do this because dairy is highly addicted, just as addictive as opiates are actually and it makes people eat and crave more. So they now put dairy in all of the dark chocolate to make you eat MORE. How rude!

Same goes for creamy chocolate hazelnut spreads, they put dairy in it to make it more addicting and get you to eat more. Plus it probably is cheaper to add milk to it and less hazelnuts as those are more expensive.

I started looking for vegan alternatives a while ago, but never found any until now. It’s not something I would eat regularly, but more of a treat to put on a slice of toast or a crepe or for a vegan waffle or something.  You know, a healthier-than-the-original-version treat.


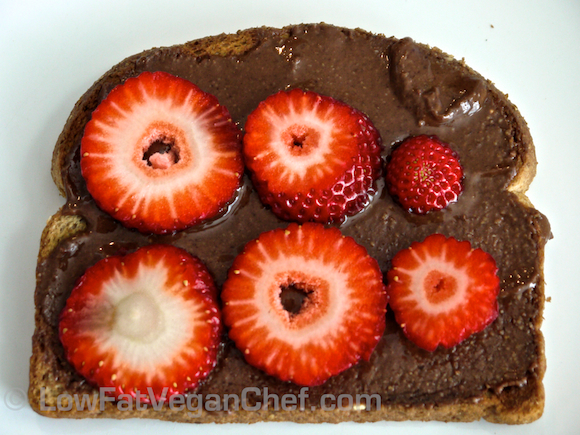
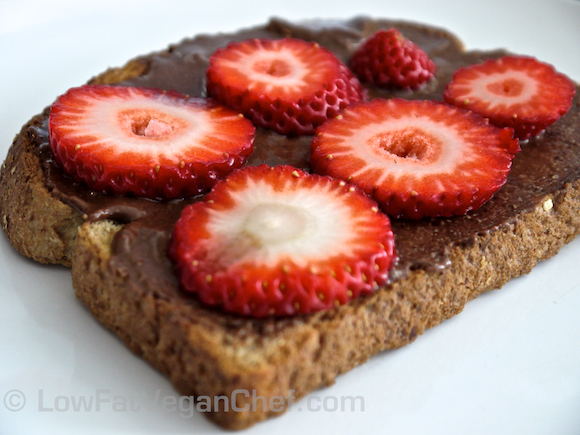
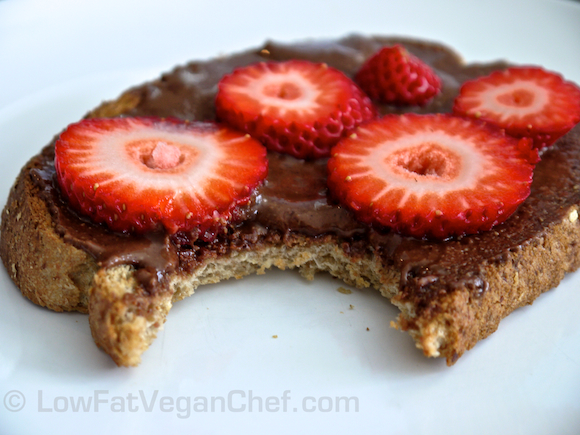
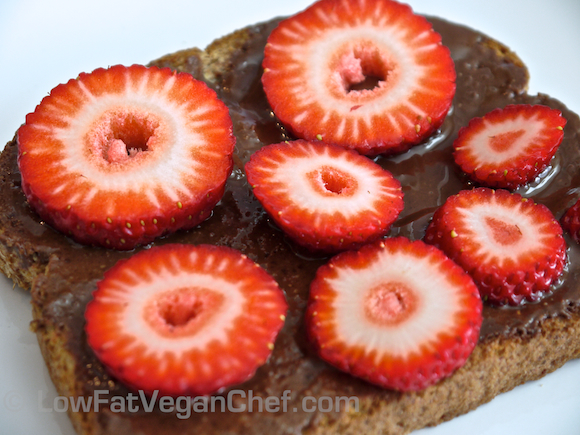
Justin’s Chocolate Hazelnut Butter Blend on toast with strawberries. A filling snack or treat for you or your kids.


The strawberries are nice because it makes it not too sweet and has a little tartness to it.


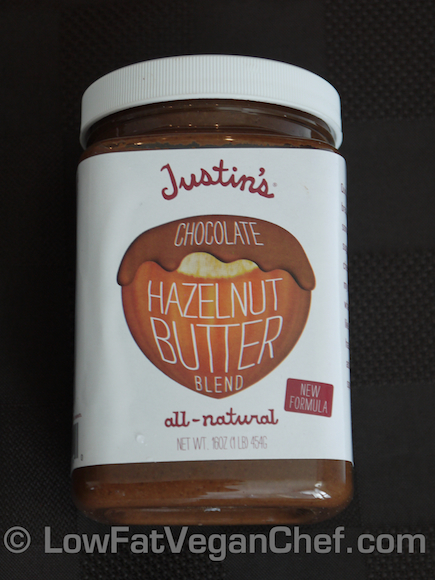
This little baby I found in Portland, OR at Whole Foods Market on a recent trip. I have sampled Justin’s peanut butter cups (the dark chocolate variety are vegan) and was quite impressed at their not too oily or  too sweet peanut butter cups. (Christmas treat).

Here they had an entire line of natural nut butters. Including chocolate peanut butter and chocolate almond butter. Crazy! I know…


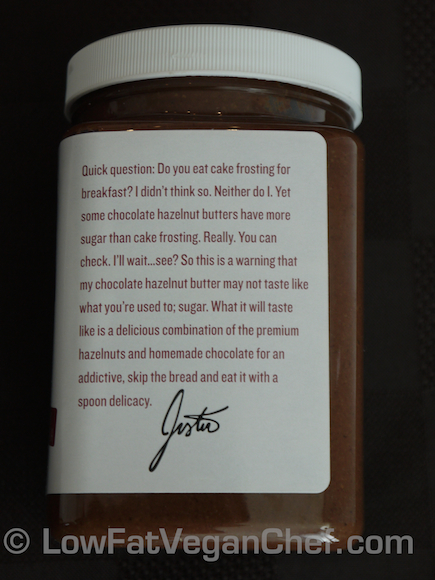
Let’s take a look at the side. Ah a nice note, it shows they are trying to make a product that is healthier than the major competitors. Who eat’s frosting for breakfast indeed? Nutella eaters that’s for sure. Here are the list of ingredients in Nutella from their website: INGREDIENTS: SUGAR, PALM OIL, HAZELNUTS, COCOA, SKIM MILK, REDUCED MINERALS WHEY (MILK), LECITHIN AS EMULSIFIER (SOY), VANILLIN: AN ARTIFICIAL FLAVOR.


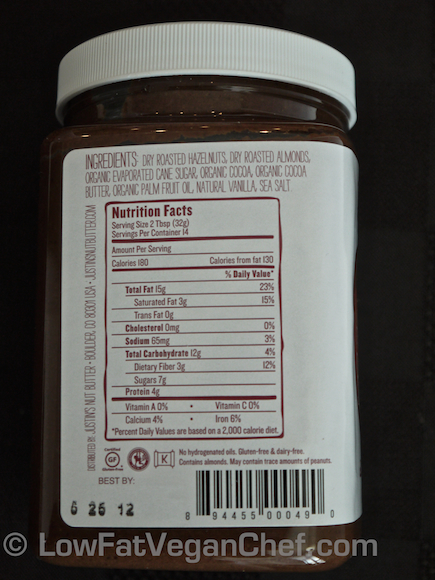
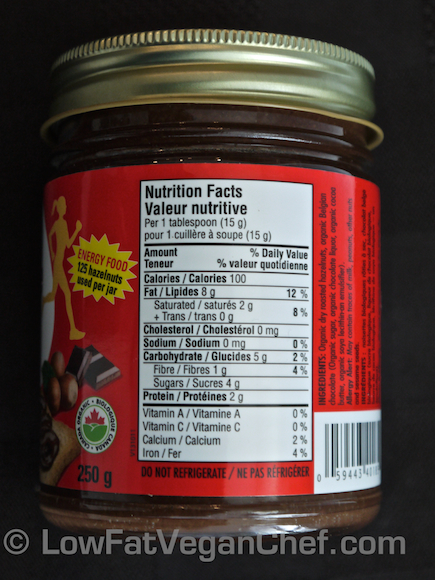
Ingredients and nutritional information. It still contains some oil in the form of palm oil (saturated fat), so sad face 🙁 but at least it’s not hydrogenated and it’s one of the last ingredients on the label, not the first.  It’s 90 calories and 7.5 g of fat per tablespoon. Ok good to know. One or two tablespoons max is all you should use for a serving.

Nutella comes in at 100 calories per tablespoon and 5.5 grams of fat, so  it’s a little less fat than Justin’s… but Nutella’s first ingredients are sugar and oil and then it’s hazelnut taste is watered down by milk and whey. Justin’s doesn’t have sugar until the third ingredient, and oil is the third last, before vanilla and salt. If you were going to pick one that was a healthier option between Justin’s and Nutella, Justin’s would win. It definitely has more natural ingredients and whole foods in it than mass produced Nutella.


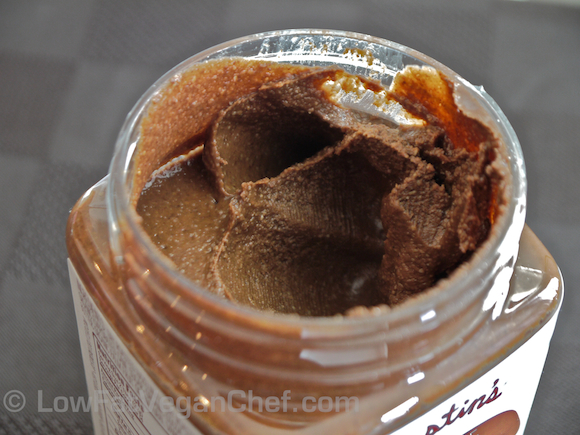
Here is Justin’s Chocolate Hazelnut Butter Blend inside. It’s quite thick. There’s no oil on top and it doesn’t look rock solid like coconut oil does at room temperature.


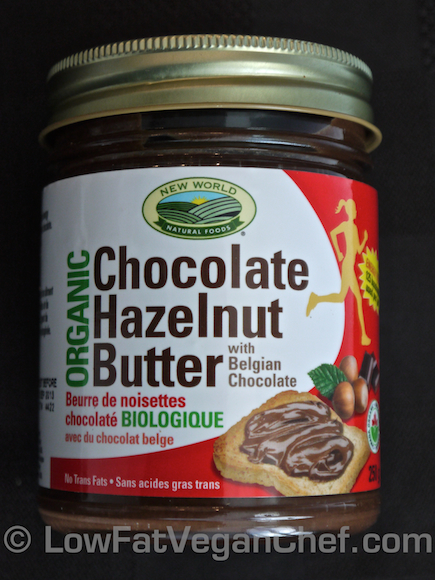
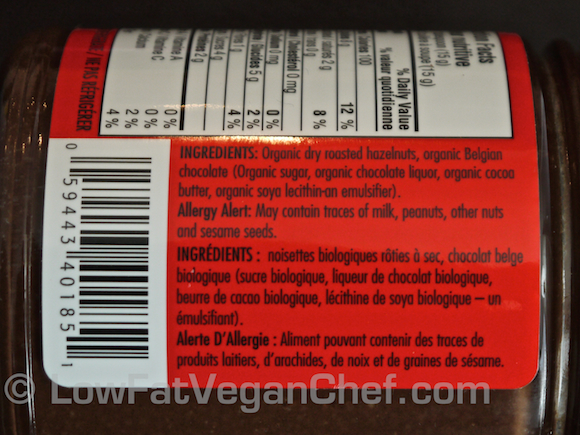
Here’s another vegan Hazelnut Butter. This is the first vegan chocolate Hazelnut Butter I found by New World Natural Foods, it’s from a local health food store in Bellingham, Washington. I thought they were the only brand that made a vegan hazelnut butter, so I picked it up.


Upon closer inspection though, it is fattier than Justin’s. 100 calories and 8 grams of fat per tablespoon.


They use cocoa butter instead of palm fruit oil. This butter is stable at room temperature (a saturated fat), which means it is a solid at room temperature and not a liquid. So this must be why they chose to use it in their butter.


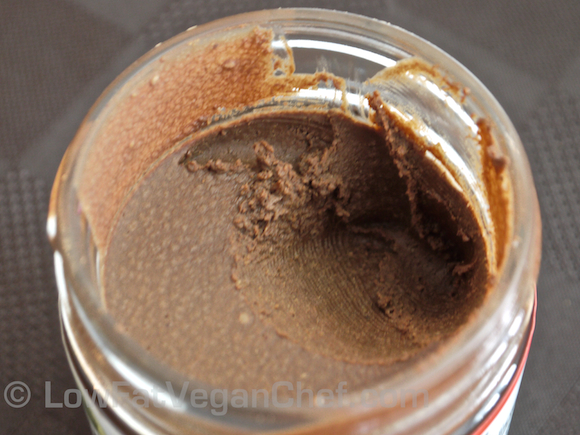
Here is what the chocolate hazelnut butter looks like inside. It’s very solid looking and actually looks like cacao or coconut butter. If you seen these you might see the resemblance. There’s little white solid flecks in it, and this is the oil, solidified.


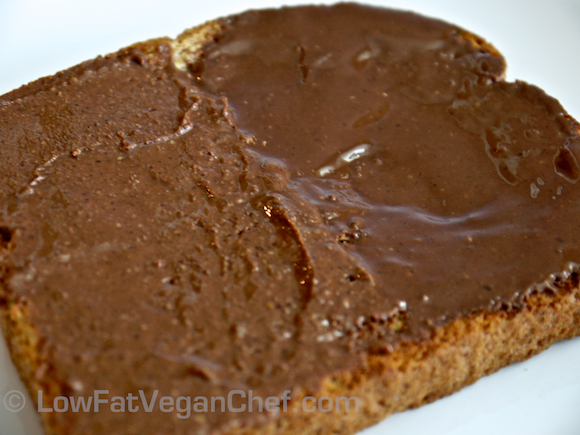
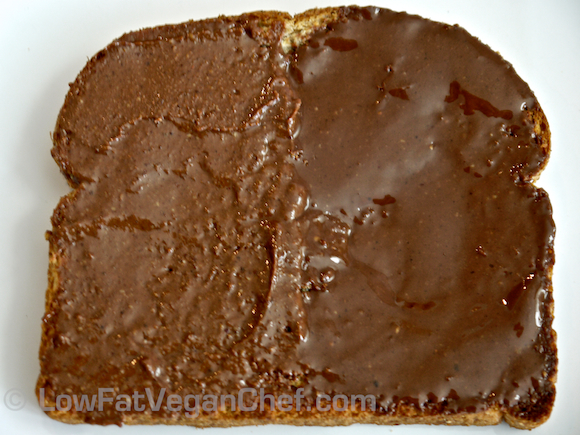
Here is a comparison on warm toast for you. Justin’s Chocolate Hazelnut Butter Blend is on the left and New World Natural Food’s Chocolate Hazelnut Butter is on the right.  Immediately I could tell the difference in the two. The one on the right melted very quickly into a liquid. Justin’s was a little harder to spread but more like a nut butter.  New World Natural Food’s was more like chocolate sauce when spread.


Here it is again from up top.


So there you have it, there are at least TWO options for vegan chocolate hazelnut butter for you. Justin’s also makes chocolate peanut butter and chocolate almond butter (it is cheaper than the hazelnut butter) if you’re looking for a more affordable treat for your family.

Like I said I was mostly curious because there was a lack of vegan options for this kind of product and I remember eating Nutella as a kid. If it’s your only source of nuts for the day and you have 1 or 2 tbsps, you should be ok. If you’re still eating oils, lots of nuts and avocados and meat and dairy however, this may be a diet of too many rich foods already. Adding this on top of it won’t be healthy.

So which one do I prefer? Hands down I prefer Justin’s Chocolate Hazelnut Blend.  I like that it isn’t too sweet, it’s a little thick, it doesn’t melt into chocolate sauce and it’s ingredients are much more natural than Nutella. For an occasional treat I like this product and they make a ton of different nut butters you can get at Whole Foods Market as well.

Have you ever tried a vegan chocolate hazelnut butter? What did you eat it with?


How To Bake A Russet Potato Without Oil For Baked Jacket Potatoes


Oil Free Vegan Baked Potato with Red Pepper Hummus and Salsa

Just a reminder that my Comfort Soups To Keep You Warm recipe eBook is out! I’m already getting lots of great feedback on how delicious the soup recipes are!

Today I’m going to show you how to bake healthy baked potatoes in the oven without all the oil and fat!

I  think baked jacket potatoes are something that most people love or have fond memories of eating.  It’s a comfort food for them and I know Dr. John McDougall is certainly very fond of them as well! Potatoes can be healthy, or unhealthy depending what you put on them though. If you’re on the McDougall Program you might be interested in baking russet potatoes regularly and without oil of course.


Or maybe you just really like having something warm and filling for dinner, either way baked russet potatoes are a good way to go for a low fat, satisfying meal or side.

The baked potato above is topped with roasted red pepper hummus (that’s oil free and low fat) and salsa and is served with a side of my Low Fat Vegan Tangy Collard Greens With Coconut Milk and Mushrooms . (It’s also delicious to pour some of the coconut cooking liquid on top of your baked potato.)

So the main reason people like to oil and salt their potato skins before baking them is because it makes the skin all crispy and taste, well salty! The other reason is that it cooks it a bit faster but it raises the temperature it cooks at. Baking in oil at such high temperatures can create carcinogens and adding excess oil to a potato skin is not the best for health.


It’s also not beneficial to your health if you load your baked potato or potato skins with bacon, cheese, butter and/or sour cream. These things are far too rich and the negative effects of these toppings outweigh all the health benefits of eating a baked potato for vitamins and fibre. If you’re watching your weight, cholesterol or salt intake, please don’t add those things to your baked potato. There are many healthier alternatives.

While leaving their rich potato toppings out won’t make it taste exactly the same, it will be healthier for you and you can dress up your potato skins with some healthy low fat vegan alternatives like:

  • Fat free salsa (homemade or jarred)
  • Tobasco sauce
  • Hummus (original or roasted red pepper, low fat of course. Look for oil free or make your own.)
  • Baked beans (homemade or canned)
  • Salt and Pepper
  • Fresh chives or green onions (scallions)
  • Nutritional yeast
  • Fat free vegan queso or “cheezy” sauce
  • Steamed veggies like broccoli or kale

What Potato Do I Use For Baked Potatoes?
Use the dark brown rough skinned russet potatoes you find at the grocery store. They make the best baked potatoes and are also good for mashed potatoes. Don’t use the smooth waxy skinned yellow or red potatoes for baked jacket potatoes, these are better suited for potato salad, mini roasted potatoes, steamed or boiled potatoes and used in stews and soups.


Make sure that you select russet potatoes that are about the same size so they cook at the same time. If you bake medium and large ones together the large ones will not be done when the medium ones are ready.

Should I Cover My Russet Potato In Tinfoil For Baking?

No. I have no idea why people think they should do this, much less why some grocery stores sell russet potatoes in tinfoil. Maybe if you want to barbecue them, but when you put tinfoil on it you are STEAMING the potato from the inside out and not BAKING it. So it is not going to turn out like a baked potato and be all dry and fluffy inside. It will be more watery and dense like potatoes steamed in water. Don’t do this. Bake them uncovered for best results.

How To Bake a Russet Potato Without Oil

from Comfort Foods From Around The World 

Step #1: Preheat your oven to 400 F/ 205 C  (375 F on a convection oven)

Step #2: Wash your russet potatoes well and cut out any “eyes” or bad spots in the potatoes.

Step #3: Use a fork and poke a lot of holes all over your potatoes. This stops them from cooking unevenly and possible exploding in the oven.


Step #4: When your oven has come up to temperature, place them directly on the rack in the middle of the oven. Leave enough space between them that they are not touching.


Step #5: Bake your potatoes for 50-70 minutes (depending on size) and check on them between 50 and 60 minutes. Using a pot holder or oven mitt, you want to gently squeeze the potatoes and see if they give. If they seem soft all the way through to the middle they are done. If you are not sure you can cut one in half and check. If they need more time, continue to bake, or you can microwave for a few minutes more to finish them off if you’re in a hurry. (Once you know the exact cooking time for your oven and this size of potato, write it down or remember it so you don’t have to check on it and guess next time. Usually they will be done within 60-70 min).

Step #6: To fluff your potato you’re going to make a slit across the top of it, and using pot holders or oven mitts gently squeeze the bottom of the potato together (like how a crab would close it’s claws) and this will push the insides up and open it for filling. (This is something I learned when I worked in a restaurant and had to plate food.)

Step #7: Fill your potato with your (hopefully healthy and vegan) seasonings and serve.

When I bake giant potatoes like this it become a whole meal when served with a side of greens. So this makes it a really easy AND cheap vegan meal!

Time Saving Tip:

You can bake multiple potatoes and keep them for future meals in the fridge and just reheat them for a quick lunch or side dish the next night.

I know a lot of Americans like to “nuke” their raw potatoes, but I really don’t like this. They can get all hard on the bottom and be a different texture. I prefer to bake mine and only reheat if necessary and not to use the microwave to cook anything that was raw.


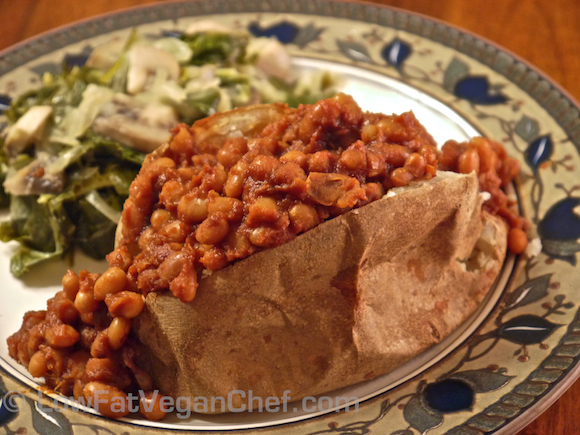
Oil Free Vegan Baked Potato With Baked Beans

Here’s another oil free baked potato served with homemade baked beans. The baked beans recipe will be in my upcoming “Comfort Dinner Recipes From Around The World” eBook.

What do you like putting on your oil free baked potatoes?


My TOP TEN Favorite Things To Do To Feel Better When Feeling Down, Sick Or Having a Bad Day

My new recipe eBook Comfort Soups To Keep You Warm is available!


Somedays are better than others and somedays can be worse. Maybe you’re feeling under the weather, maybe you’re a little stressed out, over tired, sore from a work out or working too hard, whatever the case may be. Instead of just feeling blah and laying around like a lump on the couch or sitting in a “poor me” or foul mood, here are some things I suggest doing to feel better, de-stress, and get back to your normal happy energetic self.

“How do I feel better?” you might ask? Well here are some helpful tips for you below.


#10 Take A Day Off and Fast And/Or Sleep

If you have the flu, a viral infection, got food poisoning, or just ate too much and don’t feel well, you can benefit from skipping a meal or two, or even for a whole day and just taking it easy. You might even want to have a nap and catch up on some sleep, or if you’re feeling that awful you may even want to spend all day in bed. Fasting (abstaining from eating food) can help when you are dealing with viral infections and stomach issues. It gives your body a break from digesting food 3-5 times a day, and instead can focus on detoxing and processing any leftovers in your stomach and bowels from the day before. Also if you feel lethargic it can help to skip a meal so you can have more energy later in the day. Fasting is NOT recommended when you have a “cold” or BACTERIAL infection. Fasting actually stresses the body in a negative way when you have a bacterial infection. Your body has surrounded the bacteria and quarantined it so that it does not infect the rest of your body and give you blood poisoning. If you stop eating for a long period of time, it weakens your immune system and this bacteria can break through the protective barrier and take over and make you even sicker, or cost you your life. There have been many fasters that have died of blood poisoning when they got an infection before or during their fast and chose to ignore it. There have also been people who fasted when they had Lyme Disease and this complicated their problems and caused lasting damage to themselves. Lyme Disease is a bacterial infection as well. *Fasting for a viral infection is ok, because you are making the virus weaker by not feeding is sugar and nutrients. Bacteria are not the same as viruses, and you may need antibiotics if you have a serious infection so you need to consult a qualified health professional. If you have a cold, at the very least I recommend resting, and also eating something whether it be fresh fruit or some soup to stay hydrated and feel better.


#9. Have A “Green” Smoothie

I can honestly say I have NEVER felt worse after having a green smoothie. I have actually felt better and was really glad I had it. Now some Dr.’s like Dr. Caldwell Esselstyn might be extremely against the idea of having a smoothie (because it partially breaks down and blends the fibre) I have yet to see anyone’s health get worse, or gain weight from an occasional fat free raw green smoothie. I have a few favourites, make sure to check out my Cherry Green Smoothie & Green Smoothie FAQ, and my Blueberry Grape Green Smoothie Recipe as these are two of my favourites, and you probably have not had them before. I recommend making your own smoothies as you know what goes into them and can insure fresh greens and good tasting ripe fruit goes into it (unlike the smoothie bar). But if you’re on the go hopefully you can find a fresh fruit smoothie bar, and not something like a chain smoothie bar that uses ice-cream, sorbet, bottled fruit juice, sugar and protein powders as these are not health foods.


#8 Have A Fresh Juice

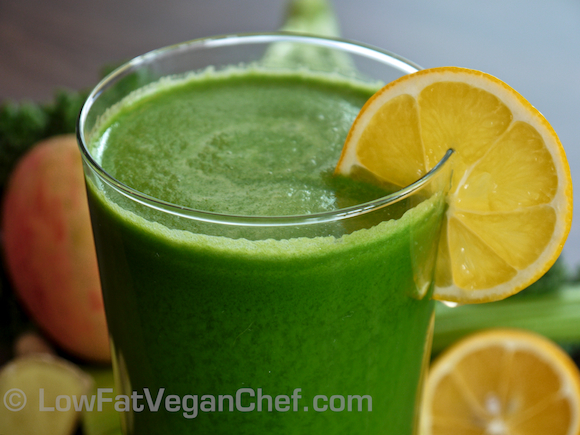
Whether you like green juice, or a fresh squeezed orange, apple, or grapefruit juice there is something for everyone. It’s best to have a green juice first thing in the morning as opposed to a fruit juice unless you have just worked out or intend to work out. As you’ve been sleeping you don’t have a high need for instant sugar in your blood stream, it’s better to have whole foods that release sugar steadily to keep you full until lunch. But if you are feeling parched, dehydrated, or sapped from a work out a fresh juice is just the thing to perk you up and help you on with your day. Check out my Kale Apple Celery Juice Recipe and Pomegranate Apple Juice Recipe  here.


#7 Have A Warm Homemade Vegetable Soup

When you’re feeling under the weather with a cold, the chills, or are just plain tired of smoothies and salads, a homemade healthy vegetable soup might be just the thing you are looking for. Not only will you love it, but your family is certain to warm up to your veggie cuisine with a hearty tasty homemade soup. Check out my Mexican Black Bean Corn SoupClean Out The Fridge Vegetable Soup Recipe , or Dr. Fuhrman’s Anti Cancer Soup. My new recipe ebook Comfort Soups To Keep You Warm also has 30 healthy vegan soup recipes to wow your tastebuds and includes recipes from all over the world.


#6 Take A Warm/Hot Shower

If you’re feeling tired, exhausted or even run down, sometimes just having a really nice warm or hot shower will pep you up and bring you back to life. If you’re short on time, or without a bathtub this can help you feel more like yourself again. I can’t say I’ve ever felt worse after having a nice shower, and I always think man why did I procrastinate? I should have done this sooner, I feel so much better. Us girls can put things off because we tire of washing and drying our hair so frequently, but go for it, or wear a shower cap. You won’t regret it.


#5 Do Some “Yoga In Daily Life” or A Relaxing Style of Yoga

Yoga that focuses on breathing, slow movements, and stretching can help you calm your mind, de-stress and relax. You don’t have to be flexible, you don’t have to do anything a contortionist would do or any difficult poses. It’s great for people who have stick backs, bad posture or sit all day at the computer. (I would know!) I love Yoga In Daily Life, I wish I did it every day, because I always feel more relaxed, stretched out and have better circulation after. Check out http://www.yogaindailylife.com/ for more information.


#4 Do Some Cardio To Get Your Blood Pumping or Go For a Walk

Sometimes I get the “working from home blues” where you’re inside all day in the kitchen and then on the computer and you feel so cut off and isolated from people. Getting out of the office, or out of the house to get some fresh air and get your body moving will do wonders for your mood AND your circulation. If you’re the kind of person who loves to jog, or go to the gym do that. If you prefer a nice stroll gazing at the trees and smelling the fresh air, go for it!


#3 Curl Up With a Book And Enjoy Some Fiction

Reading fiction novels can help your mind relax and focus on something else for a while. I do suggest something other than horror and Stephen King novels though! Most woman enjoy reading and lament that they don’t read enough, or get enough time to themselves. With the advent of Kindles and iPads it’s easier than ever to take your book collection with you and read wherever you are. The Kindle is great for reading in all locations because of it’s E-ink technology which means it’s not back lit and can be read in direct sunlight without any glare. Kindle or Kindle Touch have really come down in price over the past few years and start as low as $79.


#2 Take A Hot Bath With/Without Epsom Salts

Epsom Salts or magnesium sulfate is a compound of magnesium sulfer and oxygen that is named after the town Epsom in Surrey, England. Epsom salts help sooth sore feet and body aches. It helps prevent your skin from wrinkling so much when you take a long soak and when it’s absorbed into your body it can reduce inflammation. It is also effective at healing and soothing outbreaks of herpes and shingles (as Wikipedia informs me). You may not notice a huge difference in your bath if you add Epsom salts, but it can make you feel a bit better if you have very sore muscles or feel achey all over.


# 1 Relaxing Or Therapeutic Massage

My absolute favourite way to feel better is of course having a massage. My top choice would be a Thai massage or a Chinese Accupressure massage. Although different in technique they work on the entire body and not just rubbing your back and tickling your skin like many Swedish massage therapists. Thai massage is done wearing a pair of loose pyjama-like pants and a light loose shirt. The therapist uses their hands and feet to stretch out the muscles in your body while you lie on a soft mat on the floor and relax. The movements are slow and you can specify your preference for pressure. The end the massage by working on your back and neck while you sit up and this is pleasant because I think it ends with the best part. Chinese Accupressure starts out with you laying face down on a table with a thin sheet over you, and the therapist uses their palms, fingers, and elbows to press and work out your muscles and tendons. It’s like being stretched on a micro level I think, and they follow the lines of your body all the way down your legs and feet to realign your muscles and tendons. It can stay like this or end with a Swedish oil massage at the end. I like this because it’s generally very inexpensive and they are very thorough getting into every nook and cranny of your muscles and getting rid of any soreness or tension. In Canada I go for Chinese Accupressure more often and in Thailand I go for Thai Massage because it’s so much more affordable there. ($5-$10/hour)

Well, I hope you enjoyed my list of suggestions and found something that will help you feel better today and give you just what you needed to get back on track and feeling like your old self again!

What’s your favourite thing to do when feeling stressed out, sore or under the weather?


Sneak Peek Recipe: Mexican Black Bean Corn Soup From Low Fat Vegan Comfort Soups To Keep You Warm

And the winner of my first copy of Comfort Soups To Keep You Warm is….


….Meena Sharma! Congratulations Meena, I will be contacting you shortly to let you know you’ve won.

Thank you to everyone who entered! I really appreciate your support and excitement. My Comfort Soups To Keep You Warm recipe eBook is now ready so check it out!

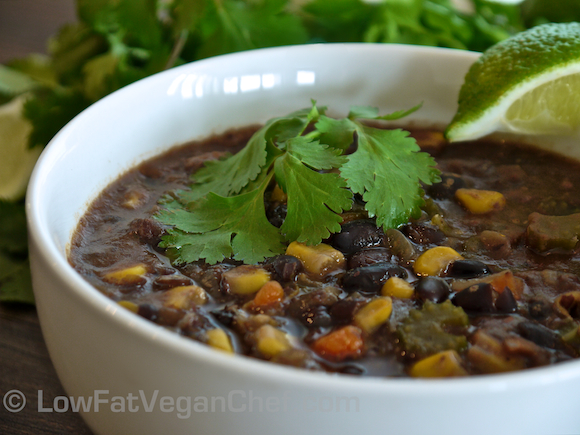
After all of those tantalizing soup photos I showed you on Monday, I bet you are craving a delicious bowl of soup by now! So I wanted to share one of my soup recipes with you. This oil free vegan Mexican Black Bean Corn Soup is one of my favourites, it’s so hearty and filling and bursting with flavour. You’re going to want to make this soon!

An insider tip I have for you is to make your own vegetable broth (my recipe is here)  and fresh black beans (instead of canned) for the absolute best taste. But if you’re in a hurry, you can always use canned black beans. For packaged vegetable broth the best substitute seems to be Pacific Natural Foods Organic Low Sodium Vegetable Broth. Roasted cumin and chipotle chili powder bring great flavour to this recipe. If you can find it over the regular versions it adds a really nice smokey flavour to the soup. I use McCormick roasted cumin, you can get it on Amazon or at places like Walmart or some grocery stores. This is probably my favourite seasoning and I go through more of it than any other spice. You’ll definitely use it a lot if you make my recipes. I also use Frontier organic chipotle powder in all of my Mexican dishes and it’s amazing in vegan chili too.

Now on to the recipe!

Low Fat Vegan Mexican Black Bean Corn Soup


Serves 8

Ingredients:

1 large onion, diced
6 cloves of garlic, minced
3 stalks of celery, diced
2 carrots, diced
5 cups/1.25 qts./1.2 L of vegetable broth (homemade or low sodium)
4 15 oz./425 g cans of black beans, low sodium (or 7 cups cooked) undrained
1 15 oz./425 g can of whole sweet corn, drained (salt free, unsweetened)
1 14.5 oz./411 g can of fire roasted tomatoes, diced (I use Muir Glen Organics)
1 tbsp. + 1 tsp. roasted ground cumin (or regular cumin)
1 to 1 1/2 tsp. chipotle chili powder or smoked paprika
1/2 tsp. Herbamare or salt (to taste)
1/2 tsp. sugar or sweetener (if needed)
Juice of 1 small lime
Fresh ground pepper to taste
1/2 bunch of cilantro, chopped to garnish

Directions:

1. In a large pot, sauté the onion, celery, carrots and garlic in 1 cup of vegetable broth over medium heat for 6-7 minutes. Add chipotle chili powder, roasted cumin, and black pepper and cook for another minute or two. Stir in the remaining vegetable broth, 4 cups (or 2.5 cans) of beans, and sweet corn. Turn to high heat and bring to a boil.

2. Add remaining 3 cups (or 1.5 cans) of beans and crushed tomatoes to a Vitamix or blender and process until smooth. Stir into soup when boiling, reduce heat to medium, and simmer for 15 minutes until beans and vegetables are done to your desired tenderness.

3. Taste test. Add Herbamare or salt to taste and lime juice. If your soup is a little too tangy or bitter, you can add a little sugar to balance the flavor if desired.

4. Serve in bowls and garnish with fresh chopped cilantro

Nutrition Facts: 8 Servings Amount Per Serving: Calories 225.8 Total Fat 0.2 g Saturated Fat 0.0 g Sodium 485.5 mg Carbs 42.6 g Dietary Fiber 16.9 g Sugars 4.1 g Protein 13.6 g

——————–

So now on to the contest for the second copy of my Comfort Soups To Keep You Warm eBook! This second contest entails a little more than the last one. If you complete it, your chances of winning are much much higher!

—–>How You Can Win The Second Copy of My eBook<—–

Contest is Closed

To be entered you need to post a comment on this article and let me know what you think of the Mexican Black Bean Corn Soup, AND you need to pick 4 other recipes on my blog and comment on them as well. If you can number your FIFTH (#5) comment (to show you are done) when you post it on another recipe, it will also help me track them. Comment #1 can be done here.

But, good new for those of you who have been following along and commenting on my recipes, your old comments on my recipes count too. So if you’ve already commented on one or two recipes, those count and you just have to comment on this one and make sure you have 5 comments total. If you number your 5th comment to let me know you’ve completed the challenge, it will be helpful for me to track.

I will take all of the commenters with 5 comments on recipe posts (including this one) and enter them into a random draw to win a second copy of my recipe eBook. The contest closes on Saturday March 24th at midnight EST/9pm PST and then I will announce the winner on Monday March 26th. Make sure you’re signed up to my newsletter to find out if you’ve won! (You can sign up on the top right of this page in the bright pink box.)

—————————————–

The winner of the second copy of Comfort Soups To Keep You Warm  is Vicky Johnston! Congratulations Vicky!

My recipe book is now available!

How To Tell If A Fruit Is Ripe Enough To Eat – Banana, Peach, Nectarine, Pear, Kiwi, Apple, Orange and Tomato

Sometimes you want to know if the fruit you are eating is actually ripe. Especially if you’re eating it raw or in a salad, you want to make sure that it’s at the peak ripeness (flavour and sweetness) and that it will taste good and not be sour, starchy, bitter or pasty and inedible.

Here I show you how to tell if your most common fruits in North America are ripe and when you want to eat them.

I couldn’t tell from my perspective what the banana would look like when I peeled it. What I meant was that the speckled spots do not mean that the banana is bruised or gone bad inside. The banana has a small discolouration from being knocked before it ripened.


Let me know what you think! Did you learn anything new?