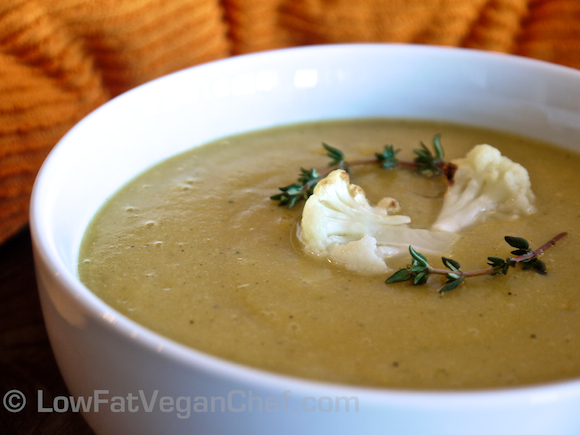
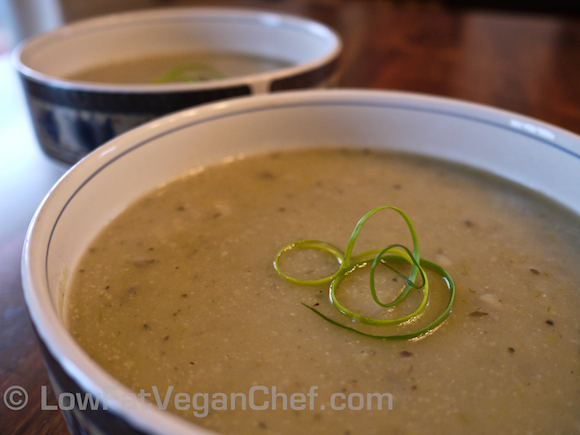
Roasted Garlic Cauliflower Soup

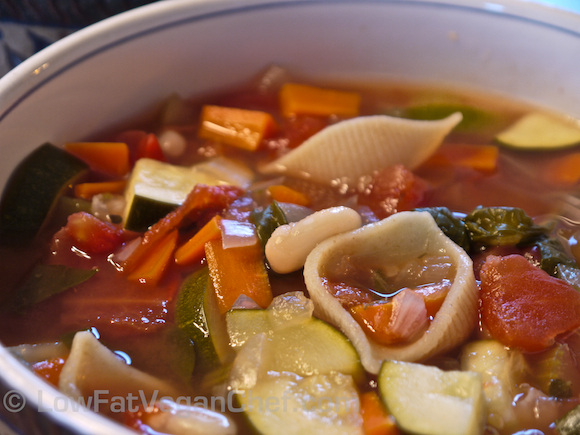
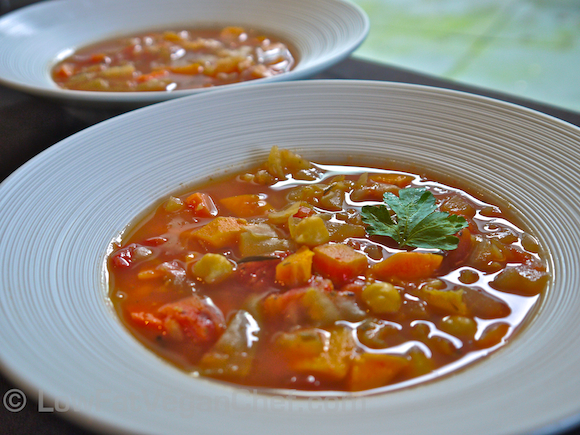
Low Fat Vegan Oil Free Red Wine Minestrone Soup

Red Wine Minestrone Soup

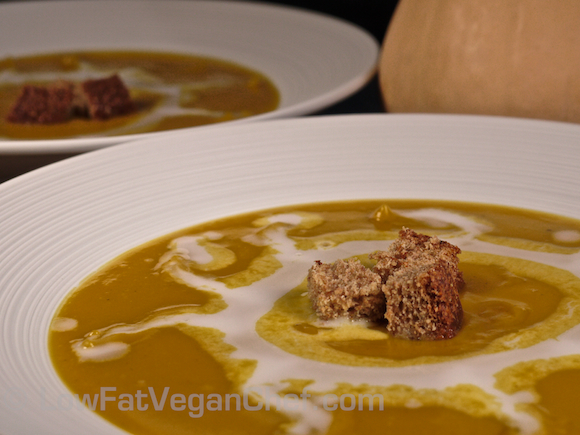
Low Fat Vegan Oil Free Roasted Butternut Squash Soup

Roasted Butternut Squash Soup With Garlic Croutons

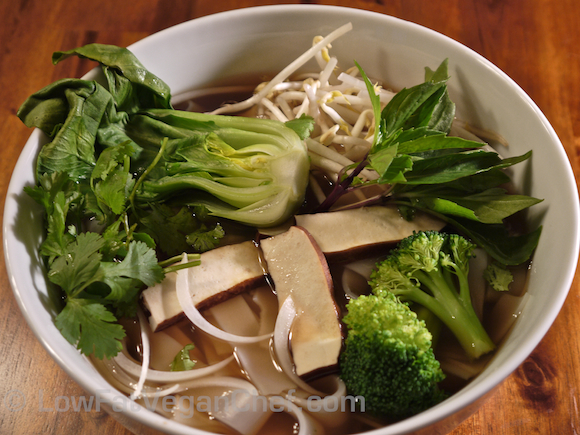
Low Fat Vegan Oil Free Vietnamese Pho Noodle Soup

Vietnamese Vegan Pho (Noodle Soup)

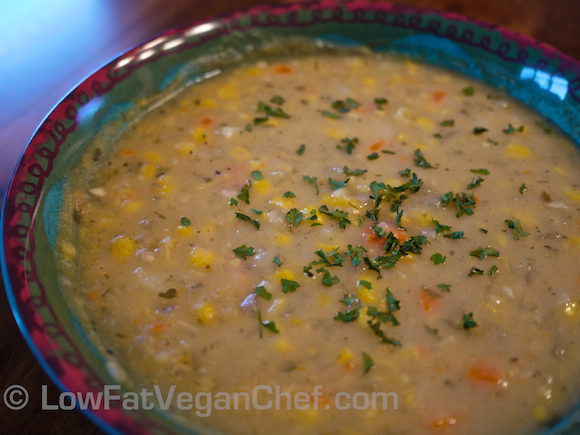
Low Fat Vegan Chef's Oil Free Creamy Potato Corn Chowder

Creamy Potato Corn Chowder

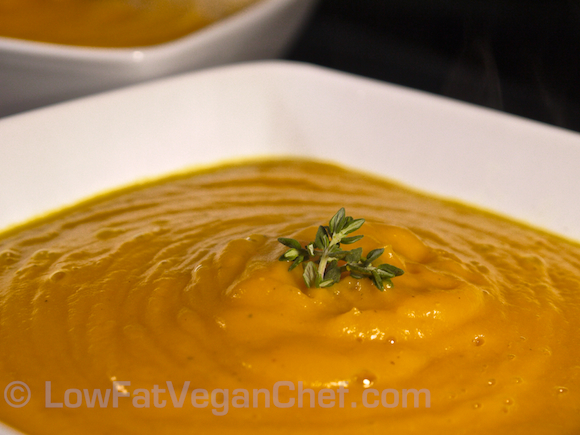
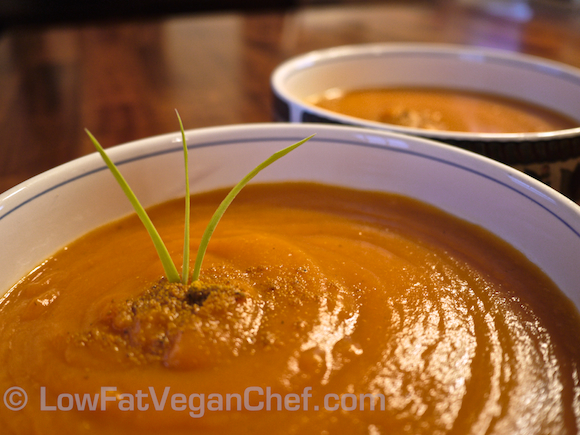
Low Fat Vegan Chef's Oil Free Potimarron Carrot Soup

Potimarron (Red Kuri Squash) Carrot Soup

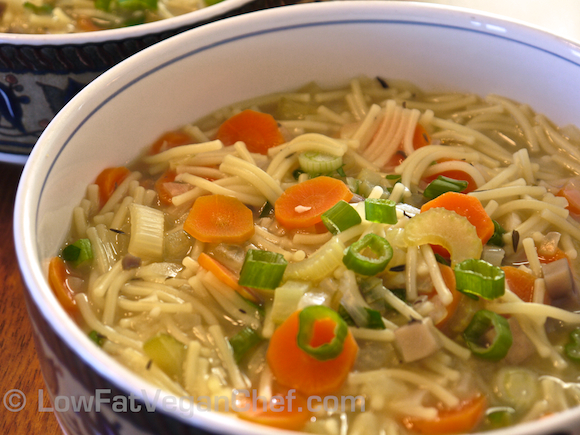
Low Fat Vegan Chef's Oil Free Just Like Chicken Noodle Soup

Just-Like “Chicken” Noodle Soup

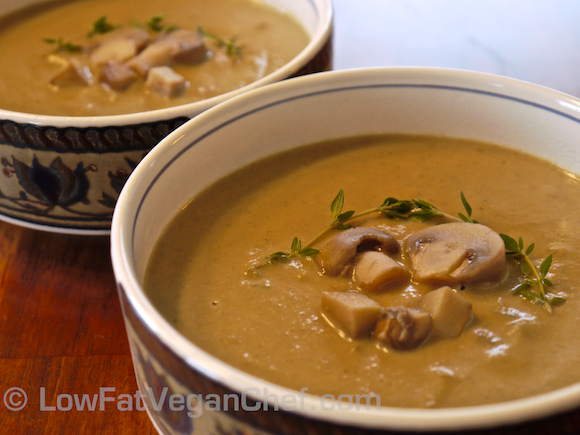
Low Fat Vegan Chef's Oil Free Gourmet Cream Of Mushroom Soup

Gourmet Cream of Mushroom Soup

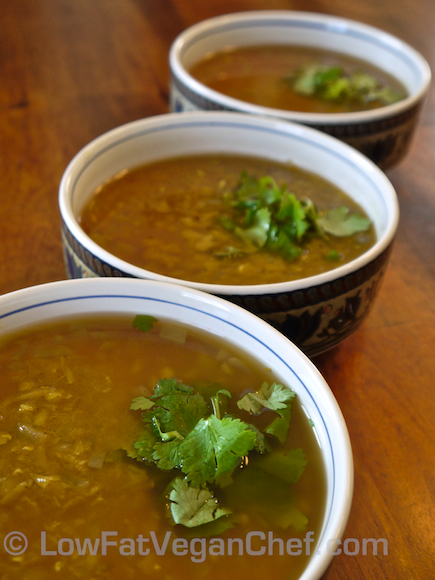
Low Fat Vegan Chef's Oil Free Spiced Indian Dal Soup

Indian Dal Soup

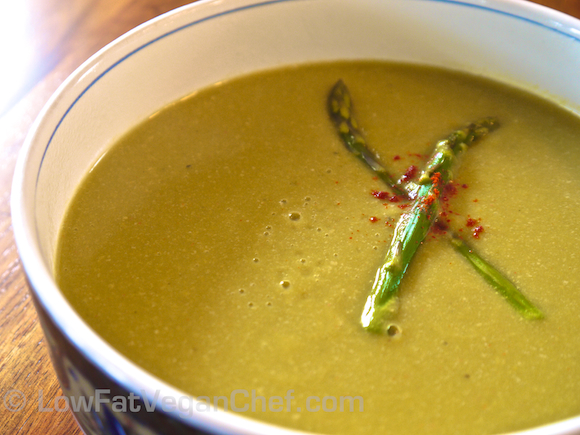
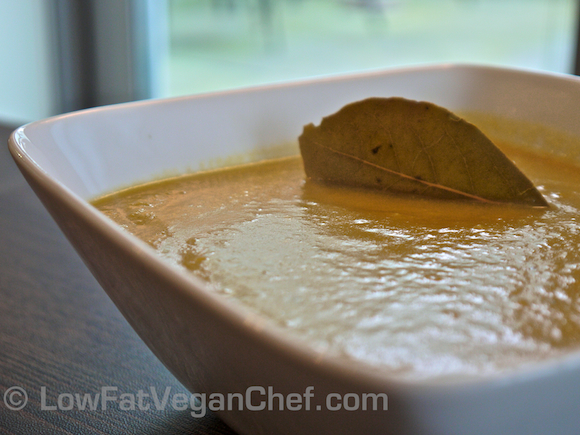
Low Fat Vegan Chef's Oil Free Cream of Asparagus Soup

Cream of Asparagus Soup

Low Fat Vegan Chef's Oil Free Yam Sweet Potato Chickpea Cabbage Soup

Yam Chickpea Cabbage Soup

Low Fat Vegan Chef's Oil Free Cream of Potato Leek Mushroom Soup

Potato Mushroom Leek Soup

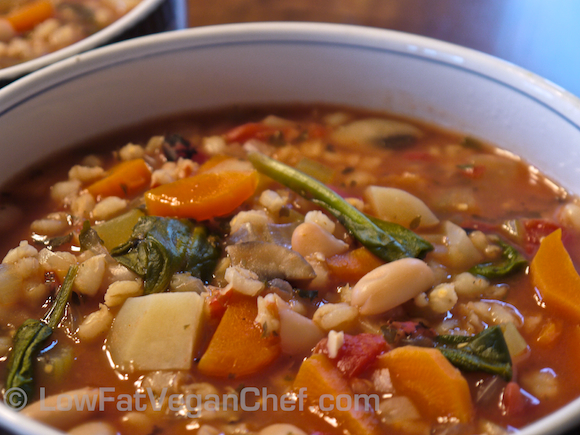
Low Fat Vegan Chef's Oil Free Vegetable Bean Barley Soup

Vegetable Bean Barley Soup

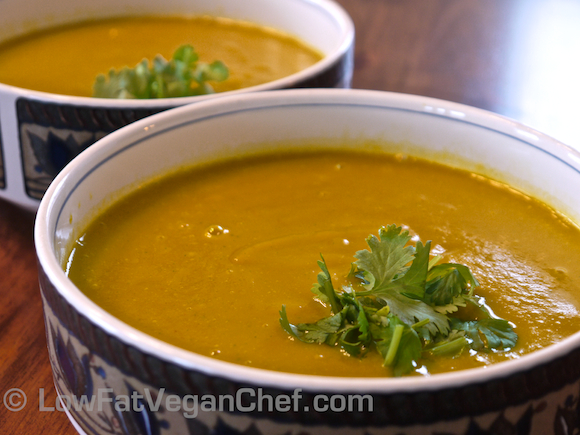
Low Fat Vegan Chef's Oil Free Thai Pumpkin Soup

Thai Pumpkin Soup

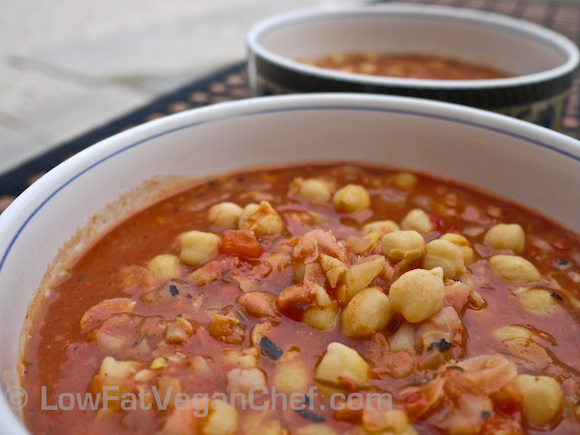
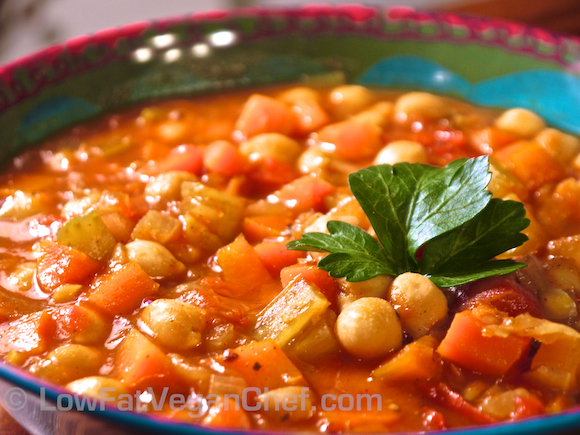
Low Fat Vegan Chef's Oil Free Moroccan Chickpea Soup

Moroccan Chickpea Soup

Low Fat Vegan Chef's Oil Free Curried Carrot Leek Soup

Curried Carrot Leek Soup

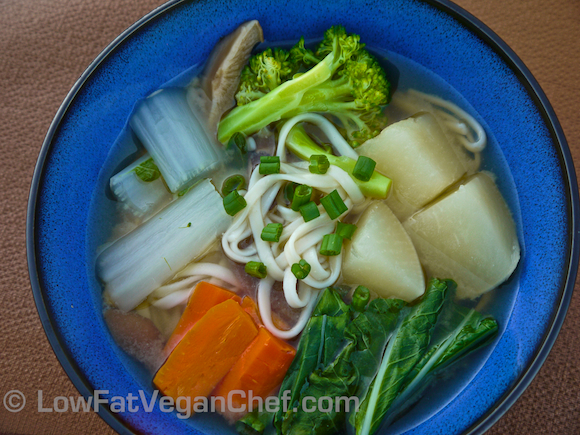
Low Fat Vegan Chef's Oil Free Chinese Asian Vegetable Noodle Soup

Chinese Vegetable Noodle Soup

Low Fat Vegan Chef's Oil Free Cream of Artichoke Soup

Cream of Artichoke Soup

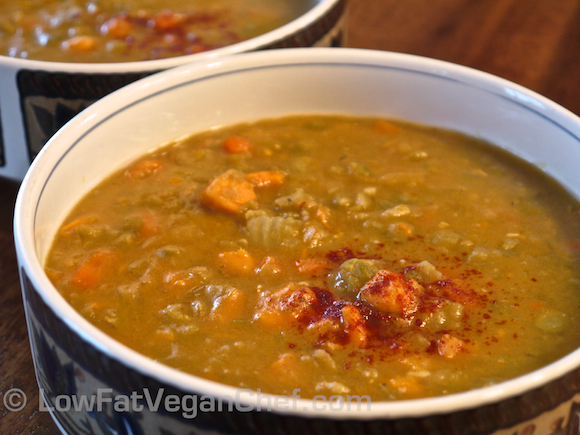
Low Fat Vegan Chef's Oil Free Split Pea Carrot Yam Sweet Potato Soup

Split Pea Carrot Yam (Sweet Potato) Soup

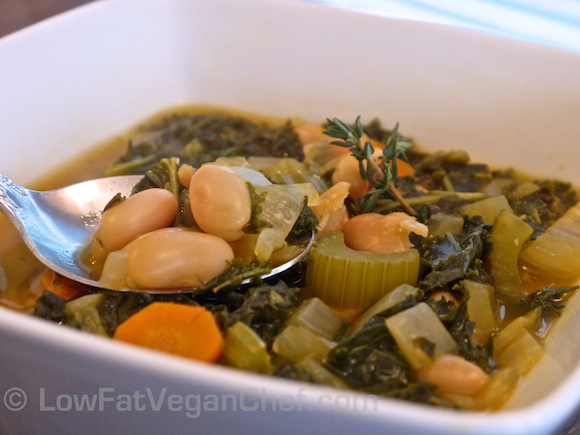
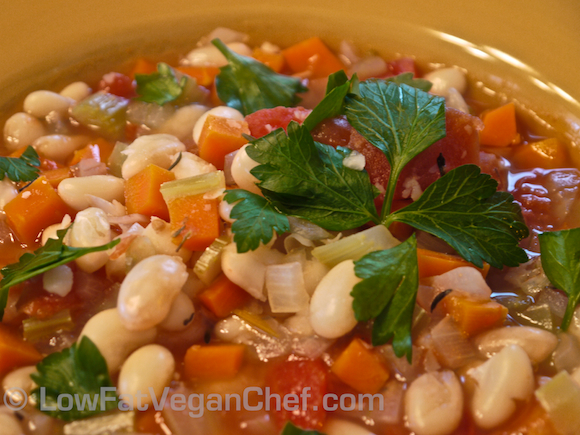
Low Fat Vegan Chef's Oil Free Greek Fasolada (White Bean) Soup

Greek Fasolada (White Bean) Soup

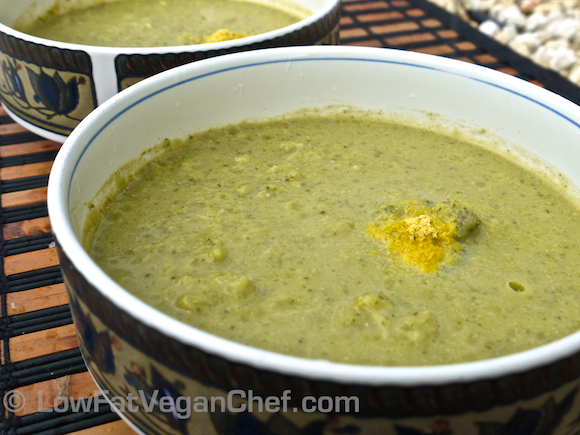
Low Fat Vegan Chef's Oil Free Cream Of Broccoli Soup

Cream of Broccoli Soup


This is just a sample of all the soups in the book, there are a few more, including 2 vegetable broth recipes and some bonus recipes you can use for sides and garnishes for the soups!

I have to say, it’s VERY difficult for me to choose a top favourite of all of these soups. I would eat them all again and again! After traveling all over the world, including Canada and the USA I can say that these recipes are MUCH MUCH better than the vegan soup offerings currently available at most restaurants. Most of the time their vegetable soups are rather watery and bland and need more seasonings and vegetables!

My soups are packed full of both vegetables and flavour that you will want to make these soups regularly as well. And who doesn’t love one pot meals with few dishes to clean up? I know I do!

————————————

Here’s How You Can Enter To Win A Copy Of My Low Fat Vegan Comfort Soups Recipe eBook

The contest is now closed.

Simply comment on this post below and tell me which one or two soups you are the MOST excited to try and why and you’ll be entered to win! I will select from one of the comments below, so PLEASE make sure you put in your real name and a correct email address so I can contact you, should you be chosen. (These emails are viewable by myself only, no one else on the blog will have access to them.) The contest closes at Midnight EST Tues March 20 (9 PM PST the blog shows PST time stamps).


Comfort Soups To Keep You Warm is now available! Make sure you’re signed up to my newsletter to find out how you can get a copy and get a free special bonus for ordering during the launch.


The Fat Future Of America Is Frightening (This Applies To All of North America)


I have a really great educational graphic on the affects of obesity in America that I wanted to share with you. The designer asked if I could post it on my website as it is in line with what I’m teaching. (Scroll down)

I want everyone to realize that people are gaining more weight and faster than ever before because of the amount of fast food and convenient foods available.

In many states children grow up without every really having a home cooked meal. I even know many adults that would rather eat out every meal of the day than cook something at home (even though this is much more expensive). Yes cooking takes some time, but honestly exercising and dieting takes even more time, so why not make a few more meals at home and save both time AND money doing so?

You may or may not have heard about the KFC Double Down. Many of you will think oh, but not many people eat like that. Well KFC would not have put so much time and money into promoting this sandwich nationally if they didn’t know for a FACT that Americans (and Canadians) would want to eat it, given the chance. And they were right. Even though you know this is obviously not healthy for you, many people are eating it as a novelty, for fun, or because it looks decadent or “manly”.

This nutritional info is straight from KFC’s website 

 Item:  Calories  Fat (g)  Sodium (mg)
 KFC Double Down 540  32  1380
 Potato Wedges  290  15 810
 20 oz. Pepsi  210  0  45
 Total:  1040  47  2215

Avg. Rec. limit 2000 calories/ Daily limit 65 g/ Daily limit 1500 mg

(Even if you don’t eat a double down chicken sandwich meal, remember a lot of people eat fried chicken, cheese and bacon as part of fast food meals as well.)

My goal with this website is to help educate people on how to eat MORE plant foods and how to make them 100% healthy and low in fat. Far too often people fall into the trap of craving only battered, deep fried, cheezy, creamy and barbecued food and forsake simple fruit and vegetable based dishes because they’ve either never had them or don’t think they would taste good at all.

This is a shame.

I guarantee you that if you try some of my recipes you will enjoy them. My recipes are not just designed for vegans and vegetarians who like healthier foods, they are designed with lots of flavour that many SAD (Standard American Diet) eaters or omnivores don’t even realize that it is oil free and vegan.

If I can get a SAD/omnivore to exclaim wow this is really good I want more, then my job has been a success.

So far it is working on my friends and family and they are slowly learning how to make more meals from scratch (and they are losing weight too!)

If you continue to eat fast food and junk food when you’re young, it’s very likely that your future will end up like this. The pounds will continue to creep every year and one day you won’t know what happened or even when it started.

Did you know that just overeating ONLY twice a year (On Thanksgiving and Christmas) can cause you to gain a pound or more? So every year your weight is increasing by 1 lb and in 10 years you’ll be 10 lbs heavier.

Combine that with DAILY treats and overeating just to satisfy your “sweet tooth” or “fat tooth” (in some people) and this can be as much as 5 lbs a year. I’m not kidding. To gain an extra 5 lbs a year, you’d only have to eat an 48 EXTRA calories more than you needed every day! That’s the equivalent to an apple or 1 bite of a chocolate bar! (If you ate an extra apple a day you probably would not gain this much weight as it has so much fibre and takes more energy to digest, but chocolate bars and desserts are high in sugar and fat and unlike a piece of fruit.)

What if you could just walk for 20 minutes a day and switch your dessert for some fruit? What if you switched your breakfast from a mcmuffin and hash browns to a fruit smoothie instead? Or your burger and fries for lunch into a oil free soup and salad?

What if you gradually switched where every meal you were eating was oil free and based on fruits and vegetables instead of bread, oil, meat, cheese, butter and cream?

These things make a big difference over the long run for your health. Not just affecting your weight but affecting your risks for heart disease, diabetes and even cancer.

Start out just trying to eat a little healthier than yesterday. Only compare yourself to yourself, and no one else. Take the time you need, educate yourself, learn how to cook something healthy and new, start walking for fun with a friend.

How To Select and Cut A Ripe Pineapple Video


Pineapple is something many people are often afraid to buy whole in the store. They are used to the overly sweet pineapple chunks or rings you get in a can that you grew up on as a kid. But when they start eating healthier or going vegan they might pick one up and sigh “Where do I even start with this thing? It’s so big and prickly and I don’t know how to cut it properly!”.

Not all pineapples come with instructions on how to cut it either!

Fear not, here is a video demonstration I did in my kitchen to show you how I cut a pineapple and how to tell if your pineapple is sweet and ripe.

There are many many ways to cut and serve pineapple, this is just one of them.

Want More Delicious Raw Food Recipes and Insider Tips?

Check Out My Savory Raw Dinner Recipes!

Please click below to watch my video on youtube:
How To Cut and Select A Pineapple

I don’t always cut my pineapples meticulously, but this is the way to do it if you want to get the most out of your pineapple or make it look pretty for serving.

You can also use a pineapple slicer, but honestly I’ve just found them to be so messy and sometimes they shred the pineapple and/or don’t fit the pineapple and it’s either too big or too small for your pineapple. And at the end my counter is covered in pineapple juice and it’s very sticky when it dries!

If I’m in a rush, I will basically cut off all the sides of the pineapples and instead of cutting out the eyes at an angle I will just cut straight down and shave off more of the flesh until the eyes are gone. This is a little more wasteful, but sometimes our pineapples are so big that we don’t miss the little extra bits.


You can freeze any leftover pineapple in bags in the freezer, or use in fruit salad for the next few days, or to put in smoothies.

How Do I Know If My Pineapple Is Ripe?

The best way to check if your pineapple is ripe is to turn it upside down and smell the bottom of it and see if has a fragrant smell. Often the bottom or the whole pineapple will be a yellowy golden color.  Although color is not the definitive guide to telling if a pineapple is ripe, I have found that yellow pineapples seem to be a bit sweeter and less acidic than hard green pineapples. And BTW pulling a leaf from the inner section of the pineapple is NOT an indication of ripeness. That means absolutely nothing! LOL.

How To Ripen a Pineapple?

Pineapples generally take about 2 years to grow and aren’t exactly a fruit, they are a bromeliad, and they have been bred to be edible. Pineapples ripen from the bottom and don’t really ripen much more once they’re picked. BUT there is still some enzyme activity going on and you can make your pineapple a little bit sweeter. Turn your pineapple upside down on your counter for a few days and the enzymes from the bottom of the pineapple will trickle down into the top of the pineapple and it will change your pineapple and make it a bit softer and sweeter all the way through. This is a trick I just learned and I thought it was so cool I’m going to do this from now on. Softer sweeter pineapples also seem to be less acidic so they won’t hurt your tongue as much after eating a few pieces.

What do you like to do with your fresh cut pineapple?

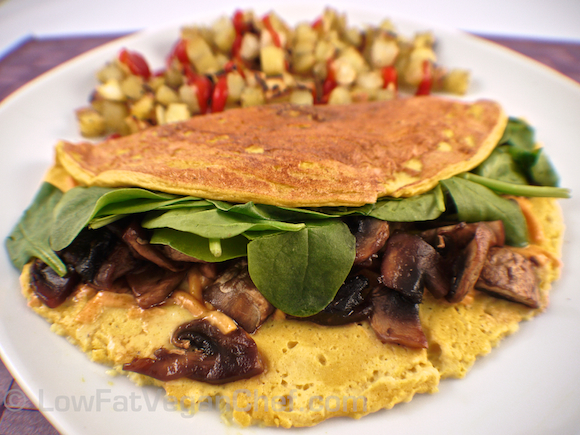
The Best Low Fat Vegan Silken Tofu Omelette Recipe!

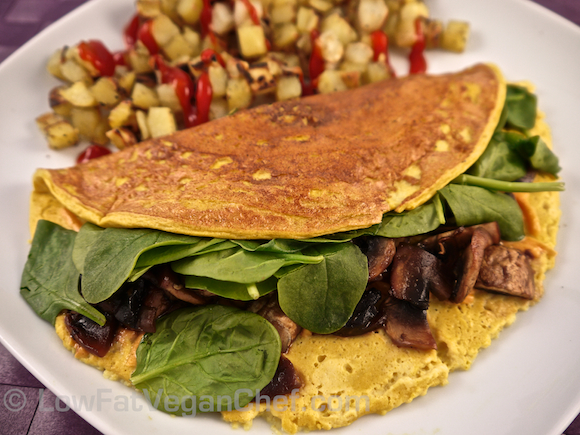
I’m going to show you just how YOU can make a delicious vegan tofu omelette. I have to confess, this omelette looks WAY better than my first attempts at making vegan tofu omelettes. Making pancake-like things including crepes, omelettes, Indian dosas and Ethiopian injeera bread have all been things that were a little hard for me to get right at first. I realized the problem was my insecurity and lack of patience in making them! Once you tell yourself you can do it and just try it, it works out  much better. And hey as long as it tastes good, it’s all that matters the first time!

Making this recipe does take a little bit of practice if you are:

1.) Inexperienced at pouring and flipping pancakes, crepes or omelettes in general

2.) Impatient and paranoid about the omelette sticking and burning to the pan and want to peek and move it around (which it will not, so do not panic and don’t touch it.)

These are things you must learn by experience and you have to accept that it will take a bit of practice being able to pour it, spread it, let it cook (and not mess with it!) and then fold it in half and slide it off the pan.

It took me about 3 cracks at this recipe before I got it right and learned to just trust the process of cooking and the tofu omelette was going to be fine, and stop panicking if it seemed stuck and trying to move it around with a spatula. Don’t do this.

I’ve now got it down pat and even made some for my mom and I over the Christmas holidays (it was her first vegan omelette ever) and she enjoyed it. I think she also enjoyed having some Daiya cheese and mushrooms in it too, but also the novelty of having something omelette-like as she’s been avoiding eggs.

This is a recipe I will make occasionally for a special vegan brunch or breakfast. It’s best for 2-3 people as it can take much much longer if you are trying to use multiple pans or cook for more people.

Tofu scrambles and tofu omelettes seem to take longer to cook than eggs (as they are not raw and drastically changing structure) so they are more forgiving and don’t really overcook. As long as it’s not turning black and you’re cooking it on medium or medium low heat it will be ok.

Also the trick to this is using silken tofu. Do not use regular tofu. You will NOT enjoy the flavour.

Like I said, I’ve made this recipe many times, I have adapted it from Susan V’s recipe at FatFreeVegan.com and made it even LOWER in fat and still delicious. I think I found the perfect vegan tofu omelette recipe! This omelette is gluten free as well!

Hurray!

Low Fat Vegan Silken Tofu Omelette Recipe

Serves 2-3 Makes 2 giant (full pan size) or 3 medium sized omelettes

Ingredients:

1 12.3 oz/349 g package FIRM Mori-nu silken tofu (must be firm or extra firm)
3 tbsp. almond or coconut milk
3 tbsp. of nutritional yeast
3 tbsp. cornstarch or tapioca starch
1 tsp. dijon mustard (essential)
1/4 tsp. turmeric
1/2 tsp. Herbamare or salt, or to taste
1/4 tsp fresh ground pepper
1/8 tsp of smoked paprika (This makes it more delicious)

Filling:
fresh spinach
sauteed mushrooms
sauteed onions
any other desired toppings
vegan cheese *optional

Directions:

1. Place all of the ingredients into a Vitamix or food processor and blend together until smooth.

2. Heat a wide shallow non-stick pan or non-stick crepe pan over medium heat. Make sure it’s very hot before using. Sprinkle a little water on it to test. If it bubbles off right away it’s ready. If not, wait until it’s really hot.

3. Pour batter onto pan about the size of a large pancake. Don’t pour too much or it will be hard to pick up and fold . Spread it out a little very gently into a circle using a small spatula. It will be quite thick, this is ok as there is a lot of air in the mixture. Don’t spread it out thinly.

4. Cook for at least 5 minutes until it almost dries out on top and sets. Turn the heat down to medium low. You have the option of flipping it over if you want the tofu to be cooked firm, or you can add your filling now to the bottom half and flip the top half of it over to cover and cook until the ingredients soften and your vegan cheese (if any) melts. I usually just cook it on one side only and then fill the bottom half.

5. When the omelette is cooked and sturdy enough to move, slide it onto a plate. If your fillings aren’t warm enough you can pop it into the microwave for 15-20 seconds to warm up and set the omelette a little more if necessary. The spinach will wilt from the heat of the cooked omelette.

6. Serve. (Be careful! The tofu will be very hot! Let it cool a bit before eating, I don’t want you to burn your mouth.)

Additional Tips:

Mori-nu silken tofu is sold at almost every store. Whether it’s a health food store or just a regular grocery store. Most commonly it is in the “health nut”/gluten free/vegetarian product section of the store with other dried goods. Sometimes it’s in the refrigerated section with tofu and fake meats, but it doesn’t have to be refrigerated so it’s usually in the dry goods section.

If you need a little extra water or milk to blend your tofu add another tbsp or two. Not much it still needs to be thick enough to set.

If your pan is not very good or tends to stick you may need a spray of non-stick spray. But if it’s a good pan, you’ll be ok. Give your pan a wipe with a wet paper towel in between omelettes and let it come back up to temperature again before making the next one. Make sure your pan is clean and doesn’t have black bits on it, or it will get on your omelette.

Practice makes perfect! Even if you mess up a little it will still taste good as long as you cooked it. Give yourself the first one and then save the nicer ones for your family.

If you have any leftover “batter” you can save it in the fridge for another day. Let it sit on the counter and warm up to room temperature before making.

Variations:

You can use any favourite omelette fillings for your vegan omelette. Get creative. Spinach and mushrooms are just my favourites. Make sure your veggies (aside from spinach) are cooked first before adding them to your omelette and season them a little so they will be delicious.

———

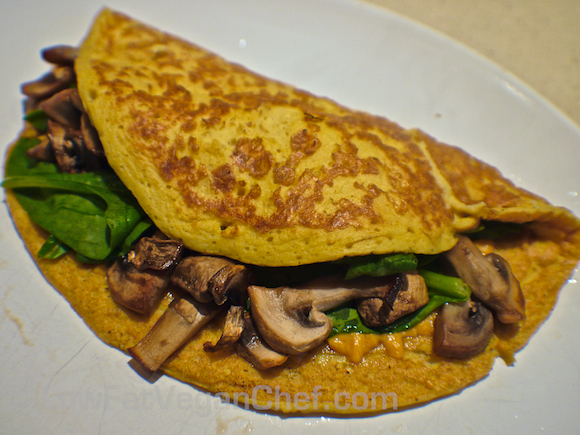
Here was my previous attempt where I kind of ripped it while flipping the top half over. It’s ok, it still tasted great!

Have you ever made a tofu omelette before? What are your favourite omelette fillings?

80/10/10 Recipe: Kale Apple Celery Green Juice Recipe

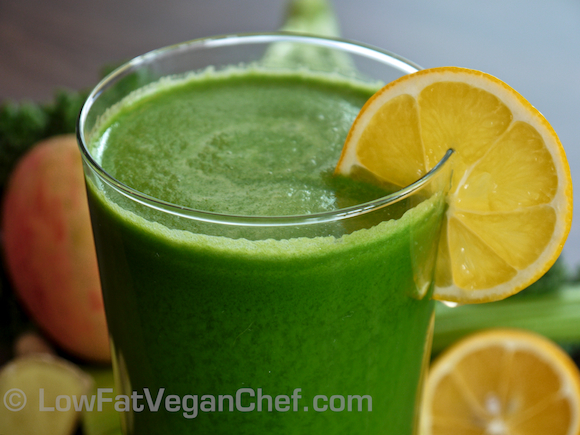
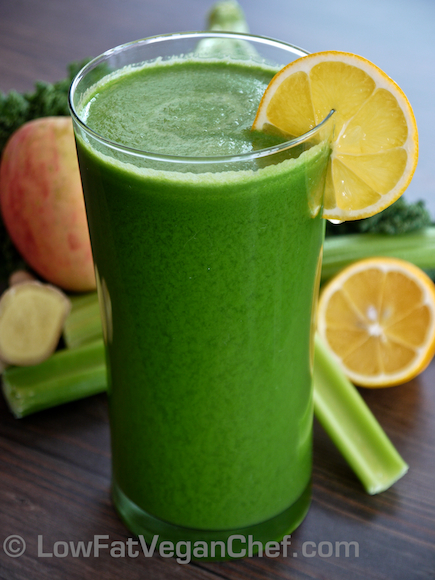
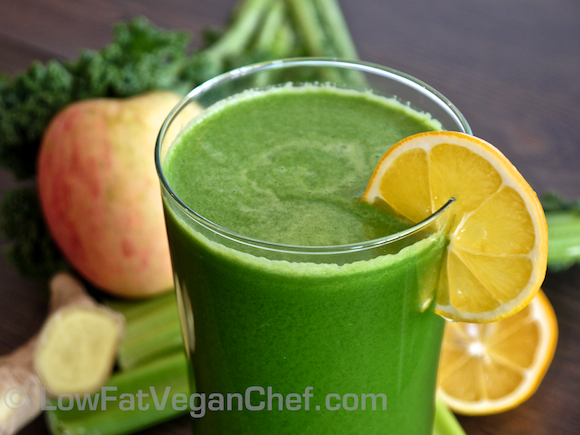
Mmm… kale apple celery juice with ginger and Meyer lemon. This is a delicious fat free kale juice with a hint of apple and the tang of lemon and a bite of ginger.

You can easily throw in a handful of greens into your morning veggie juice and a little apple to take out the bitterness.

I like to use celery as the base of my juice and then add whatever else I’d like such as carrots, apples, beets, lemon, lime, ginger, greens etc. There are so many different combinations for fresh juice. The juicer I use is a Breville. I like that it comes with this nice large juicing jug that keeps the foam out of my juice when it pours and it’s much easier to clean than my old Jack Lalane power juicer.

We picked up this bag of Meyer lemons and I thought I’d try them out in this juice. They have a much thinner skin, almost like mandarins and are very fragrant. They’re a nice treat over the regular lemons.

Kale Apple Celery Juice With Ginger and Lemon

Serves 2

Ingredients:

3 apples
16-20 stalks of celery
2 handfuls of kale
1 chunk of ginger
1 lemon

Directions:

1. Wash and/or peel all of your ingredients.

2. Pass all of the ingredients through a juicer.

3. Serve immediately and enjoy!

 What’s your favourite juice to make?

How To Sauté and Cook Without Oil, How To Cook Fat Free and Make Fat Free Vegan Salad Dressings

How To Cook Without Oil

Cooking without oil and creating oil free recipes like salad dressings is pretty easy in most cases. It’s very easy to cook without olive oil. You can steam, boil, sauté (in water or vegetable broth) or bake food all without any added oils. Oil has 120 calories per tablespoon and is 100% fat. When you’re looking to cut a few calories in your diet and give your arteries (and waistline) a little break from things like butter, olive oil, cheese, etc this is a good way to cook.

Baking/Roasting Without Olive Oil

When you’re baking in the oven, not adding oil or cooking spray will just make your dish take a little bit longer to cook, but that’s about it. You can add a little water to your roasting pan if you are worried about burning, or turn the temperature down just a little and cook it for longer. For instance, you can bake Russet potatoes in the oven at 400 F/205 C for about an hour without any oil rubbed on their skin and they will cook just fine. It’s also less carcinogenic if you avoid cooking oils at very high temperatures. I roast things like squash, Brussels sprouts, potatoes, cauliflower and more in the oven without oil. Add a little water or vegetable broth to a roasting pan if you like, or use a little balsamic vinegar and water for oil free roasted Brussels sprouts, or roast your russet potatoes dry in the oven like I show you here.


In baked goods, substitute applesauce or mashed banana for any oils. Canned pumpkin works great too in certain recipes. In my vegan baked goods I add a 1 tbsp. ground chia or flax and 2 tbsp. of water to substitute for the eggs, and then I add applesauce for the amount of oil and I find that this helps give moisture and texture to whatever I am making. My Fat-Free Two Bite Brownies  and Fat-Free Pumpkin Raisin Muffins will show you how to do this.

Sautéing/Cooking Onions Without Oil

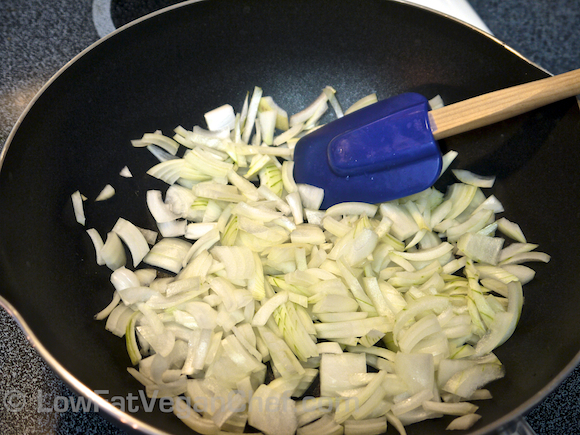
Many people think you need oil to cook with over the stove. When you’re sautéing onions or garlic in a pan you can sweat them dry over medium heat, as long as it’s non stick. Doing this for 5-6 minutes should be just fine and you won’t have a problem with anything getting stuck. If you’re going to cook them for longer then you can add a little water or vegetable broth if necessary. The better the pan, the less stick you will have though. You can also use a ceramic pan.

Check out my recipe for Home Made Vegetable Broth that I use for sautéing my onions and garlic and soups:


This is how I sauté onions dry in a pan without olive oil. This is a great method for stir fries or starting sauces.

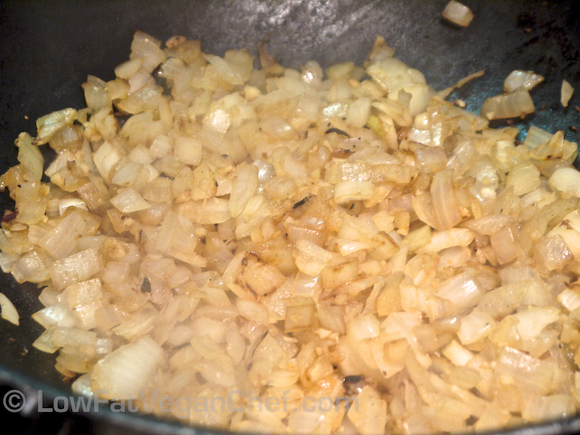
This is what my onions look like when they are done. They were dry sautéed in a non-stick pan over medium heat for 5-6 minutes and they caramelize themselves without oil!

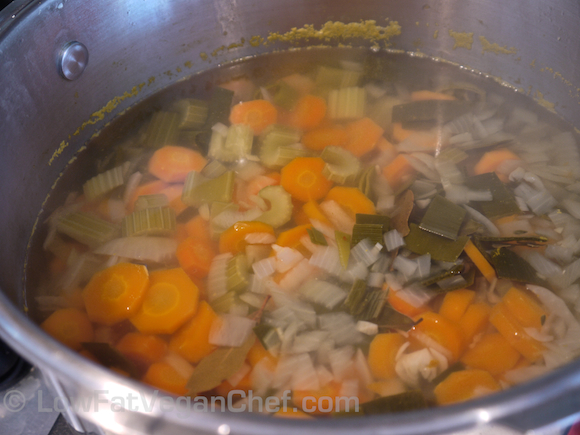
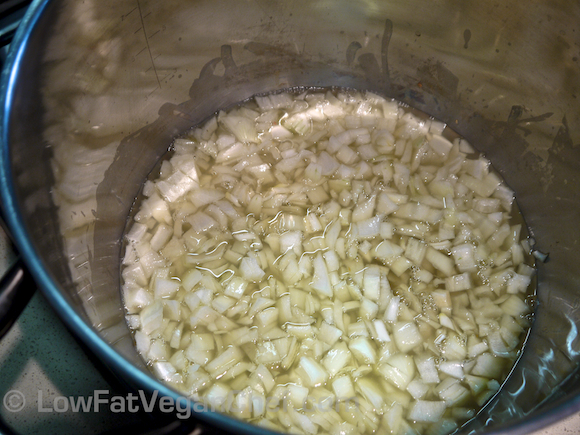
Here’s how to sauté onions in a pot in vegetable broth for making soups or stews. Garlic and ginger can go in too.

It’s really easy! Just add a little more broth or water if you start running out of liquid.

For Making Oil Free Vegan Salad Dressings

Use things like water, lemon or vinegar, blended fruits or cucumber for the base of the dressing to give it liquid. Then add seasonings like sugar/dates/honey/agave, salt, pepper, fresh herbs, mustard etc to create an oil free dressing. (Make sure you add only 1-2 tsps of vinegar or lemon juice to start so it’s not too tangy, and then adjust.)


The best oil-free salad dressings will have at least 3 flavours. Sweet, tangy and salty. If you just use one flavour like orange juice or vinegar over a salad it’s going to be one dimensional and not as flavourful. If you’re trying to cover a large salad and eat a lot of greens, it’s better to make a dressing that is a little more flavourful and interesting to eat.

I find ripe ataulfo mangoes (bright yellow skinned) or strawberries and orange juice make a great base for fat free raw vegan salads dressings.

For creamy vegan salad dressings you can use silken tofu as the base instead of cream or milk. (Nut butters work too, but only add 1-2 tbsp as they are much higher in fat than tofu or almond milk.)

For tangy vegan salad dressings make sure you add some lemon, sweetener and a few seasonings to your dressing to pump up the flavour.


To thicken it up you can add psyllium husk or chia gel/chia seeds (and blend it in) or add some cornstarch and water and thicken your dressing over  heat on the stove. Refrigerate the rest of your salad dressings. If they are raw use within 3 days, if they are made from non raw ingredients or cooked over the stove they will last longer.

—————–

There you have it! Cooking without oil and making oil free food is really easy! Did you think it would be complicated?


How To Cut And Prepare Leeks For Recipes

Leeks are something many people have heard of, but have no idea how to use or what they taste like. You can use leeks just like you would onions in a recipe, they are part of the allium family. They have a nice mild creamy taste and are great in blended soups.

They usually come in sets of 3 from the grocery store and have big long green tops on them. You can slice off the top 3-4 inches and throw that away or save the tips to use in vegetable stock along with any other cleaned vegetable trimmings.

How To Cut and Trim Leeks For Sautéing

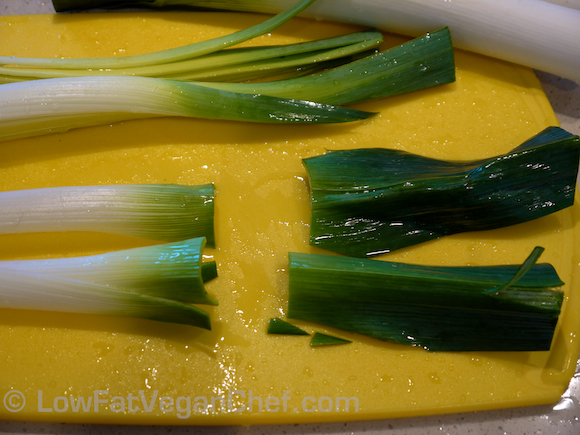
Step 1: Cut off the very top of the leeks and set aside.

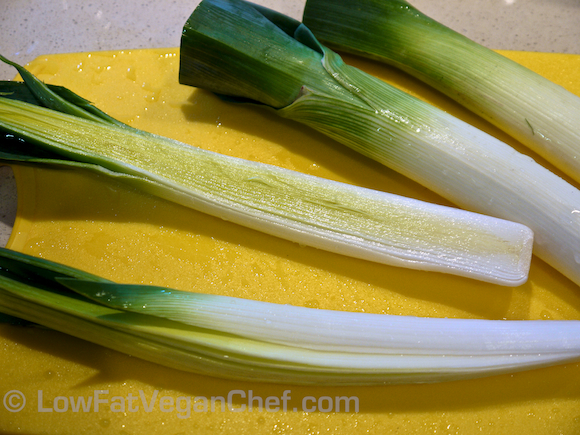
Step 2: Slice the leeks in half lengthwise.

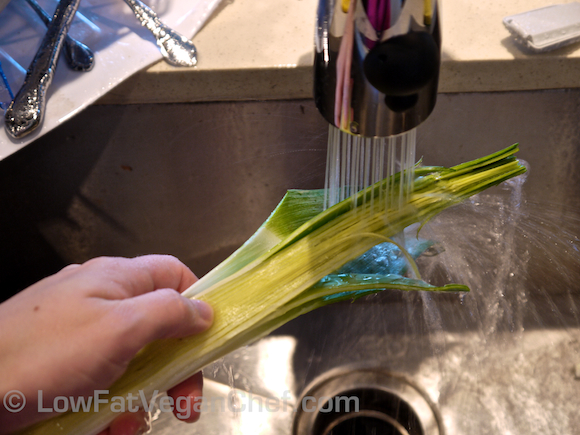
Step 3: Carefully wash in between each leaf of the leek. They usually have a lot of dirt trapped between the layers.

Step 4: Take off the large outer layers.

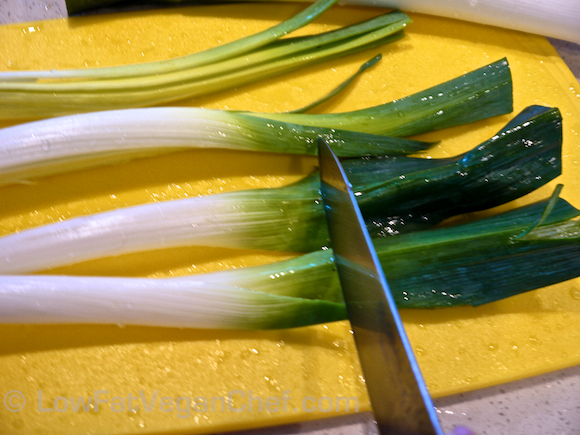
Slice off the dark green parts of the leeks and set those aside. You want to use the light green parts and the white parts only for your recipe.

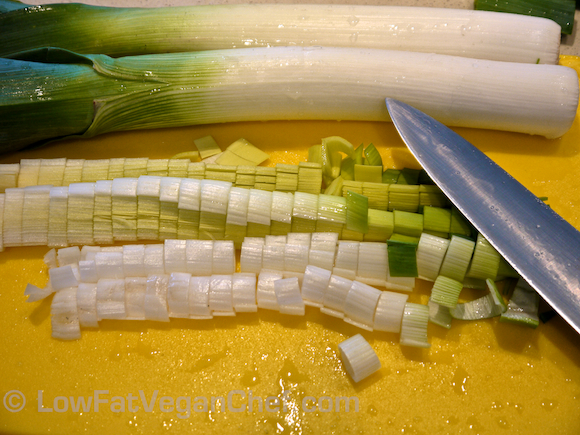
Step 5: Slice the light green parts and white parts like you would slice celery.

Now you are ready to cook your leeks, just like you would cooked diced onion.  Just sauté it in a pan or pot with some vegetable broth and when they are soft you can add the rest of your ingredients and continue cooking your dish.

How To Make Homemade Vegan Vegetable Stock Easily On The Stove Or In A Pressure Cooker Without Oil

Oil-free vegetable stock is something most people don’t make, but it is pretty easy to do (aside from chopping the veggies) and it’s worth it because it’s fresh, tastes better and is cheaper than buying it if you cook like I do. I use my vegetable stock for sautéing onions and garlic in (instead of oil) and as a base for my (oil free) vegan soup recipes.

For my Low Fat Vegan Comfort Soups Recipe eBook I had to make A LOT of stock. Often the store bought stock is only 1 quart or 1 liter and often I needed more than that. It can cost up to $2.99 a pop and that can add up when you use stock as much as I do.

So once a week or maybe twice a week I’ll make some fresh vegetable stock in my pressure cooker. It’s a great way to use up some leftover carrots or celery and some herbs like thyme or parsley that you don’t need for any other recipes.

When compared to the store bought low sodium vegetable broths mine taste MUCH better and have a nice light flavour and a natural sweetness. I find the store bought ones are a little too strong and bitter and are not something you’d want to drink a cup of.

You can use homemade vegetable broth or stock for soup, sautéing, risotto and more. And this way you get to control the flavour and the amount of sodium in it.

So here are my recipes. I have one for a 9 cup recipe and a large one for a 14 cup recipe. Sometimes you just need a lot, and sometimes you just need a little.

Homemade Vegetable Broth/Stock Recipe (smaller recipe)

Yields about 9 cups/2.25 qts/~2.12 L of broth

Ingredients:

8 cups/2 quarts/~1.9 L of filtered water
2 large onions, diced
4-6 cloves of garlic, minced
4 large carrots, peeled and sliced
3 large stalks of celery, sliced
Mushroom stems and ends *optional
1/2 bunch of parsley and a few sprigs of fresh herbs like thyme
2 bay leaves
1/4 tsp. whole peppercorns
Dash of salt *optional

Pressure Cooker Method:

1. Place the vegetables, water and seasonings into a pressure cooker. Fill with water and bring to high pressure and cook for 5-6 minutes until vegetables are very tender. Use the quick release method (putting in the sink and pouring water over the lid until it releases) and let it cool until you can open the lid.

2. Strain vegetables from broth in a large mesh strainer and use a ladle, nested measuring cup or bowl to press out the excess liquid from vegetables through the strainer to yield the most broth.

Stovetop Method:

1. Place vegetables, water and seasonings into a large pot and bring to a boil. When it’s boiling turn it down to low and simmer for an hour. Don’t let your vegetables overcook and completely fall apart, check on them after 45 minutes or so.

2. Strain vegetables from broth in a large mesh strainer and use a ladle, nested measuring cup or bowl to press out the excess liquid from vegetables through the strainer.


Additional Tips:

Use the broth right away or let it cool and store in a sealed container(s) in the fridge for up to 3 days. You can freeze any extra you won’t use in that time. Use in recipes or for daily sautéing for onions and garlic.
For the pressure cooker, I chop the vegetables a little smaller. For the stovetop you can cut them into bigger chunks and keep the garlic whole, as they will cook longer.

This recipe is really flexible, if I need more for a soup recipe I’ll just add a little more water and dilute it. When I’m making it, I will use what vegetables I have but the main important ones are onions, carrots and herbs. The point is you want the water to taste like vegetables and not like plain water and homemade broth gives the best flavor for soup.
You can also use any other vegetable tops or skins if you like, but leave out the celery leaves, as they can be too bitter. I suggest that the vegetable peels be organic if you do use them. You can also add leeks, green/spring onions, other root vegetables, already cooked beans etc. to add more depth to the flavor.

Things You Do Not Want To Add To Vegetable Broth

Don’t add cruciferous vegetables as they contain sulfur and can make the broth bitter and smell unpleasant. No kale, collards, cabbage, broccoli, cauliflower, Brussels sprouts or leafy greens aside from fresh herbs.  You’d get more out of eating or juicing the greens than adding them to your broth. It won’t make it taste better for your recipes. Please do not add raw beans, grains or pasta to your vegetable broth either.

My stock is done cooking so I open the lid.

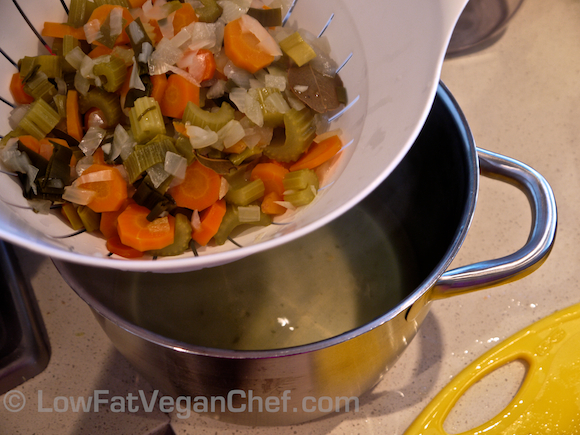
I ladle it out into a strainer/colander that is over another pot or bowl.

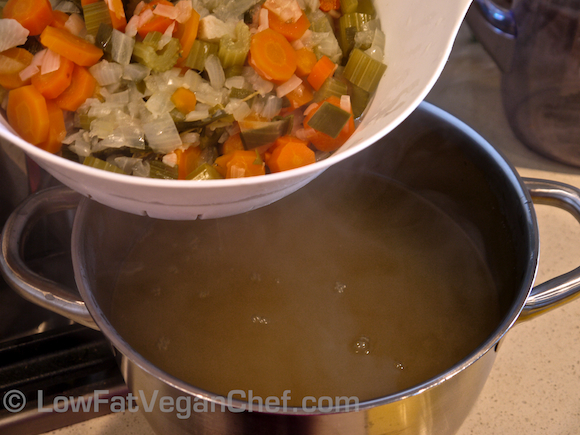
Pick up the strainer/colander filled with cooked vegetables and strain it.

I push the juices out the veggies to get any extra broth.

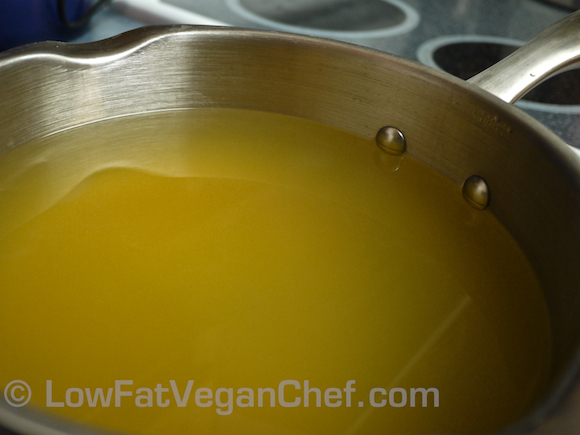
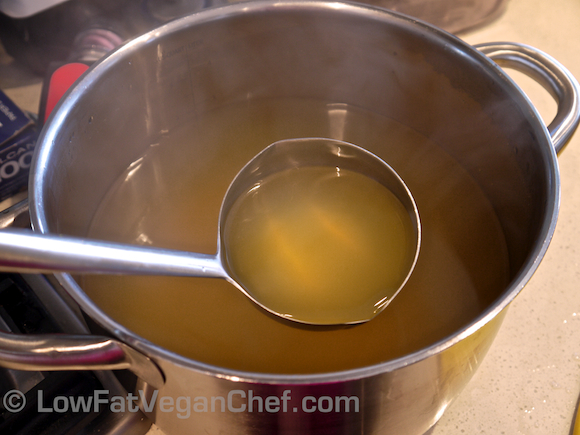
Now my vegetable broth/stock is ready to be used in my recipes!

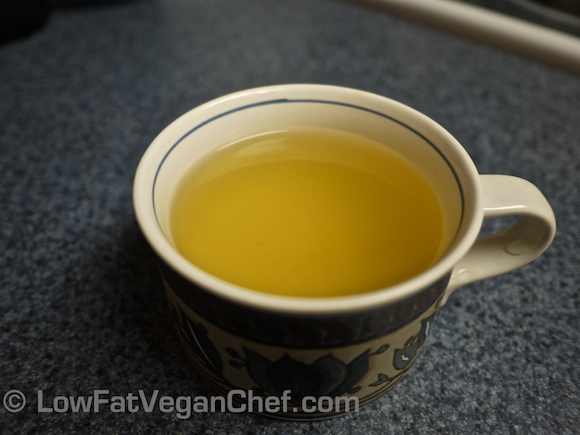
How about a cup of fresh vegetable broth?

Larger Vegetable Soup Stock Recipe

Yields 14 cups of broth

Ingredients:

12-13 cups/~3 qts./2.9 L of filtered water
2 large onions, diced
6 cloves of garlic, minced
8 large carrots, sliced
10 stalks of celery, sliced
Any other vegetable leftovers like the tops of leeks or ends of mushrooms
3 bay leaves
3 sprigs of fresh thyme
Pinch of salt
1/4 tsp whole peppercorns

Pressure Cooker Method:

1. Place the vegetables, water and seasonings into a pressure cooker. Fill with water and bring to high pressure and cook for 5-6 minutes until vegetables are very tender. Use the quick release method (putting in the sink and pouring water over the lid until it releases) and let it cool until you can open the lid.

2. Strain vegetables from broth in a large mesh strainer and use a ladle, nested measuring cup or bowl to press out the excess liquid from vegetables through the strainer to yield the most broth.

Stovetop Method:

1. Place vegetables, water and seasonings into a large pot and bring to a boil. When it’s boiling turn it down to low and simmer for an hour. Don’t let your vegetables overcook and completely fall apart, check on them after 45 minutes or so.

2. Strain vegetables from broth in a large mesh strainer and use a ladle, nested measuring cup or bowl to press out the excess liquid from vegetables through the strainer.
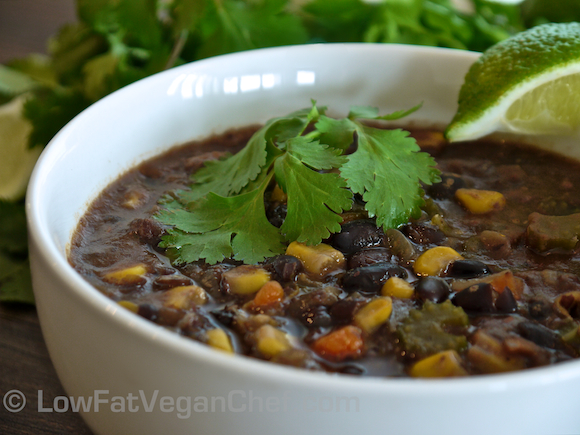
How To Cut, Prepare and Cook An Artichoke For Recipes or Stuffed Artichokes

I have to admit that artichokes are something that always sounded weird and a little frightening to me at first.

Before I was vegan, I had never had an actual artichoke. I had tried Spinach Artichoke dip at Moxie’s before, but it’s filled with cream cheese, and let’s be honest, most vegetables covered in cream cheese probably taste good anyway. So this was not a good indication for me whether I would like them or not!

The first time I ever had artichokes in their vegetable form was on one of Amy’s cheese-less pizzas and it was a new experience. I wasn’t sure I liked them at first.

I’ve tried marinated artichokes in oil and brine, and now steamed artichokes on their own and even in soup. I have to say I am a BIG fan of fresh made artichokes. The canned/jarred ones are seasoned a little too much and the ones in oil are just gross to me.

When you prepare them yourself they have this nice creamy taste (the artichoke heart) and you can do so many things with these delicious morsels it’s not even funny…

So in case you’ve never tried an artichoke or were seriously intimidated by these beastly looking vegetables I want to show you how to cut and prepare them yourself.

If you’re just doing one or two for a snack or for stuffed artichokes, it’s not that much work. I did 4 and it took a little longer. Mostly because I had to keep photographing every step!
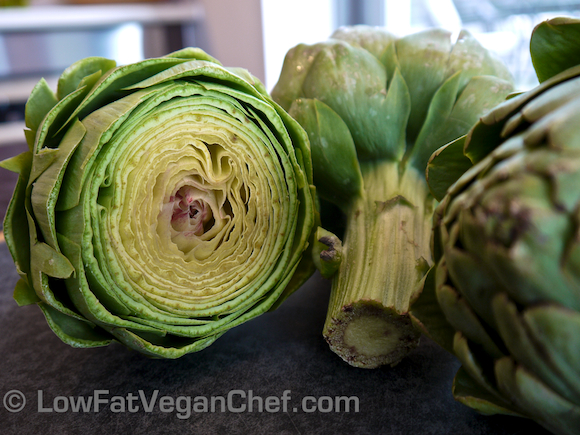
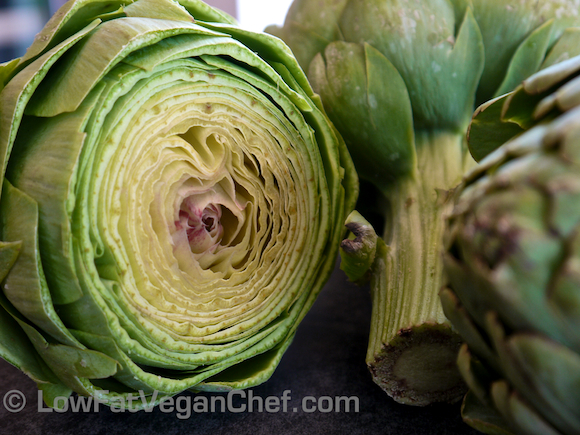
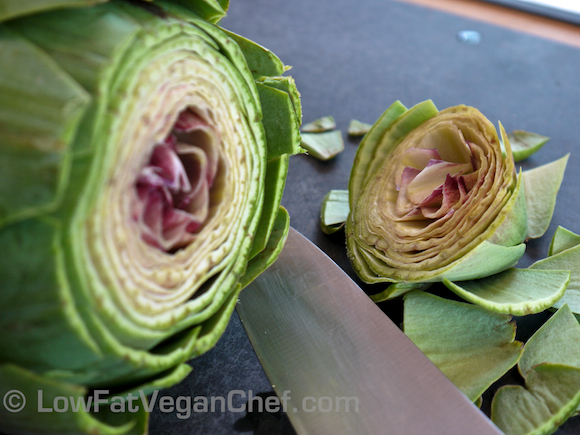
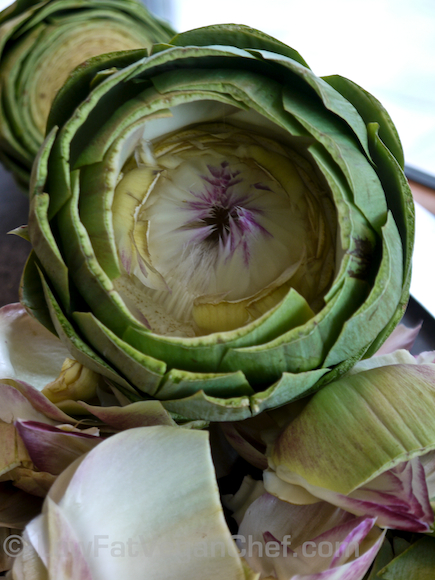
I love how pretty the purple centre is.

How To Cut, Prepare and Cook An Artichoke

for Recipes or Making Stuffed Artichokes


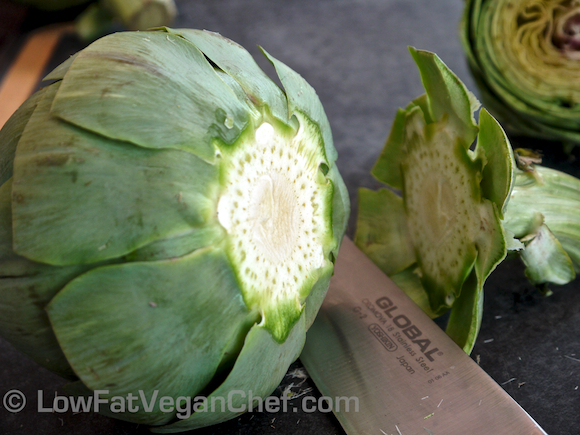
Step 1: Using a very sharp knife, cut the top point off of the artichoke. Get about the first 2 inches. These tips are prickly and you’re not going to eat it anyway.

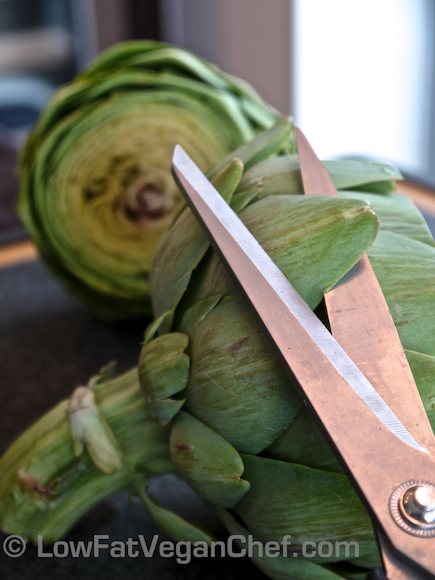
Step 2: Using a very sharp pair of scissors, cut off the pointy tips of each leaf all the way around on all the remaining tips. These are sharp and pokey and you don’t want them.

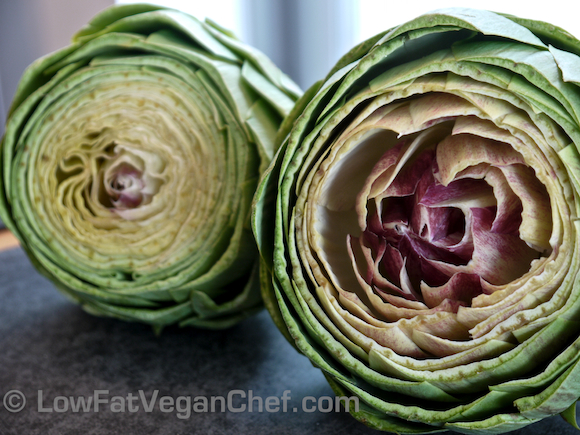
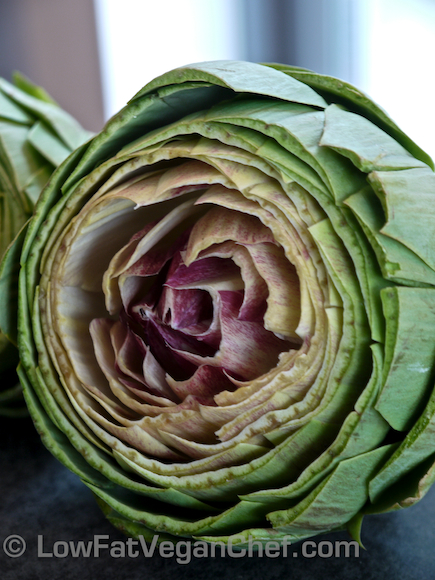
Step 3: Grasp the bottom of the artichoke in your hands and using your two thumbs, fan out the centre of the artichoke so that it is separated. The one on the right has been fanned out, the one on the left has not been.

(Close up.)

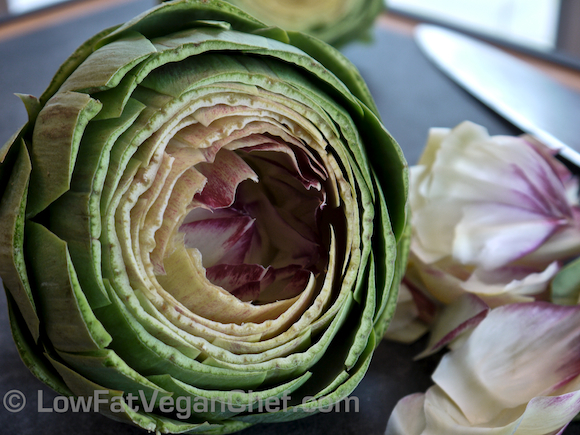
Step 4: If you want to make stuffed artichokes you can pull out the inner leaves that are light green with purple tips (Being careful not to poke yourself of course.) Go slowly one or two leaves at a time. (If you don’t care and are just going to cook the whole thing to eat it petal by petal, you can skip this step. It will just take longer to cook)

This is what it looks like when you start pulling the inner petals out. The inside part can be a little sharp.

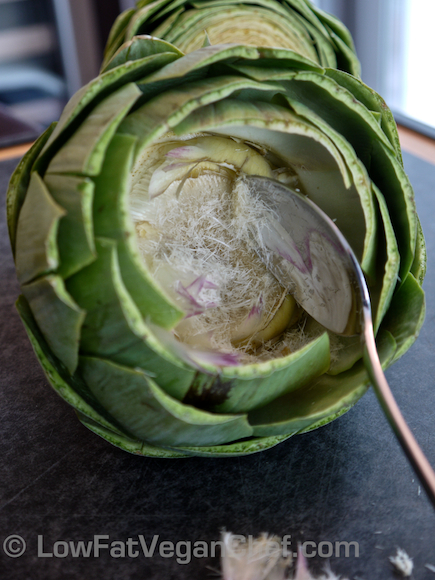
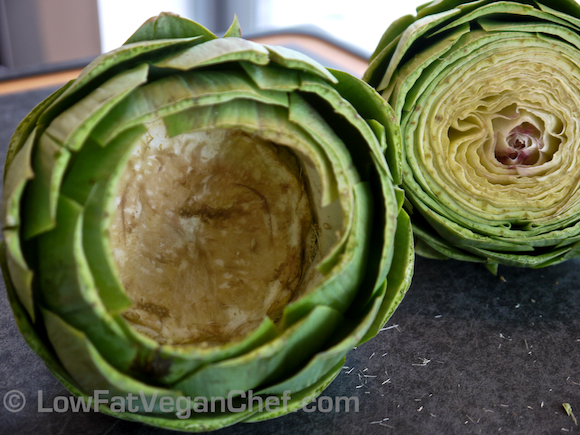
Step 5: (If you’re pulling out the centre petals) Get a spoon and start scraping out the fuzzy “choke” of the artichoke. Make sure you get all the way around the sides. Some artichokes are easier or harder to clean. I had 3 easy and 1 hard one.

Step 6: Now that your artichoke “heart” is revealed you want to dribble some fresh lemon or lime juice on it to keep it from oxidizing too badly and give it some flavour.
Step 7: Slice off the bottom stem from the artichoke close to the root. You can discard, or cut off the hard green exterior and steam the light green/white interior to use in your recipe.
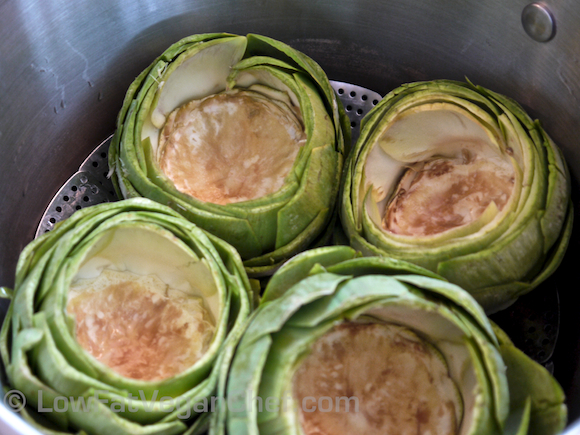
Step 8: Steam or pressure cook your artichokes. Steam them for 20-30 minutes. Check on them after 15-20 minutes. It depends on the size of them and how hard they are as well.  I pressure cooked mine. Because the inside choke was taken out they will cook MUCH faster than if you leave it in. So it’s up to you if you want to save on cooking time by doing this step or not. Pressure cook for 7-8 minutes just until tender. You don’t want your artichoke to fall apart.

What To Do With Steamed Artichokes?

When your artichokes are done you can let them cool and either fill them with dip or stuffing, or cut out the interior “hearts” to put on pizza, sandwiches, blend into soup etc. The leaves you can peel off one by one and put the inside portion into your mouth and scrape off the thin layer of tasty flesh. A lot of people like to dip these in mayo (I don’t do this) but you could make like a tahini or peanut dip or just eat them plain.

If you want to make a vegan spinach artichoke dip you can look for some Tofutti Better Than Cream Cheese vegan cream cheese at Whole Foods or your local health food store. I haven’t made one yet, but I’m sure it would be good. I just try to stay away from the really fatty vegan dairy alternatives myself.

I used my artichokes for a Cream of Artichoke Soup that is in my Comfort Soups To Keep You Warm recipe ebook. It will be available soon, I’m just finishing writing the intro and doing the layout and metric conversions. I will let you know when it’s ready! None of the recipes in it are on the blog here, they are all secret so far…

Alternatively, if you have a recipe that calls for artichokes you can buy an 8 oz can of artichoke hearts in water or brine (skip the oily ones, even rinsing won’t get rid of the oil) or you can find frozen artichoke hearts at a lot of grocery stores.

How To Peel Ginger Quickly and Easily With A SPOON!

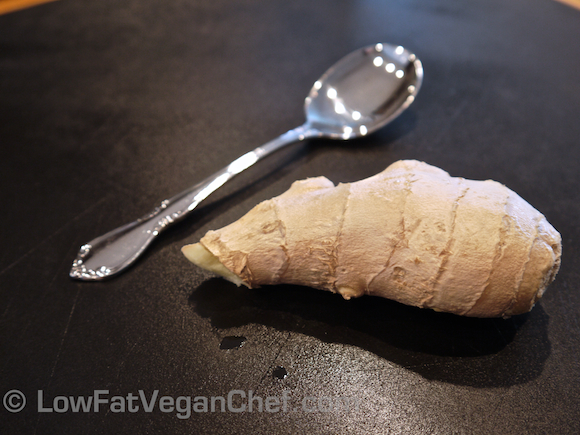
So how do you peel ginger easily? This is a neat little trick that you may not know about. You can actually save all of your ginger by peeling it with a spoon instead of cutting it or paring it with a knife. It’s really easy and safe too. When you cut it with a knife you can loose a bunch of it and then it can be all uneven and choppy.

I am using this peeled ginger here to put in some celery-apple juice. It’s really good. Even juicing this much isn’t that strong when you juice a whole head of celery.

How To Peel Ginger Using a Spoon

Step 1: Get out a large soup spoon or something other than a narrow teaspoon. It should be metal, not plastic or you may snap it.

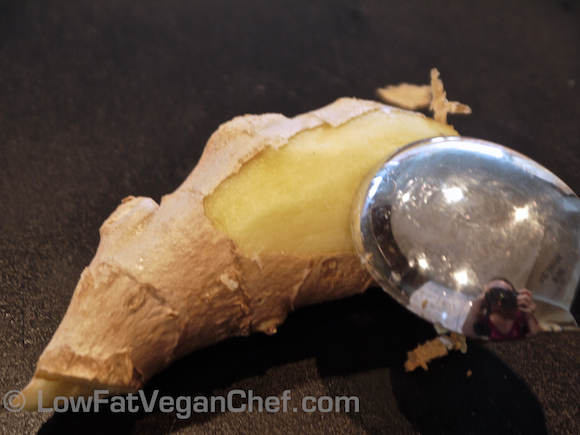
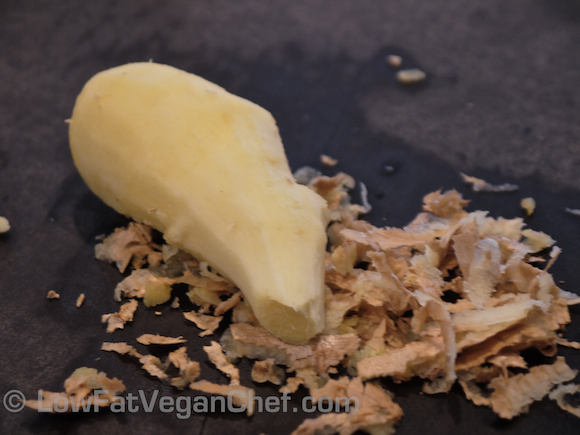
Step 2: Start scraping the outer peel off of the ginger with your spoon. This way it is safe and if you slip or have any weird nooks or crannies to get into you won’t cut yourself!

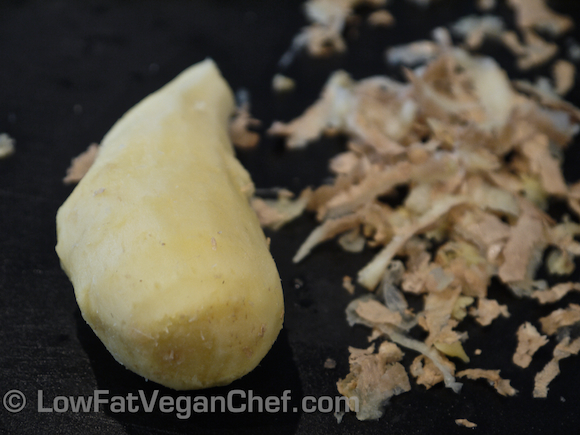
Go all the way around the ginger until all the skin is gone.

Wow that was easy! Now your ginger is ready to be used.

I know some people find  chopping or mincing ginger regularly a pain so they do up a bunch and freeze it so that it’s ready to use. I don’t do this as my freezer is always jammed full of frozen fruit, but you an and then it’s ready to grate or use in your mini garlic chopper (after you let it sit on the counter for a bit first) and you can use it in recipes quickly.

Ginger is essential for Asian and Indian dishes, so I use it quite often. It’s also dirt cheap so I always make sure to have some in the fridge. It’s definitely an essential ingredient like onions and garlic for vegan recipes or even raw vegan salad dressings.