• Skip to primary navigation
  • Skip to main content
  • Skip to primary sidebar
  • Skip to secondary sidebar

Plant Based U

Fat-Free and Low Fat Vegan Plant Based Recipes

  • Home
  • Recipes
    • Raw Vegan Recipes
    • Cooked Vegan Recipes
    • Eat to Live Dr. Fuhrman Recipes
  • Products
  • Coaching
  • Videos
  • Articles
  • About
    • What Is Low Fat Vegan/Whole Foods Plant Based
    • Resources
  • Contact

Veronica Grace

Fb-Button

Lower Fat Vegan Chocolate Pudding (Stove Top)

July 23, 2013 by Veronica Grace 37 Comments

Fb-Button

Although there are many ways to make your own vegan pudding such as blending avocados and cacao together (for a very high fat raw pudding) or combining silken tofu and melted chocolate (still high fat and has soy and oil) I wanted to make a less “sinful” way to make chocolate pudding. This vegan chocolate pudding recipe is a “better for you” version that I promise will fully satisfy your chocolate or pudding cravings! Anyone can make this recipe, you just need a handful of ingredients and you can also use whichever non dairy milk you like. I used unsweetened original almond milk as I prefer the taste of it versus soy milk, but it’s up to you.

Watch my instructional video below (it’s not very long) and the recipe follows.

Low Fat Vegan Chocolate Pudding Dairy Free Gluten Free

Lower Fat Vegan Chocolate Pudding Stove Top Recipe

Serves 4  (1/2 cup servings)

Ingredients:

2 cups unsweetened original almond milk, or other unsweetened non dairy milk
3 tbsp corn starch
1/4 cup cocoa powder
1/3 cup plus 2 tbsp maple syrup or sweetener of choice
1/2 tsp vanilla extract (I used my own homemade from fresh vanilla beans)

Directions:

1. Take 1/2 cup of the measured almond milk and combine it with the cornstarch and whisk together until there are no clumps.
2. add the maple syrup, cocoa and vanilla to a medium sauce pan over medium heat and gradually add the almond milk and whisk in.
3. Continue whisking and bring to a gentle boil. This will take up to 10 minutes.
4. Stir in the cornstarch slurry and mix well.
5. Reduce heat and continue cooking until thickened into a thin pudding.
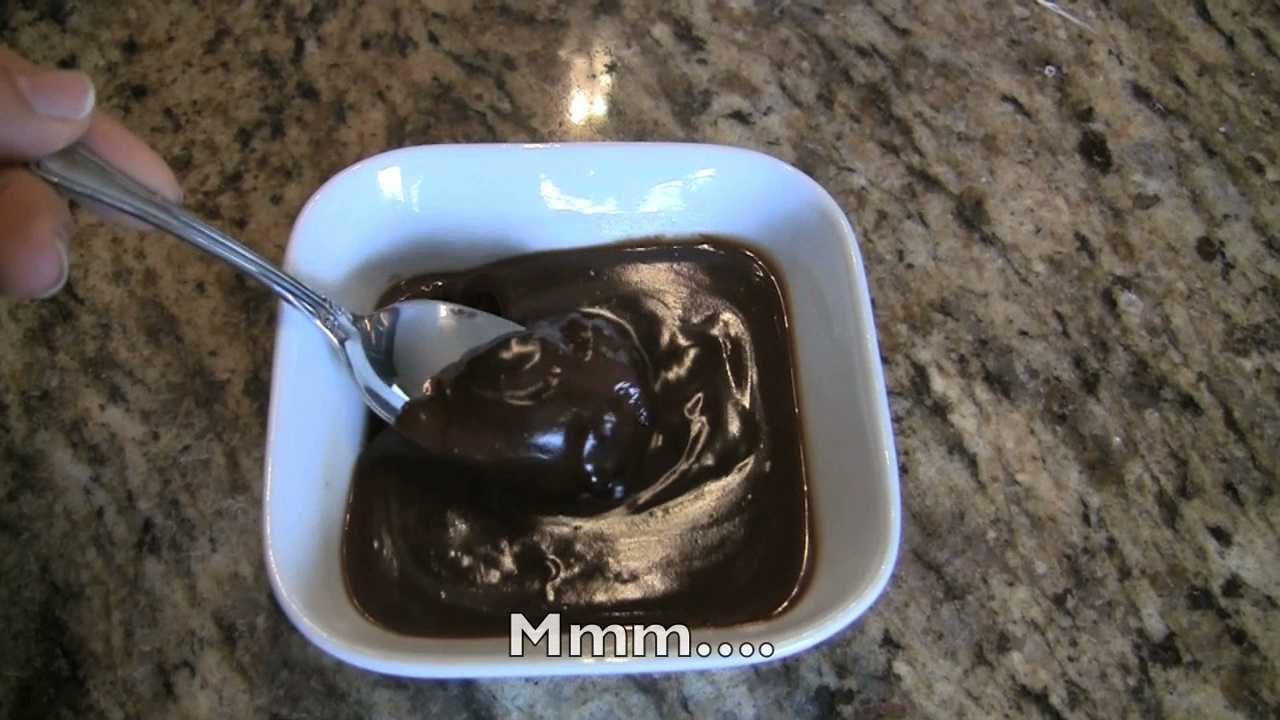
6. Remove from heat and pour into serving dishes.
7. Cover bowls with saran wrap and refrigerate until chilled and set (at least 30 minutes).

Enjoy!

I bet you didn’t realize it was so easy to make vegan chocolate pudding did you? I was very impressed with this recipe. It has all of the decadence of a melted chocolate bar, but it much lower in fat. It’s also easy to adjust the flavoring to your liking by adding more or less cocoa and more or less maple syrup. You also can’t taste the maple syrup in this recipe either. I prefer to use maple syrup as my sweetener because it’s more natural. I don’t use agave syrup as it gives me headaches just like high fructose corn syrup does (some argue it’s even worse than HFCS for you as well.)

Oh P.S. You can also use this recipe for hot chocolate and just omit the corn starch! Heat until boiling and serve. Mmm. 🙂

So there you have it. Are you ready to make vegan chocolate pudding? Come to think of it I want some more right now…. 

Filed Under: Cooked Vegan Recipes, Desserts, Videos Tagged With: almond milk, chocolate pudding, cocoa, cornstarch, dairy-free, gluten-free, low-fat, maple syrup, soy-free, vanilla, vegan pudding

20 Minutes To The Table: Mexican Black Bean Corn Tacos & Costa Rican Cabbage Salad Video

July 21, 2013 by Veronica Grace 50 Comments

Fb-Button

20 Minutes To The Table: Mexican Black Bean Corn Tacos & Costa Rican Cabbage Salad

Hi everyone! I had an idea the other day of putting together quick delicious meals for those of you short on time. This recipe is a great midweek recipe, if you can open a can and use a knife you can make this recipe very easily! I’ll start off by showing you how to make the raw Costa Rican Cabbage Salad recipe, and then the Mexican Black Bean Corn Tacos (this is a variation on my recipe in Vegan Comfort Foods From Around The World.)

If you’d like order one of my cooking aprons or my cookbook my store is here: http://lowfatveganchef.storenvy.com

I’d like to point out that I used canned ingredients in my first video to show how anyone, no matter where you are, can make this recipe. You can also use home cooked beans and fresh corn (or frozen) if desired and using organic foods is your choice as well. This new series is going to show easy plant based recipes that absolutely everyone can make with ease, when pressed for time. That’s why I list the short cuts. Most of the time I cook from scratch, but I know this is not feasible for everyone, especially on a week night after work. Please of course feel free to use fresh cooked beans, organic fresh corn and your own homemade corn tortillas if you are a scratch cooker, but of course this will add to the prep time and take much longer than 20 minutes. Enjoy 🙂

Recipes follow below.

Raw Vegan Costa Rican Cabbage Salad

Serves 4

Ingredients:

1/2 green cabbage shredded (or 5 cups bagged slaw mix)
1 medium (ripe) tomato, diced
1/2 white onion, chopped
1 glove garlic, pressed or minced
1 handful fresh cilantro/coriander roughly chopped (or to taste)
1 – 1 1/2 large limes juiced (use your discretion to balance with salt)
1/4-1/2 tsp Herbamare or salt (use your discretion to balance with the lime)
1/4 tsp fresh ground pepper (or to taste)

Directions:

1. Toss ingredients into a large salad bowl (mine was a little small but I used it as it was clear to show you) and massage well for a minute or two, scrunching the cabbage to help soften it.

2. Adjust lime, salt and pepper to your tastes. If it’s perfectly seasoned it should taste neither of just salt or lime, but a nice mix between the two.

3. Place in refrigerate to marinate until needed.

To spice things up: Add a sliced fresh jalapeno or chili pepper.

Based on my recipe in Vegan Comfort Foods From Around The World

Vegan Mexican Black Bean & Corn Tacos

Serves 2-4 (depending how ravenous you are!)

Ingredients:

19 oz. can no sodium black beans or pinto beans (or 2 1/3 cups cooked fresh)
12 oz. can no sodium/no sugar corn or 1.5 cups frozen or fresh cut
4 cloves of garlic, pressed or minced
3/4 tbsp maple syrup, maple sugar or honey – I don’t use agave (*optional to add flavor to the unsalted beans)
1.5 tsp roasted cumin (or regular, but roasted is much more flavorful)
1/4-1/2 tsp Herbamare or salt (or to taste)
Pinch of fresh ground pepper
1/4-1/2 lime juiced (or to taste)
8-12 corn tortillas (depends how full you load your tacos)
Salsa of choice (I always look for the lowest sodium on the shelves, you’d be surprised how much sodium is in salsa)

Directions:

1. Heat a pot over medium heat. Drain the corn (if applicable), add some black bean juice to the pot and the garlic and cook for 3-4 minutes.

2. Add the black beans, corn and seasonings (leave the lime juice until the end) and heat for 5-7 minutes to let the flavors meld together.

3. Meanwhile heat your corn tortillas over medium heat in a crepe pan, griddle or frying pan just until warm and place in a tortilla warmer, tinfoil or tea towel to insulate. Alternatively you can heat them over a gas flame until slightly charred or microwave just at the end all together for 30 seconds. (Any longer and it won’t be good…)

4. Add the lime juice to the beans and corn and taste test. Adjust seasonings to taste.

5. Assemble tacos, starting with a layer of black beans and corn, some salsa and then top with your marinated Costa Rican Cabbage Salad. Sometimes I like to add some fresh guacamole for variety as well.

6. Enjoy!

Make it spicy: add some chipotle chili powder, cayenne or a sliced jalapeno to the black bean and corns. Use your discretion.

Corn tortillas are fairly common in the USA and easy to find at most grocery stores and health food stores. I use corn tortillas because they usually have only 3-4 ingredients (but read the label to make sure there is no oil or lard) and are lower calorie than wheat tortillas. Wheat tortillas are more for burritos. If you’re in Canada check your health food store or google mexican/latin groceries in your area. I found several in my city of Calgary that had homemade corn tortillas. I will post a video later on show you how to make your own corn tortillas with masa (corn flour).

This makes a fairly light meal, if you’re family or dinner guests are ravenous I would recommend serving some fresh seasoned rice on the side to round it out, or double wrapping your tacos (use 2 tortillas) and load them up with beans and corn. 🙂

I hope you enjoyed my first episode of 20 minutes To The Table. I filmed this in my kitchen with a camera, a tripod and a lot of books lol.  Let me know what you think by posting below!

Filed Under: 20 Minutes To The Table, Cooked Vegan Recipes, Dinner, Videos Tagged With: 20 Minute Meals, 20 Minutes To The Table, black bean, corn, Costa Rica, Dr, Fuhrman, gluten-free, low fat vegan chef, low-fat, McDougall, mexican, nut-free, oil-free, soy-free, tacos, vegan tacos

12 Must Have Kitchen Gadgets and Tools For Your Vegan Kitchen

July 18, 2013 by Veronica Grace 22 Comments

Fb-Button

KitchenGadgets

I previously sent out an article on my Top 12 Must Have Small Kitchen Appliances and I promised to do a part 2 but focus on kitchen gadgets/tools you use without electricity. I’ve ordered these by most to least used for convenience for you and included my top picks from my kitchen for my most frequent recipes. I will probably make a list for my raw food appliances and gadgets later on too as that’s got some other essential tools for those that predominantly eat salads and non cooked foods. So are you ready to see my list?

Yes?

Read on!

12 Must Have Kitchen Gadgets and Tools For Your Vegan Kitchen


1. Global 8″ Chef’s Knife ($93) MinoSharp Ceramic Sharpener ($53)

My favorite kitchen tool is my Global Chef’s Knife, it’s super sharp, easy to clean and is perfectly balanced so it’s not handle heavy and does not cause strain on my wrist. Normal cheapo wood block knife sets are often super heavy and get very dull quickly. Dull knives lead to lots of slips and possible accidents, so it’s important to take care and use a good knife. I also got a MinoSharp to sharpen my knife, this one is great because it’s a water sharpener (you use it under the faucet) and you can use it to sharpen all of your knives. In fact I think I’m going to go sharpen my knives right now…

2. Chef’n Palm Peeler ($5-$7) /  Swisspro Speed Peeler ($7.50)

The next most used tool in my kitchen is a vegetable peeler. Sure you can use a regular vegetable peeler but I’ve found two that are a bit different than your standard one. The Chef’n Palm Peeler is nice because it doesn’t slip and it makes peeling vegetables much easier. It’s especially useful when your hands are a bit wet from freshly washed produce. A speed peeler is another useful peeler especially when you have a ton of potatoes or root vegetables to peel. It glides very smoothly over the vegetables in a single stroke without sticking. So you simply peel down and the peel falls away without you having to lift it up. This speed peeler also has a handy potato eye remover. Make sure you dry your peelers after washing to prevent rusting and replace occasionally so you’re using a sharp blade as dull ones are inefficient and dangerous.

3. Oxo Garlic Press ($20) / Oxo Mini Chopper ($12)

Mmm garlic… I use a LOT of garlic and chopping and peeling garlic is one of my least favorite tasks but it’s worth it for my recipes. I like having a garlic press to quickly get garlic into my pan or into a dish and it comes out in nice even pieces.  But sometimes I need a lot of garlic for my vegetable broth or tofu ricotta and i don’t want to have garlic fingers so I use a mini chopper to quickly mince garlic. It works great for fresh ginger as well.

4. Oxo Garlic Peeler ($7)

If you can find pre peeled garlic in the store (I’ve seen it at Whole Foods) it’s a huge time saver, but bulb garlic is fairly inexpensive and it’s got to get peeled. You can either smash the garlic with the flat side of your knife and crack it open or you can use a garlic peeler. A garlic peeler is nice when sometimes you can’t get the paper off of your garlic, or you don’t want to have garlicky smelling fingers! I swear sometimes my hands were covered in onion and garlic juice when I’m madly throwing recipes together in the kitchen… So it’s nice to have some relief.

5. Chef’n Vegetable Steamer ($12)

When I steam greens or vegetables I usually make a lot, partially because we eat a lot but also because it’s nice to have some leftovers for quick meals or lunch the next day. I like my Chef’n silicone steamer as it’s easy to clean and doesn’t get little pieces of broccoli stuck in it like my old metal steamer basket does.


6. Citrus reamer ($6) / Steel Citrus Juicer ($12)

I love fresh lemon and lime juice in my recipes. Citrus juice adds a delicious fresh zing without needing as much salt and it’s so low in calories you can use it liberally if desired. A citrus reamer is good for juicing just a half or whole lemon at the end of a recipe, but if you’re adding a lot more than that sometimes it’s nice to have a steel citrus juicer. Also great for a little glass of fresh orange juice too!


7. Progressive Vegetable Chopper ($24) / Vidalia Chop Wizard ($20)

Vegetable choppers are great to use if you don’t have a good knife, have arthritis, have shaky knife skills or you need a lot of onions, tomatos or peppers in an even dice quickly. I love using one when I’m making dishes for guests or photographing the recipe so it has a nice even dice. I use it in my Mexican Black Bean Corn Soup, Quinoa Bean Chili, Mango Cilantro Salsa, tomato salsas, vegetable stews, and more. I have both, the Progressive has a bit larger of a container and 3 inserts vs 2 in the Vidalia. For just onions and tomatoes in square dices the Vidalia Chop Wizard is enough but if you like more than just a simple square and larger capacity go with the Progressive Vegetable Chopper.


8. Benriner Mandolin Slicer ($51)

I love my Benriner Slicer… it’s very durable and very sharp. I’ve had several mandolins and v-slicers in the past, but some of them were so cheap the blades bent or the became dull very quickly. I use my mandolin to shred cabbage, make cucumber, zucchini or carrot rounds for fresh salads or raw recipes. It’s essential for my raw lasagna and Costa Rican Cabbage Salad. This mandolin will stand up to all your slicing needs!

9. Zyliss Safe Edge Can Opener ($15)

I hated opening cans with cheap can openers, especially when they left sharp edges and wouldn’t cut easily. With my Zyliss can opener it cuts on the outside edge of the can (not the inside) which leaves a safe edge for you to pick up. No more frustration, no more sticking and no more sharp edges. 🙂

10. Oxo Salad Spinner ($30)

Washing lettuce and getting dirt and bugs out of every nook and cranny can be a pain as it is, but drying my lettuce in my OXO salad spinner is actually kind of fun. You just push down the middle plunger and the faster you push it the faster it spins. Just make sure to hold onto it so it doesn’t get away from you! A good little kitchen workout and your salad is ready to go. I really prefer this style as opposed to another where you have to crank the salad spinner to get it to spin which is more tiring.


11. Ozeri Digital Kitchen Scale $16

If you’re in the UK or Australia you probably already have a kitchen scale, but I like to use them when I have bulk dried goods such as beans or pasta and I don’t know how much I have. That way I can measure out a pound or half pound and know how much is going into my recipe. I also use my kitchen scale to weigh my book packages to ship out to Canadian customers, so it’s definitely getting it’s use!

12. Oxo Citrus Zester ($10)

A citrus zester or microplane is great to use for shaving citrus peels for baked goods or garnishes and making chocolate curls for desserts…. MMM! If you have an old cheese grater it should suffice, but I find cleaning those old box style ones are kind of a pain. A zester is super fast to use and easy to clean and gives your dishes a little professional edge with some beautiful peel or curl as a garnish.

Not Must Haves… But “Nice To Haves”

Onion Goggles ($20)

When I’m not wearing my contacts and cutting a lot of onions, I put these babies on (it’s ok no one sees me! lol) and it is a life saver when cutting more than 1 onion, such as in my homemade vegetable broth or French onion soup. It also keeps you from touching your eyes after cutting onions or garlic so no more stinging pain either! They are definitely nice to have when you chop onions every day or frequently. Don’t worry they come in “manly” colors too like black, red and green too. Alternatively you can store your onions in the fridge which helps solidify the oils and onion juices so there is less when you cut into them. But sometimes I don’t have enough room in the fridge for my onions and all my veggies.

Non-slip Silicone Mat ($17)

While you can use parchment paper for all your oil free baking, I like to use a non slip silicone mat to prevent sticking and it also makes cleaning my pans much simpler, just a quick wipe with soap and all the reside is gone. These non stick mats also make your pans last longer and prevent black marks, hurray!

Chef’n VeggieChop ($20)

A VeggieChop is nice when you want to quickly chop a bunch of ingredients together such as onions, garlic and tomato for a fresh salsa, or onions, celery and carrots for a quick soup. Sometimes you don’t want to pull out your food processor (or you don’t have one) and this tool can make preparing veggies a snap.

Mortar and Pestle ($21)

A mortar and pestle is useful when making ethnic recipes such as curry pastes or grinding Indian spices for garam masala or crushing dried chilies for spicy dishes. It’s nice to have because nothing is as satisfying when you want to crush your ingredients and it gives a rustic feel to your dishes. You can also use a food processor or coffee grinder, but this is very easy to clean and great for doing small batches of spices. One recipe that I like that is made in a mortar and pestle is Thai Green Papaya Salad, essentially it’s strips of unripe green papaya shredded and seasoned with tomatoes, carrots, chillies, lime and traditionally fish sauce – but i skip that part.


Progressive Cherry-It Pitter ($12.60)

In the summer I like to get lots of fresh cherries and sometimes it’s nice not to be bothered with the stems and pits. I like to pit a big bowl of them for a no mess snack, or when I have too many that I can’t eat and toss them in the freezer for smoothies. One of my favorite smoothie recipes is cherry mango or cherry pineapple.

So that’s my list and some of what you’ll find in my kitchen.  I have a bunch of other never used, or useless kitchen tools in my cupboards just like anyone else. Actually probably more than most people… a situation I think a garage sale can rectify!

Let me know what you think, what’s on your must have list? If I’ve forgotten your favorite please forgive me, it’s been a long night!

Filed Under: Articles, How To, Product Reviews Tagged With: benriner mandolin, can opener, cherry-it, kitchen gadgets, kitchen scale, mortar, oxo, Review, salad spinner, supplies, tools, vegan kitchen, veggiechop, vidalia chop wizard, zester

How To Cook Dried Beans in an EZ Bean Cooker or Pressure Cooker

July 18, 2013 by Veronica Grace 4 Comments

Fb-Button

DriedBeans

Here I show you how easy it is to use an EZ Bean Cooker or digital pressure cooker to cook dried beans from scratch.

Please like, share and subscribe to my channel for more demos and healthy recipes! I hope you enjoyed my EZ Bean Cooker Tutorial, right now I’m running a contest for a FREE EZ Bean Cooker. Go here for details: http://www.plantbasedu.com/ez-bean-cooker-giveaway

Filed Under: How To, Videos Tagged With: black beans, chickpeas, EZ Bean Cooker, how-to, Pressure Cooker

EZ Bean Cooker Giveaway

July 14, 2013 by Veronica Grace

Fb-Button

It’s contest time again!

I just love summer contests, don’t you? This time it’s for probably my favorite kitchen appliance of the year, the Ez Bean Cooker. My mom first saw it online and told me about it and I knew I just HAD to have it.

Why?

Because I like to cook a lot of beans and lentils (without oil and salt) and it’s so much cheaper and faster to do so in this device. No more worrying about BPA in canned goods, excess sodium, sugar, preservatives etc. and I can infuse my beans and lentils with fresh herbs like thyme, basil, oregano and bay leaves very easily. Scrumptious!

The best part is probably how fast you can cook them though. With the pre-programmed settings on the EZ Bean Cooker (which is essentially a digital pressure cooker) there is ABSOLUTELY NO SOAKING REQUIRED. Yes, you do not have to pre-soak your beans the night before, nor do you have to do the “Quick Soak Method” for beans you want to make the same day.

Just choose your bean or lentil, rinse them well, cover with a sufficient amount of water, add herbs and seasonings as desired, close the lid, set the pressure release valve to the closed position and choose the program for your type of bean and press start!

If you can use a rice cooker or a microwave, you can use this, I promise!

It’s very simple and the Ez Bean Cooker does all the timing for you so there’s no more looking up pressure cooking times online or in a book, and no more guess work and having undercooked/overcooked beans. Once it’s complete it will beep, alerting you to open the pressure release valve. When the pressure dissipates and unlocks the lid you can open it up, drain your beans and use in any dish you desire.

Cooking times are between 12 minutes for lentils and 80 minutes for chickpeas/garbanzo beans. This is the actual pressure cooking time, there is additional time needed for it to come up to pressure, but the majority of your dried unsoaked beans are going to be fully cooked and ready to use in about an hour (longer for kidney beans and garbanzo beans as they are larger)

Now some people choose to use oil in their pressure cookers to prevent frothing from occurring and clogging up the pressure release valve, but so far I haven’t had any issues cooking 1 lb bags of dried beans or lentils without any. Although EZ Bean Cooker does recommend adding oil for safety reasons, but so far it works for me without oil and many other McDougallers on Amazon have done this as well.

This contest is open to residents of the USA (non-residents and Canadians with a US based shipping address can enter) only as EZ Bean Cooker only ships to the USA at this time. Disclaimer: Low Fat Vegan Chef was NOT paid to do this promotion. I received a complimentary EZ Bean Cooker to try out before I decided to recommend this product based on my own positive results with the unit. 

So how can you enter to with an EZ Bean Cooker? Just use my easy little giveawaytools widget below to get started, enter in your name and email address, you will be required to sign up for my newsletter (already valid if you’re an existing subscriber) and comment on this blog post and validate the comment. Plus you get additional entries for things such as liking my Facebook page, following me on twitter, tweeting the giveaway, following me on Pinterest and sharing with your friends. You’ve got a chance to get anywhere from 10-70 entries for this draw! Good luck!

Entry-Form


****Just a note, if you do not verify with the widget correctly your entry for that type (and just end up leaving the text box blank) it will be invalid and not count. So please enter in the correct information (such as email address, facebook name, twitter account etc.) to verify if you did subscribe to the newsletter, like on facebook, follow on twitter etc. If you don’t, the entries will be invalid and disqualified. At minimum, to be eligible to win an EZ Bean Cooker you must be subscribed to my newsletter (and stay subscribed at least until the contest ends Aug 12 2013) AND comment on this blog post. All other entry methods are optional after that. I want you to get as many entries as possible thanks so please read the instructions carefully!

Check out my recipe for How To Cook Dried Chickpeas here.

For more Canadian contests go here: Contest Canada

Contest is closed, congratulations to Kristi Lee who won!

Filed Under: Articles, Contests Tagged With: contest, digital pressure cooker, EZ Bean Cooker, giveaway, Pressure Cooker

Top 12 Must Have Vegan Kitchen Appliances

July 9, 2013 by Veronica Grace 92 Comments

Fb-Button

Kitchen Appliances

I know this is a topic some of you have been waiting for me to cover for a long time. And I have to say I’m sorry for not doing it sooner! I have pretty much all the kitchen gadgets I need (and then some!) by this point so it’s definitely time I share this with you.

I’ve made two parts, one for kitchen appliances and one for gadgets and list them in order of most used and loved. And yes I do love some of my kitchen appliances because they make my job SO much easier. And who doesn’t love that right?

I also wanted to share blog recipes using each of these gadgets so you can get some new recipe ideas as well so be sure to check out the links below. 🙂

Part 1: Top 12 Kitchen Appliances For Your Vegan Kitchen 

1. Vitamix ($400-$500) / Omni Power Blender ($300)

So the Vitamix is probably my first love. I’ve wanted one for most of my life (it was my dream as a child every time I saw the Vitamix demos at the trade shows – strange I know!) as I’ve always loved fresh fruit (no dairy!) smoothies, sorbets, fruit ice creams and blended soups.  When I first got serious about eating raw and vegan food it was the first purchase I made and I haven’t looked back since. I know it’s very pricey, but what I recommend is saving about $10/week or $40/month towards one, and after a year you’ll have enough to purchase one on Amazon or Ebay. Older models can be had for about $350. This hands down is my most used appliance and it cannot be beat for the fact that is produces the smoothest green smoothies and pureed soups and sauces and it doesn’t break! Oh you can try, but I bet you you can’t break this motor. To me it’s just not worth going through a new $50-$100 blender every few months burning it out trying to blend frozen fruits and thick dips, so the Vitamix has been a great investment for me personally, plus it saves time in the kitchen. Instead of blending and stirring, blending and stirring (which can take 5-10 min with a regular blender in all) in 30-90 seconds I am totally done blending and either eating or finishing my recipe!

Another option is the Omni Power Blender – it is essentially a Vitamix knockoff (they are not happy about this) and I have used one once and it was pretty decent for blending. It is high power and seems durable, but it does not puree green smoothies as quickly or as smooth as the Vitamix. I would say it’s a not bad option if you like to do lots of blending but the Vitamix is too out of reach. It also has a plunger which I find is essential for anyone wanting to make dips or banana ice-cream. Sure some people love the Blendtec but I am not a fan of a blender without a tamper that has too many preprogrammed functions to figure out how to use. (Saving your pennies + having a garage sale this summer can help raise some funds for some much needed kitchen gadgets too)

Vitamix Recipes:

Chocolate Cherry Blender Ice-cream, Banana Berry Acai Bowl, Vitamineral Green Smoothie, Holiday Eggnog Smoothie, How to Make Perfect Green Smoothies, Avocado Green Smoothie, Cherry Mango Love Smoothie, Strawberry Pecan Spinach Salad, The Best Caesar Salad Dressing, Mexican Black Bean Corn Soup, Creamy Raw Vegan Mexican Cilantro Corn Soup, Dr. Fuhrman’s Anti Cancer Soup, Spaghetti Marinara With Chickpeas, Summer Harvest Soup,


2. Zojirushi Rice Cooker ($139-$159) / Hamilton Beach Rice Cooker ($41)

I will confess I was a user of $10 rice cookers for much of my rice cooking period. When I first discovered them at the discount store I was intrigued, cooking regular rice instead of microwaving pre cooked rice or using Uncle Ben’s minute rice? I used it, but often it would keep resetting leaving me with undercooked or still watery rice and sometimes even burned crispy rice on the bottom. Not good. So when I heard about the Zojirushi (and then saw the price) I scoffed, how good does a rice cooker need to be? And then I tried it… and holy mackerel I was hooked. I use my Zojirushi probably 3-4 times a week for all my rice and quinoa dishes (and steel cut oats too). What I like about it is I can pre program it to start at any particular time or just hit it an hour before I start dinner (for white rice, or 2 hours for brown rice) This is great when I don’t know what I’m making yet, I have time to decide whether i’m going with stir fried vegetables, lentils, beans, curry, and more. The Zojirushi also has some special features in that you can make porridge (steel cut oats), 1 pot meals with it (comes with some recipes), bake cake (it’s true!) and use different types of mixed rice, brown rice or sweet (dessert) rice recipes.

An inexpensive alternative is the Hamilton Beach Rice Cooker which my mom has and I use it when I visit her place. It has a white rice, a whole grain (for brown rice) setting, boil and simmer function. So you can cook both rice and/or vegetables in it. It does have a delay starter which is handy and I have used it to cook steel cut oats by programming it to start before I wake up in the morning. It’s a very good option, just doesn’t have as many bells and whistles and is much bigger than the Zojirushi so it takes up more counter space.

Rice Cooker Recipes:

How To Cook Brown Rice, How To Cook Basmati Rice, Greek Rice Stuffed Peppers, Greek Stuffed Eggplant, How To Cook Sushi Rice, California Rolls,  Asian Vegetable Stir Fry With Tahini Sauce, Chickpea Quinoa Burgers with Lemon and Thyme, How To Cook Steel Cut Oats, How To Cook Quinoa, Protein Packed Spinach Salad With Quinoa, Quinoa Stuffed Zucchini Boats

EZ Bean CookerNesco Pressure Cooker

3. EZ Bean Cooker ($100) / Nesco Digital Pressure Cooker ($75) / Presto Stovetop Pressure Cooker ($50)

I’m fairly new to using pressure cookers, I’ve only been using them for about 2 years now but they are one of my favorite devices because #1 they are fast, and #2 you can cook almost anything in them. Potatoes, beans, lentils, grains, vegetable broth and more. Many people feel leery about pressure cookers imagining they are some sort of potentially exploding kitchen contraption, but please please have no fear. Dangerous pressure cookers are more old wives tales that could have only occurred with the old “jiggle top” style of pressure cooker. The ones these days come in two varieties, stove top and electrical plug in style (just like a rice cooker). I prefer the new digital pressure cooker style and just recently got an EZ Bean Cooker which is like the ultimate pressure cooker as it’s totally preprogrammed for every type of bean or lentil you would like to cook – which means NO soaking time. Yep! No overnight soaking, no taking all day to cook beans. Your beans will be done between 30-70 minutes due to cooking under high pressure. This in itself is invaluable as there’s no more need for canned beans and dried beans are so much cheaper. The Ez Bean Cooker also has a manual mode so you can use it to cook any other items you like, just program in the time to cook.

Another alternative is the Nesco Digital Pressure Cooker which you can cook everything you desire in, but you’ll need to use a pressure cooking chart to determine how long to cook the food you desire. And finally the Presto Stovetop Pressure Cooker is a great low cost option, but it’s best for gas stoves. I don’t recommend it for electric stoves as it’s hard to control the temperature (as you have to bring it to a boil and then lower it to cook with steady steam and the stove rings can retain heat for too long to do this) It also comes with a handy pressure cooking book with times and a few recipes which is very handy to have at your finger tips.

Pressure Cooker Recipes:

How To Cook Chickpeas, How To Make Homemade Vegetable Broth, Kik Alicha (Ethiopian Split Pea Stew), Holiday Yam Pecan Casserole, Vegan Avocado Dill Potato Salad and of course mashed potatoes and any recipes requiring cooked beans or lentils.

4. Ninja Cooking System ($130)/ Hamilton Beach Crock Pot (Slow Cooker) ($50)

The Ninja Cooking System is a fancy slow cooker with many more bells and whistles. You can cook in it just like a pot on the stove, it comes with a non stick pan which means easy clean up and you can sauté and brown any items you like before turning on the slow cooker setting. It also comes with a small cake pan and a wire rack so you can bake or roast in it dry just like an oven! I like using it for my chilli recipes and slow cooked vegetable stews and bean dishes.

A cheaper alternative is the Hamilton Beach Crock Pot, which can still be programmed with desired cook time on high or low and comes with a glazed ceramic insert to cook in. I like this size as it’s generally large enough to make dishes that serve 6 people. It’s definitely useful in the summer when you don’t want to heat up your house cooking, or set it and forget it Sunday recipes.

Slow Cooker Recipes:

Vegan French Split Pea Slow Cooker Soup, Slow Cooker Indian Dal Soup With Mixed Vegetables, Indian Tarka Dal Curry,

5. Cuisineart Food Processor ($100)

For some recipes, a simple food processor is required. I like to use mine to quickly shred root vegetables, slice cabbage or zucchini rounds, pulse nuts, make veggie burgers, hummus and black bean brownies. If you’re into raw food recipes or making your own dips a food processor is a must have kitchen item. It also works well when you don’t have a high powered blender and you need to puree thick mixtures.

Food Processor Recipes:

Low Fat Chickpea Hummus, Sweet Potato Yammus Hummus, Smoky Yam Black Bean Burgers, Chickpea Quinoa Burgers with Lemon and Thyme, Black Bean Brownie Recipe, Tahini Dip For Falafel, Vegan Cheesecake with Blueberry Rooibus Compote,

6. Breville Juicer ($150) / Green Star Juicer ($465-$529)

A juicer is something you may be interested in if you like to make fresh juices or Dr. Fuhrman style recipes. He starts many recipes off with fresh carrot and celery juice and a decent juicer is a quick way to get loads of nutrition from veggies you might otherwise not eat or not be able to chew. I have a Breville juicer and I like it because it’s easy to clean and the cup it comes with scrapes off the juice foam which is quite handy. For those who are concerned about centrifugal juicer and want a gentler way to extract nutrients from veggies a Green Star juicer is a great choice. It’s also the best way to juice wheatgrass and greens. (They don’t fair so well in a centrifugal juicer)

Juicer Recipes:

Pomegranate Apple Grape Juice, Kale Apple Celery Juice, Apple Celery Carrot Beet Juice, Fruit and Veggie Smoothie With Beet Juice, How To Make Dr. Fuhrman’s Anti Cancer Soup

7. Proctor-Silex Coffee Grinder ($14)

This one is absolutely essential, but not for what you think! I don’t even drink coffee, nor have I ever ground coffee. What I use it for is grinding chia seeds, flax seeds, small quantities of nuts and whole spices to make my own spice mix. It’s invaluable to have as it’s often cheaper to buy these items whole and then grind them yourself so then you have both the whole seed/spice and a ground version for quickly using in recipe. I like to add ground chia to my Banana Pancakes, smoothies, and sometimes salad dressings (it makes it thicken nicely). I don’t like buying ground chia or flax in the store because it perishes quickly and then you have to store it in freezer which can take up a lot of space, so I prefer to grind 1/2-1 cup batches at a time and keep them in smaller containers in the freezer for ease of use. A coffee grinder is easy to pick up at any kitchen store so make sure you have one.

Coffee Grinder Recipes:

Punjabi Garam Masala Spice Recipe, Dr. Fuhrman’s Cinnamon Fruit Oatmeal, The Best Ever Vegan Banana Pancakes,

8. Hamilton Beach Sandwich Maker ($23)

You may scoff at the idea of needing a sandwich maker, and truth is you don’t really need one, but if you have one you’ll enjoy making oil-free toasted sandwiches, panini, and more. I like to slather some homemade hummus on bread and add sautéed veggies such as onions, mushrooms, zucchini, peppers and more and grill it (no oil) so it comes out all toasty and melty and delicious. Get creative and use your favorite veggies, raw or cooked and favorite dip to create an easy meal.

Sandwich Maker Recipes:

Engine 2 Inspired Tempeh Mushroom Melts

9. Cuisinart Hand Blender ($35)

A hand blender is super handy (ok I know) to use for a variety of reasons. When I travel and can’t take my Vitamix with me, I can bring my hand blender as it’s stowable and easy to pack. You can make smoothies on the go wherever you are. At home it’s nice to make blended sauces and soups straight in the pot (instead of moving everything into a blender to puree) in a matter of seconds.

10. Procter-Silex Electric Kettle ($14.50)

An electric kettle is great to use to save on time for cooking pasta. Just boil your water and then pour it into the pot and return to a boil to easily chop your cooking time in half. I also use my kettle to make rooibus or herbal tea on a cold fall/winter day.

11. Black & Decker Toaster ($35)

You probably already have a toaster, but it’s nice to have to quickly toast some bread for toast and jam, toasted sandwiches, breakfast bagels, or even toasted buns for homemade veggie burgers.

12. Presto Air Popper Popcorn Maker ($20)

Who doesn’t love popcorn? I skip the the microwaved popcorn and prefer to make my own in an air popper so it’s oil free. Then I use a mister to spray on a little soy sauce and season with spices. Nutritional yeast, paprika, chipotle powder, salt and pepper are all great choices for your oil free pop corn.

So there you have it, my list for the top 12 “Must Have” Kitchen Appliances for your vegan kitchen.

What is your most beloved small kitchen appliance? Which one do you want to get next?

Check out Part Two: Must Have Vegan Kitchen Gadgets!

Filed Under: Articles, How To, Kitchen Tools, Product Reviews Tagged With: Black and Decker Toaster, blendtec, breville juicer, Cuisinart Food Processor, Cuisinart hand blender, EZ Bean Cooker, GreenStar Juicer, Hamilton Beach Crock Pot, hamilton beach rice cooker, Hamilton Beach Sandwich Maker, hand mixer, Kitchen appliances, Nesco Pressure Cooker, Ninja Cooking System, omni blender, Presto Air Popper Popcorn Maker, Presto Pressure Cooker, Proctor Silex Coffee Grinder, proctor silex electric kettle, Slow Cooker, vitamix, Zojirushi rice cooker

Vegan Chickpea Quinoa Burgers with Lemon and Thyme (Gluten Free)

July 7, 2013 by Veronica Grace 22 Comments

Fb-Button

Summer is here and it’s the perfect time to be enjoying outdoor barbecues and picnics. Everyone wants to enjoy a freshly grilled hamburger or veggie burger. But making your own is quite easy and insanely tasty without using oils or refined soy products. My chickpea quinoa burgers are soy-free, nut-free and gluten-free so they will work for everyone no matter how they eat. If you’ve ever made homemade hamburgers or wanted to, you can make these.

A simple food processor is such a versatile tool for making your own chickpea quinoa burgers. Mine isn’t anything fancy, just a basic mid sized one and it’s perfect for pulsing various ingredients to use in veggie burgers.

I like to top my veggie burgers with some fresh hummus (see my chickpea hummus here or my yam/sweet potato hummus here), sautéed mushrooms and onions (I use a little soy sauce and maple syrup to flavor them), lettuce, tomatoes and pickles. Cucumbers also work well in place of tomatoes for this chickpea quinoa burger as well as spicy mustard.

Find a nice whole grain bun or roll, toast the insides and top your veggie burger with all your favorite toppings. I also highly recommend some of my Summer salad recipes to go along with it such as Avocado Dill Potato Salad, Strawberry Spinach Salad, Shaved Asparagus Salad, Costa Rican Cabbage Salad, Sweet and Savory Asian Salad, or Rock my Broccoli Salad. So now that your head is spinning with delicious Summer recipes let’s get grillin’! Mmm hmm.

Vegan Chickpea Quinoa Burgers with Lemon and Thyme

 
Makes 10-12 patties (depending on size)

Ingredients:

1 cup mashed yam/sweet potato, cooled (1 medium yam, cooked)
4 cloves garlic
3/4 cup chopped red onion
2 cans chickpeas, drained and patted dry
2 tbsp fresh thyme leaves (stems removed)
2 tbsp lemon zest
2 tbsp lemon juice
1 cup cooked quinoa, cooled (I used 1/2 cup dry mix of white and red)
1 tsp white pepper
1 tsp Herbamare or salt *or to taste

Directions:

1. Poke holes in your yam and bake at 400 F for an hour or until tender inside. Set aside until cool.

2. Cook quinoa with a 1:1 ratio of vegetable broth or water in a pressure cooker or on the stove. (See my directions here)

3. In a food processor, add the garlic and onion and pulse until chopped finely. Add the chickpeas, thyme, lemon zest and juice and pulse until chopped and well combined. Scoop out flesh from yam (discard peel) and to food processor along with quinoa, pepper and salt. Pulse until well combined.

4. Form into equal sized balls and place on a non stick sheet or plate lined with parchment paper. Refrigerate until needed.

5. Pre heat a pan or barbecue and press patties gently until slightly flatted and cook for 4-5 minutes per side, flipping once. Be careful to move gently so they don’t fall apart.

6. Serve on buns or lettuce wraps. (I find using a bun slightly bigger than the patty works best as they will squish a bit when eaten.

7. Store any patties in an air tight container and refrigerate or freeze until needed. (Leaving them uncooked is best).

Variations:

You can also use fresh dill instead of thyme if you wish for variety.

Also check out my Smoky Yam Black Bean Burger Recipe.

Have you ever made your own veggie burgers? What do you like to top your burgers with?

Filed Under: Burgers, Cooked Vegan Recipes, Dinner, McDougall Program, Quinoa Tagged With: chickpea burger, chickpeas, cooked vegan, fat-free, garbanzos, gluten-free, lemon, low fat vegan, nut-free, plant-based, quinoa, quinoa burger, soy-free, sweet potato, thyme, yam

Eating Plant-Based, Vegan and Vegetarian in Reykjavik, Iceland

July 2, 2013 by Veronica Grace 4 Comments

Fb-Button

Eating Plant-Based, Vegan and Vegetarian in Reykjavik, Iceland


(Originally written in July 2010)

I had the chance to spend 5 amazing days in Iceland.  I had never really known anything about Iceland or thought to go there before, but I am really really glad we did.  Iceland not being known for it’s vegan-friendly cuisine or fresh fruit worried me a little at first, but the benefits of visiting Iceland far outweighed any negatives we encountered.

I thought I’d share with you some of our amazing photos, some info you may not know about Iceland and how you can eat plant-based, raw or vegan should you choose to discover Iceland yourself as well!

Nesjavellir, a high temperature geothermal area

Impressions and Interesting Facts of Iceland

Iceland is the 18th largest island and second only in size to Great Britain in Europe. Situated along the mid-ocean ridge of the Atlantic Ocean, Iceland is a geologic “hot zone” with volcanic eruptions, fissure eruptions, shield volcanoes, pillow basalts, glaciers, geothermal features, and more.

There are roughly 320,000 people living all over Iceland with less than half of that concentrated in the capital of Reykjavik.

The Icelandic language has remained relatively unchanged in 1000 years due to their isolation from the rest of the world.

People are friendly to outsiders, but rather shy, since everyone knows each other it is not customary to introduce new friends to people, any newcomers typically introduce themselves.

Thingvillir

Icelanders speak English very well and most people are bilingual, but they often believe their English is not very good and are very modest about it. Even your average bus driver speaks English very well which makes travel very easy for a newcomer.

Icelanders read and write more than most countries, they have one of the highest literacy rates and they often prefer reading to television. Iceland has the highest per capita number of artists and writers in the world.


Iceland’s hot water contains sulfur and is piped in from geothermal plants, cold water is fresh glacial water and clean for drinking. Your bathroom will smell like sulfur, but this is ok!

All movies in Iceland are left in the original language and Icelandic subtitles are added for those who do not speak the language or are too young to understand. Children’s movies can be dubbed in Icelandic.

Ice-cream is available EVERYWHERE, gas stations, gift shops and convenience stores sell both soft serve and ice cream bars, there’s also a wide variety of dairy desserts like skyr (skeer, a cheese like pudding flavoured with fruit) available. Many Icelanders seem to eat a lot of dairy and admit to eating ice cream quite often.

No matter where you go in Iceland you always feel like you’re in a small town and the scenery around you is magnificent.

Although Icelanders don’t believe Iceland to be very touristy, you will find free maps, bus schedules and tour information everywhere you go, even in a small isolated town the gas stations will have maps and tour information.

Vik Beach

The temperature in Iceland is not as cold as you think it would be since the Gulf Stream brings warm water to the surrounding ocean and geothermal vents and hot water from volcanic activity are present year round. Most of Iceland is heated using geothermal water to heat up fresh water and is piped using thick insulated pipes to all of the towns and main city Reykjavik. The daily temperature in Iceland is usually between 0 and 5 degrees C in the winter, 10 to 15 C degrees in spring and fall and up to 20 degrees C in the summer. Overall it’s a fairly mild climate considering it’s northern latitude.

The colourful Aurora Borealis (Northern Lights) appear from the end of August through the winter, which is a great time to visit and see this spectacular wonder.

Wool is a staple in Iceland for providing warm sweaters, outerwear and socks for year round comfort when venturing outside.

Before the 1900’s most Icelandic houses were built from stone and turf (slabs of grass and soil cut from the ground) and it was not until the invention of concrete that they were able to build more modern and larger buildings.

Icelandic horse - by Veronica Grace (do not call them ponies!)

Most of Iceland is quite sparse when it comes to trees and shrubs since a lot of it has been cut down and used for firewood or building over the years. Many tree planting projects are now in place to help restore the lack of foliage.


Icelanders are more adapted to their climate and 20 degrees C in the summer time is a very hot day in their opinion!

Over 50% of Icelanders will admit that they believe in supernatural beings (ghosts) or “hidden people” aka elves. If something goes missing in Iceland people will often joke that it an elf is to blame.  You will often see little colored doors painted on rocks at the base of mountains when you drive by. This is so the hidden people can get back into their homes!

Year round heated outdoor pools all over the island - by Veronica Grace

There are heated outdoor pools everywhere, heated by the free geothermal heat provided by the island.

A lot of Icelanders believe they have 100% Viking ancestry, but recent genetics testing has shown than 80% of Icelanders today are descendants of Irish settlers who were brought as slaves (mostly women) when the Vikings first settled Iceland.

While most of the Icelandic diet is based on meat, dairy and bread, there are several vegetarian restaurants, a raw restaurant and a few other restaurants offering vegetarian options in the city of Reykjavik. Outside of the city however, you’re options are basically lacto-ovo vegetarian only as vegetable, cheese and egg sandwiches seem to be the only meal offered for non meat eaters in general. You will find both hard boiled eggs and cheese in almost every sandwich or salad! You can always stop by the grocery store to pick up some fruit such as bananas, oranges or apples though.

Must-See Places in Iceland

thingvellir orÞingvellir - by Veronica Grace

Geysir - by Veronica Grace

The “Golden Circle” – Includes Þingvellir, the waterfall Gullfoss (meaning “golden falls”), and the geothermally active valley of Haukadalur, which contains the geysers Geysir and Strokkur.

Outside The Blue Lagoon - by Veronica Grace

The “Blue Lagoon” (www.bluelagoon.com) The Blue Lagoon is a pool of geothermal seawater (2/3 saltwater and 1/3 freshwater). The source of the water is as deep as 2000 meters/6000 feet. The seawater is led directly from its natural source to the Blue Lagoon where guests enjoy bathing enveloped in the warm blue water.

Blue Lagoon - by Veronica Grace

A glacier walk or snowmobile tour.  There are many glaciers in Iceland, even in the summer time. Skaftafell Glacier is one of the most popular and you can see the glacier breaking and dropping off into the ocean!

Other Tips For Traveling in Iceland

Find a place in Reykjavik to stay when you first arrive so you can check out the city for a day or two.  A lot of places will be advertised to be near Reykjavik so just make sure you know where the hotel is before you go.


If you’re staying more than a few days you’ll more than likely want to check out areas beyond Reykjavik in which case you will want to find a hotel in a central area on the south, west, or northern shore to plan some day trips around. It is too far to drive to most places from Reykjavik to check out all of Iceland.

2 to 3 weeks would be the ideal amount of time to visit if you want to check out everything the island has to offer.  It can take over a week just driving around the Ring Road (with stops) just to catch glimpses of how magnificent Iceland is.

A lot of “hotels” are not actually hotels, but guesthouses where people share common rooms like bathrooms, kitchens and living rooms.  Most actual hotels are very pricey and luxurious so make sure you research the place you are staying.

Grocery stores are available in Reykjavik and can be seen from the main road in every little town you pass through so you will be able to fill up on necessities before venturing out.

Car rentals are very expensive starting at $188 a day for a small Toyota Yaris.  Be sure to decide if you want a vehicle in advance, they can go quickly.  You can also just book tours through companies like Iceland Excursions (www.grayline.is) which will pick you up directly from your hotel or a meeting spot in towns outside of Reykjavik.

Vegetarian Restaurants in Reykjavik

Gló
Raw and Vegetarian Food
Rope yoga center, Engjateig 19
Tel: 553-1111
http://www.glo.is/
Mon-Fri 11:30-20:00 and Saturday 11-15

Is the only restaurant that serves raw food, but they also serve some cooked food. Note their website is only in Icelandic. We tried to contact the owner to do an interview with us on what it’s like to be a raw foodist in Iceland, but she wasn’t interested in returning our request. Perhaps it has something to do with her focus on dehydrated and nut based recipes. So we cannot comment more since we did not try the food.

A Naestu Grosu 
Vegetarian/Vegan
Laugavegur 20b, Simi
Tel: 354-5528410
Mon-Sat 11.30am-10pm, Sun 5-10pm.
http://www.anaestugrosum.is/

Vegan-friendly, macrobiotic, international, Indian. Buffet style lunch and dinner plates. Seems to very popular, we stopped by and saw it it almost packed and a good variety of salads and vegetable based dishes.

Graenn Kostur
Vegetarian
Skólavörðustígur 8b
Tel: 354-5522028
Mon-Sat 11.30-9.00, Sun 1.00-9.00

Lacto vegetarian options, limited vegan items.

Ecstasy’s Heart-Garden
Vegetarian
Klapparstigur 37
Tel: 354-5612345
Mon-Fri 11:00-17:00, Sat 12:00-17:00, closed Sunday.

Ovo-lacto vegetarian, limited vegan options, some organic, international cuisine.

Madur Lifandi
Health food and Juice Bar
Haedasmari 6, Kopavogur (201)
354-5858710

Fresh juices available as well as health and beauty products.

Vik Beach - by Veronica Grace

Filed Under: Articles, Travel Tagged With: Blue Lagoon, Circle Tour, Eating, Europe, Iceland, Icelandic, nesjavillir, plant-based, Thingvillir, Travelogue, UK, vegan, vegetarian, Vik, Vik Beach

Low Fat Yammus or Sweet Potato Hummus – Mmm Mmm Good!

June 30, 2013 by Veronica Grace 30 Comments

Fb-Button

Low Fat Vegan Oil Free Yammus Yummus Yam Sweet Potato Hummus

Oh my goodness this yammus yam/sweet potato hummus is deeeeeelicious!

Now you may have seen this available at the store before but I have to tell you making your own is absolute heaven! Plus you get about double the amount for half the price and it’s super duper easy to make.

I love making hummus any time of year to eat with fresh crunchy veggies such as celery, cucumber, zucchini, carrots, bell peppers and more. Pretty much anything you love to dip, you can dip into this delectable yammus/sweet potato hummus recipe and I promise you that you will fall in love with it!


Low Fat Vegan Oil Free Yammus Yummus Yam Sweet Potato Hummus

I’ve added some smokey savory spices to kick up the mild yam flavor such as roasted cumin, curry powder and smoked paprika which is a delight mixed with the sweet notes of the yams/sweet potatoes and the apple cider vinegar.

Especially if you are not a fan of traditional lemony/garlicky hummus I know you will like this because it has a lot of flavor without any of the harsh bite. It’s also great to use to slather in vegetable sandwiches, wraps, pitas and more instead of high fat mayonnaise.


Low Fat Vegan Oil Free Yammus Yummus Yam Sweet Potato Hummus

And best of all because it’s low in fat, it’s lower in calories so there’s no guilt if you eat a bowl of it with a plate of veggies for a meal or snack. All you need to make your own yammus/sweet potato hummus is a food processor or high powered blender with a plunger (such as a Vitamix). The natural moisture in baked yams/sweet potatoes makes it easy to cream together with chickpeas and just a touch of tahini.

If you’re looking for something fun yet healthy to serve this summer at potlucks, barbecue or dinner parties, this yammus is sure to be a hit. No need for the standard ranch dip and veggies or bland and oily store bought hummus. Plus when you make your own dips, you can control the amount of fat, salt and spices you put in it and come up with your own perfect combo of deliciousness to dip your veggies into!

Check out the recipe below…


Low Fat Vegan Oil Free Yammus Yummus Yam Sweet Potato Hummus

Low Fat Vegan Yammus or Sweet Potato Hummus

(yields approx 3 cups)

Ingredients:

1 1/4 cups mashed yam/sweet potato (1 lb/454g yam/sweet potato; I used 2 small)
2-3 cloves garlic (roasted garlic is even better, I used previously frozen garlic cloves as its not as strong as raw garlic)
1 15 oz. can sodium free chickpeas/garbanzos, drained (reserve some liquid and set aside)
2-3 tbsp chickpea liquid (or as needed to cream hummus)
3 tsp apple cider vinegar
1 tablespoon tahini
1 teaspoon cumin
1/2 tsp curry powder
1/2 tsp smoked paprika
1/4-1/2 teaspoon Herbamare or salt (or to taste)
Fresh ground pepper to taste

Directions:

1. Poke holes in yam/sweet potato and bake at 400 F/205 C for 45-60 minutes (depending on size). Set aside when cool.

2. Pulse garlic in food processor until chopped and then add remaining ingredients. (Make sure to slice open and peel yam/sweet potato and scoop flesh out, don’t use the peel.)

3. Process until smooth and adjust consistency as desired with reserved chickpea liquid. Adjust seasonings to taste.

Low Fat Vegan Oil Free Yammus Yummus Yam Sweet Potato Hummus


4. Serve with veggie sticks, veggie rounds, pita and more!

Low Fat Vegan Oil Free Yammus Yummus Yam Sweet Potato Hummus

Enjoy 🙂

Have you ever tried yammus or sweet potato hummus? What do you like to eat it with?


Filed Under: Cooked Vegan Recipes, Dips For Veggies Or Chips, Sauces, Snacks Tagged With: apple cider vinegar, chickpeas, cumin, curry powder, hummus, sesame seeds, smoked paprika, sweet potato hummus, tahini, yam hummus, yammus, yummus

Eating Plant-Based, Vegan and Vegetarian in Budapest, Hungary

June 29, 2013 by Veronica Grace 4 Comments

Fb-Button


Eating Plant-Based, Vegan and Vegetarian in Budapest, Hungary

(taken by me while sitting on top of a moving double decker bus!)

(originally written for another blog in August of 2010)

After my short stay in the Czech Republic for Freshness Week  I headed off to Budapest, Hungary.

I had not planned anything in advance and had no idea what to expect. But I had heard that everyone said it was a beautiful city.

Saint Stephen’s Basilica Budapest

Boy were they right!

Every day was over 35 C / 95 F and it was hot hot hot! But not as humid as a lot of other cities so it was actually quite enjoyable.

I had the pleasure of staying in a hotel with an ideal city centre location, just steps away from the St. Stephen’s Basilica, the largest church in Hungary.

While I did not venture inside, I thoroughly enjoyed marvelling at the impeccable architecture with our heads titled all the way back gazing up in awe at this behemoth of a structure. It is one of two of the tallest buildings in all of Budapest at 315 ft! (The other being the Parliament building) Both of which can be seen from most every part of the city, so it was a great way to orient myself each day!


In my 2 days we spent in Budapest I spent most of our time walking around and touring the city. I have to say that Budapest is a very walkable and easy to get around city. You can see most of the sites in Buda from across the Danube on the Pest side, which made it easy for us to decide where to go first.

I visited the Castle District, the Citadel, the Danube, the Central Market and passed by the famous Heroes’ Square and Szechenyi Thermal Baths to name a few of the highlights of my trip.

I didn’t get a chance to actually enjoy Szechenyi, but if you visit Budapest you definitely have to check it out. The Széchenyi Medicinal Bath in Budapest is the largest medicinal bath in Europe. The water is supplied by two thermal springs underground with temperatures above  74°C/165°F! Wow that’s hot!

There is simply too much to do and see in Budapest that I plan on returning again in the future to fully enjoy everything that the city has to offer.

One of the best things though, was how CHEAP everything seemed to be. Well inexpensive compared to a lot of other countries in the European Union. It was much more affordable buying fruits and vegetables than previous places such as Copenhagen, Malmo and even Berlin. I definitely would have saved a lot more money on food if I had stayed here longer than more expensive cities like Paris and London I visited.

Central Market – Veronica Grace

The Central Market is going to be one of your must see’s when visiting this city because it’s open all week long, is fully indoors and you will find the largest number of fruit and vegetable vendors you will find anywhere in Budapest. It’s simply the place to go for fresh food.

What impressed me the most was the amount of pride each vendor had for their produce. Displaying all of the items pristinely so that everything catches your eye and you can tell that everything is very fresh. They even pick out any squished, mouldy or wilted fruits and vegetables throughout the day and would never even consider selling it! (Unlike our mishap in Berlin, where a fruit vendor proceeded to sell Frederic an entire bag of golden kiwis that had all fermented and wouldn’t budge on the price…)

In Europe the produce stands are run differently, it is not like your grocery store where you can pick and rifle through all of the produce looking for the best or ripest specimen.

No, in Europe you have to actually get in line and point to what you would like, no touching, no tasting, no smelling before you buy. So this can be a little tricky if shopping at a small produce stand on the street. But this is not so at the Central Market where everything is top quality and a lot of it is locally grown as well.

I did not see anything really exotic there, but we didn’t mind in the least. The watermelons I bought were absolutely amazing, much more reliable than the ones we get in Canada. And the navel oranges were huge and juicy sweet. I also bought blueberries, raspberries and blackberries which were pretty reasonably priced considering the fact that they are usually the most expensive of fruits by weight.


Central Market by Veronica Grace


Some of the prices I got:

1 pint of blueberries 2.50 euros
watermelon 0.46 euros/kilo
peaches 1.06 euros/kilo
plums 0.53 euros/kilo
blackberries 1.96 euros/kilo

Converting that to USD per lb:

1 pint of blueberries $3.21
watermelon $0.27/lb
peaches $0.62/lb
plums $0.31/lb
blackberries $1.15/lb

These are specialty fruits and aren’t even as cheap as apples, oranges and bananas, so you can only imagine how inexpensive buying these things regularly in Hungary would be.

The Central Market is also famous for having typical Hungarian (meat based) food stands, paprika, crafts, clothing, collectible dolls, knickknacks and anything else Hungarian you’re in the mood for.

Overall, as a big city with a warm climate it is pretty darn liveable and affordable! It’s also not as small and compact in regards to living space compared to other European metropolises.

I will definitely be back one day!

So if you’re looking to visit Budapest and want to find the best places to find raw and vegan food check these out:

Central Market
1093 Budapest,
Vámház körút, Hungary

Obviously the best place to get your produce from every week, no raw restaurants here though.

Le-bar
Múzeum Körut 19 (at Brody Sandor, Muzeum krt)
Budapest, Hungary
Vegan, Raw options, Organic, Juice bar, Take-out

This place is rumored to have some raw options on their daily menu along with fresh juices and cooked vegan plate lunches.

Edeni Vegan
Iskola Utca 31 (1011)(at corner of Gyorskocsi utca, 1 block from Batthány tér bus and metro station, 1 blk from the Danube)
Budapest, Hungary
+36-6203077575
Open Mon-Thur 8-21, Fri 8-18, Sun 11-19, closed Saturday.
Vegan buffet, Hungarian and Mediterranean food, Juice bar, Take-out
Cash only.

This place has GREAT juices at a steal of a price… 2.50 euros for a large glass and some inexpensive buffet style plate lunches too. They speak a little English here and can tell you about their menu and fresh juices.


Napfenyes Etterem
Rózsa u 39, District VII (1077) (at Király u.)
Budapest, Hungary
+36-1-3135555
weekday 10:00-6:00pm Saturday 10:00 to 2:00pm

Vegan, Organic, Salad bar, Juice bar, Hungarian, Italian

Hummus Bar – Kertesz
Kertesz u. 39 (1073 Budapest VII) (at Jewish quarter, across Franz Liszt Music Academy, metro Oktagon on M1)
Budapest, Hungary
+06-1-3217477
Daily: 12:00pm-11:30pm, close midnight
Vegan, Middle Eastern, Fast food

Falafels, pita, hummus, soups. English spoken and on the menu.

You will also find several little corner grocery stores, but they are particularly small and only sell the bare essentials of the SAD lifestyle, a little bit of fruit, which can be helpful if you’re in a pinch, but otherwise head to the Central Market.

Here are some more of my photos of beautiful Budapest

Parliament – by Veronica Grace

Chain Bridge – by Veronica Grace

Filed Under: Articles, Travel Tagged With: Budapest, Central Market, Eating Vegan in Budapest, Edeni Vegan, Hero Square, Hungary, Parliament, Széchenyi Medicinal Bath, travel, Travelogue, vegan, vegetarian

  • « Go to Previous Page
  • Page 1
  • Interim pages omitted …
  • Page 6
  • Page 7
  • Page 8
  • Page 9
  • Page 10
  • Interim pages omitted …
  • Page 28
  • Go to Next Page »

Primary Sidebar

Follow Us:

Newsletter

Get The Low Fat Vegan Starter Kit

natural organic skin care line

Free Skincare Samples

Earn Free Crypto At Binance

Earn Free Bitcoin on Gemini Exchange

Earn $10 in Bitcoin With Gemini Exchange
Dr. Fuhrman
Dr. Fuhrman
Dr. Fuhrman

Tags

80/10/10 apple avocado banana blueberries breakfast broccoli Carrots celery chickpeas cilantro corn cucumber Curry dill dinner easy Eat To Live fat-free gluten-free how-to Indian Dishes lemon low-fat mango mexican mushrooms nut-free oil-free pasta pineapple plant-based raw raw vegan rice smoothie soup soy-free spinach tofu tomato tomatoes vegan vegetarian vitamix

Secondary Sidebar

Recipes:

  • Cooked Vegan Recipes
  • *My Recipe Books
  • Breads and Baked Goods
  • Breakfast
  • Brunch
  • Burgers
  • Casseroles
  • Curries
  • Desserts
  • Dinner
  • Dips for Veggies or Chips
  • Eat to Live-Dr. Fuhrman Recipes
  • Engine2Diet
  • Ethiopian Dishes
  • Greek
  • Green Dishes
  • Holiday
  • Indian Dishes
  • Mexican
  • One Pot Meals
  • Pasta
  • Pizza
  • Quinoa
  • Salads
  • Sandwiches and Wraps
  • Raw Vegan Recipes
  • 80/10/10
  • Raw Breakfast
  • Raw Desserts
  • Raw Dips
  • Raw Dressings
  • Raw Entrees
  • Raw Juices
  • Raw Salads
  • Raw Smoothies
  • Raw Snacks
  • Raw Soups
  • Sauces
  • Side Dishes
  • Slow Cooker Recipes
  • Snacks
  • Soups and Stews
  • Spices/Seasonings
  • Sushi
  • Thai
  • Vietnamese

Copyright © 2026 · Foodie Pro & The Genesis Framework