• Skip to primary navigation
  • Skip to main content
  • Skip to primary sidebar
  • Skip to secondary sidebar

Plant Based U

Fat-Free and Low Fat Vegan Plant Based Recipes

  • Home
  • Recipes
    • Raw Vegan Recipes
    • Cooked Vegan Recipes
    • Eat to Live Dr. Fuhrman Recipes
  • Products
  • Coaching
  • Videos
  • Articles
  • About
    • What Is Low Fat Vegan/Whole Foods Plant Based
    • Resources
  • Contact

soy-free

Fb-Button

80/10/10 Recipe: Beginner’s Green Smoothie Banana Blueberry Spinach

April 11, 2012 by Veronica Grace 20 Comments

Fb-Button

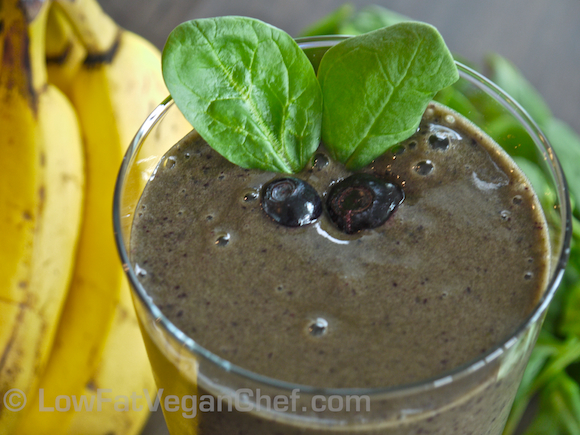
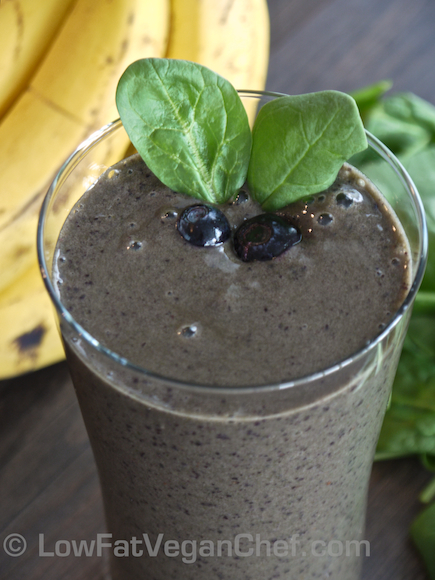
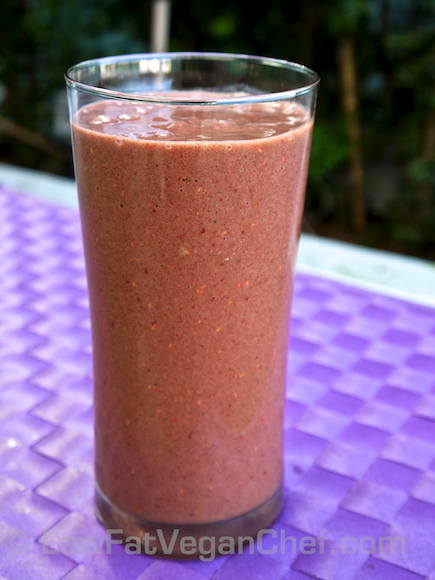
Low Fat Vegan Chef's Beginner's Green Smoothie Blueberry Banana Spinach Smoothie

For some of you green smoothies might be something new, or something you’ve heard of but never tried. Others may make green smoothies regularly and enjoy them. I wanted to share a really easy green smoothie recipe with you today. Something I would call a “basic” or “beginner’s green smoothie”.

#1. Because it’s not too frightening looking and you can tell it has berries in it (this may seem a little normal looking). This may also appeal to people who are afraid of drinking something that looks like green grass!

#2. It tastes very nice and you cannot detect any greens in it at all. Baby spinach is probably the best green to start with when dipping your toes (and taste buds) into making a green smoothie.

Green smoothies are basically just a mixture of fresh ripe fruits, some mild greens, maybe some frozen berries and a little water. They need not be complicated, and they don’t need any kind of protein powders, raw pseudo “super foods” or oils like coconut or flax oil. The goodness of a simple green smoothie comes from whole foods. Whole fruit and whole greens is all I put into my smoothies.

Green smoothies can also help get some more greens into your diet (especially since they don’t need dressing) and can be good for children or people with a compromised ability to chew their food really well.

I only blend my smoothies for about 30-45 seconds in my Vitamix. I don’t like to let it run on too long and get too thin, or warm.

Another good thing to do is to not gulp your smoothie but drink it and chew it a bit. I don’t recommend sipping on smoothies for hours at a time or all day (this can cause dental problems and weaken your enamel from feeding the carries and bacteria in your mouth sugar all day) though. Consuming a smoothie in 10-20 minutes should be fine, and then you can wait 30 minutes before brushing your teeth and rinse your mouth with water if you desire. When using berries that have little seeds I like to use a water pik as well as there can be little pieces that are hard to get out between your teeth.

To make a basic green smoothie you want to start out with a base of either ripe bananas or ripe mangoes (I like ataulfo mangoes) or even a mixture of both. Then you can use 2 cups of mild greens like baby spinach, lettuce, mache (lambs lettuce/corn salad), or 2-3 leaves of kale or Swiss chard (remove the big stems). If desired you can add another fruit like berries, pineapple, mango, papaya, grapes, even watermelon. Depending on what blender you have you may need to add a little water as well, just enough to blend or to get the consistency you like. I like really thick smoothies so I chew them. Some people like only very thin ones so it’s like fruit juice. It’s up to you. Always stack the smoothie in your blender with water at the bottom, then bananas, then greens, and then frozen fruit. Use a tamper (if you have a Vitamix) or break up the chunks of banana before blending to get everything to combine easily. If you have a basic blender you may want to blend the banana, water and greens first, and then add a little additional fresh or frozen fruit and blend again.

Ok, now that I’ve shared some tips on green smoothies, let’s go on to the recipe.

Low Fat Vegan Chef's Beginner's Green Smoothie Blueberry Banana Spinach Smoothie

80/10/10 Recipe: Banana Blueberry Green Smoothie

Serves 1

Ingredients:

3 ripe bananas (see my post on how to tell if your bananas are ripe enough)
2 cups baby spinach, packed
2 cups fresh or frozen blueberries
1/4-1/2 cup water (as desired)

Directions:

  1. Place ingredients into blender in the order above putting the bananas on the bottom. Add a little water if desired to help it liquify.
  2. Blend for 30-45 seconds if you have a Vitamix. (If you have a regular blender you may need to break up the banana pieces into smaller chunks and blend with a little more water or a little longer depending on how strong the motor is.)

I find that having frozen fruit gets the smoothie cool enough without the need to add ice. Unless you have a Vitamix adding ice to a smoothie can make it too gritty and not very smooth to drink.

Have you ever made a green smoothie before? If so what’s your favourite?


Filed Under: 80/10/10, Raw Breakfast, Raw Smoothies, Raw Vegan Recipes Tagged With: 80/10/10, banana, blueberries, fat-free, gluten-free, green, nut-free, raw, smoothie, soy-free, spinach

Easy Vegan Rainbow Bowl: Steamed Veggies Over Yams & Squash With Peanut Dressing

April 9, 2012 by Veronica Grace

Fb-Button

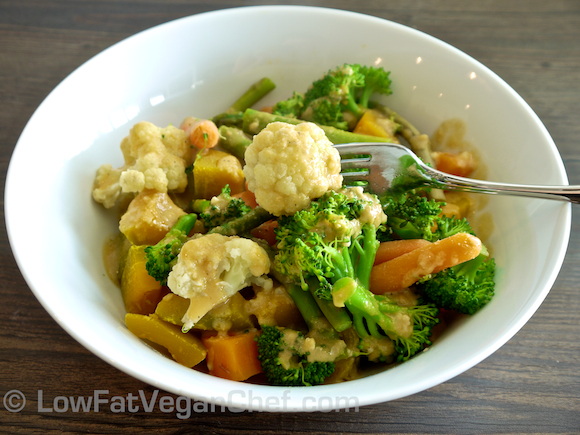
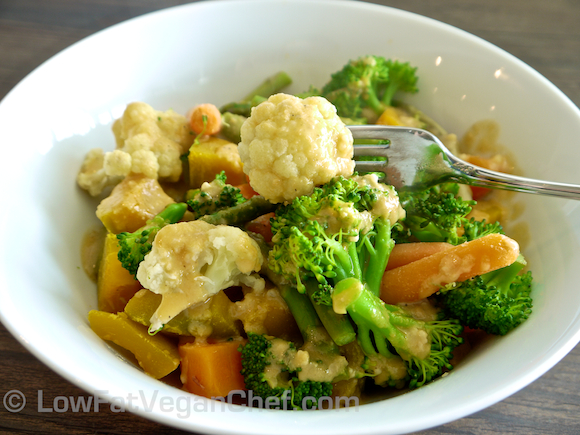
Low Fat Vegan Chef's Vegan Rainbow Steamed Veggie Bowl With Peanut Sauce

I wanted to have a quick and healthy lunch yesterday, but I did not have any rice ready. So instead I decided to serve my veggies over some delicious steamed yams (sweet potatoes) and Kobocha Squash (Thai/Japanese pumpkin). It’s kind of Macrobiotic, it just doesn’t have rice, beans, or fermented veggies. I guess it’s like a lazy version of a Macrobiotic dish instead.

This is a nutritious and easy way to get a lot of veggies all into one dish. I’ve got broccoli, cauliflower, carrots, asparagus, yams (sweet potatoes) and squash, topped with a light peanut dressing to give it some nice flavour.

Basically my Rainbow Veggie Bowl is like a vegetable stir fry, but with steamed vegetables and nothing is fried! This is an easy meal idea for you when you’re not sure what to make, but just want something that still tastes good while being healthy at the same time. It’s also really easy to use up extra vegetables in the fridge, or use a whole bag of fresh mixed vegetables like I did and then they’re already washed and chopped for you.

You can also make the peanut dressing in advance and then use it throughout the week if you want to make this even quicker.

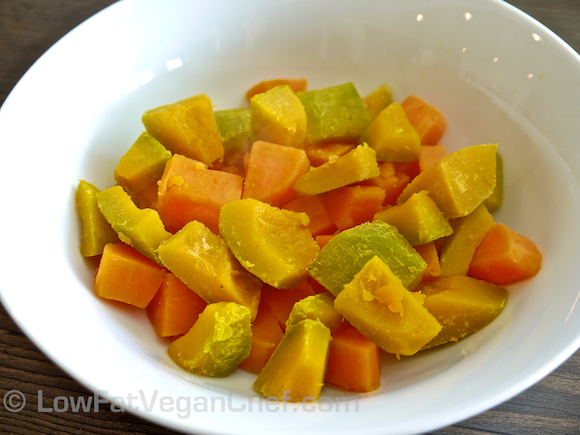
Steamed Yams (Sweet Potatoes) Kobocha Squash

This is the steamed yams and squash before I topped it with the veggies.

Low Fat Vegan Chef's Vegan Rainbow Steamed Veggie Bowl With Peanut Sauce

Veronica’s Easy Rainbow Veggie Bowl

Serves 2

Ingredients:

1 large yam/sweet potato, peeled and chopped
1 small Kabocha squash, peeled and chopped (Thai/Japanese pumpkin) or 2-3 cups frozen butternut squash cubes
1 12 oz./340 g mixed vegetables (I used broccoli, cauliflower and baby carrots)
1/2 bunch asparagus, ends trimmed and cut in half (or other vegetables as desired)
1/2 recipe of Thin Peanut Dressing (see recipe below)

Directions:

  1. Steam yams/sweet potatoes and squash in a medium-large pot in a steamer basket (if you have one) just until tender.
  2. When yams and squash are starting to cook, place other vegetables into another pot with a steamer basket (if you have one) and steam just until cooked. Be sure to check on them so that the broccoli doesn’t fall apart.
  3. Arrange steamed yams and squash into bowls and top with steamed vegetables. Drizzle with thin peanut dressing and serve!

Variations:

Use any other vegetables you desire instead of the asparagus, broccoli, cauliflower or carrots. You can also use ones like kale, Swiss chard, collard greens, Bok Choy, cabbage, onions, zucchini, etc.

Feel free to top your bowl with other goodies like seasoned tofu, tempeh, or black beans.

Kobacha squash can be substituted with Butternut squash, or even more yams/sweet potatoes if you like.

You can also serve with brown or white rice if you don’t want to use yams or squash.

(Oil-Free) Thin Peanut Dressing For Veggies

Serves 2-4

4 tbsp peanut butter
4 small dates, pitted or 1-2 tbsp of liquid sweetener of choice
1 clove of garlic
2 tsp light tamari or light soy sauce
2/3-3/4 cup water (to thin as desired)

Directions:

  1.  Add all ingredients to a blender and combine. Taste test and adjust seasonings if desired. Use as much or as little water as you like depending on how far you want your sauce to go.
  2. Serve over greens or steamed vegetables.

Additional Tips:

Refrigerate any leftovers for up to 3 days.

Variations:

You can also try almond butter, or tahini if you prefer instead of peanut butter. You can also add fresh ginger or a splash of apple cider vinegar if desired for different flavours.

What do you think of my Easy Rainbow Veggie Bowl with Peanut Sauce?

viagra

Filed Under: Cooked Vegan Recipes, Dinner, Eat To Live - Dr. Fuhrman Recipes, One Pot Meals Tagged With: asparagus, broccoli, cauliflower, easy, gluten-free, Macrobiotic, peanut, quick, soy-free, squash, sweet potatoes

A Healthier Alternative to Special K, Frosted Flakes And Other Processed Sugary Cereals

April 9, 2012 by Veronica Grace 6 Comments

Fb-Button

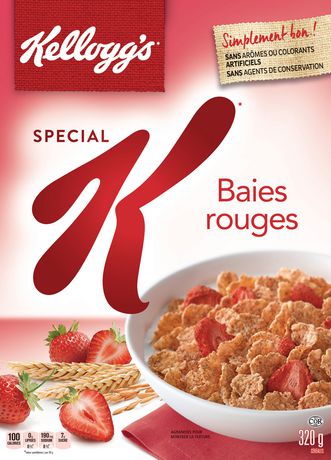
Who needs to eat Special K for breakfast every day for 2 weeks to lose weight? You certainly don’t have to. You can find any low sugar, low fat cereal of your choice, top it with some fruit and a little almond or soy milk and use that as a low calorie breakfast to start your day. Fresh fruit is always preferable, but you can add things like dried raisins, goji berries, sliced up apricots, prunes, figs etc. as well.

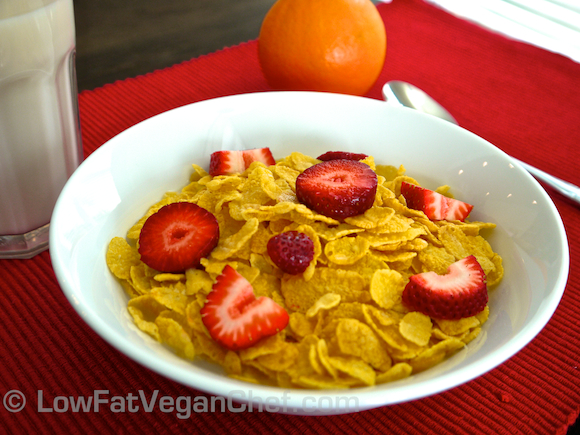
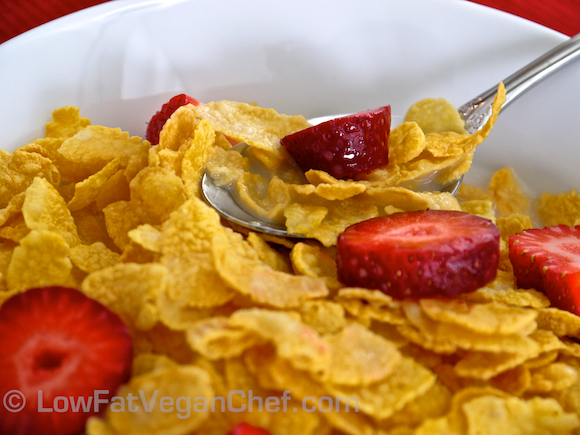
Sugary cereals were never healthy, they were just an excuse to get children and those concerned with fibre intake to eat some grains and get their servings of dairy in. If you’re vegan and still want to eat some cereal from time to time, make up a healthy one of your own. I have some organic corn flakes here (because they were low fat, low sugar and low salt) and dressed them up wish fresh sliced strawberries and served it with some original sugar free almond milk. I also like using sliced bananas, but I didn’t have any that were ripe. Raspberries or other berries work great too. This recipe is gluten free and soy free as well.


Low Fat Vegan Chef's Cornflakes With Strawberries

Homemade Special K – Corn Flakes With Fresh Strawberries and Almond Milk

Serves 1

Ingredients:

1 1/2 cups organic corn flakes (low fat, low sugar, low salt)
1/2 cup fresh sliced strawberries
2/3-3/4 cup almond milk (I used Blue Diamond Almond Breeze Unsweetened Original)

Directions:

Add cereal to a bowl. Top with strawberries, add almond milk and any additional fruits or sweeteners if desired.
If you want to add a sprinkle or brown sugar you can, or you could try the sweetened original version of almond milk if that’s more to your taste.

Enjoy!

Filed Under: Breakfast, Cooked Vegan Recipes Tagged With: breakfast, cereal, gluten-free, soy-free, strawberries, sugar-free

80/10/10 Recipe: Morning Sunrise (Pineapple Grapefruit Ginger) Juice

April 4, 2012 by Veronica Grace 9 Comments


Fb-Button

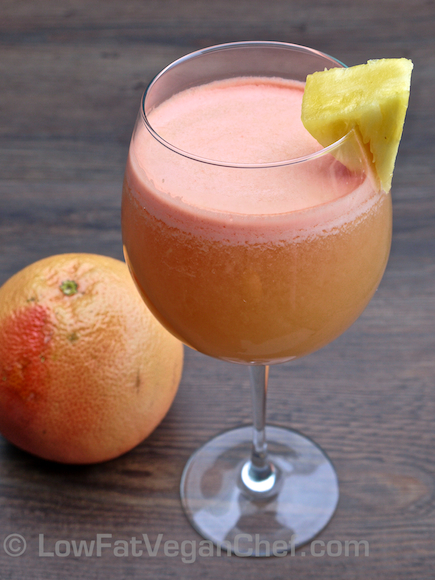
Low Fat Vegan Chef's Morning Sunrise Pineapple Grapefruit Ginger Juice (1)

This is a really delicious juice recipe  that combines red grapefruits with fresh pineapple that I wanted to try. I really love Texas Star grapefruits as they are sweeter and even nice to eat on their own.

Did you know that the reason people used to put sugar on their grapefruit halves is because grapefruits used less sweet? Even sour compared to today? The scary thing is I still notice people putting sugar on their grapefruit halves thinking they are “sour” and that’s what you’re supposed to do. They have no idea how sweet and delicious grapefruits are now and they don’t need any additional sugar. Generally people who eat a lot of processed foods, don’t enjoy raw fruits and vegetables because they aren’t sweet or salty enough compared to their favourite packaged foods.

The key to enjoying grapefruit is to eat it before you eat anything else. When you eat grapefruit or grapefruit juice on it’s own it will taste more naturally sweet than if you ate it with sugary coffee, cereal, muffins, pastries, sweet fruits like mango and other sugary foods.

For instance if you ate a bite of mango and then went to eat some grapefruit it would taste very sour in comparison because your tastebuds had to adjust to the sweet taste of mango. A tip I have for you is to eat mangoes last if you’re having a few fruits for breakfast, as everything will taste less appetizing in comparison. Similarly eat your grapefruit first, and then everything you eat later will taste it’s best. I don’t recommend putting grapefruits in fruit salad either, as they will taste sour in comparison.

Now I don’t drink a lot of juice myself, I only drink homemade juice and never store bought bottled juice. But it is nice to have fresh pressed juice before or after a workout or on days that you will be traveling or being inside an air conditioned building for long periods of time. I like to drink fresh fruit and vegetable juice before traveling on a plane as it’s a good way to get some extra hydration and use up whatever’s left in the fridge before we leave!

Having a small glass of this juice for breakfast will brighten your day and the little bit of ginger adds another layer of flavour to it. I don’t like really gingery juices, but this is just right. You can also leave it out, or add more ginger depending on how much you like the flavour.

It’s best to use fresh sweet pineapple for this recipe. See my video on How To Select And Cut a Ripe Pineapple. If you’re buying pre-cut pineapple from the store, look for one that was packed recently, and has the darkest yellow colour you can find. If it is really pale and mostly white with only a little tinge of yellow it isn’t a ripe pineapple and won’t be sweet enough. You can also use defrosted frozen pineapple if you let it sit overnight in the fridge or out on the counter for a half hour on a tray, but generally frozen pineapple is not as sweet as fresh ripe pineapple.

Also did you know you can peel ginger very easily with a spoon? Check out my post How To Peel Ginger With A Spoon.

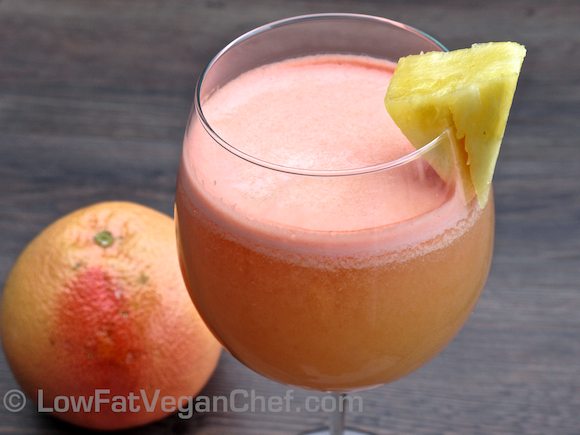
Low Fat Vegan Chef's Morning Sunrise Pineapple Grapefruit Ginger Juice (1)

Morning Sunrise (Pineapple Grapefruit Ginger) Juice

Serves 1-2

Ingredients:

2 large Ruby Red or Texas Star grapefruits (or use a sweeter less tart variety available in your country)
4 cups pineapple chunks (fresh is best)
1 knob of ginger the size of your thumb, peeled (use more or less to your tastes)

Directions:

  1. Juice the grapefruit in a citrus juicer or handheld citrus juicer. (This way you get more juice than putting it through a centrifugal juicer).
  2. Run the pineapple chunks and ginger through a centrifugal  or Green Star style juicer.
  3. Combine juices and pour into glasses.
  4. Garnish with pineapple chunk if desired.
  5. Serve.

What do you think of this breakfast juice? Do you enjoy the taste of fresh red grapefruits?

Filed Under: 80/10/10, Raw Breakfast, Raw Juices Tagged With: 80/10/10, breakfast, fat-free, ginger, gluten-free, grapefruit, juice, nut-free, pineapple, raw, soy-free

Low Fat Vegan Apple Strawberry Giant Strudel Pie in Phyllo Pastry

April 1, 2012 by Veronica Grace 17 Comments


Fb-Button

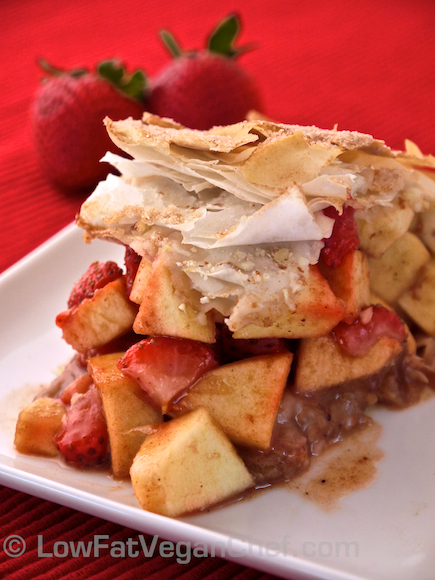
Low Fat Vegan Chef's Apple Strawberry Strudel

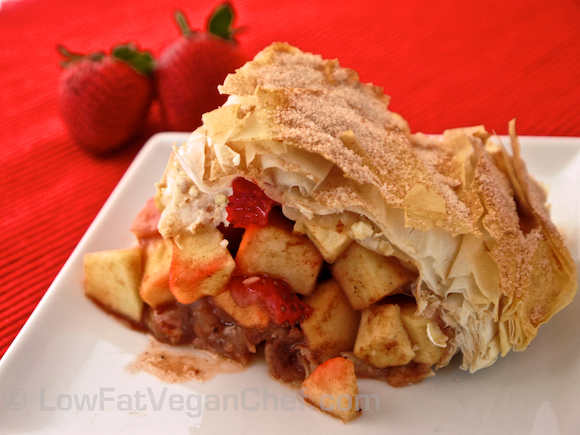
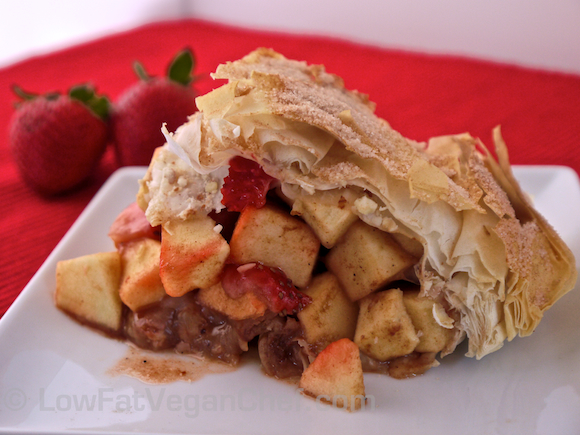
Low Fat Vegan Apple Strawberry Strudel In Phyllo Pastry

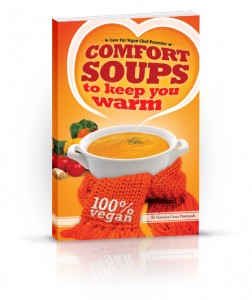
Now, before you start drooling all over the keyboard on my delicious (lower fat vegan) Apple Strawberry Giant Strudel Pie recipe, I want to make a quick reminder that my new recipe ebook Comfort Soups To Keep You Warm is now available for sale. I am so happy with the response I’ve recieved on this book so far. People are in love with the delicious and filling soup recipes and blown away by my 40+ pages on tips and tricks on exactly how I cook, what you need and how anyone can make soup and even create their own recipes with anything they have in the fridge! It also contains 30 oil free soup recipes and even some additional bonus recipes you won’t want to miss out on. I know you’re family is going to love these soups recipes so much, they won’t even notice they are healthy or vegan!


Ok, I have a very special recipe for you today… This would be GREAT for a special vegan Easter or holiday dessert.

It was my friend’s birthday a while back and he wanted me to make something yummy for dessert that had apples and cinnamon in it. I started thinking, how could I possibly make an apple pie low fat, but that tastes good? Pie crusts have lots of fat in them from margarine or shortening and raw pie crusts are really fatty from using nuts, so neither were a good solution.

I started thinking of apple crumble, but then you still need margarine to make the crumble crispy and delicious too. (Oil free oat crumble turns out like little muffin bits and rises because of the lack of oil, I’ve already tried it.) So I thought, hey I bet a few layers of phyllo (film or fillo) pastry would do the trick and make the apple strudel delicious without being too heavy. I was inspired by Susan’s recipe for Apple cranberry strudel pie.

But most people’s recipes want you to layer on the margarine or butter in between the phyllo and add lots of nuts.


Well PFFFT to them! Because you don’t even have to do that. The trick to getting a crispy phyllo pastry, is well, just baking it and let is crisp up in the heat. It doesn’t even need oil or butter to get crispy and flaky. I’ll show you how!

Low Fat Vegan Chef's Apple Strawberry Strudel

Low Fat Apple Strawberry Strudel Pie

So the key to working with phyllo pastry is to make sure ALL of your fillings and baking dish are ready to go. Phyllo dries out very very quickly and you have to work fast or it can tear and fall apart. I had some phyllo in the freezer that I bought months ago (as I had no idea what I would use it for and it became a little warped and ugly). Make sure you let the phyllo rest for a bit and come up to room temperature if you defrost it overnight in the fridge because it is inflexible when it’s so cold. Even though I ripped some of it… I managed to make it work anyway, even though I had never used phyllo before. See? Just fake it til you make it and you can make this apple strawberry strudel too… Even if you rip the phyllo and make a big mess, as long as you get some layers of phyllo sheets in there it will still taste good.

As always I wanted to pack in some more fruit into it, so I decided to use 2 different kinds of apples and some strawberries as they looked pretty fresh at the store. Who doesn’t love fresh summer strawberries? Anyone? I didn’t think so… I also think this would work well if you had frozen cherries, or really sweet peaches, or pears. I’m going to try an apple-pear combo next.


Although I made a bottom crust and a top for this, I decided that the crust (bottom layers) aren’t necessary to make this strudel tasty. They don’t really crisp up and they all stay flat anyway, and the most important part of the strudel is really the top crust. So next time I make it I’m going to skip the bottom crust.

Also the nuts aren’t really that necessary either, the reason we add a little crumbled “something in between” the layers it to keep them separate so hot air can get to them and crisp up the phyllo sheets. You can easily just use rolled oats and skip the nuts to make the recipe even lower in fat.

Low Fat Vegan Chef's Apple Strawberry Strudel

(Low Fat) Vegan Apple Strawberry Strudel In Phyllo Pastry

Serves 8

Ingredients: 

12 (or 6 if you use no bottom crust) 9 x 14″ sheets of phyllo pastry dough (thaw overnight in refrigerator or 5 hours on the counter)
2 tbsp. almonds or other nuts (optional)
2 tbsp. rolled oats (the big flat type oats)
4 medium apples, peeled, cored, and diced (I used Granny Smith and Golden Delicious)
1/2 cup turbinado sugar (raw cane sugar) or other coarse sugar (not white sugar or powdered sugar)
2 teaspoons  all purpose white flour, unbleached or cornstarch
2 teaspoons maple syrup, honey, agave or brown rice syrup (any liquid sweetener)
1 tbsp. ceylon cinnamon (my favourite available here) or 1/2 tbsp reg. cassia cinnamon
1/4 tsp. nutmeg
1 1/2 cups diced strawberries
2-3 second spray of canola oil or non-stick spray

Cinnamon-Sugar Topping:
1/4 teaspoon ceylon cinnamon
2 teaspoons regular sugar/white sugar


Directions:

Step #1. Preheat oven to 350 F /177 C. Use a rectangular (not square) baking dish and spritz the bottom with non stick spray (only if making a bottom crust, if not omit). Get the box of phyllo out of the fridge and let it warm up before using so it’s more flexible. Don’t take it out of the plastic package until you are ready to use it.

Step #2: Use a food processor or Vitamix to process the nuts and rolled oats until they are coarsely ground. (You can also just use rolled oats and skip the nuts if desired.)

Step #3: In a large sized bowl, toss the apples, turbinado (raw) sugar, flour, liquid sweetener, ceylon cinnamon, nutmeg and strawberries together gently. In a separate small bowl, mix the ceylon cinnamon and sugar together for the cinnamon-sugar topping.

*If you don’t want a bottom crust, you can skip this next part and go to Step #6.

Step #4: Get out a large piece of parchment paper and unroll the phyllo pastry over it (have a damp towel ready to cover the rest) and take out two sheets at a time and place them into the bottom of the baking dish. (Cover the remaining pieces with the damp towel to prevent them from drying out and cracking.) The sheets will probably be too big for your dish, but you can try and lean them on the side like I did. Also you can use scissors and trim any large ends that stick out.

Step #5: Sprinkle a tablespoon of the nut/oats (or just oats) over the phyllo pastry, layer another two sheets, sprinkle 1 tbsp again, and layer another 2 sheets. You will have 6 sheets total for the bottom of your pastry, in 3 layers.

Low Fat Vegan Chef's Apple Strawberry Strudel

As you can see my dish is a little small for the size of the pastry sheets. Feel free to trim.


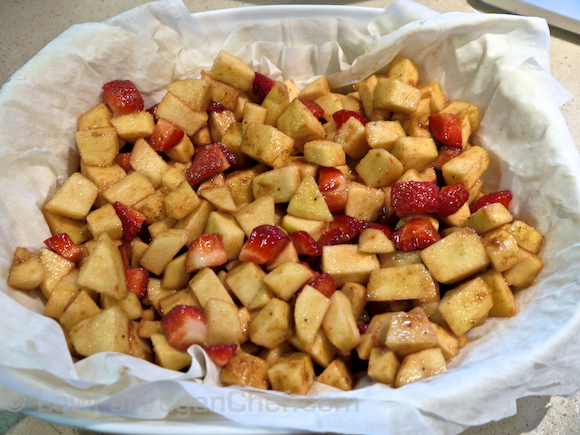
Step #6: Pour in the apple strawberry mixture on top of the 6th sheet (if using a bottom crust). If you’re not using a bottom crust, just pour the apples and strawberries into the bottom of the baking dish.

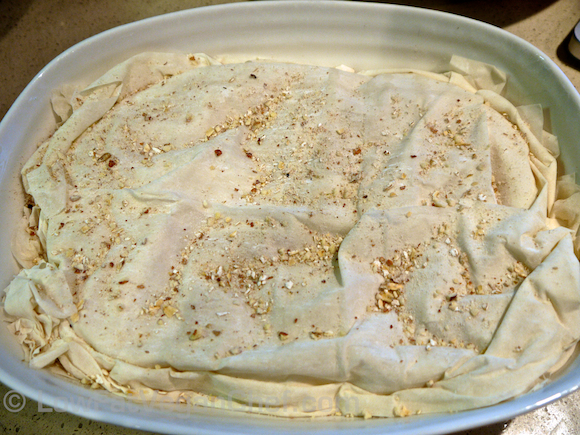
Step #7: Cover the apple strawberry mixture with 2 more sheets of phyllo and push the edges down a little. If they are too giant, you can trim them. If the edges of the layers are all crammed together in a bunch at the top they won’t cook and will be like raw dough. So use your judgement, you want some tucked in, but not too much. Sprinkle another tablespoon of the nut/oats mixture and cover with another 2 sheets of phyllo. Repeat and cover with another 2 layers, another sprinkle of nuts/oats mixture, and another 2 sheets of phyllo.

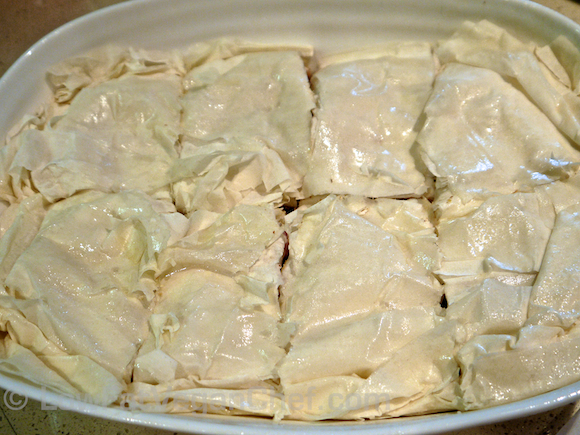
Step #8: Spray just the top layer of phyllo with a 2 second spray of canola oil or non stick spray and with a sharp knife, cut the strudel into 8 pieces. (This is so it doesn’t shred when it’s cooked. It’s better to cut it beforehand.)

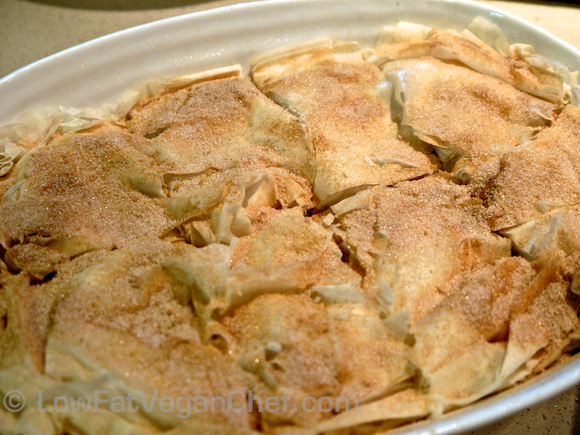
Step #9: Sprinkle it with the cinnamon-sugar topping. Ooh doesn’t that look pretty!

Step #10: Bake for 45-50 minutes until the apples are tender. You can test them with a fork after 45 minutes in the middle.


Low Fat Vegan Chef's Apple Strawberry Strudel

Step #11: Allow the strudel to cool a bit before serving (20-30 minutes). Serve warm.

Low Fat Vegan Chef's Apple Strawberry Strudel

Additional Tips:

Use whatever rectangular baking dish you have to make this strudel pie. Mine is like an oval casserole dish, and it worked ok. I could have used a larger dish because the phyllo sheets are a pretty big. I will trim a little of the excess overhang next time. If you use a large lasagna like pan (9″ x 13″), you should be fine and not have so much extra phyllo on the edges.

*To reheat the apple strawberry strudel you have to do it in an oven. You cannot microwave it or the crust will get all soggy and not be flakey anymore.

 Variations:

Use whatever other fruit you like if you don’t want to use strawberries. It’s nice to have two flavours. You could also use some stewed rhubarb. My Nana used to make Apple Rhubarb pie and I loved this combination.

I also made this recipe with apples and Bosc pears. It was quite delicious too!


To Make Traditional Individual Apple Strawberry Strudels

You can also make little strudels with this recipe instead of a giant strudel-like pie.

If you want to make individual strudels, take 3-4 sheet of phyllo pastry per strudel.  Place a large piece of parchment paper (larger than the phyllo) underneath it and fill the bottom side of the phyllo (the long side of the rectangle), but leave a 2″ gap on all sides and then roll the strudel up and away from you until it’s like a burrito. Tuck the short ends of the phyllo under the roll. Spritz with a little cooking spray and top with cinnamon-sugar. Pierce the strudel every 2″ to vent along the top and cover loosely in tinfoil. Bake at 375 F/ 190 C in the centre of the oven for 15 minutes. Take off the foil and bake for another 15 minutes until golden. Remove from the oven and let cool before slicing and serve warm.

Low Fat Vegan Chef's Apple Strawberry Strudel


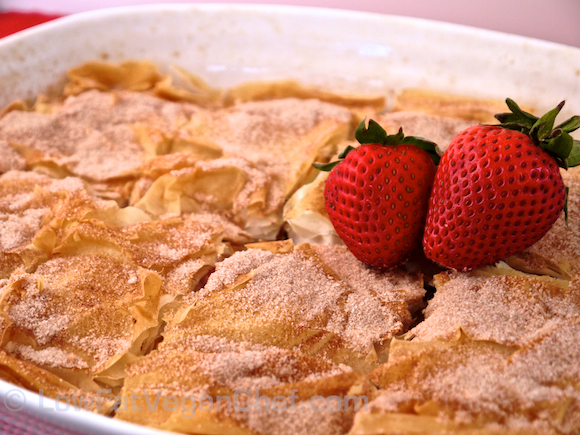
The top crust of the Apple Strawberry Strudel Pie is really pretty.  You can barely see the bottom crust, but it is there. It’s pretty flat and soggy so this is why I don’t think it’s essential to be delicious.

Low Fat Vegan Chef's Apple Strawberry Strudel

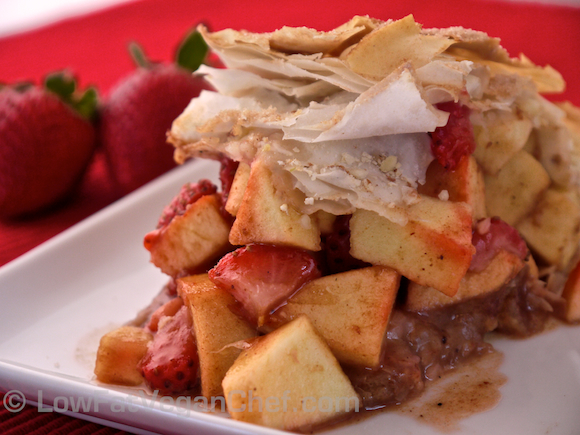
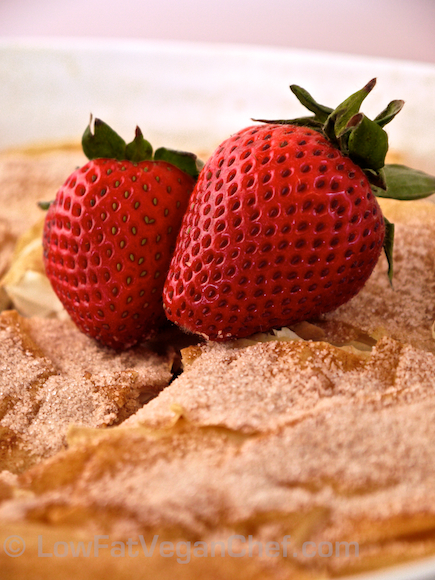
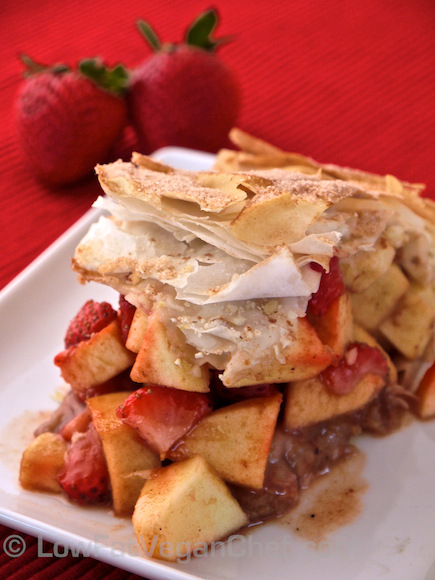
Side view of the apple strawberry strudel. Is your mouth watering yet? Hee hee.

What do you think of my Low Fat Apple Strawberry Strudel Pie recipe?

Also what do you think of the new printer function of the site? Pretty cool huh!


Filed Under: Cooked Vegan Recipes, Desserts, Holiday Tagged With: apple, dessert, holiday, soy-free, special occasions, strawberry, strudel

80/10/10 Recipe: Banana Raspberry Pineapple Smoothie

March 30, 2012 by Veronica Grace 6 Comments


Fb-Button

80/10/10 Raw Vegan Banana Raspberry Pineapple Smoothie

Raw Banana Raspberry Pineapple Smoothie


Spring is coming! I know it! We’re getting a few sunny days in between the rain here in Vancouver. So sometimes I can take my pictures outside. Yay!

I really love pineapple and raspberries in smoothies, I think they make almost as good of a combination as pineapple and black cherries.

This is a smoothie I regularly make as it has creaminess from the bananas, the tartness from raspberries, and a tropical pineapple twist to it. As long as you’re using fully ripe, spotted bananas as the base you can pretty much throw any frozen fruit into the blender with it and make a delicious smoothie.

80/10/10 Banana Raspberry Pineapple Smoothie

Serves 1-2

Ingredients:

2-3 bananas (ripe with lots of brown spots)
1 cup of frozen raspberries
1 cup of frozen pineapple
a little water to blend

Directions:

Add ingredients to blender starting with the bananas at the bottom and the water and frozen fruit on top. Blend until smooth.

Drink and enjoy!

Variations:

You can easily make this a green smoothie by adding a few handfuls of spinach or kale (destemmed of course)

——-

What smoothie combination have you been wanting to try but have never had before? What fruits are you excited about coming into season again?

Filed Under: 80/10/10, Raw Breakfast, Raw Smoothies, Raw Vegan Recipes Tagged With: 80/10/10, banana, fat-free, gluten-free, nut-free, pineapple, raspberry, raw, soy-free

Is There A Vegan Chocolate Hazelnut Butter? (Like Nutella) Why, Yes There Is!

March 28, 2012 by Veronica Grace 3 Comments


Fb-Button

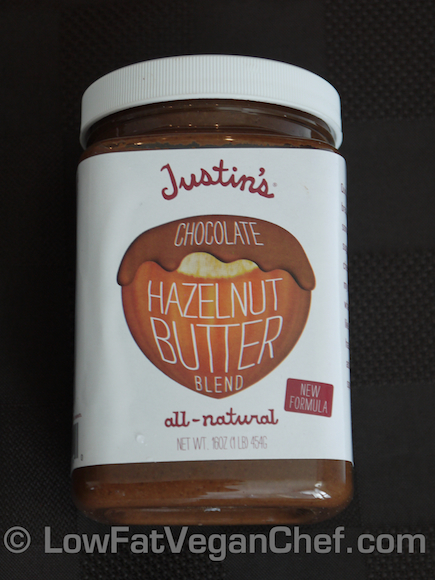
Justin's Chocolate Hazelnut Butter Blend (It's Vegan!)

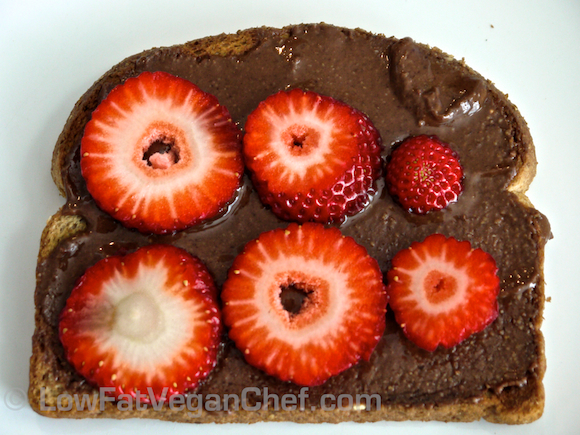
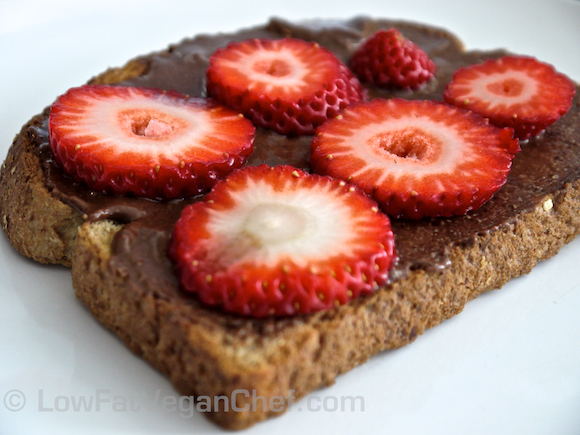
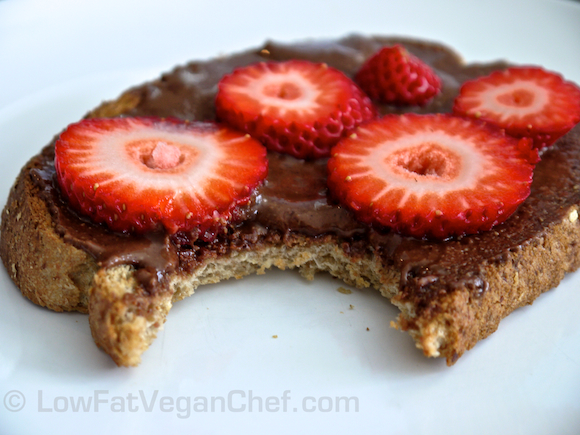
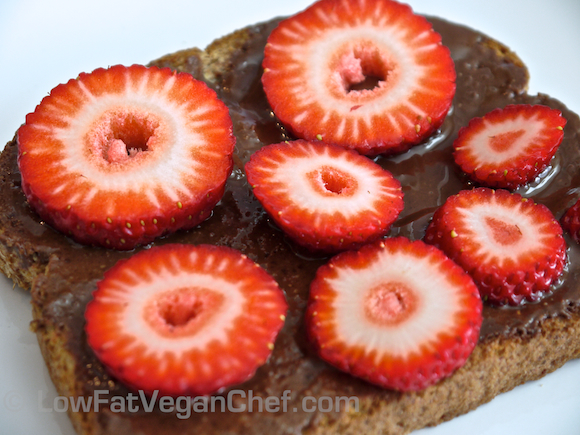
Justin's Chocolate Hazelnut Butter Blend with Strawberries

Have you ever asked yourself the question, “Is there a chocolate hazelnut butter or spread that is vegan?” I have. And when I previously googled it, I came up with nothing but homemade recipes for chocolate hazelnut butter spread. Hazelnuts are expensive, and I didn’t plan on making it for just a small sample. Plus if it’s fresh it also goes bad within a week and I was not about to eat the whole batch in one week.

I think everyone remembers eating Nutella as a kid, or if you live in Europe, you probably ate it or still eat it regularly. They have this serious OBSESSION with Nutella in crepes filled with fruit. Very decadent indeed… That get’s me thinking I need to make a vegan chocolate hazelnut crepe recipe soon, I’ve never had one… but for now we’re going for chocolate hazelnut butter on toast with strawberries.

Since I’ve traveled in Europe a lot and there are also many creperies in Vancouver, Canada many places I’ve seen serve crepes with Nutella and because it had dairy in it, it’s not vegan. (The crepes are also not vegan as well.) I’ve often wondered if ANY company was going to get up the guts to actually make a healthier chocolate vegan hazelnut spread without the dairy and for the longest time could not find any. I checked the health food stores in Canada and no dice. I checked a bunch in the USA as well, and just recently found 2 different brands that were dairy free! This was a surprise to me because I had been casually reading labels for a while.

Since the dairy industry has been so adept at lobbying for companies and restaurants to put milk and cheese into everything, it can be very hard to find plain chocolate ANYWHERE. Almost every chocolate and chocolate bar EVEN DARK CHOCOLATE that is manufactured in the USA contains milk fat solids.  They do this because dairy is highly addicted, just as addictive as opiates are actually and it makes people eat and crave more. So they now put dairy in all of the dark chocolate to make you eat MORE. How rude!

Same goes for creamy chocolate hazelnut spreads, they put dairy in it to make it more addicting and get you to eat more. Plus it probably is cheaper to add milk to it and less hazelnuts as those are more expensive.

I started looking for vegan alternatives a while ago, but never found any until now. It’s not something I would eat regularly, but more of a treat to put on a slice of toast or a crepe or for a vegan waffle or something.  You know, a healthier-than-the-original-version treat.

Justin’s Chocolate Hazelnut Butter Blend on toast with strawberries. A filling snack or treat for you or your kids.

The strawberries are nice because it makes it not too sweet and has a little tartness to it.

Justin's Chocolate Hazelnut Butter Blend (It's Vegan!)

This little baby I found in Portland, OR at Whole Foods Market on a recent trip. I have sampled Justin’s peanut butter cups (the dark chocolate variety are vegan) and was quite impressed at their not too oily or  too sweet peanut butter cups. (Christmas treat).

Here they had an entire line of natural nut butters. Including chocolate peanut butter and chocolate almond butter. Crazy! I know…

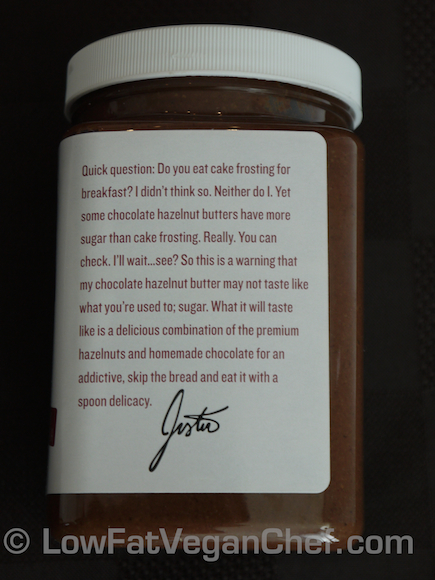
Let’s take a look at the side. Ah a nice note, it shows they are trying to make a product that is healthier than the major competitors. Who eat’s frosting for breakfast indeed? Nutella eaters that’s for sure. Here are the list of ingredients in Nutella from their website: INGREDIENTS: SUGAR, PALM OIL, HAZELNUTS, COCOA, SKIM MILK, REDUCED MINERALS WHEY (MILK), LECITHIN AS EMULSIFIER (SOY), VANILLIN: AN ARTIFICIAL FLAVOR.

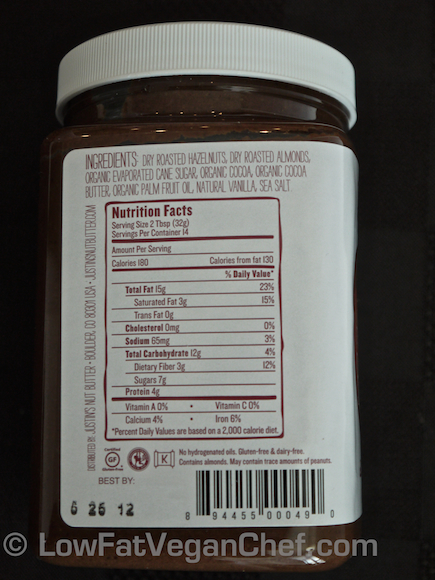
Ingredients and nutritional information. It still contains some oil in the form of palm oil (saturated fat), so sad face 🙁 but at least it’s not hydrogenated and it’s one of the last ingredients on the label, not the first.  It’s 90 calories and 7.5 g of fat per tablespoon. Ok good to know. One or two tablespoons max is all you should use for a serving.
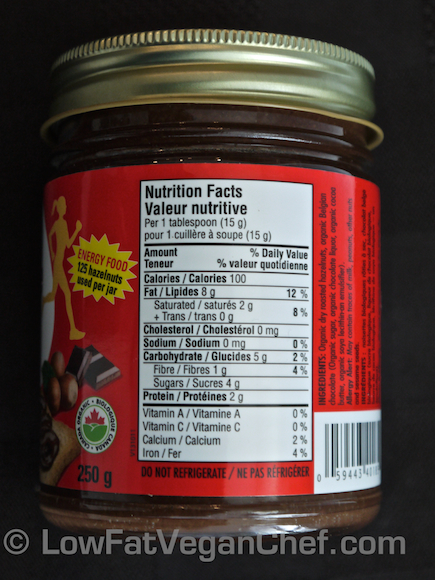
Nutella comes in at 100 calories per tablespoon and 5.5 grams of fat, so  it’s a little less fat than Justin’s… but Nutella’s first ingredients are sugar and oil and then it’s hazelnut taste is watered down by milk and whey. Justin’s doesn’t have sugar until the third ingredient, and oil is the third last, before vanilla and salt. If you were going to pick one that was a healthier option between Justin’s and Nutella, Justin’s would win. It definitely has more natural ingredients and whole foods in it than mass produced Nutella.

Here is Justin’s Chocolate Hazelnut Butter Blend inside. It’s quite thick. There’s no oil on top and it doesn’t look rock solid like coconut oil does at room temperature.

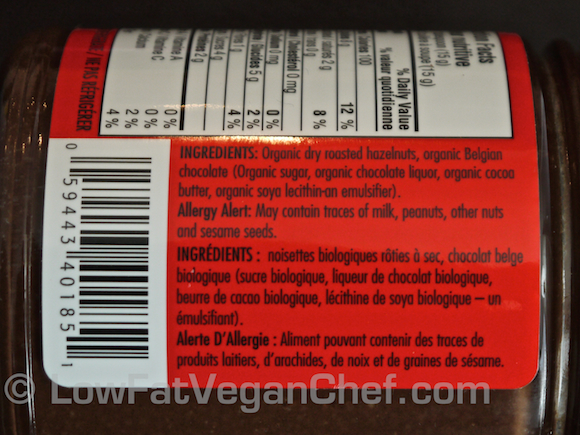
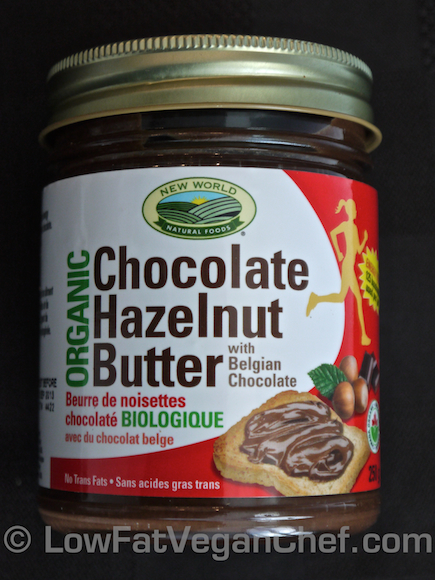
Here’s another vegan Hazelnut Butter. This is the first vegan chocolate Hazelnut Butter I found by New World Natural Foods, it’s from a local health food store in Bellingham, Washington. I thought they were the only brand that made a vegan hazelnut butter, so I picked it up.

Upon closer inspection though, it is fattier than Justin’s. 100 calories and 8 grams of fat per tablespoon.

They use cocoa butter instead of palm fruit oil. This butter is stable at room temperature (a saturated fat), which means it is a solid at room temperature and not a liquid. So this must be why they chose to use it in their butter.

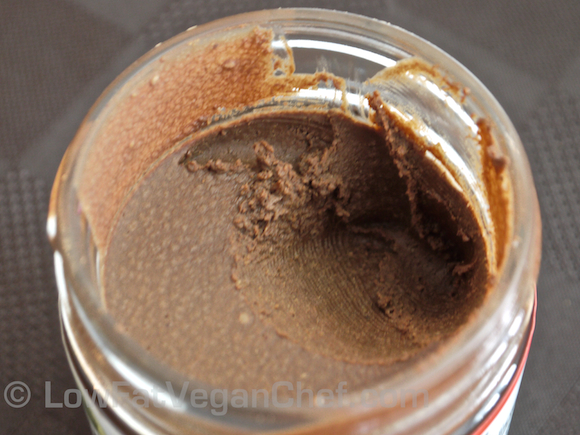
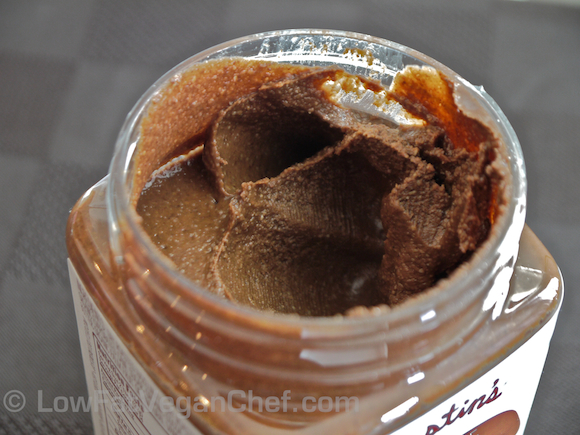
Here is what the chocolate hazelnut butter looks like inside. It’s very solid looking and actually looks like cacao or coconut butter. If you seen these you might see the resemblance. There’s little white solid flecks in it, and this is the oil, solidified.

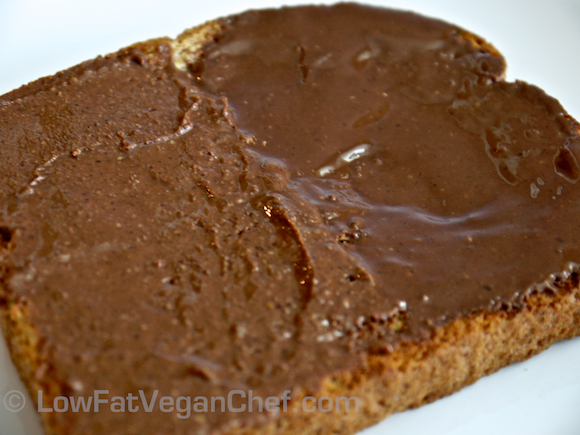
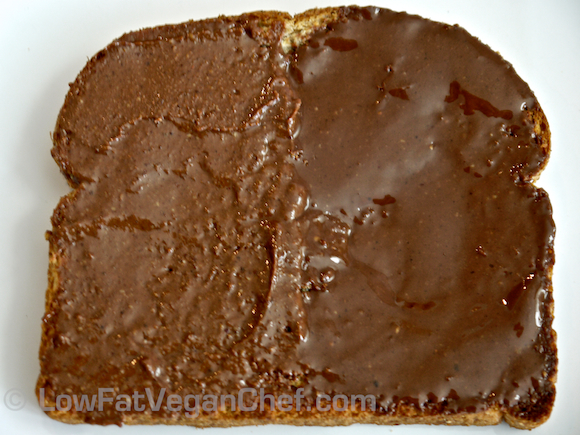
Here is a comparison on warm toast for you. Justin’s Chocolate Hazelnut Butter Blend is on the left and New World Natural Food’s Chocolate Hazelnut Butter is on the right.  Immediately I could tell the difference in the two. The one on the right melted very quickly into a liquid. Justin’s was a little harder to spread but more like a nut butter.  New World Natural Food’s was more like chocolate sauce when spread.

Here it is again from up top.

So there you have it, there are at least TWO options for vegan chocolate hazelnut butter for you. Justin’s also makes chocolate peanut butter and chocolate almond butter (it is cheaper than the hazelnut butter) if you’re looking for a more affordable treat for your family.

Like I said I was mostly curious because there was a lack of vegan options for this kind of product and I remember eating Nutella as a kid. If it’s your only source of nuts for the day and you have 1 or 2 tbsps, you should be ok. If you’re still eating oils, lots of nuts and avocados and meat and dairy however, this may be a diet of too many rich foods already. Adding this on top of it won’t be healthy.

So which one do I prefer? Hands down I prefer Justin’s Chocolate Hazelnut Blend.  I like that it isn’t too sweet, it’s a little thick, it doesn’t melt into chocolate sauce and it’s ingredients are much more natural than Nutella. For an occasional treat I like this product and they make a ton of different nut butters you can get at Whole Foods Market as well.

Have you ever tried a vegan chocolate hazelnut butter? What did you eat it with?


Filed Under: Articles, Product Reviews Tagged With: chocolate, hazelnuts, soy-free, strawberries

Sneak Peek Recipe: Mexican Black Bean Corn Soup From Low Fat Vegan Comfort Soups To Keep You Warm

March 22, 2012 by Veronica Grace 36 Comments


Fb-Button

And the winner of my first copy of Comfort Soups To Keep You Warm is….


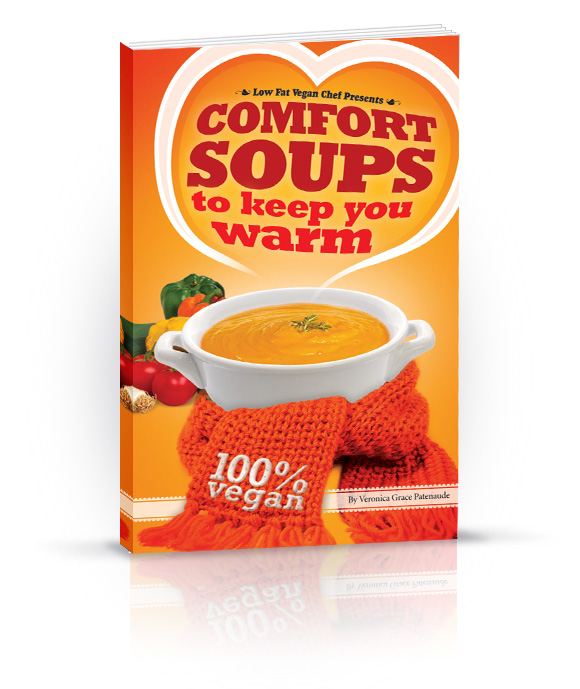
Low Fat Vegan Comfort Soups To Keep Warm

….Meena Sharma! Congratulations Meena, I will be contacting you shortly to let you know you’ve won.

Thank you to everyone who entered! I really appreciate your support and excitement. My Comfort Soups To Keep You Warm recipe eBook is now ready so check it out!

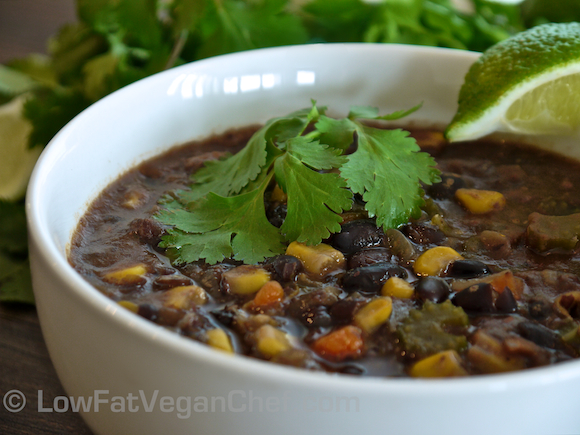
After all of those tantalizing soup photos I showed you on Monday, I bet you are craving a delicious bowl of soup by now! So I wanted to share one of my soup recipes with you. This oil free vegan Mexican Black Bean Corn Soup is one of my favourites, it’s so hearty and filling and bursting with flavour. You’re going to want to make this soon!

An insider tip I have for you is to make your own vegetable broth (my recipe is here)  and fresh black beans (instead of canned) for the absolute best taste. But if you’re in a hurry, you can always use canned black beans. For packaged vegetable broth the best substitute seems to be Pacific Natural Foods Organic Low Sodium Vegetable Broth. Roasted cumin and chipotle chili powder bring great flavour to this recipe. If you can find it over the regular versions it adds a really nice smokey flavour to the soup. I use McCormick roasted cumin, you can get it on Amazon or at places like Walmart or some grocery stores. This is probably my favourite seasoning and I go through more of it than any other spice. You’ll definitely use it a lot if you make my recipes. I also use Frontier organic chipotle powder in all of my Mexican dishes and it’s amazing in vegan chili too.

Now on to the recipe!

Low Fat Vegan Mexican Black Bean Corn Soup


Low Fat Vegan Chef's Mexican Black Bean Corn Soup

Serves 8

Ingredients:

1 large onion, diced
6 cloves of garlic, minced
3 stalks of celery, diced
2 carrots, diced
5 cups/1.25 qts./1.2 L of vegetable broth (homemade or low sodium)
4 15 oz./425 g cans of black beans, low sodium (or 7 cups cooked) undrained
1 15 oz./425 g can of whole sweet corn, drained (salt free, unsweetened)
1 14.5 oz./411 g can of fire roasted tomatoes, diced (I use Muir Glen Organics)
1 tbsp. + 1 tsp. roasted ground cumin (or regular cumin)
1 to 1 1/2 tsp. chipotle chili powder or smoked paprika
1/2 tsp. Herbamare or salt (to taste)
1/2 tsp. sugar or sweetener (if needed)
Juice of 1 small lime
Fresh ground pepper to taste
1/2 bunch of cilantro, chopped to garnish

Directions:

1. In a large pot, sauté the onion, celery, carrots and garlic in 1 cup of vegetable broth over medium heat for 6-7 minutes. Add chipotle chili powder, roasted cumin, and black pepper and cook for another minute or two. Stir in the remaining vegetable broth, 4 cups (or 2.5 cans) of beans, and sweet corn. Turn to high heat and bring to a boil.

2. Add remaining 3 cups (or 1.5 cans) of beans and crushed tomatoes to a Vitamix or blender and process until smooth. Stir into soup when boiling, reduce heat to medium, and simmer for 15 minutes until beans and vegetables are done to your desired tenderness.

3. Taste test. Add Herbamare or salt to taste and lime juice. If your soup is a little too tangy or bitter, you can add a little sugar to balance the flavor if desired.

4. Serve in bowls and garnish with fresh chopped cilantro

Nutrition Facts: 8 Servings Amount Per Serving: Calories 225.8 Total Fat 0.2 g Saturated Fat 0.0 g Sodium 485.5 mg Carbs 42.6 g Dietary Fiber 16.9 g Sugars 4.1 g Protein 13.6 g

——————–

So now on to the contest for the second copy of my Comfort Soups To Keep You Warm eBook! This second contest entails a little more than the last one. If you complete it, your chances of winning are much much higher!

—–>How You Can Win The Second Copy of My eBook<—–

Contest is Closed

To be entered you need to post a comment on this article and let me know what you think of the Mexican Black Bean Corn Soup, AND you need to pick 4 other recipes on my blog and comment on them as well. If you can number your FIFTH (#5) comment (to show you are done) when you post it on another recipe, it will also help me track them. Comment #1 can be done here.

But, good new for those of you who have been following along and commenting on my recipes, your old comments on my recipes count too. So if you’ve already commented on one or two recipes, those count and you just have to comment on this one and make sure you have 5 comments total. If you number your 5th comment to let me know you’ve completed the challenge, it will be helpful for me to track.

I will take all of the commenters with 5 comments on recipe posts (including this one) and enter them into a random draw to win a second copy of my recipe eBook. The contest closes on Saturday March 24th at midnight EST/9pm PST and then I will announce the winner on Monday March 26th. Make sure you’re signed up to my newsletter to find out if you’ve won! (You can sign up on the top right of this page in the bright pink box.)

—————————————–

The winner of the second copy of Comfort Soups To Keep You Warm  is Vicky Johnston! Congratulations Vicky!

My recipe book is now available!

Filed Under: *My Recipe Books, Eat To Live - Dr. Fuhrman Recipes, Mexican, Soups and Stews Tagged With: black bean, cilantro, corn, fat-free, gluten-free, mexican, nut-free, soup, soy-free, stew

How To Make Dr. Fuhrman’s Eat To Live “Anti Cancer Soup” With Step By Step Photos

February 27, 2012 by Veronica Grace


Fb-Button

Dr. Joel Fuhrman's Eat To Live Anti Cancer Soup

FTC Notice: This post contains affiliate links that go towards supporting the blog.

Holy mackerel this “Anti Cancer Soup” recipe makes a ton of soup! You can eat for a whole week off of this one recipe. I decided to try and document Dr. Fuhrman’s famous “Anti Cancer Soup” as it seemed like a fairly intensive recipe and I took it as a challenge to make a soup an entirely new way. For this recipe you’re going to need a good juicer that can handle juicing a lot of carrots and celery. This is the one I use, it’s a medium priced Breville juicer and it does the job.

I met Dr. Joel Fuhrman last February (2011) at Dr. John McDougall’s 3 Day Advanced Study Weekend and he mentioned in his lecture about chopping onions, cooking them and then blending them into the soup for some additional nutritional benefits on how everything combines together. I do NOT remember the exact processes going on, he had a very scientific explanation for this. I will have to watch the recording of the lecture again to get it straight. But all you need to know is, this soup is HEALTHY for you and highly recommended by Dr. Fuhrman as a nutrient dense soup that’s crammed with veggies. Might I just add that Dr. Fuhrman is totally ripped and in amazing shape and his “Disease Proof” diet is definitely working well for him. I saw some pictures of his wife and daughters and they are all very slim and quite beautiful too. He should be very proud to have such a happy and healthy family setting such a great example on a oil free plant based diet.

I just finished up a low fat vegan recipe book of my own called Comfort Soups To Keep You Warm, so I’ve made quite a bit of soup these past few months. I have actually nicknamed myself the “Vegan Soup Queen”  I’ve made so much soup lol! Dr. Joel Fuhrman’s “Anti Cancer Soup” recipe comes from his book Eat To Live (which is actually less than $10 on Amazon right now so check it out.) One thing about this anti cancer soup is that you can definitely tell it was designed by a man without any need for great culinary skills. It is very simple in presentation as everything is pretty much just blended together, and it’s something that you start cooking while you continue to prep the rest of your veggies as you go. So this seems very practical, albeit because of the amount of soup this recipe makes it can be a bit of work. What I like most about Dr. Fuhrman’s recipes is that they are oil free and really healthy, so this is right up my alley and I am happy to be able to make his recipes without any major modifications.


Dr. Fuhrman recommends that you make a big pot of this once and then eat it for the rest of the week, or freeze portions of it. It does take much more time and effort than my other soup recipes, but it makes a ton of soup and if you’re only doing this once or twice a month on a Sunday afternoon it’s no big deal. Better yet, get a helper to help you prep the veggies and then you can relax in between cooking steps! I really wish I had had a helper… haha Since his “Anti Cancer Soup” is such a big recipe with so many ingredients I wanted to estimate the cost of making it. Now just FYI this is approximately what I paid in Canada at a discount grocery store in 2012, and none of these items were bought in bulk. If you live in the USA and/or buy in bulk it will probably be a bit cheaper. But if you buy all organic produce it will definitely cost more.

Split peas ~$0.50
Raw cashews ~$5
Onions ~$5
Zucchini ~$4
Carrots ~$3
Celery $2.60
Leeks $3.49
Mushrooms $4.50

Total Cost: ~ $28.09

Divided by 12 servings:

$2.34 a serving

Dr. Joel Fuhrman's Eat To Live Anti Cancer Soup

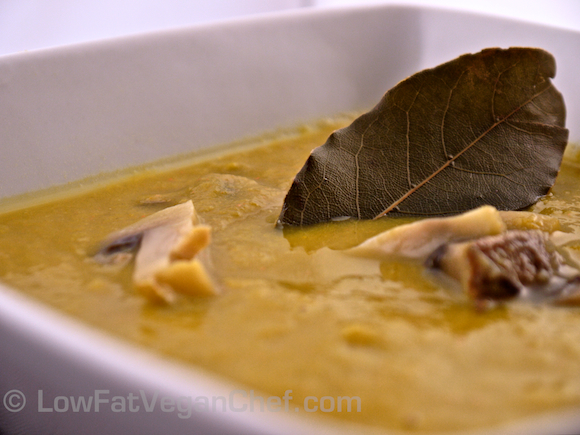
So when you divide the “Anti Cancer Soup” costs out by the number servings (and you will get at least 12 servings) it’s not too expensive. It’s a little less than the price of an organic canned soup and definitely less than buying lunch somewhere else. If I had to describe the taste of this anti cancer soup I would say that it mostly tastes like mild split peas with leeks and mushrooms. It’s not very strong tasting or in any way offensive. You can definitely eat it as is, or add some more herbs or spices to it. When I make soup I like to add things like thyme, bay leaves or other seasonings. I like really flavourful soups.


Now on to my step by step (with photos!) instructions on how to make this soup. My soup recipes have way less directions btw, I just wanted this to be clear as even I was scratching my head at all the steps when I made it the first time. It also looked very strange while cooking, so I didn’t want anyone else to be afraid or discouraged and not know what to expect! I took over 100 pictures of this recipe preparation! I hope you enjoy it. 🙂 Dr. Fuhrman also likes to add a cruciferous leafy green to his soup now too. So you can add a bunch or two of kale (stems removed) or collard greens if you desire.
Dr. Fuhrman’s Anti Cancer Soup (From Eat To Live) With A Low Fat Vegan Chef Twist

Total Time: 1 h 30 min

Serves 12

Ingredients:

1 cup dried split peas (green)

4 cups/1 L filtered water

4 large onions

4 large zucchinis or 8 small

3 medium leeks

leafy greens, broccoli or cauliflower (optional, about 2 bunches)

5 lbs./2.26 kg carrots

2 bunches of celery

1 cup raw cashews (un-roasted, unsalted)

1 lb/454 g mushrooms

2 tsp granulated garlic powder (his recipe has 2 tbsp VegiZest)

2 bay leaves (my addition)

1- 1 1/2 tsp Herbamare or salt (my addition)

Directions:

How To Make Dr. Joel Fuhrman's Eat To Live Anti Cancer Split Pea Mushroom Soup

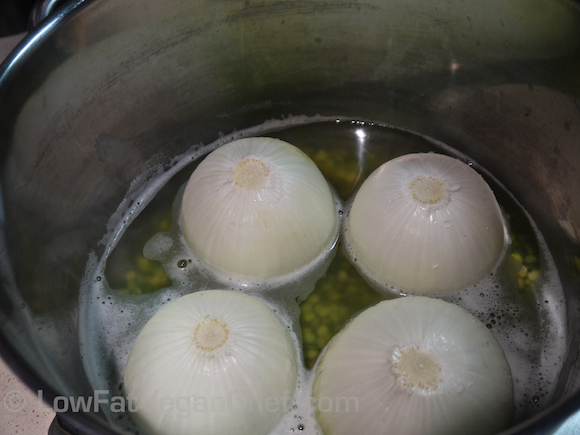
In a large 6 qt soup pot add 4 cups/1 L of water and the split peas and bring to a boil. Slice off the tops of the onions, shave off the roots and peel the outer skins and place them into the pot whole. (Update: Fuhrman now recommends cutting the onions up so their enzymes can react while cooking as this increases their nutrition.) Cover with a lid to start the steaming process. Once at a boil reduce  heat to medium low.


How To Make Dr. Joel Fuhrman's Eat To Live Anti Cancer Soup

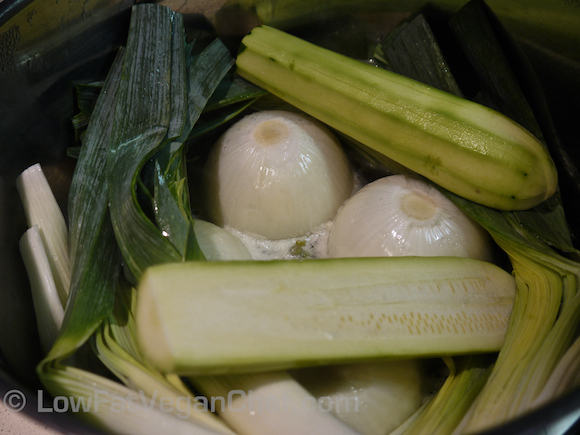
Peel the zuchinnis, and place in the pot uncut. (If they are large cut them in half lengthwise). Cut the bottom roots off the leeks and slice them up the side so each leaf can be thoroughly washed, because leeks have lots of dirt hidden inside. (This is a good tip, I found a little worm in one of my leaves. Gross.) Cut off the top inch of the leeks and discard. Then place the entire leek (leaves uncut) into the pot and cover again.

How To Make Dr. Joel Fuhrman's Eat To Live Anti Cancer Split Pea Mushroom Soup Peel and Juice Carrots

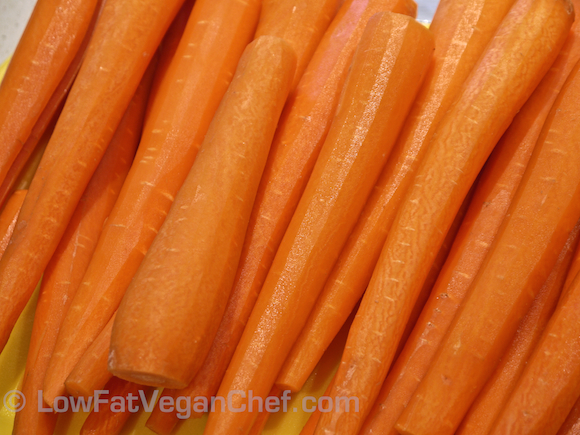
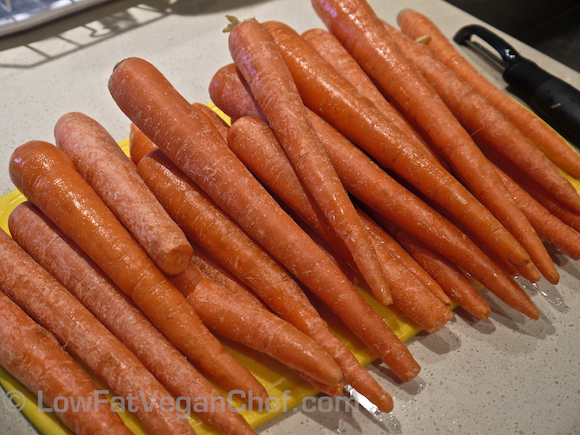
Oh, so THAT’S what 5 pounds of carrots look like…

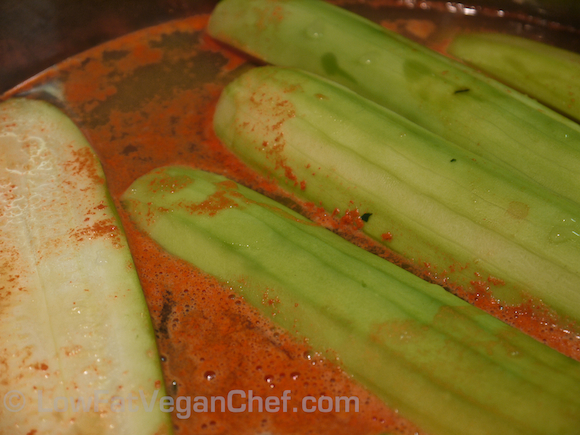
How To Make Dr. Joel Fuhrman's Eat To Live Anti Cancer Split Pea Mushroom Soup Peeled Carrots

Peel the carrots. (If they are organic, this is optional) Whew that was hard…


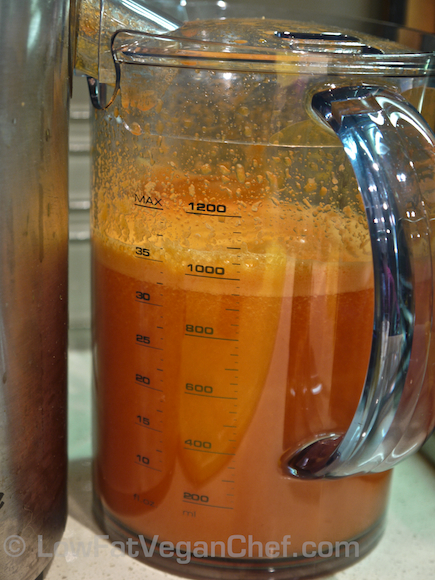
How To Make Dr. Joel Fuhrman's Eat To Live Anti Cancer Split Pea Mushroom Soup Carrot Juice

That’s a lot of juice! About 32 ounces worth

Juice the carrots in a juicer.

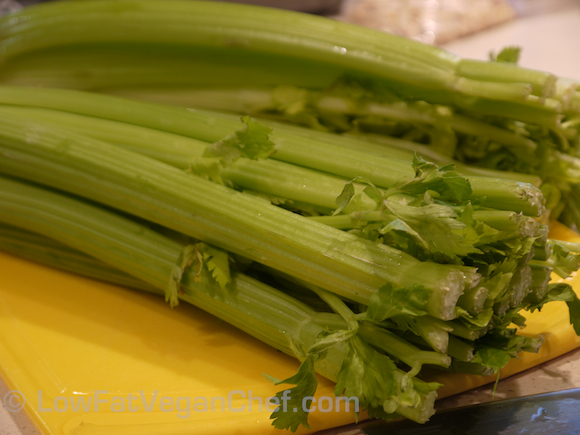
How To Make Dr. Joel Fuhrman's Eat To Live Anti Cancer Split Pea Mushroom Soup Celery

Wash the celery and cut off the tops and bottoms.

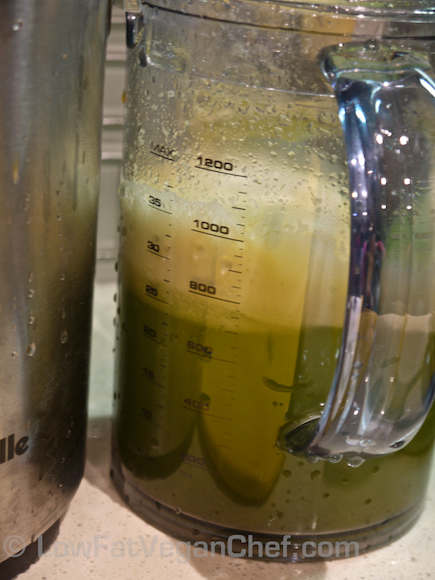
How To Make Dr. Joel Fuhrman's Eat To Live Anti Cancer Split Pea Mushroom Soup Celery Juice

Makes about 22-23 ounces

Juice celery in a juicer.


How To Make Dr. Joel Fuhrman's Eat To Live Anti Cancer Split Pea Mushroom Soup

(Ok now this is starting to look like witches’ brew….)

Add the juices to the pot.

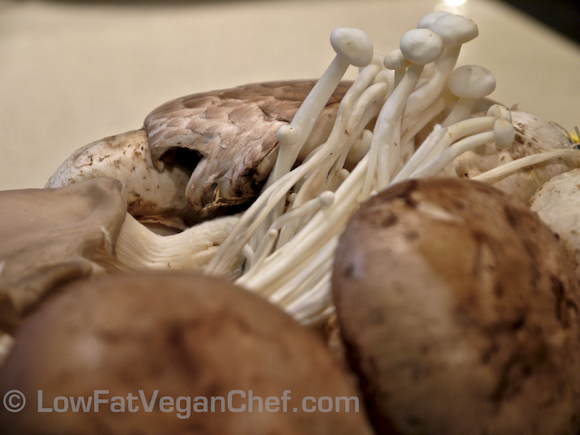
How To Make Dr. Joel Fuhrman's Eat To Live Anti Cancer Split Pea Mushroom Soup Mixed Mushrooms
I got a 1 lb pack of mixed mushrooms for variety. Really it was just a few different mushrooms on top of a layer of dirty white mushrooms… Marketing can be deceptive!
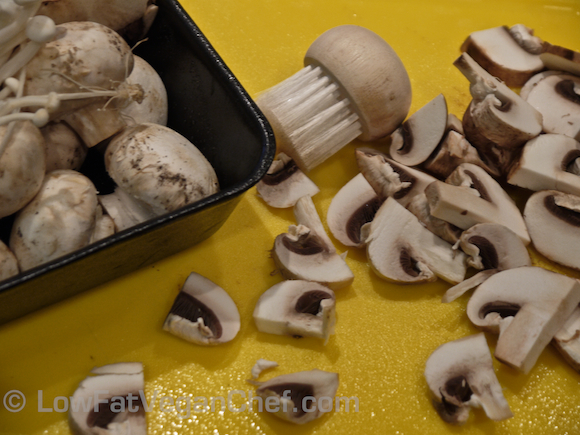
How To Make Dr. Joel Fuhrman's Eat To Live Anti Cancer Split Pea Mushroom Soup Cleaning And Chopping Mushrooms

While the soup is simmering, clean the mushrooms with a mushroom brush. Cut and slice up the mushrooms. By the time you get to this stage, the zucchini, leeks, onions should be soft. If they aren’t just keep cleaning and chopping the mushrooms.

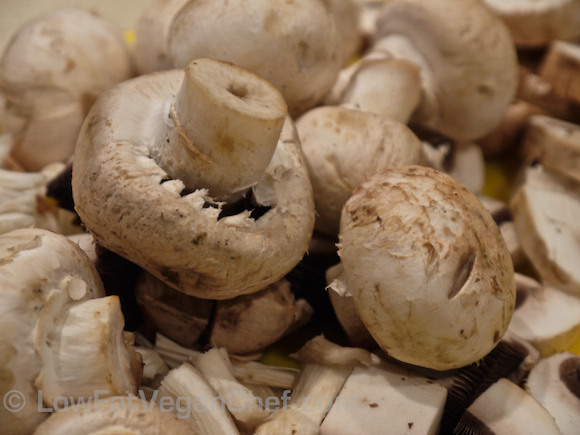
How To Make Dr. Joel Fuhrman's Eat To Live Anti Cancer Split Pea Mushroom Soup Cleaned Mushrooms

Pretty mushrooms…

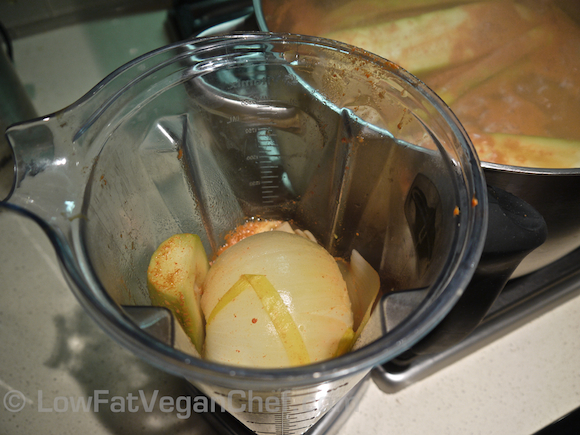
How To Make Dr. Joel Fuhrman's Eat To Live Anti Cancer Split Pea Mushroom Soup Blending Soup in Vitamix


Ladle some of the liquid from the pot into a Vitamix or food processor. Use tongs to remove the soft onions, zucchini, and leeks. Be careful to leave the split peas or beans in the bottom of the pot.

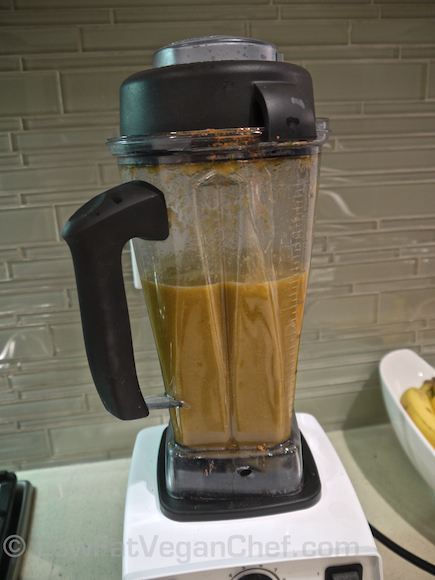
How To Make Dr. Joel Fuhrman's Eat To Live Anti Cancer Split Pea Mushroom Soup Blending Soup In Vitamix

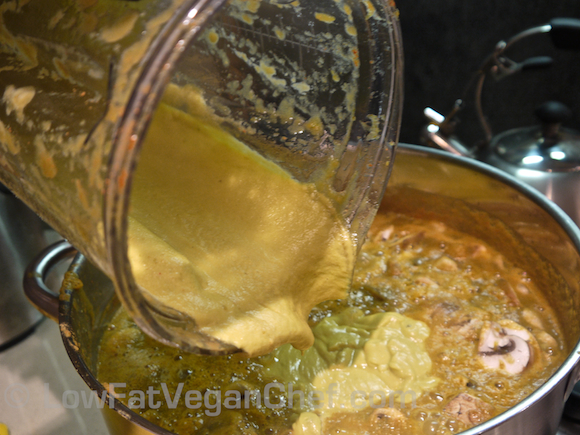
In a few separate batches, completely blend together the onions, zucchini, and leeks. Pour the blended mixture back into the pot.

How To Make Dr. Joel Fuhrman's Eat To Live Anti Cancer Split Pea Mushroom Soup Blending Soup In Vitamix

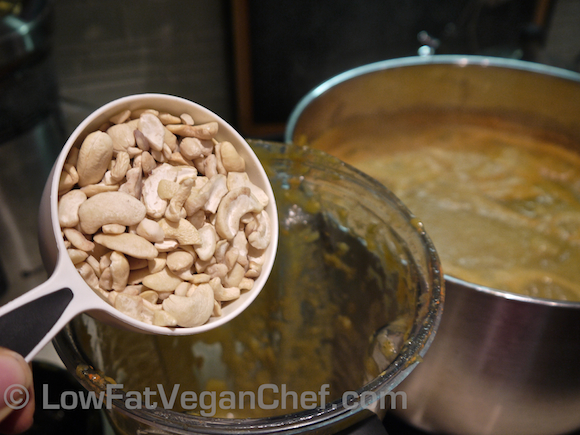
How To Make Dr. Joel Fuhrman's Eat To Live Anti Cancer Split Pea Mushroom Soup Adding Cashews To The Soup

Add a lot of liquid to blend the cashews, don’t make the same mistake I did or it will become thick like cashew butter.


Add more soup liquid (lots) and cashews to the mixture, and blend in.

How To Make Dr. Joel Fuhrman's Eat To Live Anti Cancer Split Pea Mushroom Soup Adding Cashews To The Soup

Return the blended, creamy mixture back to the pot.

How To Make Dr. Joel Fuhrman's Eat To Live Anti Cancer Split Pea Mushroom Soup Adding The Mushrooms

Add the sliced mushrooms and bay leaves. Simmer another 20-30 minutes until mushrooms are tender.

(This time I used to cleaned my kitchen, which now looked like a soup bomb went off in it! The funny part is, this is EXACTLY what Dr. Fuhrman and his wife do too. See how this recipe is obviously designed by a man? Very practical. haha)

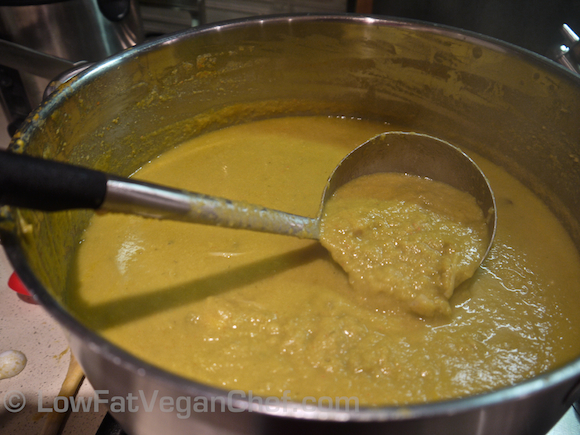
How To Make Dr. Joel Fuhrman's Eat To Live Anti Cancer Split Pea Mushroom Soup Blended


Season to taste with granulated garlic and Herbamare or other salt free seasonings if desired.

How To Make Dr. Joel Fuhrman's Eat To Live Anti Cancer Split Pea Mushroom Soup

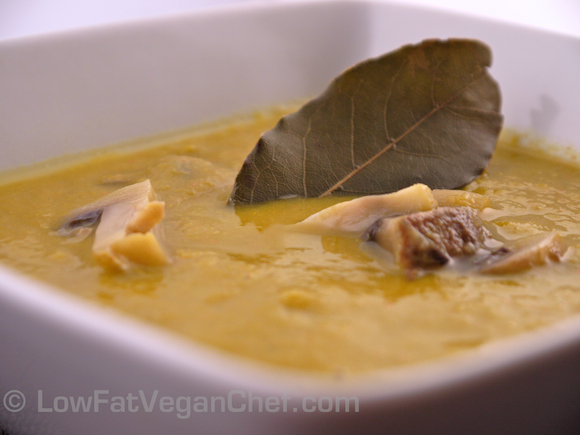
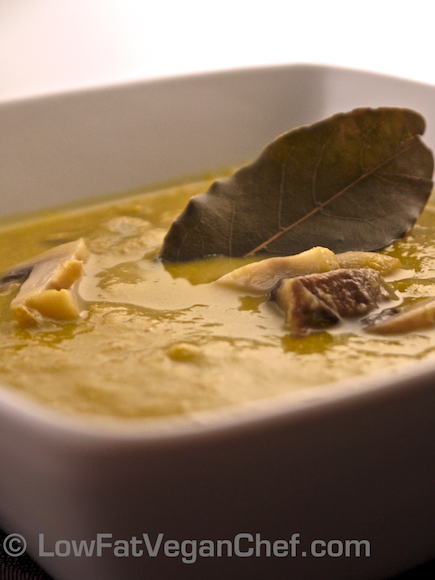
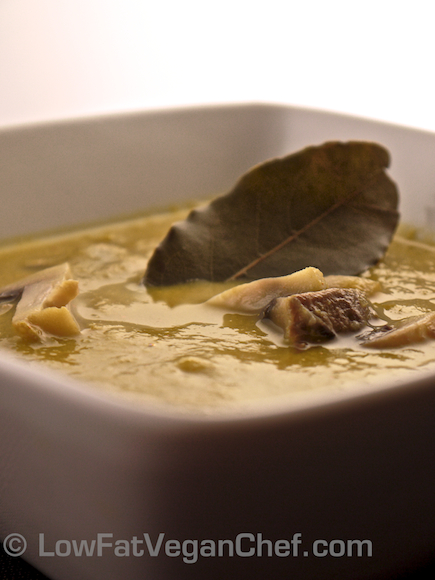
Remove bay leaves and serve. (Now that your kitchen is clean you can sit down, relax and enjoy!)

How To Make Dr. Joel Fuhrman's Eat To Live Anti Cancer Split Pea Mushroom Soup

If you LOVED this recipe you’ll love my new ebook Comfort Soups To Keep You Warm:

You WILL have lots of leftovers from Dr. Fuhrman’s “Anti Cancer Soup”. Save the rest in containers and use for lunches for the next week. Might I add that this was probably the hardest soup I’ve had to make look delicious in a photo. I tried really hard. It tastes better than it looks!

Nutritional Information: 12 Servings

Amount Per Serving: Calories 179.2 Total Fat 1.0 g Sat. Fat 0.2 g Poly Fat 0.5 g Mono Fat 0.1 g Cholesterol 0 g Sodium 593 mg Potassium 1,577.9 mg Carbs 40.0 g Fiber (unknown due to carrot and celery juice data unavailable) Sugars 12.7 g Protein 7.1 g


Filed Under: Eat To Live - Dr. Fuhrman Recipes, How To, One Pot Meals, Soups and Stews Tagged With: Carrots, celery, Eat To Live, Fuhrman, gluten-free, Leeks, mushrooms, soy-free, split-peas

Raw Vegan No Fat Sweet Onion Salad Dressing Recipe And Why Fast Food Salads Are Bad For Your Health

February 6, 2012 by Veronica Grace 38 Comments


Fb-Button


Raw Vegan Fat Free Sweet Onion Salad Dressing Recipe

This is an oil free and fat free  bonus recipe that comes in my Savory Raw Dinner Recipes book and ebook (not shown in the dvd) that I’m going to share with you today. If you are looking for some amazingly delicious and healthy raw food recipes, please check it out. I’ve gotten so much positive feedback on my spin on oil free raw vegan dinner recipes. (Scroll down for the recipe.)

Travel update: We are back home now in Vancouver, BC this week after spending 2 months in Corpus Christi, Texas and enjoying the sun down there (and avoiding the dark clouds and rain here). It’s nice to be back home, but it feels a little surreal. I have to get used to my kitchen again and finding all of my seasonings and kitchen gadgets. So I’m going to ease back into making recipes, as I’ve totally broken my groove from traveling and moving back in and unpacking everything.

Sweet onion dressing was one of my favourite dressings I used to buy from a bottle (because it’s low fat), but it’s filled with high fructose corn syrup, so I decided to make my own and it tastes pretty similar and is much healthier.

Why Do I Make And Prefer Fat Free Raw or Vegan Salad Dressings?

Well because salad is supposed to be healthy and full of nutrients, and not be a fat bomb of a meal. When I was at the Houston, TX airport we grabbed a bite to eat at Wendy’s and I was just curiously looking around me at what other families were getting. I noticed the woman beside me was eating what she thought was a really healthy meal, because there were no burgers or fries in sight: a BLT Cobb Chicken Salad, a cup of chili and a large soda.

Now I don’t know if you know this, but all restaurants and fast food companies market their salads to women, especially mothers and older women who are trying to eat healthier, watch their weight (or lose weight) as their children and husbands love ordering a burger and fries regularly. Everyone generally thinks burgers and fries are less healthy and salads are on the top of the list of healthy meals so this can be misleading when it comes down to the details.

The woman who ordered this was also probably 35-45 lbs over her ideal weight. I don’t say this to be critical, just to give you an idea of who buys these fast food salads and how they are being seriously deceived. The thing that shocked me the most was that she squeezed every last drop of dressing out of her packet and then proceeded to suck on the packet just to double check! Gross! I thought people knew these dressings were very fatty and to only use half the packet or less. I guess not in Texas…

Why Wendy’s and Fast Food Salads Are

NOT Healthy and Actually Bad For You.

Let’s take a look at her “healthy” Wendy’s meal. <- Go here for the nutritional info.

BLT Cobb salad, chicken, bacon, feta cheese, tortilla strips, dressing

Let’s add up her totals here just to get an idea of how “healthy” this meal is. I’ll pretend she only got a small soda, as Wendy’s doesn’t want to acknowledge people drink more than this… yeah right!

 Menu Item  Calories     Fat    Sat Fat   Cholest  Sodium   Fiber
Wendy’s BLT Cobb Salad  450  25g  11g  270mg  1610mg  3g
Thousand Island Dressing  160  15g  2.5g  15mg 290mg  0g
Large Chili  310  9g  3.5g  60mg  1330mg  10g
Small Cola Or Sprite 160  0g 0g  0g  0mg  0g
Total:  1080  49g  17g  345mg  3230mg  13g
 Rec. D. Allowance:  2000  65g  20g  300mg  1500mg  25g


Thousand Island Dressing is the highest calorie dressing they offer. Avoid it at all costs!

Sodas: Wendy’s CONVENIENTLY only lists the amounts for a SMALL cup of every beverage in their nutritional info. This is insanity. Combo meals come with a medium or large drink! This is total deception.

This salad meal with chili is over half the recommended daily calories for an athletic adult women or an inactive man. Most woman in their 40-60’s only need 1600-1800 calories if they are fairly sedentary. So the RDA of 2000 calories is obviously too high for her. It blows the RDA for cholesterol and sodium out of the water, and is almost maxing out the fat and sat fat for the entire day.

Let’s compare this to a typical combo meal at Wendy’s, just to see how it stacks up as a “healthy choice” for woman.

Menu Item  Calories      Fat  Sat Fat   Cholest        Sodium   Fiber        
Single 1/4 pounder  580  33g  14g  105mg  1240mg  3g
Med. Fries  420  21g  4g  0mg  450mg  6g
Small Cola or Sprite  160  0g  0g  0g  0g  0g
 Total:  1160  54g   18g  105mg 1690mg 9g
Diff Between Salad Meal and Burger Combo  -80  -5g  -1g  +240mg  +1540mg  -3g


There isn’t any real health benefit in going for a salad with chicken, bacon, feta cheese, creamy dressing, croutons/tortilla strips, and ground beef chili instead of a burger and fries. You save a little bit of calories, but let’s face it, if you’re a woman you blew your calorie budget for almost 2 meals on one meal, and you killed your cholesterol and sodium recommendations for the day. This is bad news for your heart, arteries, blood pressure, and waistline ladies. Don’t be fooled that restaurant and fast food salads are in ANY way shape or form healthy, low in fat, or low in calories. If you want a salad, the best bet is to bring your own fat free dressing (store bought or homemade) and get a large green garden salad. No croutons, no cheese, no bacon, no meat, no fried noodles, no tortilla strips etc. You can also bring or order a fruit plate, fruit cup, piece of fruit (if available). Or try going somewhere that can do steamed vegetables and plain rice, that’s a healthy meal as well.

Now, are you curious what we got instead at Wendy’s? Bet you had no idea you could eat Low Fat Vegan at Wendy’s!

We got a side salad and a plain baked potato each with a small packet of Italian dressing (they didn’t have light so we made do).

(DO NOT eat the fried croutons this can come with the garden salad!)

Menu Item:  Calories  Fat  Sat Fat  Cholest  Sodium  Fiber
 Wendy’s Garden Side Salad  25  0g  0g  0g  30mg  2g
 Wendy’s Plain Baked Potato  270  0g  0g  0g 25mg  7g
 Italian Vinaigrette (Low Fat)  70  6g  1g  0g  180mg  0g
 Total:  365  6g  1g  0g  235mg  9g


This is your best option at Wendy’s for a low fat, filling, nutrient and fiber rich meal. You can even get an extra baked potato for a more filling meal.

If you want to know more about why oils, nuts and seeds are NOT good for your health check out this great dvd by vegan RD and Nutritionist Jeff Novick      From Oil To Nuts. It will dispel every half truth and myth you’ve ever heard about oils and nuts being “heart healthy”, “good for weightloss” “super foods” and more. I’ve shown it to all of my friends and they were just shocked. They are much more conscientious about their food choices now and have lost weight and lowered their cholesterol and risk for heart disease and cancer.

Wow, what a difference it makes just ordering vegan sides (that are not deep fried and free of creamy dressings/butter/margarine) compared to the regular fast food fare. You can get a large snack or a mini meal, for about $3.50 or less. If you want a larger meal, just order 2 baked potatoes. We always skip the butter, margarine, sour cream and fatty dressings. You can use ketchup or a vinaigrette to season it, or better yet bring a little packet or container of salsa, or barbecue sauce etc if you’re planning ahead.

It is actually NOT that hard to eat vegan and relatively low fat when traveling. Of course it’s not 100% unrefined and ideal, but it’s a heck of a lot better than just saying oh well and getting that pack of fries or fatty oil and cheese salad like many vegans and vegetarians do.

Our first option of course when in airports is always to scope out the Asian food and look for steamed veggies, rice, vegan sushi rolls, rice paper wraps, or stir fries. Keep that in mind next time, if you are new to eating vegan or low fat vegan and worry about eating on the go.

Now on to my recipe oil free vegan salad dressing recipe.

This is a really easy no oil, fat free vegan salad dressing recipe that you can make with ingredients you probably already have on hand. I know I had all of these already, so it was simple enough. I put mine into an empty condiment style bottle so it could be squirted easily on the salad in small amounts.

(Oil Free) No Fat Raw Vegan Sweet Onion Salad Dressing


Makes about 1 1/2 cups of dressing

Ingredients:

5-6 tbsp of apple cider vinegar
1 cup peeled cucumber, chopped
1 clove of garlic
1 cup of sweet vidalia onion, diced (about 1/2 large onion) (Walla Walla is another variety you can use too)
8 small dates, pitted
1/4 tsp salt
pepper to taste
2+ tbsp water (to blend or thin as necessary)

Directions:

1. Place ingredients into a Vitamix or food processor and blend until smooth.
2. Taste test and adjust seasonings if desired.
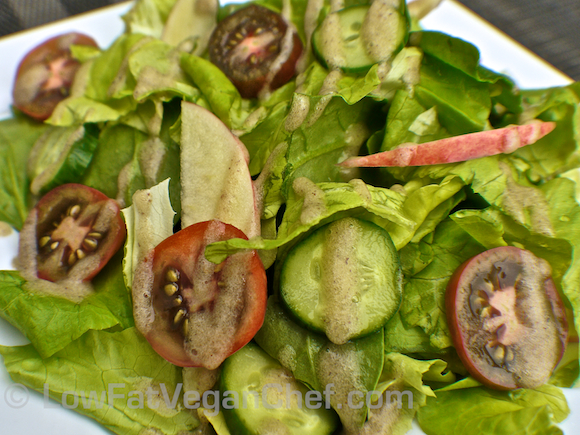
3. Serve over green salad and refrigerate any leftovers.

Tip:

To make the onion flavour more mild, you can chop the onion in advance and let it sit out or in the fridge and oxidize so that some of the strong oils dissipate and it won’t be as intense.

This is a dressing I would use in smaller quantities because of the bite. I wouldn’t make an entire family sized salad with it, and eat it myself. It might sting your tongue a little if you eat the whole recipe in one meal. Side salads or a medium sized salad would be best with this recipe.

For more information on Savory Raw Dinner Recipes click here

What do you think of this recipe? What was your favourite salad dressing you now make vegan or raw?

Filed Under: Articles, Eat To Live - Dr. Fuhrman Recipes, Raw Dressings, Raw Vegan Recipes Tagged With: fat-free, gluten-free, nut-free, onion, raw, soy-free, vitamix

  • « Go to Previous Page
  • Page 1
  • Interim pages omitted …
  • Page 6
  • Page 7
  • Page 8
  • Page 9
  • Page 10
  • Page 11
  • Go to Next Page »

Primary Sidebar

Follow Us:

Newsletter

Get The Low Fat Vegan Starter Kit

natural organic skin care line

Free Skincare Samples

Earn Free Crypto At Binance

Earn Free Bitcoin on Gemini Exchange

Earn $10 in Bitcoin With Gemini Exchange
Dr. Fuhrman
Dr. Fuhrman
Dr. Fuhrman

Tags

80/10/10 apple avocado banana blueberries breakfast broccoli Carrots celery chickpeas cilantro corn cucumber Curry dill dinner easy Eat To Live fat-free gluten-free how-to Indian Dishes lemon low-fat mango mexican mushrooms nut-free oil-free pasta pineapple plant-based raw raw vegan rice smoothie soup soy-free spinach tofu tomato tomatoes vegan vegetarian vitamix

Secondary Sidebar

Recipes:

  • Cooked Vegan Recipes
  • *My Recipe Books
  • Breads and Baked Goods
  • Breakfast
  • Brunch
  • Burgers
  • Casseroles
  • Curries
  • Desserts
  • Dinner
  • Dips for Veggies or Chips
  • Eat to Live-Dr. Fuhrman Recipes
  • Engine2Diet
  • Ethiopian Dishes
  • Greek
  • Green Dishes
  • Holiday
  • Indian Dishes
  • Mexican
  • One Pot Meals
  • Pasta
  • Pizza
  • Quinoa
  • Salads
  • Sandwiches and Wraps
  • Raw Vegan Recipes
  • 80/10/10
  • Raw Breakfast
  • Raw Desserts
  • Raw Dips
  • Raw Dressings
  • Raw Entrees
  • Raw Juices
  • Raw Salads
  • Raw Smoothies
  • Raw Snacks
  • Raw Soups
  • Sauces
  • Side Dishes
  • Slow Cooker Recipes
  • Snacks
  • Soups and Stews
  • Spices/Seasonings
  • Sushi
  • Thai
  • Vietnamese

Copyright © 2025 · Foodie Pro & The Genesis Framework