• Skip to primary navigation
  • Skip to main content
  • Skip to primary sidebar
  • Skip to secondary sidebar

Plant Based U

Fat-Free and Low Fat Vegan Plant Based Recipes

  • Home
  • Recipes
    • Raw Vegan Recipes
    • Cooked Vegan Recipes
    • Eat to Live Dr. Fuhrman Recipes
  • Products
  • Coaching
  • Videos
  • Articles
  • About
    • What Is Low Fat Vegan/Whole Foods Plant Based
    • Resources
  • Contact

Quick Lower Fat Vegan Pad Thai Recipe (Rice Stick Noodles with Veggies in Spicy Peanut Sauce)

May 7, 2012 by Veronica Grace 24 Comments

Fb-Button

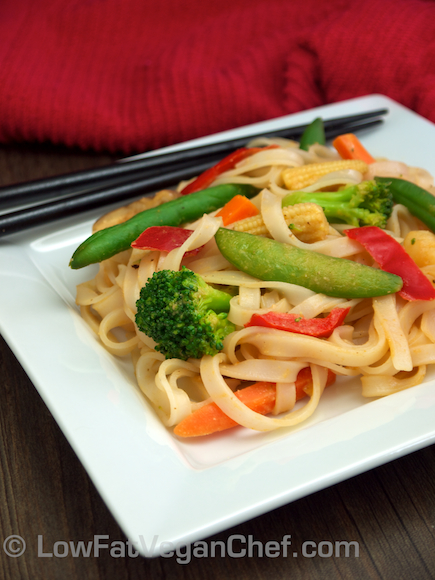
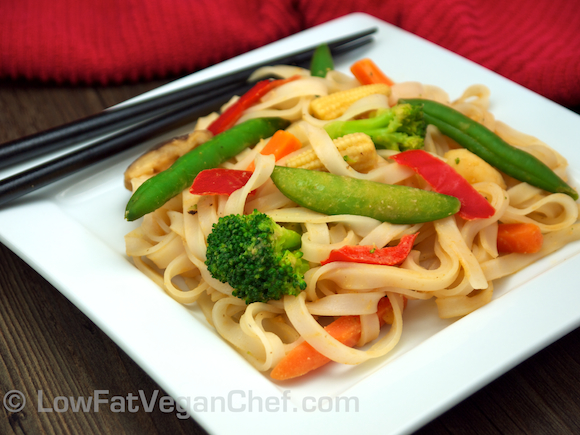
Low Fat Vegan Quick Pad Thai With Rice Stick Noodles Veggies and Peanut Sauce

Have you ever had a craving for Pad Thai or stir fried noodles so badly, but you didn’t really feel like cooking or have much time to throw something together? Or maybe Pad Thai is one of your favourite dishes but you don’t know how to make an easier version at home. If this sounds like you, then I know you’re going to love this recipe!

My Quick Lower Fat Pad Thai recipe has all the best parts of authentic Pad Thai, but it skips the oil, the eggs and the fuss. Generally Pad Thai is very oily as they fry the noodles in lots of oil so the noodles don’t stick to the pan or each other, but if you have a non stick pan and the rice noodles are still moist you can do without actually. I’ve had Pad Thai in Thailand, Canada and the USA and although everyone makes it a little differently, the one thing that is common is that they are not really healthy and are really greasy. So it’s not a good choice if you’re eating out at a restaurant and trying to stick to a healthier diet. A Thai soup, salad or even vegetable curry often has less calories and fat than noodles when they’re fried in oil and topped with peanuts.

The best solution for a lighter and lower calorie noodle dish is to just make it at home, you can also increase the amount of veggies and reduce the amount of noodles if desired as well. This recipe is definitely going to become one of our staples as it’s pretty easy for me to throw together. If you keep frozen stir fry veggies in the freezer then it makes this dish even faster to make. Really there’s no excuse now, everything is washed and chopped for you!

You can also easily make my Pad Thai sauce or a big double batch of it once a week to use for your veggie stir fries and serve with rice or noodles for a quick meal any day of the week. Ketchup is usually only used in Americanized Pad Thai, but for this recipe it works well and adds a little tomatoey flavour to it without being as acidic as plain tomato paste. (This sauce tastes more like spicy peanut sauce than anything, it won’t taste like plain ketchup, I promise!)

This recipe will make a substantial meal for a couple or 4 side servings. (The picture below is just a small side serving size.)

Low Fat Vegan Quick Pad Thai With Rice Stick Noodles Veggies and Peanut Sauce

Quick Lower Fat Vegan Pad Thai (Rice Stick Noodles With Veggies in Spicy Peanut Sauce)

Serves 2-3 dinner sized portions

Ingredients:

1/2 454 g package pad thai rice stick noodles (use 227 g) (pictured are the L/5mm size)
1 large salad bowlful of frozen or fresh stir fry veggies of choice (about 4-5 cups)

Pad Thai Sauce

1/4 cup water
2 tbsp low sodium soy sauce or tamari (for gluten free)
2 tbsp smooth peanut butter
3 tbsp ketchup (organic or low sodium)
1-2 tsp Sriracha Hot Chili Sauce (depending how spicy you like it)
1 tsp liquid sweetener of choice or brown sugar
1-2 cloves of garlic
1/2 tbsp fresh ginger

Directions:

  1. In a medium-medium large sized pot, fill it about 1/2 way with water (about 3-4 inches deep) with water and bring it to a boil.
  2. Add 1/2 package of rice stick noodles and stir in to break up. Make sure the water covers the noodles. Let sit while you make the sauce.
  3. Combine sauce ingredients in a small blender, Vitamix or magic bullet. You may need to mince the garlic and ginger first if you have a low powered blender. (or you can double the sauce recipe and save the rest for another stir fry or an asian salad dressing.) Blend until smooth. Add a little more water if you want a thinner sauce. Taste test and add more hot sauce if you like it really hot! (I only use 1 tsp for my tastes.)
  4. Measure out your veggies and put a large skillet or wok to heat over medium-medium high heat. When hot add the veggies and the sauce.(Frozen will only take 4 minutes to cook, fresh will take longer.)
  5. Check on the noodles, you want them to just be al dente or they will rip and fall apart if overcooked. If soft enough quickly drain and add to vegetables when veggies are almost done. Toss to combine with sauce. (If you take out your noodles and let them sit for a while they will stick together in a clump, if this happens rinse them in a colander briefly and drain before adding to pan with the vegetables.)
  6. Stop cooking when veggies are al dente and crisp tender.
  7. Serve immediately.

Variations:

Use different veggies or try different stir fry mixes, add fresh bean sprouts, cubed tofu or Thai chili peppers when stir frying.

To make this recipe gluten free use wheat-free tamari instead of soy sauce. To make it peanut free substitute almond, cashew or tahini butter instead.

For single servings save half or 2/3 of the sauce (for small portions) for later or another stir fry and use 1/4 of a package of rice noodles and only 1-2 cups of veggies.

To make stir fries without oil, just use a non stick pan and sauté your veggies or tofu in a sauce. If your sauce is a little thick, don’t worry the veggies will release some liquid as they cook. Non stick pans were designed for oil free cooking, yet most people continue to use oil no matter what they are cooking.

Trouble Shooting Rice Stick Noodles

“Why did my rice noodles fall apart?” Read below.

Do not boil the noodles on the stove. Only add them to a large bowl or pot and pour boiling water over them. Let them sit uncovered until desired tenderness. They should be al dente, if you let them get really soft like overcooked spaghetti they will tear when you lift them out and stir them in.

If your noodles are broken when you lift them out of the pot or bowl when cooked, you cooked them for too long. For my size of noodles (5mm) I checked them after about 5 minutes. Keep testing them every minute until you find the exact time that works for you. Vermicelli (spaghetti/angel hair thin) will only take a minute or so. 3mm size rice stick should be checked after 2-3 minutes. Remember they will soften a little bit after you take them out and if they are already soft they will be too soft when you prepare the stir fry.

If your noodles were fine when you took them out but then broke when you stirred them into the vegetables after a while, you added them too soon and stirred too much. Let the vegetables cook until they are almost done and THEN add the noodles. (Make sure the noodles are separated and not a big clump. If clumpy briefly rinse in water again and drain before adding.) Gently toss with the veggies and don’t over stir. The biggest mistake to fried rice and fried noodles is over stirring. So make sure things are almost cooked before adding and you’re just tossing together to heat through and get the sauce on them. Plate gently to prevent the noodles from tearing too much.

What is Sriracha Hot Chili Sauce?

Sriracha Hot Chili Sauce is available at many grocery stores, Asian markets and even Costco. Click here to get it on Amazon.

Filed Under: Cooked Vegan Recipes, Dinner, One Pot Meals, Thai Tagged With: gluten-free, noodles, stir fry, Thai, veggies

80/10/10 Recipe: Raw Vegan Berrylicious (Banana Mango Berry) Smoothie Recipe

May 3, 2012 by Veronica Grace 9 Comments

Fb-Button

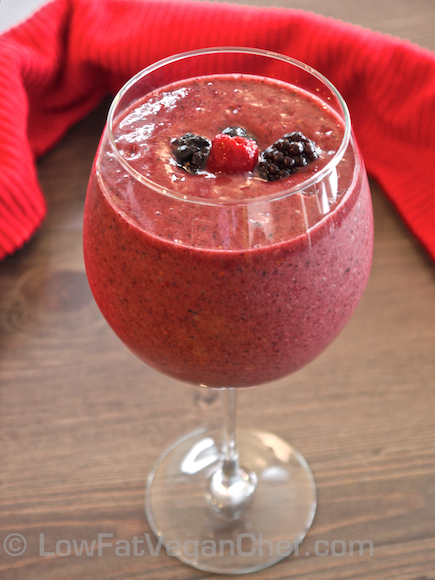
Low Fat Vegan Chef's 80/10/10 Raw Vegan Banana Mango Mixed Berry Smoothie Recipe

Happy Friday everyone!

I’m back home in Vancouver after spending 2 weeks in Oahu and Kauai. Hawaii is still one of my top favourite places in the world. Probably because as an island state it has many more amenities than most smaller tropical islands I’ve been to (and loads of fresh fruit and veggie friendly restaurant options).

It’s rather chilly and rainy here right now as we’re getting a late start on warm sunny weather, but it’s the perfect time to start eating more fresh fruits and vegetables now that summer is approaching.

Smoothies are something that there is no standard recipe for, and generally what you get when you purchase one is a lot of added sugar, processed juice or milk (for the base) an unripe banana and a little sour frozen fruit. Generally I don’t like smoothies at smoothie bars, unless they are from places that don’t use processed juice or added sugar.

I actually never have to add sugar or milks to my smoothies because I make sure my fruit has completely ripened before using it. Vegetables generally come ripe when you buy them from the store (except for tomatoes and peppers are they are fruit-vegetables and need to ripen.)

How To Make Great Vegan Smoothies Every Time

The key to making a delicious whole food and sugar free smoothie is to use fully ripe and quality ingredients. Also you don’t have to throw a lot of things into it like some witch’s brew. I prefer to use only 2-4 ingredients to make a fruit smoothie and I generally start with a base of ripe (very spotted) bananas or ataulfo/champagne (yellow skinned) mangoes and then I add other things like ripe papaya, pineapple, berries, peaches, plums, spinach, etc. Whatever is ripe and sweet tasting can go into a great tasting smoothie.

The biggest crime at smoothie bars is probably using underripe yellow bananas or even worse yellow bananas with green still on them. Bananas contain a lot of starch and the enzymes in the bananas have to process the raw starch and convert it into natural sugars for it to taste sweet instead of sticky and pasty. To compensate they put in sugar, when it’s really not necessary.

The best tip for having quality ripe produce every day  for smoothies or recipes is to make sure you are buying it at least a week in advance. I always have bananas and mangoes or papayas (when in season) ripening on the counter. It generally takes 4-8 days to ripen (I’m in Canada and it’s not hot or humid right now) on the counter in cooler climates. In tropical and subtropical places fruit can ripen in 3-4 days and then be stored in the refrigerator when it’s ripe. Frozen berries or bags of pineapple or mango are great additions to a base of ripe bananas or even fresh papaya.

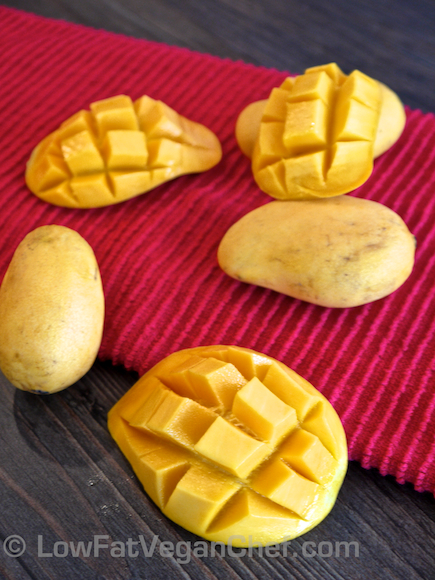
Low Fat Vegan Chef Ripe Mini Ataulfo Champagne Mangoes

How To Select And Ripen Mangoes

Mangoes can be hard to understand for those new to tropical fruits. They often don’t know how to select them, when they are ripe, or know how to cut them. Generally I buy the yellow skinned ataulfo/champagne style mangoes because they don’t have a stringy flesh and are very sweet and creamy when ripe. Most people buy the Tommy green/red type mangoes. When ripe these can be good too but they are much stringier and have a larger woody core in them.

Mangoes will take 5-10 days to ripen depending on when they were picked and what kind of climate you live in. You can tell a mango is ripe when it is starting to wrinkle on the skin and get soft. (Just like an avocado gets soft to the touch when ripe.) It should not have any hard spots on it and should be slightly soft and juicy inside and not taught and rock hard. The inside colour will change from light yellow to dark yellow or orange depending on the variety. Unripe mangoes don’t make for tasty recipes, and when it doubt leave it another day or two. Even I sometimes get impatient and open a mango too early and am disappointed that it’s not at it’s peak ripeness yet.

Another tip I have to getting good mangoes is to NOT buy them at the regular grocery or mainstream grocery stores. I find that their supplies are often poor, they are picked super early and don’t always ripen properly. This is a terrible place to buy mangoes. Bananas can generally be bought anywhere and will ripen, but not mangoes or papayas. Buy your mangoes from fruit markets, farmers markets, China Town/Asian fruit markets, Indian markets, Whole Foods, health food stores or Costco. (Costco’s ataulfo mangoes are usually fine, but the red/green mangoes when bought out of season often don’t ripen so I avoid those until the spring/summer.)

If you live in tropical places or states like California, Hawaii or Florida you may be able to get mangoes at the regular grocery stores that are fine, but this is usually because they were shipped shorter distances and thus did not need to be picked so hard and unripe or gassed. If you live in the northern states, Canada or northern European countries, you’ll want to avoid the regular grocery stores for tropical fruit purchases because of their bulk suppliers and slow turn around times.

Now onto my smoothies. I make raw smoothies because they are the tastiest and are completely whole food based. I don’t like adding supplements or super foods (especially cacao and maca as they are too addicting and stimulating) so my goal is to show you how to enjoy a simple delicious whole food fruit based smoothie. Many people don’t get enough servings of fruit in their diet, including vegans who tend to eat more packaged foods. But breakfast is the perfect time for a juicy water rich easy to digest fruit meal whether it is a smoothie or a large fruit salad. Often I only feel like eating fruit in the morning because it’s so hydrating and a great choice for eating before or after a workout. My smoothies are also enough for a whole meal, so I’m not having a little glass of smoothie and a bunch of toast or heavy breakfast foods. If you’re a woman with a small stomach or not used to eating smoothies you may only use half of this recipe, but you will soon be hungry again and probably want something again, so you can take the other half with you or keep in the fridge. If your an active man you may need to add a few more bananas to this recipe to accommodate for your higher caloric needs. When I have a smoothie this size it’s all I need for breakfast and it will hold me over until lunch. So with this information you can decide how to accommodate your needs with breakfast smoothies.

Also for those new to my site I do have a print button option on the top of every post so you can decide exactly what information to print and print with or without pictures if necessary.

(80/10/10 Style) Raw Vegan Berrylicious (Banana Mango Berry) Smoothie Recipe

Makes 2 medium glasses

Ingredients:

2 ripe bananas (see my post on ripe bananas)
2 ataulfo/champagne mangoes (cut around the inner woody seed and scoop out the flesh from the skin)
1 cup frozen mixed berries (I used raspberry, blackberry, blueberry and strawberry)
1/3 cup water

Directions:

Add ingredients to your Vitamix or blender starting with the mangoes and bananas at the bottom, add the water and place the frozen fruit on top. Blend until smooth.

Drink and enjoy!

Variations:

You can also use frozen cherries, just raspberries, or just blackberries instead of the mixed berries if desired.

If you don’t have bananas just add another mango, if you don’t have mangoes add another banana.

You can easily make this a green smoothie by throwing in a handful or two of baby spinach or chopped kale (remove the stems first though).

Have you ever eaten an ataulfo/champagne mango before?

Filed Under: 80/10/10, Raw Breakfast, Raw Smoothies, Raw Vegan Recipes Tagged With: 80/10/10, banana, breakfast, fat-free, gluten-free, mango, nut-free, raw, smoothie, soy-free, vitamix

(Oil-Free) Low Fat Vegan Chickpea Hummus Recipe

April 30, 2012 by Veronica Grace 96 Comments

Fb-Button

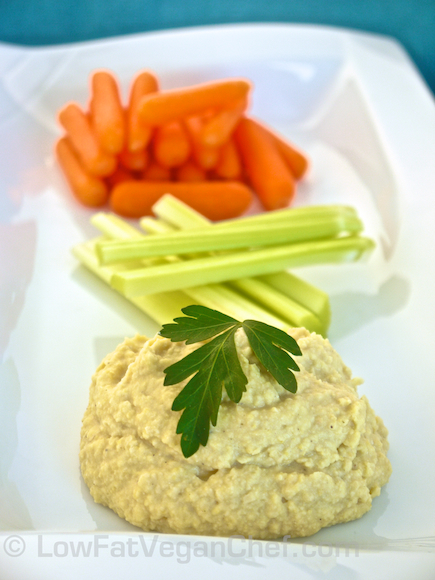
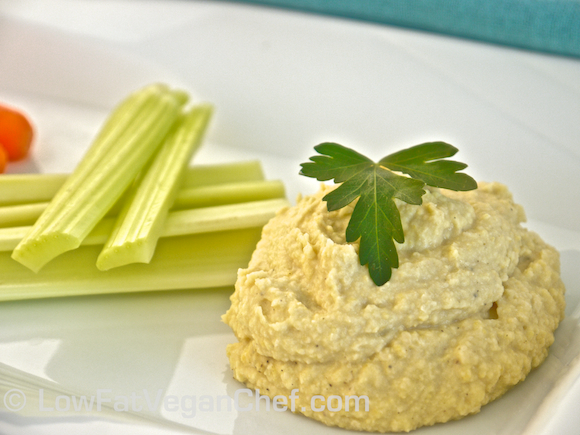
Low Fat Vegan Chef's (Oil Free) Low Fat Chickpea Hummus Recipe

Ah hummus! The classic Mediterranean staple dip (and staple of many vegan sandwich lovers). I usually always make my own hummus at home as the store-bought ones are #1 usually expensive for the amount you get, and #2 have a lot of oil and salt in them and make each tablespoon higher calorie than necessary.

Hummus is basically cooked chickpeas, pureed with tahini (sesame seed butter), garlic, lemon, salt and sometimes olive oil. Babaghanoush (Eggplant Hummus) is very similar but it has roasted eggplant in it for a slightly different flavour. If you’ve never seen tahini before it’s generally in the nut butter/peanut butter section of the health food store, or some grocery stores. Tahini also available at ethnic markets and Indian and Middle Eastern stores. You can also find tahini on Amazon.


If you’ve made your own homemade hummus before you probably use olive oil in it too, but I want to show you a way to make a much lower fat hummus that is great if you REALLY like hummus and put it on everything. This way you’ll cut out excess calories you won’t even miss and still get that delicious creamy hummus flavour.

So I got into the kitchen and made this chickpea hummus using canned chickpeas, as that’s what most of you are going to do. (I use the salt free variety.) BUT you are more than welcome to use fresh cooked chickpeas. I prefer them and cook them with some kombu (seaweed) and bay leaves to give them a delicious flavour.

If you’re into really decadent high fat dips, you should try switching to my hummus recipe to have a new better for you dip to serve to your friends and family with fresh pita, veggies or chips.

For this recipe you’re going to need a food processor. I use an 8 cup Cuisinart that I bought in Costa Rica (when I lived there) and it’s not a recent model or anything but it does the job. A hand crank food processor will probably not be good enough as this is quite a thick dip. You can get a basic Hamilton Beach food processor fairly cheap on Amazon like this one.


BTW this recipe is featured in my Vegan Comfort Foods From Around the World recipe ebook. So check it out! It’s got over 60 deliciously savory and satisfying recipes you’re going to love!

Low Fat Vegan Chef's Low Fat Oil Free Chickpea Hummus Recipe

(Oil-Free) Low Fat Vegan Chickpea Hummus

From Comfort Foods From Around The World 

Ingredients:

1 15 oz./425 g can chickpeas (no salt) or 1 3/4 cup of fresh cooked chickpeas
1-2 small cloves of garlic (depending on how spicy you like it)
1 1/2 tbsp filtered water (this is replacing the oil)
3-4 tbsp lemon juice (depending on how lemony you like it)
1 1/2 tbsp tahini (sesame seed butter)
1/4 tsp Herbamare (original) or salt (or none if you are using salted canned chickpeas)
Fresh ground pepper to taste *optional

Directions:

  1. Drain and rinse the chickpeas (only drain if fresh cooked) and set aside.
  2. Add the garlic clove(s) to the food processor and pulse until chopped up. Stop the food processor.
  3. Add the chickpeas, filtered water, lemon juice (start with less and add more if desired) and pulse the chickpeas until they are fairly broken up. Depending on how strong your food processor is when they are broken up you can let it run for a few seconds or just keep pulsing until it’s a little smooth. Stop the food processor. Taste test and add more lemon if desired.
  4. Add the tahini, Herbamare (if desired) and a little fresh ground pepper. Let it run until everything is creamed up. Taste test and adjust any additional salt, pepper, lemon or water (for consistency). Your hummus should be creamy with no chunks left.
  5. Serve with veggies, pita or baked chips if desired.


Generally people will not be able to tell there is no oil in this dip. It will be creamy and tangy, it will just seem lighter and fluffier to them. Skipping the oil in recipes is a great way to trim that waist line and satisfy your desire for savory dishes without the guilt!

Do you like hummus? What do you serve it with? Have you ever made oil free hummus before? 


Filed Under: Cooked Vegan Recipes, Dips For Veggies Or Chips, Sauces Tagged With: chickpeas, dip, fat-free, gluten-free, lemon, nut-free, soy-free

Raw Vegan Antioxidant Rich Apple Celery Carrot Beet Juice

April 26, 2012 by Veronica Grace 11 Comments

Fb-Button

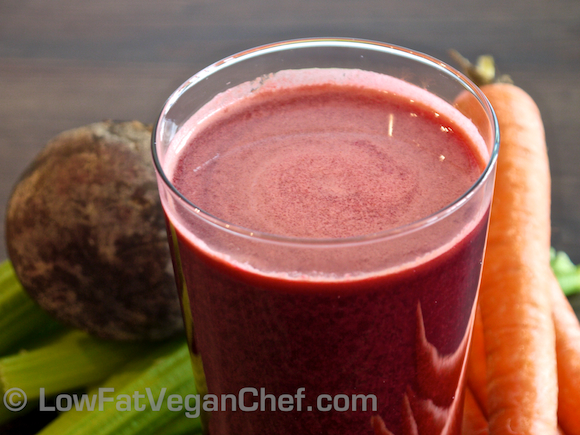
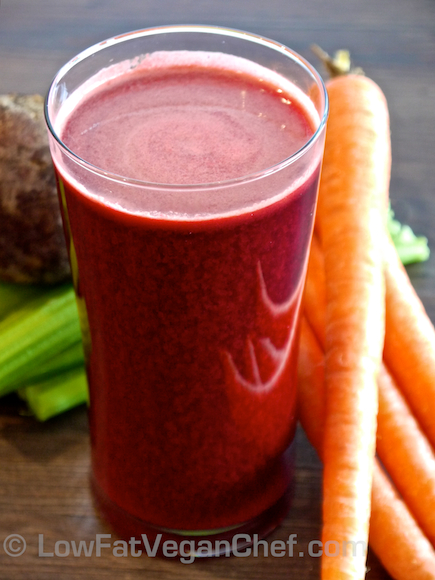
Low Fat Vegan Chef's Raw Vegan Apple Beet Carrot Celery Juice

Happy Friday everyone! I hope you’ve enjoyed your week so far. I know I have. I’m still in Kauai for a few more days and have been doing some kayaking, hiking, and snorkelling and taking lots of photos. If you’re curious to see what it’s like on Kauai (the oldest Hawaiian island) check out my Kauai Travel Pics post. It’s the end of their rainy season here so we’ve been getting a little bit of rain but nothing like what they get in the winter time. It’s about 82-84 F (27-29 C) a day here so it’s quite nice!

We’ve been eating a TON of Maui Gold pineapple here along with Hawaiian papayas, bananas, watermelon, cantaloupe, salads and veggies. Just keeping things pretty simple as I’m not really making specific recipes while I’m here. The Maui Gold pineapple is really out of this world, it’s so sweet and not acidic at all. I get the mini ones and I eat a whole one for breakfast and it doesn’t bother my tongue. Some of the larger pineapples we’ve got were pale yellow inside and not ripe enough and too acidic to eat, ripe dark yellow (inside) pineapples are really the best. We always smell the bottoms of our pineapples to see if they seem sweet or ripe. If your fresh pineapple smells like nothing chances are it’s been picked too early and isn’t ripe enough and will burn your tongue and taste tart.

Today I wanted to share with you one of my favourite veggie juice recipes. I don’t generally buy juices from juice and smoothie bars because #1 they are far to expensive and small for the price and #2 they are usually super foamy on top, and I can make them better at home. The juicer I have is a Breville and has this nice jug that has a foam blocker in it so when you pour the juice it skims off the top portion of foam before it goes into your glass. So this is nice. Especially for people new to drinking fresh juices (vs. something lie V8) who might be turned off by the natural occurring foam when you juice with a centrifugal juicer.

I love putting apples and beets together in juice the flavour is really rich and energizing. Apple and beets, carrots and beets, carrots and celery, and celery and apples all go great together flavor-wise, so when you combine them all you get a really tasty vitamin and mineral rich juice!

Low Fat Vegan Chef's Raw Vegan Apple Beet Carrot Celery Juice

Raw Vegan Apple Celery Carrot Beet Juice

Serves 2

Ingredients:

3 medium apples, peeled (unless organic)
1 large beet, peeled and cut if necessary
8 large stalks of celery (leaves removed)
3 medium carrots, peeled (unless organic)

Directions:

Prepare vegetables, peel apples if desired. Cut veggies into chunks if required for your type of juicer. Run everything through a juicer and serve immediately.

Additional Tips:

Feel free to 1/2 the recipe if you’d only like a small juice. I usually make a big one after a work out.

You may enjoy serving this juice over ice. Depending on your tastes you can add more or less apple, carrot or beets. People new to drinking fresh juices may enjoy more of an apple flavour for the base. If you are trying to juice all at once and want to save some juice for later, it should only be stored in a glass airtight mason jar. Fresh juice spoils quite quickly because it is raw and uncooked. It will not keep in the fridge unless it’s completely sealed and airtight. So make sure to use a jar of the appropriate size to ensure it’s filled to the top and sealed.

What do you think of this juice? What’s your favourite fruit+veggie juice recipe?

Also check out my photos of Kauai if you missed them.

Mobic

Filed Under: Raw Breakfast, Raw Juices, Raw Vegan Recipes Tagged With: apple, beet, carrot, celery, fat-free, gluten-free, juice, nut-free, raw, soy-free

Travel Photos From Kauai, Hawaii

April 26, 2012 by Veronica Grace 12 Comments

Fb-Button

Kapaa, Kauai

Landscape photography is my first love, even more than making recipes, photographing them and eating them! I always dreamed of one day traveling around the world and taking gorgeous photos of places I’d only seen in magazines. Traveling is one of my favourite things to do! So I hope you enjoy these photos as much as I enjoyed taking them.

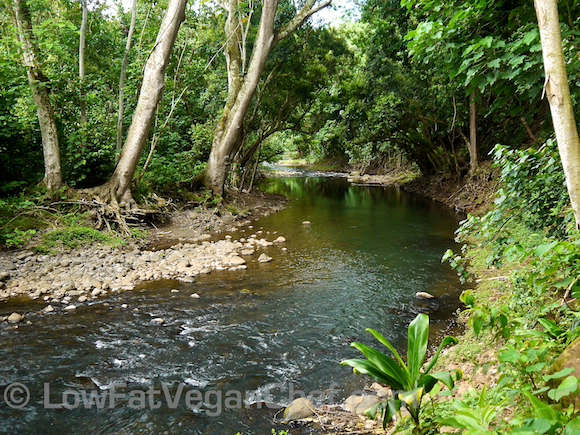
I’m in Kauai for the next couple of days still and I wanted to share with you some of the beautiful spots I’ve found. Kauai is home to one of the wettest spot on Earth, the summit of Mount Wai’ale’ale (Wai alay alay) which means “overflowing water”. This spot receives over 462 inches (11,500 cm) of rain a year! It’s one of the reasons it’s so green and lush on the north and east side of Kauai, but they also get strong winds and grey skies during during the winter/rainy season. It’s still technically the rainy season so the weather has been some sun, some cloud and some rain since I’ve been here.

The first photos are from when I went on a photo tour around the north eastern part of the island earlier this week and it just happened to be cloudy, windy and rainy for half of the day so my pictures aren’t super paradisiacal-looking, but you get the idea. On a gorgeous day these places are even more beautiful.

At the end are different days which were sunnier.  All of these places are on ONE island. You won’t believe the diversity there is on Kauai. It’s just amazing so have so many beautiful features to the island all in one place.  And this isn’t even including the gorgeous Napali Coastline either! (Think King Kong’s mountains from the movie). They’ve used Kauai as the back drop to many Hollywood movies. Gilligan’s Island, Raiders of the Lost Ark, Jurassic Park, Jurassic Park III, Mighty Joe Young, George Of The Jungle, Hook, 6 Days/7 Nights, King Kong, Tropic Thunder, Pirates Of The Caribbean: On Stranger Tides, Avatar, The Descendants (with George Clooney), Soul Surfer and dozens more have all been filmed on Kauai. Chances are you have seen not only one but many many movies that used Kauai as the breathtaking backdrop for their exotic scenes.

Kealia Lookout Kauai Hawaii

Kealia Lookout Kauai Hawaii

Kealia Lookout, Kauai

Anahola Beach Kauai Hawaii

Anahola Beach, Kauai

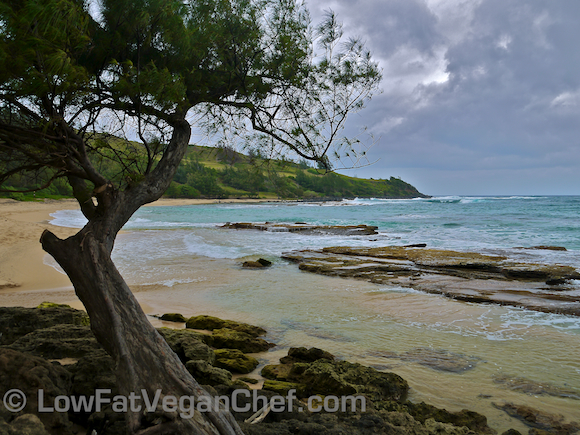
Moloaa Beach Kauai Hawaii

Moloaa Beach Kauai Hawaii

Moloaa Beach, Kauai

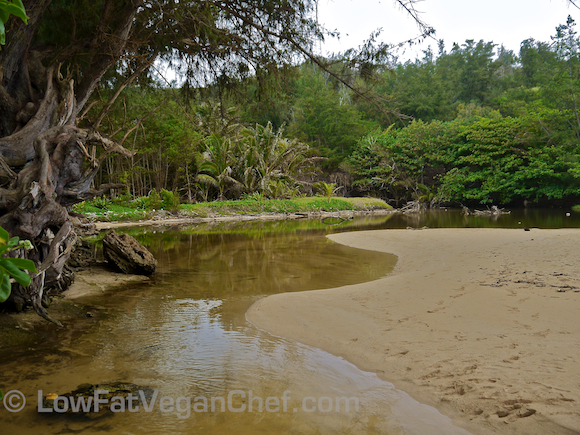
Anini Beach Kauai Hawaii

Anini Beach Kauai Hawaii

Anini Beach, Kauai

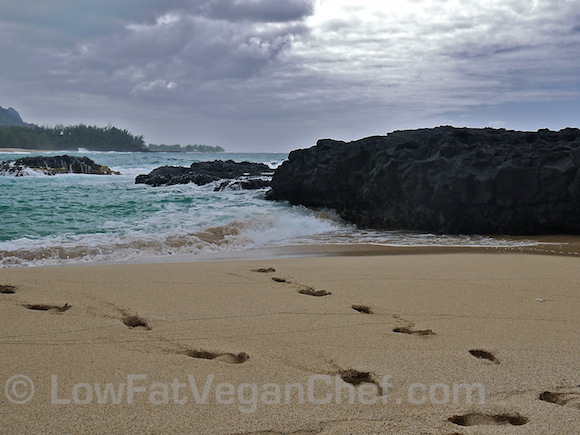
Lumahai Beach Kauai Hawaii

Lumahai Beach, Kauai

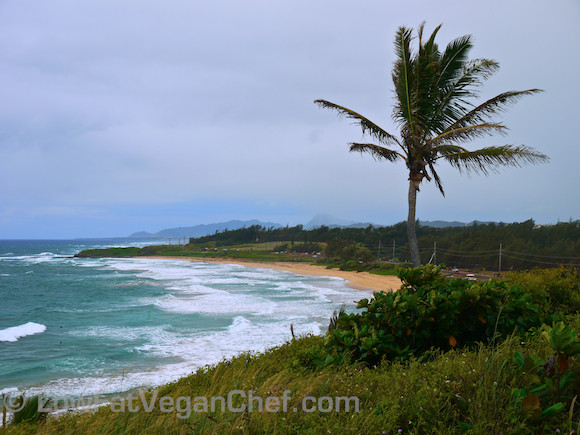
Palm Tree Tropical Paradise Kauai Hawaii

Me at Waimea Canyon

Waimea Canyon Kauai Hawaii

Waimea Canyon Kauai Hawaii

Waimea Canyon Kauai Hawaii

Waimea Canyon, Kauai

Kalalau Lookout Kauai

Kalalau Lookout, Kauai

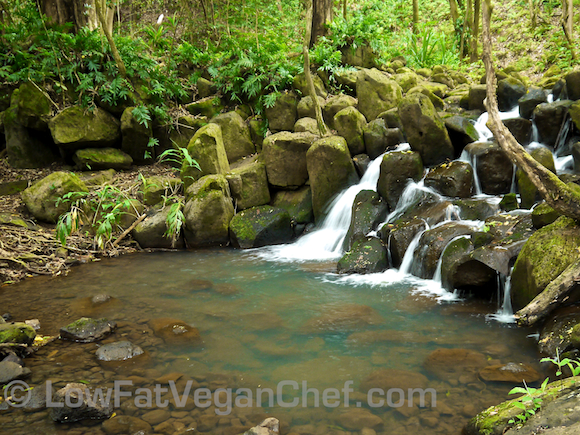
Secret Falls Trail Kauai, Hawaii

Kauai Secret Falls Trail Wailua River

Secret Falls Waterfall Wailua River Kauai, Hawaii

Secret Falls Trail and Secret Falls

The west side of Kauai where Waimea Canyon is is drier because most of the rain falls at the summit in the centre of the island and so it’s rather sandy, grassy and sunnier on this part of the island (along with the south side). It’s like a totally different island on this side. So whether you prefer lush greenery and regular rain or dry dessert-like conditions you will find it on Kauai!

These are just a tiny fraction of all the beautiful spots on Kauai. If you’re looking for some tropical island/adventure inspiration check out this gorgeous and professionally filmed video of Kauai. It’s excellent!

Filed Under: Articles, Travel Tagged With: kauai, paradise, travel, tropical

Low Fat Vegan Cheezy Sauce For Steamed Vegetables

April 23, 2012 by Veronica Grace 23 Comments

Fb-Button

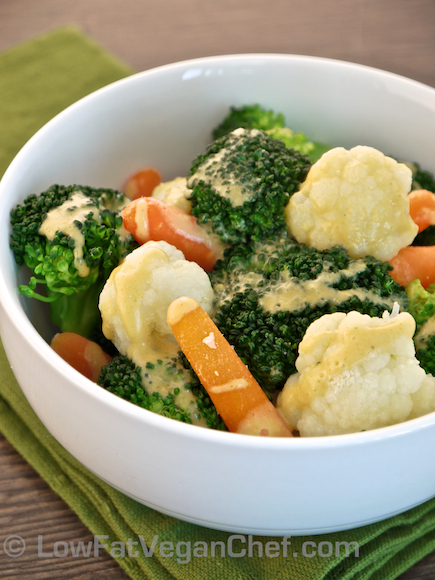
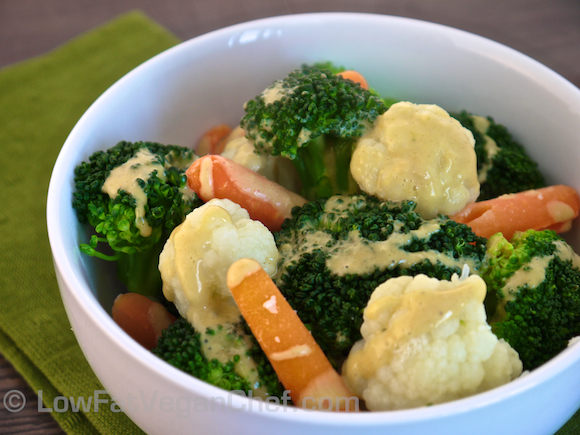
Low Fat Vegan Chef Cheezy Cheese Sauce For Steamed Vegetables

Today I wanted to share a recipe with you from my upcoming second recipe ebook: Low Fat Vegan Chef Presents: Vegan Comfort Foods From Around The World. All the recipes are done and photographed, I just have to write it and put it together. In total there is going to be about 60 recipes in it all with photos! It should be available in a few weeks, so keep your eyes out if you’re missing some home cooked comfort meals!

As I’m currently in Kauai (our second stop in Hawaii) and pretty much away from the kitchen (aside from throwing together cut up fruit, basic salads and steamed vegetables) I haven’t been making any new actual recipes in a week. I kind of feel like I should be making food, but when you’re on vacation you’d rather be snorkelling, swimming or taking pictures! (If you’re like me I guess!)

I thought this would be a great recipe for those not sure what to put on their steamed vegetables for dinner. Most of you have probably had some sort of cheese, Cheese Whiz or cheese sauce on your vegetables prior to eating vegan and have a craving for something cheese-like at the dinner table. Also sometimes kids (and even grown ups!) like to dip their veggies into a sauce or dip and don’t enjoy eating them plain.

Growing up my mom would always make this homemade butter+flour+milk+grated cheese sauce for us when we had pierogies, ham, mixed vegetables, or even a dish called Welsh Rarebit (essentially a fried egg on toast topped with cheese sauce. Her version anyways and no we’re not Welsh or Polish. I have no idea where these recipes came from!). We loved this sauce. We asked for it all the time, we wanted to pour it on everything and we wanted to dip everything into it.

Pretty much everything about my mom’s cheese sauce that made it delicious isn’t really healthy or vegan, so I wanted to create something that was much much healthier and still tasty for those who miss cheese sauce.

The trick to getting a cheese-like taste in your sauces is to use nutritional yeast (this is yellow yeast flakes that are sold at the health food store, this is not brewers yeast, quick rising yeast nor does it have anything to do with baking) and miso paste. Nutritional yeast has a cheese-like tangy flavour and can be used in sauces, dips, dressings, or even shaken onto salads and pop corn. The miso paste is what gives it a strong fermented salty flavour and gives the cheesiness more depth. Nutritional yeast and salt is really not enough, miso paste is essential. You can find this at the health food store or any local asian market. I usually buy yellow/mild or brown rice miso. I don’t use white shiro miso or red miso. But use what you can find. The miso won’t go bad and will last a while and you can use it for more asian sauces, dips and add to soup stocks or make miso soup with it. If you use my recipe ebooks you will find it in several of the recipes as well.

For this recipe I just used a pre pack of fresh mixed vegetables that I got at the store. I wanted to make it simple for people who are new to preparing fresh vegetables and don’t have a lot of time. You can also cut up your own assorted fresh vegetables, or use frozen vegetables as well. The key is to make sure you don’t overcook them and make them mushy. I am constantly checking on them while they steam and testing them with a knife to see if they are soft in the centre. When they are al dente and ALMOST cooked turn off the heat and take off the lid. The veggies will continue to cook with all the hot steam in the pan and they will be overcooked if you continue to leave the heat on them. Leave the cover off so you dissipate some of the steam. No one likes overcooked veggies! This takes some practice, but if you can set a timer and find out the exact time it takes when the water boils you will make things easier next time you make them. Broccoli is the first to overcook and cauliflower is sturdier so I usually put it in the pot for a minute first and then put the broccoli on top to cook.

Low Fat Vegan Chef Cheezy Cheese Sauce For Steamed Vegetables

Low Fat Vegan Cheezy Sauce For Steamed Vegetables

From Comfort Foods From Around The World 

Serves 3-4 for a side dish of veggies

Ingredients:

1 cup almond milk, unsweetened original (I used Blue Diamond brand. Don’t use sweetened or vanilla)
1/4 cup nutritional yeast flakes
1/4 tsp smoked paprika (available at Indian stores, spice markets and Amazon. McCormick also makes one available at Walmart)
1/2 tsp miso paste
Fresh ground pepper (if desired)
1 1/2 tbsp flour (GF if desired)

Directions:

  1. Add almond milk to a sauce pan and heat over medium (or medium low on gas stove) heat until warm. Sprinkle in the nutritional yeast and smoked paprika. Whisk it in.
  2. Add the miso paste and try to break it up so there are no large clumps. Let it heat through a little and keep whisking it. Taste test and add a little more smoked paprika and some ground pepper if desired. If you add more miso it will make it saltier so use caution. (You want a tangy zesty flavour.)
  3. Gently sprinkle in the flour and whisk in to combine. Try to ensure there are no clumps. Heat through for a minute or two until it’s thickened up. Stir it to prevent it from sticking or burning at the bottom.
  4. Have your steamed vegetables ready or turn off the element and cover to keep warm until your veggies are ready.
  5. Drizzle over vegetables and serve. (Have extra ready for your dinner guests to add more if they wish.)
Variations:
Feel free to use soy milk, rice milk, hemp milk etc as desired. I just have a preference for almond milk and don’t enjoy the taste of soy milk myself. To change some of the flavours in this sauce you could omit the smoked paprika and add some garlic and onion granules instead or add some tabasco or chipotle chili powder to make it spicy.

What do you think of this recipe? Did you ever have cheese sauce before you were vegan? What do you like to use now on vegetables?

Filed Under: Cooked Vegan Recipes, Eat To Live - Dr. Fuhrman Recipes, Green Dishes, Sauces, Side Dishes Tagged With: broccoli, Carrots, cauliflower, cheese, cheeze, gluten-free, miso, sauce, soy-free

Restaurant Worthy Raw Vegan Strawberry Pecan Spinach Salad

April 18, 2012 by Veronica Grace 32 Comments

Fb-Button

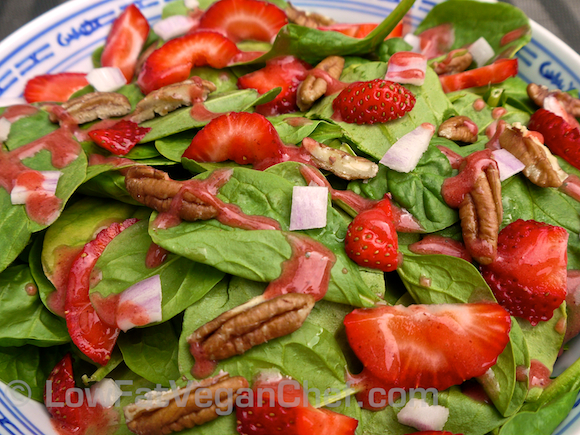
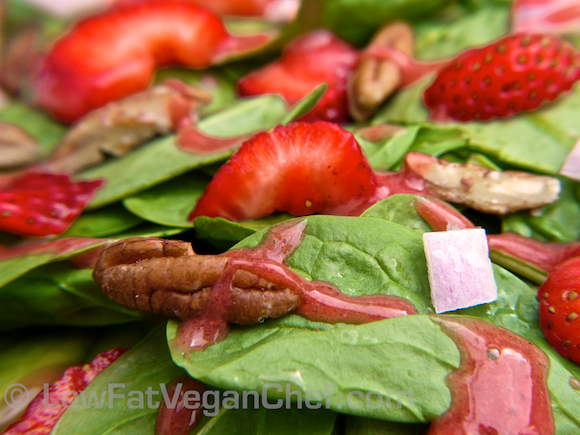
Low Fat Raw Vegan Chef's Strawberry Pecan Spinach Salad

I wanted to share this special and healthy salad recipe with you today for a few reasons. It’s also my friend Karmyn Malone’s top favourite raw recipe. She is a raw foodists and is always on the look out for delicious and simple oil free raw recipes, so this is right up her alley.

Another great thing about this recipe is that it has few ingredients and is easy to make. You don’t have to spend a lot of time making it and the ingredients are fairly easy to find at the grocery store.


As spring is here and it’s looking like it’s going to be a nice warm summer you’ll be able to make this recipe many times for yourself or for entertaining. It’s perfect to bring to a potluck, barbecue or to serve as a first course for dinner guests.

The problem with most salads is that they rely on store bought dressings that are neither nutritious or great tasting. The ones that people generally do like are full of cream and fat and are not part of a healthy life style if you eat them every day. The oil free ones are basically vinegar, sugar, salt and flavourings and after a while most people can’t stand another vinegary dressing!

I prefer to make my own salad dressings at home with fresh ingredients and combine them in a blender. You can even use a basic blender or a hand blender to make this recipe.

This Raw Vegan Strawberry Pecan Spinach Salad recipe is delicious AND nutritious! Even Karmyn’s young son Andrew loved this recipe, and as you know it can be hard to get some kids to eat raw greens and vegetables. But not Andrew, he was begging for more!

This recipe is part of my Savory Raw Dinner Recipes DVD and book collection that has received many rave reviews from friends and customers. They’re 100% oil free and much lower in fat than traditional gourmet raw salad and nut heavy entree recipes.
———-

For more yummy recipes go to:

Savory Raw Dinner Recipes

(We even have a 100% digital version for those who don’t want to wait for shipping!)
———

With this set of recipes you’ll be on your way to enjoying more fresh salads and learn my tips and tricks for making delicious oil free low fat vegan dressings that you will actually enjoy eating! No more buying expensive store bought dressings that only last a few meals that don’t tickle your taste buds anymore.

I have to say that I wish I could have this salad right now as we bought a big bag of spinach and I’m having a craving for it! (Sadly I did not bring any chia seeds with me to Hawaii!)


Low Fat Raw Vegan Chef's Strawberry Pecan Spinach Salad

Raw Vegan Strawberry Pecan Spinach Salad

Makes 2 dinner servings or 4 side servings

Ingredients:

Strawberry Pecan Spinach Salad:

11 oz. container baby spinach leaves
2 cups of sliced fresh strawberries
1/2 cup red onion, diced or sliced (your choice)
1/3 cup raw pecans

Strawberry Chia Dressing:

1 cup fresh sliced strawberries
1/4 cup clementine mandarin orange juice (use the sweetest FRESH oranges you can find)
4 small dates, pitted (or you can sub 1-2 tbsp of liquid sweetener)
2 tsp apple cider vinegar
1 tbsp chia gel (or 1 tsp chia seeds)

Directions:

  1. Slice pecans lengthwise on a cutting board so they are in long halves. (This makes them go farther and you’ll use less in the recipe)
  2.  Arrange salad ingredients into 2 large bowls or 4 medium sized bowls for starter salads.
  3. Blend dressing ingredients together and drizzle over salad.
  4. Serve immediately.
Additional Tips:
I don’t recommend using frozen strawberries for this recipe as they are usually too tart and sour. Use dark sweet strawberries. Store bought orange juice is also not a good base for this dressing. I don’t like store bought orange juice because it’s highly processed and quite acidic compared to fresh squeezed orange juice. Clementines or mandarins are preferable because they are mild and sweet, but you can also use Cara Cara or Valencia oranges if that’s what you can find.
You can make this dressing and keep it for 2-3 days in the fridge. Raw dressings ARE perishable and will not stay fresh for weeks like cooked salad dressings. So this is best enjoyed soon after making it.

What is Chia Gel?

Chia gel is just chia seeds mixed with water. I learned this from Victoria and Valya Boutenko when I met them in my home town of Calgary.  When chia seeds absorb water they create this gel that suspends them and it great to add to dressings because it will hold it together much like oil would. So when you use blended fruits or juices for the base of your dressing it will be a little thicker and a better consistency. You can also use psyllium husk powder if you don’t have or don’t want to use chia gel. Psyllium husk powder is something people often add with some flavour to water to get extra fibre in their diet (not something we generally need as a whole food vegan) BUT it is useful in making dressings because it add some bulk to the liquid and holds it together nicely. You cannot taste it and it will not affect the flavour of your dressing. It just makes it more into a thin gel than just stay a watery dressing.


To make chia gel I mix 1/3 cup chia seeds into a container (that can go in the fridge) with 2 cups of water. You have to add chia to the water, and not pour water over the chia to prevent it from clumping together in uneven clumps. This lasts for 2-3 weeks in the fridge and you can add a tablespoon or two to your dressings or smoothies to get some whole food omega 3’s into your diet. This is more of a recommendation for raw foodists, if you’re not into raw food and won’t use this amount of chia gel you can just add 1 tsp of chia seeds to your dressing or smoothie if desired instead.

————-

For more information go to:

Savory Raw Dinner Recipes

————-


What do you think of this recipe? Have you ever had strawberry spinach salad before or chia seeds?

Filed Under: 80/10/10, Eat To Live - Dr. Fuhrman Recipes, Raw Salads, Raw Vegan Recipes Tagged With: gluten-free, oranges, pecan, raw, soy-free, spinach, strawberry

Aloha From Honolulu Hawaii!

April 17, 2012 by Veronica Grace 4 Comments

Fb-Button

Yesterday I arrived in Honolulu, Oahu, for a much needed two-week vacation
following the launch of my first ebook (and the completion of testing my recipes
for my second ebook). I have to say it feels great to be “off my feet” so to speak
and out of the kitchen for a while!

Honolulu Oahu Hawaii Ala Moana Beach Park

(The view from Ala Moana Beach Park)

Oahu Hawaii Honolulu Downtown

Honolulu Waikiki area

Hawaii is one of my top favourite places in the whole world. Every time I come
here I just feel so relaxed and happy. Stepping off of the plane you are greeted
by the fragrant scent of tropical flowers, a warm breeze envelopes you like a
cozy blanket and you feel like you’ve entered a magical paradise that you never
want to leave. I know I feel like that every time I come here…

What’s great about Honolulu and the Waikiki area is that you don’t need a car.
We have a friend pick us up from the airport and we can just walk to everything
around here. Generally we don’t even take cabs, but if you wanted to say go to
Costco or something you can go there by cab or bus.  We’ve taken the bus a
few times here, it’s pretty easy. The busses announce their names and each
stop so it’s great for tourists trying to orient themselves in a new place.

One of the things people on Oahu complain about is the traffic, but if you’re on
vacation you probably won’t notice it unless you’re driving around in rush hour
or going on a tour all around the island. If you check out the North Shore you might
get to see some sea turtles coming inland or bathing on the beach by the side of the
highway. If you go to the West side of Oahu you can check out Matsumoto’s Shave Ice.
Shave ice is like a finely shaved snow and much better than a snow cone. Most of the
shaved ice in Hawaii is the same, and it’s kind of like a slurpee/snow cone and really loose.
Matsumoto’s is better because they actually pack it in like a snow cone, so it doesn’t melt as
fast and the flavours stay separate on each side. After having it once and then some other
shave ice places I can say it’s definitely worth checking out if you’ve never had it before.

Ala Wai Canal

————

To jumpstart your healthy lifestyle before summer, get my DVD series
“Savory Raw Dinner Recipes.”

Go to: http://www.plantbasedu.com/savory

————–

Because I’ve been out of the kitchen for a few days and won’t have access
to my usual kitchen tools and ingredients I’ll only be sending you one
vegan recipe this week instead of the usual two.

BUT the recipe I’m going to send you is a good one! Actually my friend
Karmyn, who lives on the Big Island of Hawaii just told me there’s a new
vegetarian restaurant opening up that wants to put one of my raw recipes
on their menu! (Karmyn was raving about it and convinced them it was so
delicious, easy and healthy, they couldn’t refuse.)

This is so exciting that I’m going to share the recipe with you on Thursday.
I know you’re going to love it, especially now that it’s spring and you’re
craving something new and refreshing.

Now is the perfect time to start thinking about eating healthier and getting
active. Eating some fresh produce whether it’s in smoothies, salads or
even whole is relatively easy to add to your diet. But for those of you looking
for a little guidance and some sure-fire tasty raw dishes to add to your
repertoire, there’s my Savory Raw Dinner Recipes DVD and recipe book
collection.

Maui Gold Mini Hawaiian Pineapple

Since I’ve arrived I’ve already eaten a ton of fresh Maui Gold pineapple (this is
some of the best sweet pineapple you will ever have) and a bunch of Hawaiian
papayas. Yes we can get these things at home, but they are just so fresh
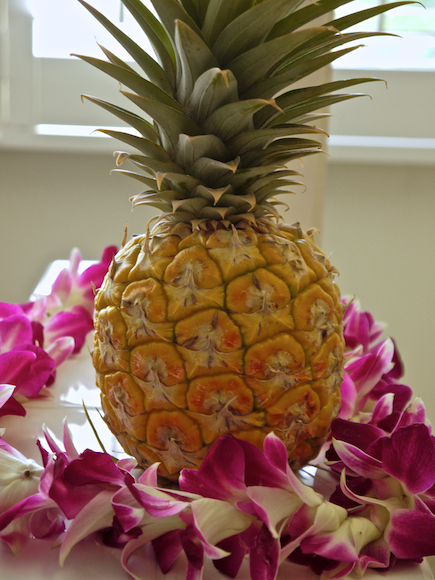
and delicious here I feel even more drawn to them.

Eating fresh and seasonal produce is one of the best things you can do for
your health. The fresher and least amount of processing, the better. I know
salads can be something you either love or hate, just based on the dressing
alone! I know I like salads myself, but only if there’s a good (and oil-free)
dressing that really adds another dimension to it. And I don’t like eating
the exact same one every day either!

This is one thing I think most people have a problem with. They kind of get
stuck in a salad rut and use the same old store bought dressing every time,
or just give up eating salad because they don’t really know what to put in it
or on it.

This is why I created some awesome salads and raw entrees and added
some killer combinations to them to make the flavours pop in your mouth
to savor.

It’s called Savory Raw Dinner Recipes because fruit salad and
smoothies are pretty simple in terms of preparing and flavor combinations,
but mixing salad, fruit and vegetables together into a healthy dish can be
a little trickier and more complex.

If you want to eat more raw foods but are bored with typical raw recipes,
salads and veggie sticks and dip, I think you will love Savory Raw Dinner
Recipes.

————–
Get over 50 more healthy and delicious raw recipes here:
http://www.plantbasedu.com/savory
—————-

In addition to the DVD version, we’ve now created a DIGITAL VERSION
of this program for those who prefer to download everything right away and
not wait for post man!

Have you ever been to Hawaii before? What is your favourite place? Where would you like to go?


Honolulu on Dwellable

Filed Under: Articles, Travel Tagged With: dinner, raw, savory

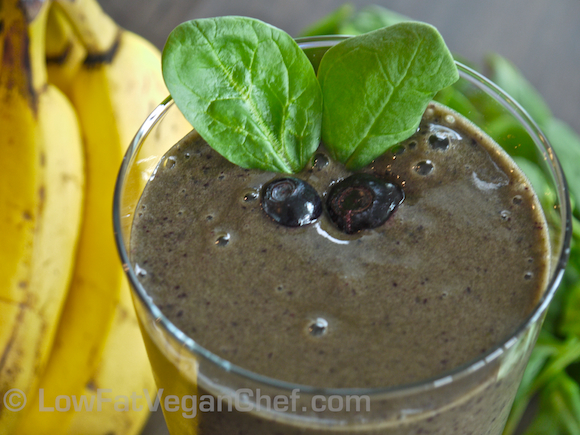
80/10/10 Recipe: Beginner’s Green Smoothie Banana Blueberry Spinach

April 11, 2012 by Veronica Grace 20 Comments

Fb-Button

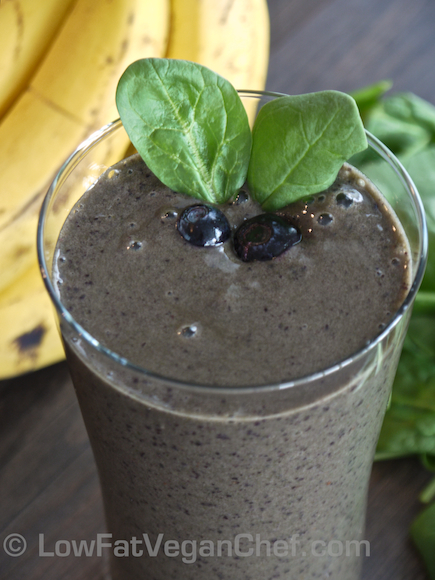
Low Fat Vegan Chef's Beginner's Green Smoothie Blueberry Banana Spinach Smoothie

For some of you green smoothies might be something new, or something you’ve heard of but never tried. Others may make green smoothies regularly and enjoy them. I wanted to share a really easy green smoothie recipe with you today. Something I would call a “basic” or “beginner’s green smoothie”.

#1. Because it’s not too frightening looking and you can tell it has berries in it (this may seem a little normal looking). This may also appeal to people who are afraid of drinking something that looks like green grass!

#2. It tastes very nice and you cannot detect any greens in it at all. Baby spinach is probably the best green to start with when dipping your toes (and taste buds) into making a green smoothie.

Green smoothies are basically just a mixture of fresh ripe fruits, some mild greens, maybe some frozen berries and a little water. They need not be complicated, and they don’t need any kind of protein powders, raw pseudo “super foods” or oils like coconut or flax oil. The goodness of a simple green smoothie comes from whole foods. Whole fruit and whole greens is all I put into my smoothies.

Green smoothies can also help get some more greens into your diet (especially since they don’t need dressing) and can be good for children or people with a compromised ability to chew their food really well.

I only blend my smoothies for about 30-45 seconds in my Vitamix. I don’t like to let it run on too long and get too thin, or warm.

Another good thing to do is to not gulp your smoothie but drink it and chew it a bit. I don’t recommend sipping on smoothies for hours at a time or all day (this can cause dental problems and weaken your enamel from feeding the carries and bacteria in your mouth sugar all day) though. Consuming a smoothie in 10-20 minutes should be fine, and then you can wait 30 minutes before brushing your teeth and rinse your mouth with water if you desire. When using berries that have little seeds I like to use a water pik as well as there can be little pieces that are hard to get out between your teeth.

To make a basic green smoothie you want to start out with a base of either ripe bananas or ripe mangoes (I like ataulfo mangoes) or even a mixture of both. Then you can use 2 cups of mild greens like baby spinach, lettuce, mache (lambs lettuce/corn salad), or 2-3 leaves of kale or Swiss chard (remove the big stems). If desired you can add another fruit like berries, pineapple, mango, papaya, grapes, even watermelon. Depending on what blender you have you may need to add a little water as well, just enough to blend or to get the consistency you like. I like really thick smoothies so I chew them. Some people like only very thin ones so it’s like fruit juice. It’s up to you. Always stack the smoothie in your blender with water at the bottom, then bananas, then greens, and then frozen fruit. Use a tamper (if you have a Vitamix) or break up the chunks of banana before blending to get everything to combine easily. If you have a basic blender you may want to blend the banana, water and greens first, and then add a little additional fresh or frozen fruit and blend again.

Ok, now that I’ve shared some tips on green smoothies, let’s go on to the recipe.

Low Fat Vegan Chef's Beginner's Green Smoothie Blueberry Banana Spinach Smoothie

80/10/10 Recipe: Banana Blueberry Green Smoothie

Serves 1

Ingredients:

3 ripe bananas (see my post on how to tell if your bananas are ripe enough)
2 cups baby spinach, packed
2 cups fresh or frozen blueberries
1/4-1/2 cup water (as desired)

Directions:

  1. Place ingredients into blender in the order above putting the bananas on the bottom. Add a little water if desired to help it liquify.
  2. Blend for 30-45 seconds if you have a Vitamix. (If you have a regular blender you may need to break up the banana pieces into smaller chunks and blend with a little more water or a little longer depending on how strong the motor is.)

I find that having frozen fruit gets the smoothie cool enough without the need to add ice. Unless you have a Vitamix adding ice to a smoothie can make it too gritty and not very smooth to drink.

Have you ever made a green smoothie before? If so what’s your favourite?


Filed Under: 80/10/10, Raw Breakfast, Raw Smoothies, Raw Vegan Recipes Tagged With: 80/10/10, banana, blueberries, fat-free, gluten-free, green, nut-free, raw, smoothie, soy-free, spinach

Gordon Ramsay Finally Empathizes With Vegetarians – Shocked At Factory Farming Practices

April 10, 2012 by Veronica Grace 5 Comments

Fb-Button

Although this is about farming practices in the UK, don’t think that it’s not just like this or worse in the USA or Canada. Pigs, cows, chickens, and turkeys are kept in horrific environments and under often dangerous and unsanitary living conditions.

Gordon Ramsay prefers to use free range vegetarian fed animals in his cooking, but at least after what he sees going on in factory farms he admits that he can see why people would choose to give up the taste of meat to become vegetarian or vegan. This is really really great to hear. I have been a fan of Gordon Ramsay for a while, but was always bothered by his often dismissive and negative comments to vegans and vegetarians on his shows. They could have been edited that way, but it sure seemed like he didn’t like us before. I have seen him create a few vegetarian recipes, but I am not sure of any vegan ones being made on his shows.

There are SO many more reasons to go vegetarian or vegan as well besides just animal cruelty. It does send a message when you vote with your dollars to buy fruits and vegetables instead of meat and dairy products. But you also are taking more control over your health and what goes onto your plate by questioning where it came from and how it was produced. The sad fact is that most meat and dairy products come from animals that are treated very poorly and sometimes even brutally and that’s not something that I want to be a part of. While some may argue it’s not natural or hard to be vegetarian or vegan, I think it’s important for your health, the planet and the animals to not support these disgusting factory farms. Everything you buy counts as your vote to have more of that. Big companies are profit driven and what you choose to eat every day makes a big difference.

If I can help people learn how to enjoy cooking and making vegan food, or even just eat more of it (and less meat) that makes a difference. Every little bit counts.

Filed Under: Articles, Videos Tagged With: factory, farming, gordon ramsay, videos

  • « Go to Previous Page
  • Page 1
  • Interim pages omitted …
  • Page 19
  • Page 20
  • Page 21
  • Page 22
  • Page 23
  • Interim pages omitted …
  • Page 28
  • Go to Next Page »

Primary Sidebar

Follow Us:

Newsletter

Get The Low Fat Vegan Starter Kit

natural organic skin care line

Free Skincare Samples

Earn Free Crypto At Binance

Earn Free Bitcoin on Gemini Exchange

Earn $10 in Bitcoin With Gemini Exchange
Dr. Fuhrman
Dr. Fuhrman
Dr. Fuhrman

Tags

80/10/10 apple avocado banana blueberries breakfast broccoli Carrots celery chickpeas cilantro corn cucumber Curry dill dinner easy Eat To Live fat-free gluten-free how-to Indian Dishes lemon low-fat mango mexican mushrooms nut-free oil-free pasta pineapple plant-based raw raw vegan rice smoothie soup soy-free spinach tofu tomato tomatoes vegan vegetarian vitamix

Secondary Sidebar

Recipes:

  • Cooked Vegan Recipes
  • *My Recipe Books
  • Breads and Baked Goods
  • Breakfast
  • Brunch
  • Burgers
  • Casseroles
  • Curries
  • Desserts
  • Dinner
  • Dips for Veggies or Chips
  • Eat to Live-Dr. Fuhrman Recipes
  • Engine2Diet
  • Ethiopian Dishes
  • Greek
  • Green Dishes
  • Holiday
  • Indian Dishes
  • Mexican
  • One Pot Meals
  • Pasta
  • Pizza
  • Quinoa
  • Salads
  • Sandwiches and Wraps
  • Raw Vegan Recipes
  • 80/10/10
  • Raw Breakfast
  • Raw Desserts
  • Raw Dips
  • Raw Dressings
  • Raw Entrees
  • Raw Juices
  • Raw Salads
  • Raw Smoothies
  • Raw Snacks
  • Raw Soups
  • Sauces
  • Side Dishes
  • Slow Cooker Recipes
  • Snacks
  • Soups and Stews
  • Spices/Seasonings
  • Sushi
  • Thai
  • Vietnamese

Copyright © 2025 · Foodie Pro & The Genesis Framework