• Skip to primary navigation
  • Skip to main content
  • Skip to primary sidebar
  • Skip to secondary sidebar

Plant Based U

Fat-Free and Low Fat Vegan Plant Based Recipes

  • Home
  • Recipes
    • Raw Vegan Recipes
    • Cooked Vegan Recipes
    • Eat to Live Dr. Fuhrman Recipes
  • Products
  • Coaching
  • Videos
  • Articles
  • About
    • What Is Low Fat Vegan/Whole Foods Plant Based
    • Resources
  • Contact

mushrooms

Fb-Button

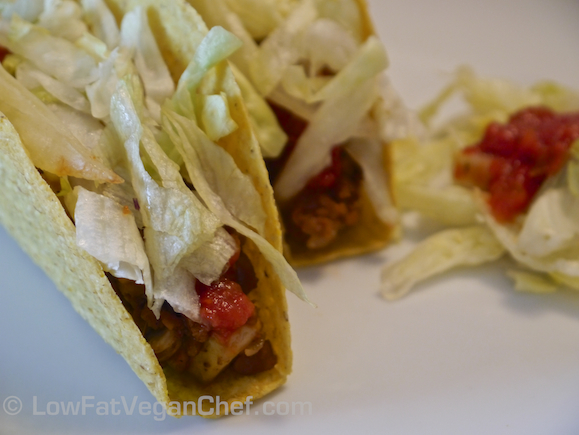
Vegan Soy Veggie Ground Tacos with Mushrooms

May 6, 2013 by Veronica Grace 17 Comments

Fb-Button

Sometimes you get a hankering for those tacos you used to make at home. You know, back when your family cooked up some ground beef and had family taco night? (At least my mom did this when I was growing up!)

But now you can have delicious meat-free tacos and jazz up them with your favorite toppings and make them a little healthier. This vegan taco recipe uses veggie ground that you can purchase at most grocery stores or health food stores. And while I don’t eat fake or packaged meat-like products very often, sometimes your friends or family might want something that has a  familiar meaty taste. These fit the bill. Alternatively for a soy-free whole food option you can cook up some brown lentils (or used canned) and substitute that for the veggie ground if you wish.

These vegan tacos are pretty easy to whip up, and take no more time than traditional homemade tacos. And best of all you don’t have to worry about touching or cooking and draining fatty ground beef and making a mess! (That was never fun anyways, right?) You can also top these tacos with your favorite garnishes like homemade pico de gallo, salsa, guacamole and more. I even reused some leftover fajita seasoning mix I made for another recipe so I don’t have to use the high salt msg laden one they sell at the store. Yay 🙂

Now let’s check out the recipe!

Yves Veggie Ground Tacos with Mushrooms

Serves 4

Taco Ingredients:

1 onion, chopped
6 oz./170 grams mushrooms, sliced
3 cloves of garlic, minced
1 340 g package regular Yves Veggie Ground (or Gardein Veggie Ground) *or sub drained, brown lentils
2 tbsp salsa (low sodium)
2 tsp fajita or taco seasonings (see my homemade recipe here)
Herbamare or salt to taste
Fresh ground pepper to taste
1 package of taco shells or soft corn tortillas

Taco Garnishes:
Salsa or diced tomatoes
Shredded Lettuce or shredded cabbage
Chopped Cilantro
Homemade guacamole *optional

Directions:

Preheat oven (to temperature specified on package of tortilla shells)

1. In a large non-stick pan sauté onions and mushrooms for 5-6 minutes until soft. Add a little water if necessary if it begins to stick to your pan.

2. Add the garlic and the veggie ground and break up with a wooden spoon or spatula.

3. Add salsa and fajita or taco seasoning and cook until veggie ground is browned and heated through.

4. Add salt and pepper to taste. Remove from heat and cover.

5. Lay tortilla shells on a baking sheet and bake as directed until crispy.

6. Assemble tacos with seasoned veggie ground and top with tomatoes/salsa, lettuce, cilantro and any other garnishes.

7. Serve and enjoy immediately!

Variations:

Alternatively you can substitute cooked brown lentils for the veggie ground for a gluten free or soy free option. Add seasonings to taste. You may need some water or broth to prevent sticking in your sauté pan.

What’s your favorite way to eat tacos? Hard shell or soft tortillas?

Filed Under: Cooked Vegan Recipes, Dinner, Mexican, One Pot Meals Tagged With: cooked vegan, gardein, lettuce, mexican, mushrooms, nut-free, salsa, soy, taco, vegan, veggie tacos, yves

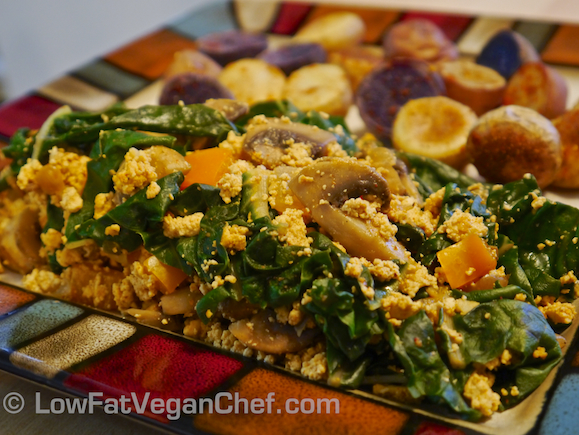
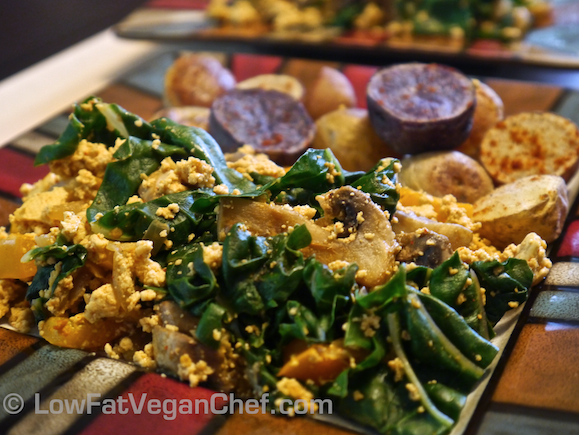
Plant Based Swiss Chard and Mushroom Tofu Scramble (Vegan Breakfast Scramble)

April 7, 2013 by Veronica Grace 21 Comments

Fb-Button


FTC Notice: This blog post contains affiliate links that go to support the blog. 

Psst… I have a secret to tell you…

Sometimes I like to make breakfast for dinner. 🙂 I don’t eat large or heavy breakfast, maybe only occasionally on the weekend as a brunch, but I prefer fruit, smoothies or fresh juice in the morning. So when I am writing breakfast/brunch recipes I sometimes make them for dinner! I have a favorite tofu scramble as my staple (see the recipe here), but I wanted some more variety with my greens. There was some beautiful Swiss chard at the grocery store, so I grabbed it and decided to create a new recipe for it.


I always like to add mushrooms and onions to my tofu scrambles for extra flavor as well but you can feel free to omit those or add tomatoes, zucchini or broccoli etc. This plant based tofu scramble is such a vibrant recipe it’s sure to be a crowd-pleaser whenever you serve it. I also roasted some baby potatoes dry in the oven and sprinkled some salt and smoked paprika on them for a little flavor. I hope you enjoy this recipe as much as I did!


Plant Based Swiss Chard and Mushroom Tofu Scramble

Serves 2 or 4 smaller side servings

Ingredients:

14 oz package firm organic tofu
1/2 medium onion, chopped
8 oz mushrooms, sliced
1-2 tsp low sodium soy sauce
1 bell pepper, diced
3 cloves of garlic, minced
1/4 cup nutritional yeast
1-2 tsp smoked paprika
1/4 tsp Herbamare or sea salt
Fresh ground pepper to taste
1/4 cup almond milk or soy milk (unsweetened original) or you can blend a tbsp of hemp seeds/raw cashews with 1/4 cup of water
1 bunch chard, stems removed and chopped


Directions:

1. Drain, dry and crumble the tofu. (Try to squeeze out as much water as possible so it absorbs more flavour. I like to press it between clean tea towels or a tofu press!)

2. Heat a large non-stick pan and sauté onions and mushrooms in soy sauce for 5 minutes until soft. Add garlic and bell pepper and cook for 2 minutes.

3. While the vegetables are cooking add the tofu to a bowl and season with nutritional yeast, smoked paprika, Herbamare or salt and pepper to taste. Stir to combine.

4. Add tofu to vegetables and heat through and cook for about 5-8 minutes.

5. Add the chopped Swiss chard or other greens and almond or soy milk. Cover and steam for 1-2 minutes. (Longer if you use kale, less if you use spinach.)

6. Stir and check seasonings.

7. Serve with toast or roasted or steamed potatoes. (I made oil-free roasted baby potatoes with it. I like to add rosemary or thyme along with garlic and onion powder and a little salt. )


Have you ever made plant based tofu scramble before? What do you put in it?


Filed Under: Breakfast, Brunch, Cooked Vegan Recipes Tagged With: bell pepper, breakfast, brunch, gluten-free, low fat vegan, mushrooms, onions, smoked paprika, swiss chard, tofu scramble, vegan

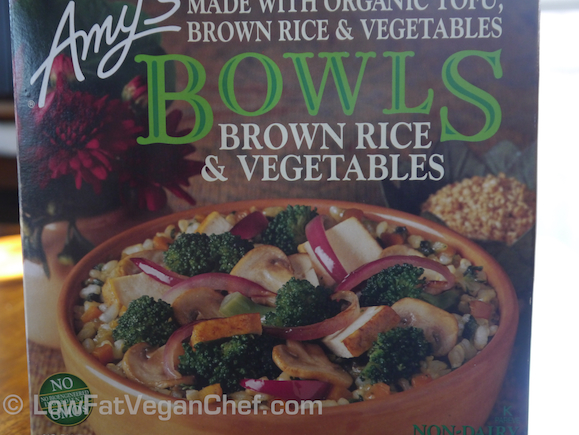
Product Review: Amy’s Bowls Brown Rice & Vegetables

January 23, 2013 by Veronica Grace 1 Comment

Fb-Button

I wanted to do a few reviews on some vegan products my readers might be interested in trying. This one is a frozen dinner by Amy’s and is a brown rice and vegetables bowl.

From Amy’s website “Organic brown rice, tofu and vegetables in a delectable sesame tahini sauce. A flavorful, nutritious high protein meal, containing no dairy or gluten. Satisfying at any time of the day. (Amy’s dad eats his for breakfast on the way to work.)”

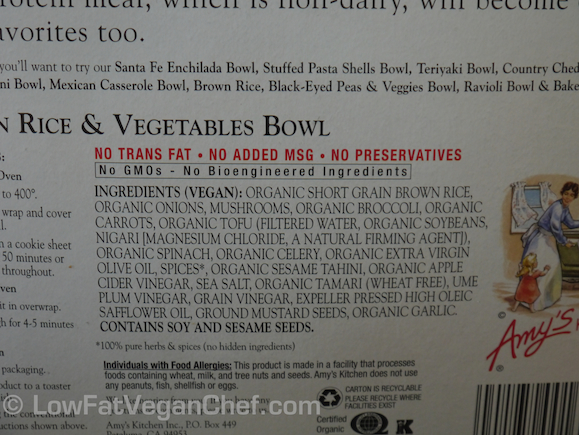
Let’s check out the ingredients:

ingredients

So the ingredients look pretty good overall, considering most frozen dinners have things like high fructose corn syrup, sugar, MSG, preservatives and chemical flavors in them. It also has food ingredients first and not oil or sugar, so this is good.

nutritional info

Now let’s check out the nutritional info.

This is not a low fat meal, but it is not a high fat meal either. The fat in this product is mainly coming from olive oil, tahini and safflower oil. I’m not sure why there are two kinds of oil in this food. That’s the only thing I find strange about this product.

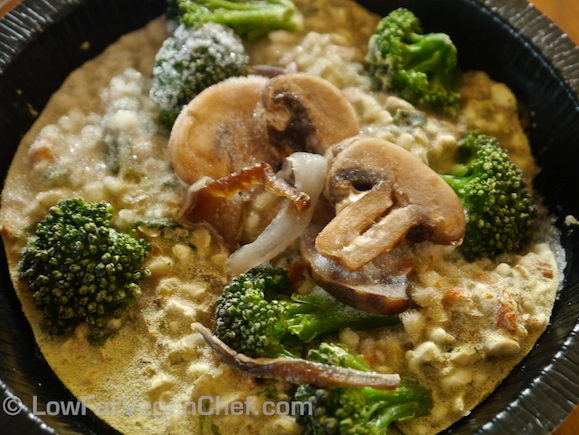
Now let’s see what it actually looks like out of the package.

frozen, removed from box

Microwave directions: Cut slit in package and microwave on high for 4-5 minutes.

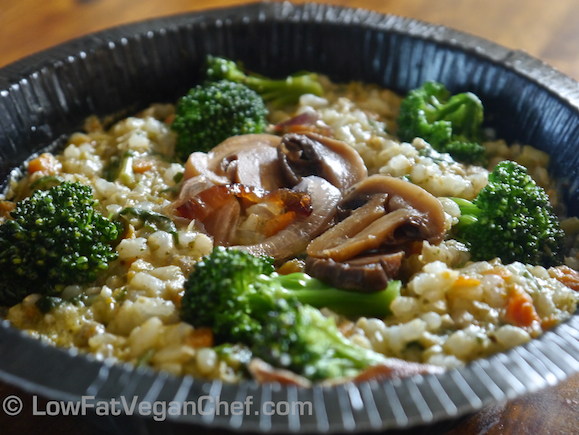
Now that my frozen dinner is hot and ready it’s time to eat!

While it has a nice mild taste and some colour, I would say it tastes more like a creamy mushroom sauce rather than a sesame tahini sauce (tahini means sesame paste.) The tofu had a nice flavor. It kind of reminded me of the tofurky flavor, but maybe that’s just me.

In any case it’s a nice mellow flavored bowl and if you like mushrooms, broccoli and flavored tofu you will like this. Here’s a little review breakdown for you.

Basic Nutritional Info: 260 calories 9 grams of fat 31% fat by calories

Price: $3.74 USD on sale ($4.99 reg) In Canada about $6-$7

Taste: 4/5

Texture: 3/5

Healthfulness: 3/5

Looks: 3/5

Low fat: No, medium fat recipe

Vegan: Yes

Gluten Free: Yes

Soy Free: Yes

Nut Free: Yes

GMO Free: Yes

Would I eat it again? Sure for a quick mini meal on the go. But I won’t likely buy it again soon as I enjoy homemade rice bowls better.

What could be improved? More rice so it’s not so moist and wet (and more filling) and remove the two kinds of oil which is kind of overkill and unnecessary.

*Disclosure, I’m doing this review of my own accord, I was not given any free product nor was I paid to do this review.

Hope you enjoyed my review! Let me know what you thought of your Amy’s Bowls Brown Rice And Vegetables.

Filed Under: Articles, Product Reviews Tagged With: Amy's Bowl, broccoli, Brown Rice and Vegetables, mushrooms, Review, Sesame Tahini, vegan

Vegan Soy Curl Fajitas With Yams (Sweet Potatoes)

January 21, 2013 by Veronica Grace 3 Comments

Fb-Button

I don’t often use “fake meat” substitutes and prefer to make almost everything from scratch.  But my favourite “just like chicken” product is Soy Curls because they do have a great taste and texture once they are seasoned.  They don’t contain a lot of ingredients, just soy and they are gluten free (and GMO free as well).

So far everything I have put Soy Curls in has turned out delicious. You really can’t screw up Soy Curls.  Essentially you take the dried product and soak it in warm/hot water for about 10 minutes to plump up and you drain them.  I like to add some salt and seasonings to them while they soak, or else they don’t taste like anything. They do need some salt to have flavor.

Then you can just sauté these dry in a pan (they taste better if you cook some of the water out) I cook them for 10-15 minutes until they seem done and have a good texture. You can then add the Soy Curls to any recipe you desire, but they taste best if you season them or put a sauce over them. See my previous Soy Curl recipe here that is one of my favorites.

If you don’t want to buy Soy Curls you can omit them and just use the veggies and yams in this recipe instead.

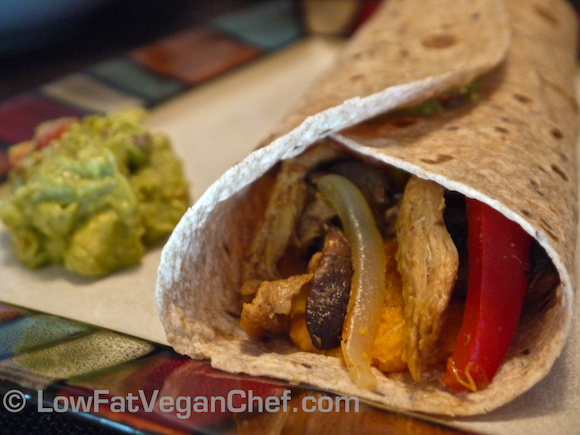
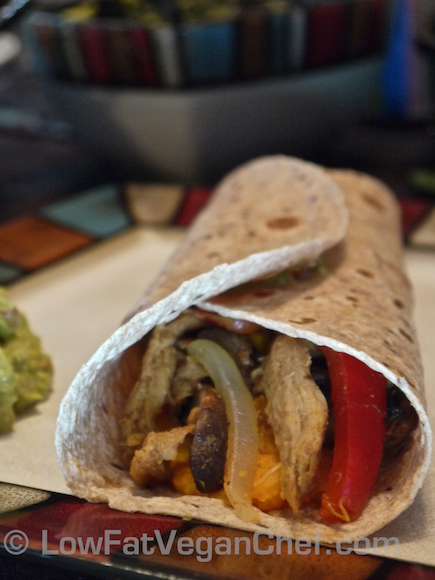
It’s also really hard to make fajitas look appetizing when you have so many brown/beige colours with the whole wheat tortillas, mushrooms, onions and Soy Curls! At least my new colorful plates help…

Vegan Soy Curl Fajitas With Mashed Yams (Sweet Potatoes)

Serves 4

Ingredients:

3 small yams (orange sweet potatoes/kumara)
Roasted cumin (I use McCormick’s) to taste
Herbamare or Sea salt to taste
Chipotle chili powder or chili powder to taste
1 1/2 cups Soy Curls (dried)
1 sweet onion, sliced
2 bell peppers, sliced
1 cup mushrooms slices
9-12 small corn or small wheat tortillas
1-2 tbsp fajita seasoning (recipe found here)

Directions:

Peel and slice the yams. Place in a pot or steamer basket and steam until fork tender. 15-20 minutes depending on size. Set aside when done.

Soak the Soy Curls in warm/hot water for 10 minutes. Season with some salt if desired (I do). Drain.

In a large non-stick skillet or wok saute the Soy Curls over medium heat for about 10 minutes. Add the mushrooms and saute for another 2-3 minutes. Add the onions and peppers and season to taste with fajita seasoning. Cook until peppers and onions are at desired tenderness (about 1-3 minutes).

Place the yams in a bowl and mash them and season to taste with cumin, salt and chipotle powder. (Don’t over season, just give it a little flavour.)

Lay out a tortilla, spread some mashed yams and add the fajita ingredients.

Serve with guacamole or salsa if desired.

Repeat with remaining tortillas.

Additional Tips:

For warm tortillas you can microwave them for a few seconds until warm or heat them in an oven wrapped in tinfoil on low while you prepare your ingredients.

Feel free to add other veggies as desired like zucchini or carrots. Cook longer if necessary.

Soy Curls can be cooked a lot without burning because they are so moist so keep cooking them until your vegetables are at desired tenderness.


What are your favorite ingredients in veggie fajitas?
Filed Under: Cooked Vegan Recipes, Dinner, McDougall Program, Mexican Tagged With: bell peppers, fajitas, mexican, mushrooms, onion, seasoning, soy curls, sweet potatoes, tortillas, vegan, yams

Asian Vegetable Stir Fry in Tahini Sauce

January 7, 2013 by Veronica Grace 10 Comments

Fb-Button

Stir fries can vary widely from delicious and tasty to boring and bland, and as a vegan it isn’t always the most appetizing dish to make (if you’ve eaten it a thousand times before.)

I find the solution is to vary the sauces you use and I like to make different ones. You can also change up the rice you serve them on by using brown rice, white rice, red rice or a combination of any of them.

You can use this tahini sauce over steamed vegetables or stir fried vegetables in a non stick pan. (You don’t need to use oil in non stick pans, you can cook the vegetables by themselves or in a little water if necessary).

Use your favorite veggies and get creative!

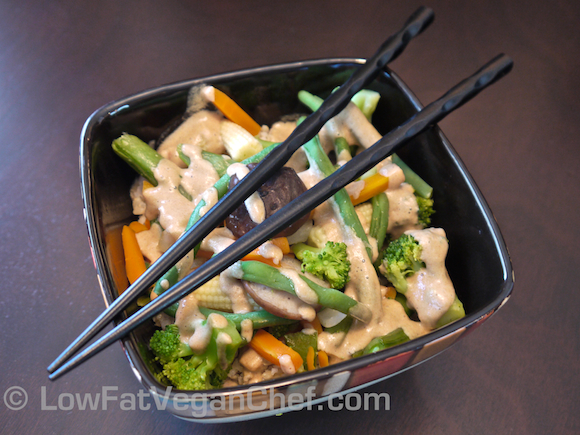
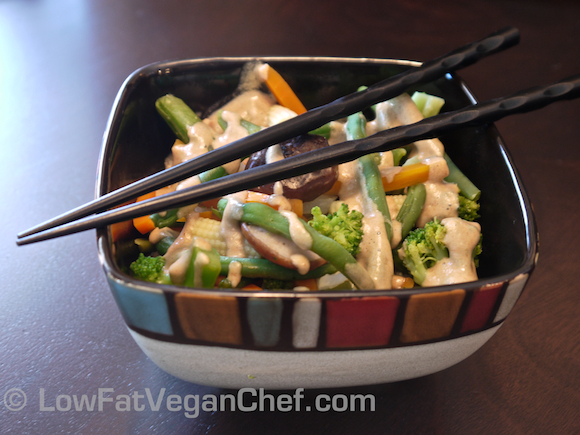
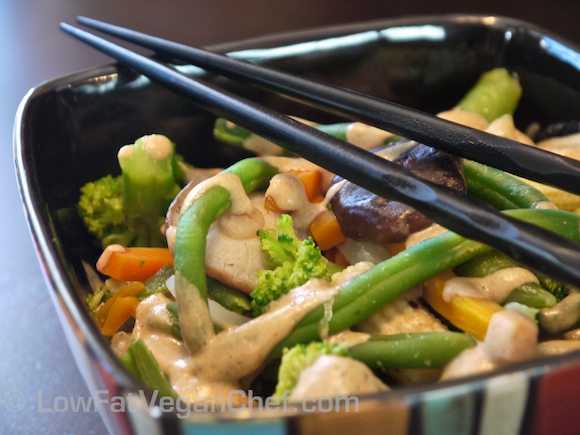
Asian Vegetable Stir Fry in Tahini Sauce

Serves 2

Tahini Sauce Ingredients:

1/3-1/2 cup water (I use the lower amount, my Vitamix pulverizes everything, only use higher amount for low powered blender)
2 tbsp tahini
2 large medjool dates, pitted (and chopped if necessary for your blender)
1 large clove of garlic
2 tsp of fresh chopped ginger
1 1/2 tbsp low sodium tamari or soy sauce (GF if desired)

Stir Fry:

3-4 cups frozen or fresh mixed vegetables
1 1/2 cups cooked brown or white rice

Directions:

1. Combine sauce ingredients in a Vita-Mix or blender and blend until smooth. If using a basic blender you may need to use the higher amount of water and chop your garlic, ginger and dates to ensure that it blends properly.

2. Saute fresh or frozen vegetables in a wok or non-stick skillet with 1/2 cup water. Cover with a pot lid and steam until tender. Add additional water if necessary.

3. Assemble bowl. Add brown rice to a bowl or plate, top with vegetables and drizzle with tahini sauce.

4. Serve.

Additional Tips:

You can customize this sauce by adding more or less garlic or ginger or dates, or by swapping out the tahini for almond or peanut butter instead for variety.

To make this recipe really quickly you can use frozen stir fry veggies or pre cut fresh veggies from the produce section of the grocery store.

What’s in your favorite stir fry recipe? 

Filed Under: Cooked Vegan Recipes, Dinner, Eat To Live - Dr. Fuhrman Recipes, One Pot Meals, Sauces Tagged With: broth, Carrots, cooked, corn, garlic, ginger, gluten-free, mushrooms, nut-free, sesame, snap peas, stir fry, tahini, vegetable

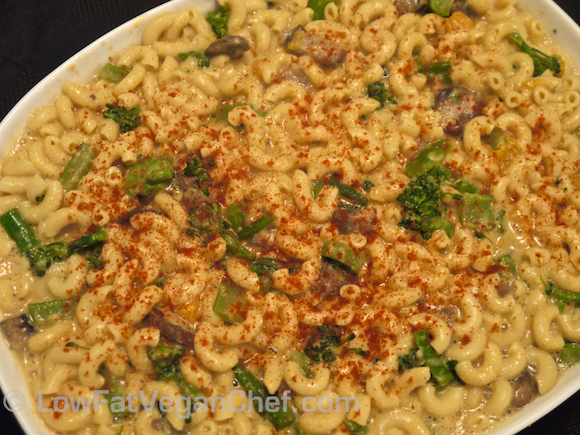
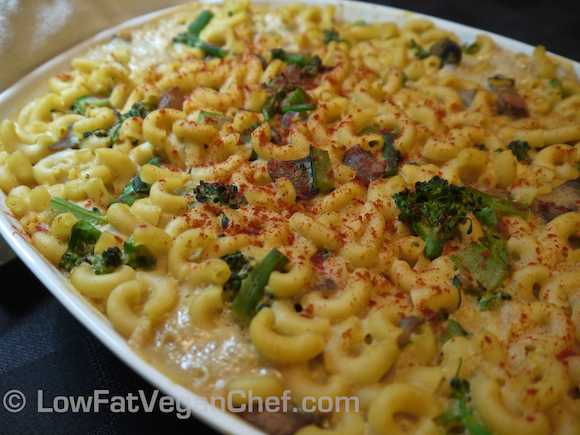
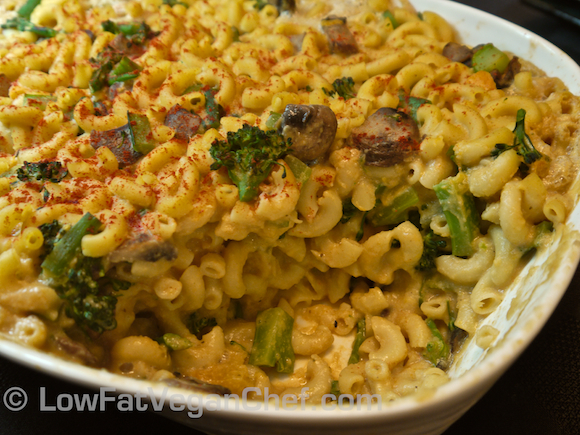
Vegan Baked Butternut Squash Macaroni and Cheese with Broccoli and Mushrooms

December 27, 2012 by Veronica Grace 16 Comments

Fb-Button

Sometimes I like to play around with my own recipes and change them up for variety! This is a different spin on my Low Fat Vegan Baked Butternut Squash Mac & Cheese. This time I’ve left out the panko breadcrumbs so you can see all those lovely vegetables inside!

I’ve added lightly steamed broccolini/brocolette (a milder form of broccoli) and sautéed mushrooms to the mix!

So now not only is this probably the healthiest baked mac and cheese ever (cuz it’s oil free, cheese free and gluten friendly) but it’s packed full of nutritional powerhouse vegetables such as butternut squash, garlic and onions (used in the sauce) and broccoli and mushrooms.

This is just one of 60 delicious recipes in my Vegan Comfort Foods From Around The World recipe ebook.

I’m sure kids would love this recipe too because the veggies are fairly mild tasting and covered in sauce!

Vegan Baked Butternut Squash Macaroni and Cheese with Broccoli and Mushrooms

adapted from my Baked Butternut Squash Mac & Cheese in Comfort Foods From Around The World

Note: Because I added vegetables to this recipe, the flavor of the sauce needs to be enhanced so I increased the amounts of seasonings.

Serves 6

Ingredients:

½ medium butternut squash (or 1 2/3 cups cooked and mashed)
16 oz./454 g package elbow macaroni or spirals (for GF use Tinkyada brown rice pasta for best results)
1/4 – 1/2 tsp. salt (*optional for pasta)
1 cup broccoli florets, chopped into little pieces
1 cup mushroom slices, chopped
1/2 – 3/4 cup vegetable broth (for cooking)
1 large onion, diced
4 cloves garlic, minced
3 – 4 tsp. brown rice miso (use a lot more if using shiro/white/yellow miso)
3 cups almond milk (unsweetened original)
2 tbsp. flour or cornstarch
3/4 cup nutritional yeast flakes
1/2 tsp. black pepper
1 – 1 1/2 tsp. smoked paprika
3/4 – 1 tsp. salt (*optional for sauce)

Topping:
1/4 tsp. smoked paprika

Directions:

1. Peel and cube the butternut squash and bring to a boil and steam just until soft. Alternatively you can cook in a pressure cooker at high pressure for 5-7 minutes. Drain well. (Tip, if your squash is hard to peel or cut, pop it in the microwave for 3-4 minutes to soften the skin to make it easier to slice.) Measure out 1 2/3 cup of mashed squash and set aside.

2. In a large pot, bring water to a rolling boil and then add salt if desired. Add pasta and cook just before tender (about 2 minutes less than package directions). Generally it’s about 5 minutes. Drain well in a colander and rinse in cold water. (Do not overcook the pasta.)

3. In a non-stick pan, saute mushrooms in 1/4 cup of water over medium high heat for about 5 minutes. Add the broccoli and a little more water and cook for about 2 minutes. Remove from heat, drain and set aside.

4. Preheat oven to 350 F/ 177 C.

5. In a large saucepan heat vegetable broth over medium heat and add the onions. Cook for 5-6 minutes until tender adding broth when needed to prevent burning.

6. Add cooked onions and any remaining broth from pan into Vita-Mix or food processor, add mashed squash, 1 cup almond milk and miso and blend until combined. Set aside.

7. In the same large saucepan add 1 cup of the almond milk and sprinkle 1 tbsp. of the flour or cornstarch when hot and whisk in. Add the remaining 1 cup of milk and sprinkle in another tbsp. of flour. Whisk this together fast. It’s ok if there are a few small bits of flour still.

8. Cook the sauce for a minute or two until hot and quickly add the squash mixture and whisk in. Heat through another minute or two and then add the nutritional yeast and whisk in. Turn off heat and add remaining seasonings starting with the lower amounts. Taste test and add additional seasonings to your liking.

9. Add drained pasta and mushrooms and broccoli to sauce pot and stir to coat. Spread out in a casserole dish. (If you want to add some vegan cheese like Daiya cheese you would layer some in now and mix it in, but I don’t feel the need to add it personally.)

10. Bake for 20-30 minutes just until pasta is tender. (20 minutes if you slightly overcooked your pasta, 30 minutes if you didn’t)

11. Serve.

Additional Tips:

To save time you can use frozen cubed butternut squash and then cook it and mash it, or use canned butternut squash. Both are sold at health food stores in North America.

Smoked paprika (also called Spanish Paprika) is much more flavourful than traditional paprika, it lends a nice smokey flavor to this cheesy sauce. McCormick makes one, or you can get it at some ethnic or Indian markets.

Brown rice miso paste is the best for this recipe, is has a stronger tangier flavor than the lighter misos. This is what gives the sauce a tangy cheezy flavor. If you don’t use it your sauce will not taste like a cheese sauce.

If you’d like a runnier mac and cheese you can add an extra 1/4 cup of almond milk to the sauce, but you’ll need to add some more seasonings to readjust the flavor.

Have you ever made an oil free, cheese free mac and cheese recipe? What did you use? 

Filed Under: Casseroles, Cooked Vegan Recipes, Dinner, McDougall Program, Pasta Tagged With: almond milk, broccoli, butternut squash, cheezy sauce, cooked, gluten-free, mac & cheese, mac and cheese, macaroni and cheese, mushrooms, pasta, soy-free

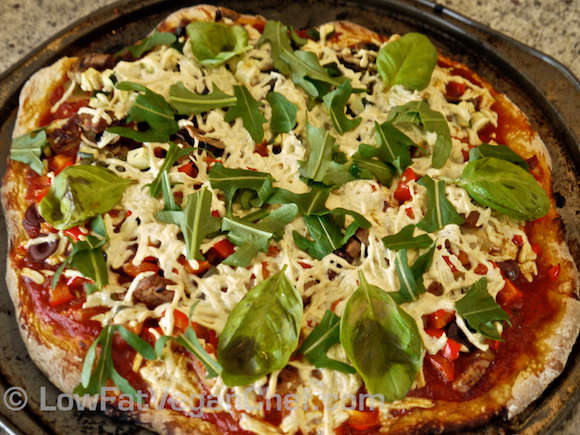
Vegan Mushroom, Olive, Pepper, Arugala and Basil Pizza

October 26, 2012 by Veronica Grace 6 Comments

Fb-Button

olives, mushrooms, red pepper, arugula, basil, Daiya cheese

Mmm vegan pizza… so many delicious options for veggies and herbs to put on your pizza. My friend and I made some homemade pizza crusts using this dough recipe below.

This dough recipe is from Zojirushi’s bread maker recipe book

Traditional Pizza Dough Recipe (Bread maker)

Makes 2 12″ pizza crusts

Ingredients:

1 cup water
1 tbsp olive oil (I skipped it)
1 tbsp of sugar
1 tsp salt
2 1/2 cups bread flour
2 tsp active dry yeast

Directions:

  1. Measure all ingredients and sprinkle into baking pan, making sure the yeast doesn’t touch the sugar or water.
  2. Select dough setting on bread maker and press start.
  3. Remove dough and preheat oven to 400 F degrees.
  4. Roll out dough and shape into desired shape.
  5. Cover dough with cloth and let rest for 15 minutes.
  6. Spread pizza sauce over crust.
  7. Top with desired toppings and vegan cheese if desired. (I used Daiya.)
  8. Bake 20-25 minutes until crust is golden brown.

This pizza was topped with olives, red bell pepper, sautéed mushrooms and onions, fresh arugula, fresh basil and Daiya cheese. Not a typical vegetarian pizza, but it was very delicious! If you can’t find Daiya cheese you can substitute another vegan cheese, make your own vegan cashew cheese, or leave it with just sauce and veggies like a flatbread.

Filed Under: Cooked Vegan Recipes, pizza Tagged With: arugula, basil, mushrooms, nut-free, olives, pizza, soy-free

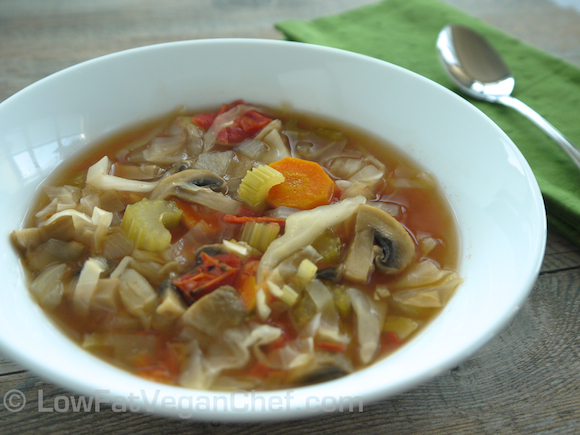
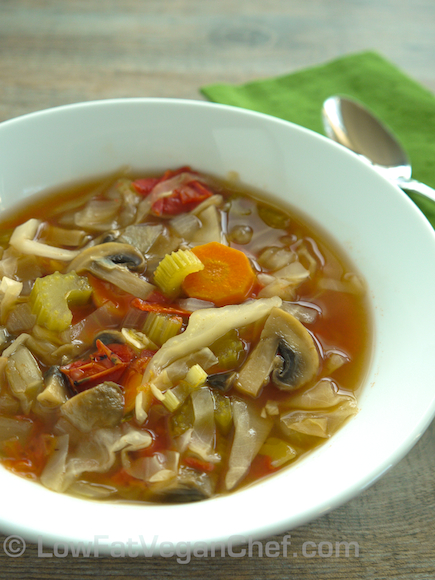
Fat Free Vegan Cabbage Soup (Cabbage Soup Diet Recipe For Weight Loss)

May 22, 2012 by Veronica Grace 72 Comments

Fb-Button

Fat Free Vegan Low Calorie Cabbage Soup Diet Recipe

Today I have a really healthy and easy recipe for you, especially if you’re interested in losing some weight, feeling better and eating more home cooked food. It’s a delicious spin on cabbage soup.  No this is not the recipe from the Cabbage Soup Diet (which after looking at makes me think it kinda sucks…) Mine features whole homemade ingredients without any packages of soup seasoning, V8 or chemical flavour enhancers.

The point of the cabbage soup in the cabbage soup diet is to fill you up on broth and vegetables in place of one meal a day so that you can lose weight fairly easily without crash dieting or being hungry.

A Healthier Alternative To The Cabbage Soup Diet

If you wanted a healthy guideline to lose some weight a safe and manageable way it would be to just eat fruits, lots of vegetables (even baked potatoes, sweet potatoes and squash are ok) and homemade vegetable soup (should be oil/cream free). You want to fill up on lower calorie high fibre nutrient dense foods. You could also have some beans or homemade hummus to go with your meals if desired as well. People gain weight because they eat too many rich foods like fried foods, meat, cheese, cream, butter, pastries, and bread products with oil in/on them. Even eating a diet of just potatoes wouldn’t cause you to gain weight, but if you slathered every potato in butter, sour cream and bacon it would become far too rich to achieve weight loss.

Actually I put a friend of mine on a fat free (and also no bread or flour products) diet back in September and she’s lost 50 lbs already just by eating more homemade meals and making sure they were based on foods like potatoes, vegetables and even rice instead of meat, bread, pastries and dairy products. She’s doing great and still enjoys eating this way every day.

One thing people think when it comes to alternative “healthier” lifestyles it that they will always hate it, never be able to do it or even starve to death (maybe even get bored to death too!). Let me tell you that is not the case. I started eating more raw and vegan for health reasons, not because I didn’t like how steak or chicken tasted.  (Hey I’m being honest!) But now I’ve been eating vegetable based dishes for so long that I actually don’t miss or crave any animal foods at all. I really couldn’t imagine eating them again. I actually enjoy the food I eat now even more than the food I used to eat. (Whatever you do most often now, you tend to like even more than what you used to do back then. It’s just the way the brain perceives things. Recent events tend to be better than past events a lot of the time because their more clear in our minds.) I like vegetables so much that if I go to a regular restaurant and get a pasta dish or soup that has hardly any vegetables in it, I get sad and want more vegetables! I could never just eat a big plate of plain spaghetti and sauce anymore, I love putting vegetables or lentils in it to give it more flavour.

People may think all vegans eat are carrots, broccoli and celery, but that is simply not true. In fact I eat a much wider variety of ALL plant foods now than I ever did before. I can’t even say I have a favourite fruit or vegetable. I love many of them like cherries, mangoes, watermelon, white peaches, Hawaiian papayas, pineapple, blackberries, blueberries, raspberries, eggplant, sweet potatoes, butternut squash, Thai pumpkin, broccoli, asparagus, mushrooms and more. I wouldn’t be able to choose any of those as my favourite.  I eat an even bigger variety than these, but these are some foods I really enjoy eating regularly and never get sick of eating. (This doesn’t even includes all the beans, legumes and whole grains I enjoy as well!)

I made 2 batches of vegetable broth and 2 batches of this cabbage soup last week, it was that good. One day I had 3 bowls of it for dinner! At 108 calories a bowl there’s really nothing to worry because you couldn’t possibly gain weight by eating this soup.

Fat Free Vegan Low Calorie Cabbage Soup Diet Recipe

Fat Free Vegan Cabbage Soup Recipe

Serves 8

Ingredients:

2 medium sweet onions, diced (like Vidalia, Walla Walla etc. They have light coloured skin and a slightly flattened top and bottom)
5 cloves of garlic, minced
10 oz./283 g package of mushrooms, sliced
2 tsp fresh thyme (or 1 tsp dried)
6 large stalks of celery, leaves removed and sliced
4 large carrots, peeled and sliced
1 lb/454 g (1/2 head) of green cabbage, shredded or cut with mandolin
28 oz/793 g (or 2 16oz cans) fire roasted diced tomatoes (I use Muir Glen Organics)
10 cups/2.5 qtss/2.3 L fresh vegetable broth (my recipes are here) or low sodium packaged vegetable broth
Herbamare/Sea salt and pepper to taste

Directions:

  1. Saute onions, garlic and mushrooms in 2-3 cups of vegetable broth for 5-6 minutes until the onions are tender. (Mushrooms take longer to cook than the rest of the veggies, so we’re cooking them first.)
  2. Add the rest of the vegetables, the thyme, the canned tomatoes, and the vegetable broth.
  3. Cook the vegetables over medium heat for 30-40 minutes or low heat for 1.5-2 hours until the vegetables are tender.
  4. Season to taste with Herbamare or salt and pepper. Add a little cayenne or chili pepper if you like the soup spicy. If you like your soup a little thinner you can add a little more vegetable broth or water if desired. But don’t add too much or you will dilute the flavour.
  5. Serve!


Additional Tips:

This soup is almost like a cabbage stew because it’s so full of vegetables. I prefer to have lots of veggies in my soup and a little less broth. You can add a little more broth if you like really watery soups. (But this is already so low calorie you don’t really need to water it down if you’re looking for a diet-friendly meal.)

I found I didn’t need to add much salt to my soup as I made homemade broth that was naturally sweet from the sweet onions, carrots and thyme and the fire roasted tomatoes have enough salt in them already.

This is a great recipe that you can use for a soup base and just change out some of the veggies for different ones for variety. You can also experiment with different salt free seasoning blends. Just make sure you always add a little, let it cook for a few minutes and taste test before adding more, so you don’t end up with an over seasoned soup!

If you use a bowl or two of this soup with some fruit or a salad every day instead of your normal meal it will help you lose weight just like any other meal replacement plan.  But this is much more nutritious because it’s homemade and packed full of vitamins and minerals from the veggies. Even more so if you make your own vegetable broth.  There is no comparison for me between store bought and homemade broth, so give it a try sometime and you will enjoy homemade soups even more!

Even if you changed a few of the vegetables in this soup it would be around the same calories. Overall it’s a very low calorie nutrient dense soup.

Nutrition Facts
  Servings Per Recipe: 8
  Serving Size: 1 serving
Amount Per Serving
  Calories 104.0
  Total Fat 0.4 g
    Saturated Fat 0.1 g
    Polyunsaturated Fat 0.2 g
    Monounsaturated Fat 0.0 g
  Cholesterol 0.0 mg
  Sodium 254.9 mg
  Potassium 562.3 mg
  Total Carbohydrate 17.8 g
    Dietary Fiber 6.3 g
    Sugars 7.8 g
  Protein 3.8 g
 
  Vitamin A 97.3 %
  Vitamin B-12 0.0 %
  Vitamin B-6 9.9 %
  Vitamin C 69.2 %
  Vitamin D 6.7 %
  Vitamin E 2.0 %
  Calcium 10.3 %
  Copper 9.9 %
  Folate 12.6 %
  Iron 10.5 %
  Magnesium 5.5 %
  Manganese 9.9 %
  Niacin 10.4 %
  Pantothenic Acid     7.9 %
  Phosphorus     7.1 %
  Riboflavin 11.7 %
  Selenium 6.2 %
  Thiamin 6.6 %
  Zinc 3.3 %


 Have you ever made cabbage soup before or tried the Cabbage Soup Diet?

Filed Under: Cooked Vegan Recipes, Eat To Live - Dr. Fuhrman Recipes, One Pot Meals, Soups and Stews Tagged With: cabbage, Carrots, celery, fat-free, gluten-free, mushrooms, nut-free, soup, soy-free, stew, weight-loss

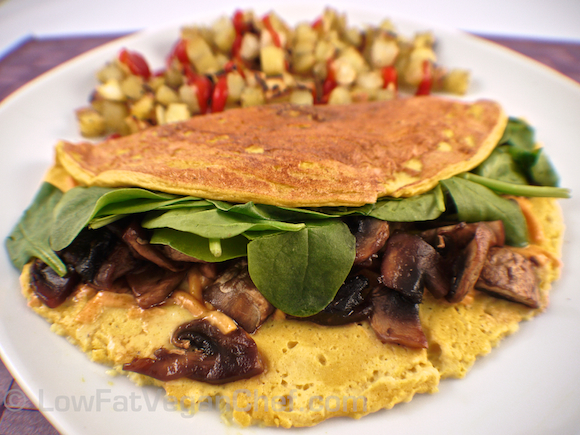
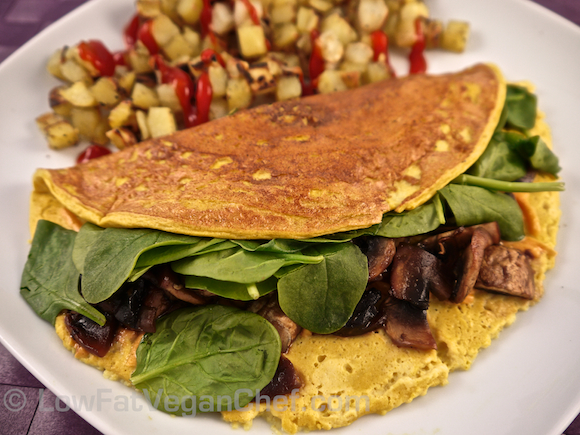
The Best Low Fat Vegan Silken Tofu Omelette Recipe!

March 12, 2012 by Veronica Grace 27 Comments

Fb-Button

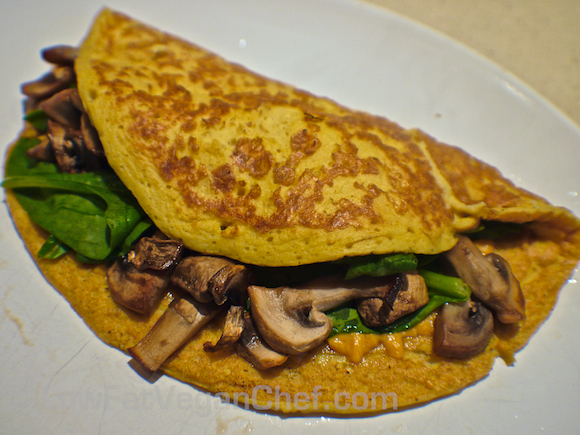
Low Fat Vegan Chef's Silken Tofu Omelette With Spinach and Mushrooms

I’m going to show you just how YOU can make a delicious vegan tofu omelette. I have to confess, this omelette looks WAY better than my first attempts at making vegan tofu omelettes. Making pancake-like things including crepes, omelettes, Indian dosas and Ethiopian injeera bread have all been things that were a little hard for me to get right at first. I realized the problem was my insecurity and lack of patience in making them! Once you tell yourself you can do it and just try it, it works out  much better. And hey as long as it tastes good, it’s all that matters the first time!

Making this recipe does take a little bit of practice if you are:

1.) Inexperienced at pouring and flipping pancakes, crepes or omelettes in general

2.) Impatient and paranoid about the omelette sticking and burning to the pan and want to peek and move it around (which it will not, so do not panic and don’t touch it.)

These are things you must learn by experience and you have to accept that it will take a bit of practice being able to pour it, spread it, let it cook (and not mess with it!) and then fold it in half and slide it off the pan.

It took me about 3 cracks at this recipe before I got it right and learned to just trust the process of cooking and the tofu omelette was going to be fine, and stop panicking if it seemed stuck and trying to move it around with a spatula. Don’t do this.

I’ve now got it down pat and even made some for my mom and I over the Christmas holidays (it was her first vegan omelette ever) and she enjoyed it. I think she also enjoyed having some Daiya cheese and mushrooms in it too, but also the novelty of having something omelette-like as she’s been avoiding eggs.

This is a recipe I will make occasionally for a special vegan brunch or breakfast. It’s best for 2-3 people as it can take much much longer if you are trying to use multiple pans or cook for more people.

Tofu scrambles and tofu omelettes seem to take longer to cook than eggs (as they are not raw and drastically changing structure) so they are more forgiving and don’t really overcook. As long as it’s not turning black and you’re cooking it on medium or medium low heat it will be ok.

Also the trick to this is using silken tofu. Do not use regular tofu. You will NOT enjoy the flavour.

Like I said, I’ve made this recipe many times, I have adapted it from Susan V’s recipe at FatFreeVegan.com and made it even LOWER in fat and still delicious. I think I found the perfect vegan tofu omelette recipe! This omelette is gluten free as well!

Hurray!

Low Fat Vegan Chef's Vegan Silken Tofu Omelette With Mushrooms And Spinach

Low Fat Vegan Silken Tofu Omelette Recipe

Serves 2-3 Makes 2 giant (full pan size) or 3 medium sized omelettes

Ingredients:

1 12.3 oz/349 g package FIRM Mori-nu silken tofu (must be firm or extra firm)
3 tbsp. almond or coconut milk
3 tbsp. of nutritional yeast
3 tbsp. cornstarch or tapioca starch
1 tsp. dijon mustard (essential)
1/4 tsp. turmeric
1/2 tsp. Herbamare or salt, or to taste
1/4 tsp fresh ground pepper
1/8 tsp of smoked paprika (This makes it more delicious)

Filling:
fresh spinach
sauteed mushrooms
sauteed onions
any other desired toppings
vegan cheese *optional

Directions:

1. Place all of the ingredients into a Vitamix or food processor and blend together until smooth.

2. Heat a wide shallow non-stick pan or non-stick crepe pan over medium heat. Make sure it’s very hot before using. Sprinkle a little water on it to test. If it bubbles off right away it’s ready. If not, wait until it’s really hot.

3. Pour batter onto pan about the size of a large pancake. Don’t pour too much or it will be hard to pick up and fold . Spread it out a little very gently into a circle using a small spatula. It will be quite thick, this is ok as there is a lot of air in the mixture. Don’t spread it out thinly.

4. Cook for at least 5 minutes until it almost dries out on top and sets. Turn the heat down to medium low. You have the option of flipping it over if you want the tofu to be cooked firm, or you can add your filling now to the bottom half and flip the top half of it over to cover and cook until the ingredients soften and your vegan cheese (if any) melts. I usually just cook it on one side only and then fill the bottom half.

5. When the omelette is cooked and sturdy enough to move, slide it onto a plate. If your fillings aren’t warm enough you can pop it into the microwave for 15-20 seconds to warm up and set the omelette a little more if necessary. The spinach will wilt from the heat of the cooked omelette.

6. Serve. (Be careful! The tofu will be very hot! Let it cool a bit before eating, I don’t want you to burn your mouth.)

Additional Tips:

Mori-nu silken tofu is sold at almost every store. Whether it’s a health food store or just a regular grocery store. Most commonly it is in the “health nut”/gluten free/vegetarian product section of the store with other dried goods. Sometimes it’s in the refrigerated section with tofu and fake meats, but it doesn’t have to be refrigerated so it’s usually in the dry goods section.

If you need a little extra water or milk to blend your tofu add another tbsp or two. Not much it still needs to be thick enough to set.

If your pan is not very good or tends to stick you may need a spray of non-stick spray. But if it’s a good pan, you’ll be ok. Give your pan a wipe with a wet paper towel in between omelettes and let it come back up to temperature again before making the next one. Make sure your pan is clean and doesn’t have black bits on it, or it will get on your omelette.

Practice makes perfect! Even if you mess up a little it will still taste good as long as you cooked it. Give yourself the first one and then save the nicer ones for your family.

If you have any leftover “batter” you can save it in the fridge for another day. Let it sit on the counter and warm up to room temperature before making.

Variations:

You can use any favourite omelette fillings for your vegan omelette. Get creative. Spinach and mushrooms are just my favourites. Make sure your veggies (aside from spinach) are cooked first before adding them to your omelette and season them a little so they will be delicious.

———

Here was my previous attempt where I kind of ripped it while flipping the top half over. It’s ok, it still tasted great!

Have you ever made a tofu omelette before? What are your favourite omelette fillings?
Filed Under: Breakfast, Brunch, Cooked Vegan Recipes, Eat To Live - Dr. Fuhrman Recipes Tagged With: breakfast, brunch, gluten-free, mushrooms, spinach, tofu

How To Make Dr. Fuhrman’s Eat To Live “Anti Cancer Soup” With Step By Step Photos

February 27, 2012 by Veronica Grace

Fb-Button

Dr. Joel Fuhrman's Eat To Live Anti Cancer Soup

FTC Notice: This post contains affiliate links that go towards supporting the blog.

Holy mackerel this “Anti Cancer Soup” recipe makes a ton of soup! You can eat for a whole week off of this one recipe. I decided to try and document Dr. Fuhrman’s famous “Anti Cancer Soup” as it seemed like a fairly intensive recipe and I took it as a challenge to make a soup an entirely new way. For this recipe you’re going to need a good juicer that can handle juicing a lot of carrots and celery. This is the one I use, it’s a medium priced Breville juicer and it does the job.

I met Dr. Joel Fuhrman last February (2011) at Dr. John McDougall’s 3 Day Advanced Study Weekend and he mentioned in his lecture about chopping onions, cooking them and then blending them into the soup for some additional nutritional benefits on how everything combines together. I do NOT remember the exact processes going on, he had a very scientific explanation for this. I will have to watch the recording of the lecture again to get it straight. But all you need to know is, this soup is HEALTHY for you and highly recommended by Dr. Fuhrman as a nutrient dense soup that’s crammed with veggies. Might I just add that Dr. Fuhrman is totally ripped and in amazing shape and his “Disease Proof” diet is definitely working well for him. I saw some pictures of his wife and daughters and they are all very slim and quite beautiful too. He should be very proud to have such a happy and healthy family setting such a great example on a oil free plant based diet.

I just finished up a low fat vegan recipe book of my own called Comfort Soups To Keep You Warm, so I’ve made quite a bit of soup these past few months. I have actually nicknamed myself the “Vegan Soup Queen”  I’ve made so much soup lol! Dr. Joel Fuhrman’s “Anti Cancer Soup” recipe comes from his book Eat To Live (which is actually less than $10 on Amazon right now so check it out.) One thing about this anti cancer soup is that you can definitely tell it was designed by a man without any need for great culinary skills. It is very simple in presentation as everything is pretty much just blended together, and it’s something that you start cooking while you continue to prep the rest of your veggies as you go. So this seems very practical, albeit because of the amount of soup this recipe makes it can be a bit of work. What I like most about Dr. Fuhrman’s recipes is that they are oil free and really healthy, so this is right up my alley and I am happy to be able to make his recipes without any major modifications.


Dr. Fuhrman recommends that you make a big pot of this once and then eat it for the rest of the week, or freeze portions of it. It does take much more time and effort than my other soup recipes, but it makes a ton of soup and if you’re only doing this once or twice a month on a Sunday afternoon it’s no big deal. Better yet, get a helper to help you prep the veggies and then you can relax in between cooking steps! I really wish I had had a helper… haha Since his “Anti Cancer Soup” is such a big recipe with so many ingredients I wanted to estimate the cost of making it. Now just FYI this is approximately what I paid in Canada at a discount grocery store in 2012, and none of these items were bought in bulk. If you live in the USA and/or buy in bulk it will probably be a bit cheaper. But if you buy all organic produce it will definitely cost more.

Split peas ~$0.50
Raw cashews ~$5
Onions ~$5
Zucchini ~$4
Carrots ~$3
Celery $2.60
Leeks $3.49
Mushrooms $4.50

Total Cost: ~ $28.09

Divided by 12 servings:

$2.34 a serving

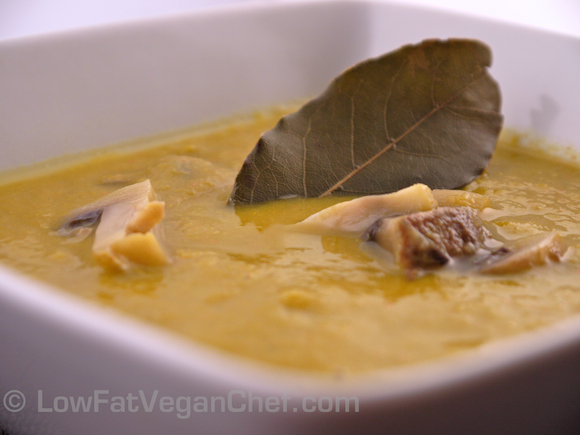
Dr. Joel Fuhrman's Eat To Live Anti Cancer Soup

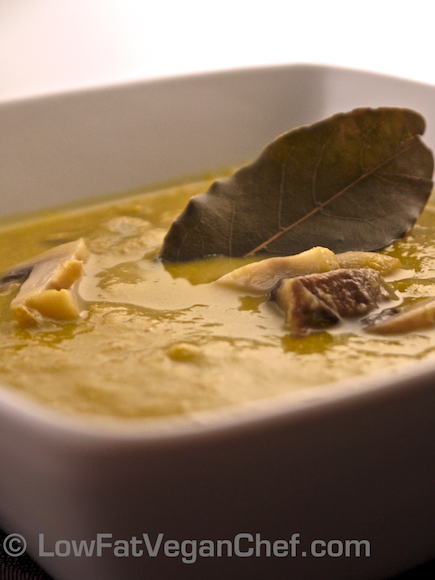
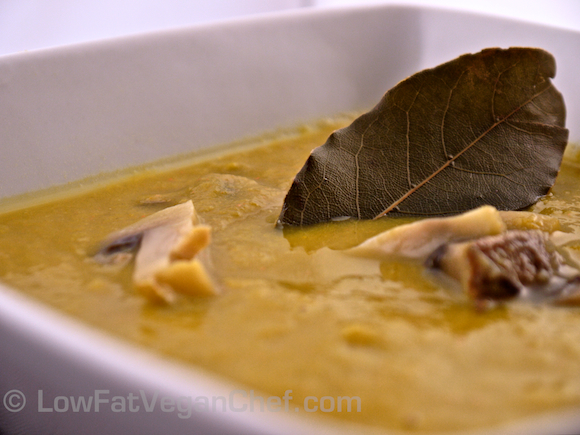
So when you divide the “Anti Cancer Soup” costs out by the number servings (and you will get at least 12 servings) it’s not too expensive. It’s a little less than the price of an organic canned soup and definitely less than buying lunch somewhere else. If I had to describe the taste of this anti cancer soup I would say that it mostly tastes like mild split peas with leeks and mushrooms. It’s not very strong tasting or in any way offensive. You can definitely eat it as is, or add some more herbs or spices to it. When I make soup I like to add things like thyme, bay leaves or other seasonings. I like really flavourful soups.


Now on to my step by step (with photos!) instructions on how to make this soup. My soup recipes have way less directions btw, I just wanted this to be clear as even I was scratching my head at all the steps when I made it the first time. It also looked very strange while cooking, so I didn’t want anyone else to be afraid or discouraged and not know what to expect! I took over 100 pictures of this recipe preparation! I hope you enjoy it. 🙂 Dr. Fuhrman also likes to add a cruciferous leafy green to his soup now too. So you can add a bunch or two of kale (stems removed) or collard greens if you desire.

Dr. Fuhrman’s Anti Cancer Soup (From Eat To Live) With A Low Fat Vegan Chef Twist

Total Time: 1 h 30 min

Serves 12

Ingredients:

1 cup dried split peas (green)

4 cups/1 L filtered water

4 large onions

4 large zucchinis or 8 small

3 medium leeks

leafy greens, broccoli or cauliflower (optional, about 2 bunches)

5 lbs./2.26 kg carrots

2 bunches of celery

1 cup raw cashews (un-roasted, unsalted)

1 lb/454 g mushrooms

2 tsp granulated garlic powder (his recipe has 2 tbsp VegiZest)

2 bay leaves (my addition)

1- 1 1/2 tsp Herbamare or salt (my addition)

Directions:

How To Make Dr. Joel Fuhrman's Eat To Live Anti Cancer Split Pea Mushroom Soup

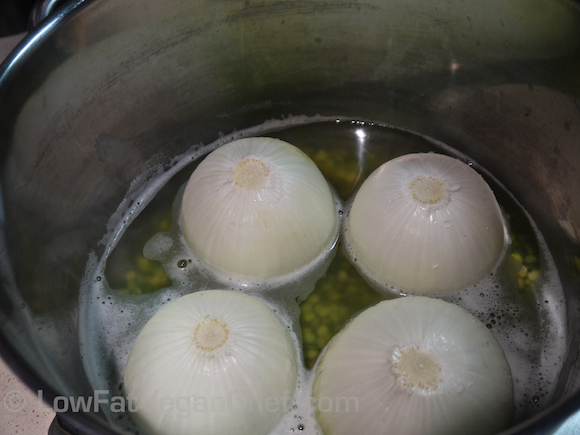
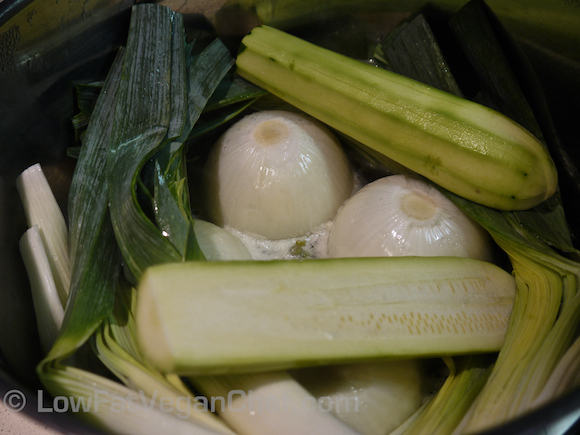
In a large 6 qt soup pot add 4 cups/1 L of water and the split peas and bring to a boil. Slice off the tops of the onions, shave off the roots and peel the outer skins and place them into the pot whole. (Update: Fuhrman now recommends cutting the onions up so their enzymes can react while cooking as this increases their nutrition.) Cover with a lid to start the steaming process. Once at a boil reduce  heat to medium low.


How To Make Dr. Joel Fuhrman's Eat To Live Anti Cancer Soup

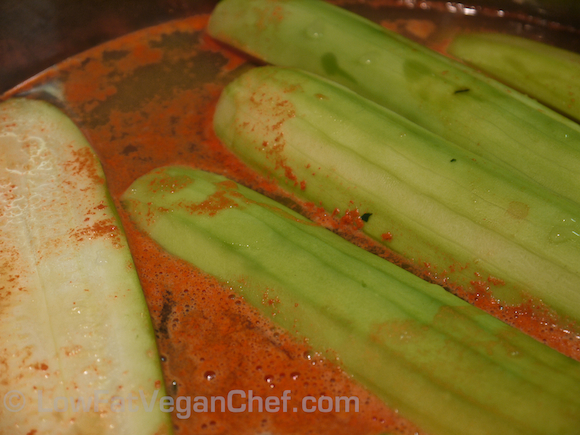
Peel the zuchinnis, and place in the pot uncut. (If they are large cut them in half lengthwise). Cut the bottom roots off the leeks and slice them up the side so each leaf can be thoroughly washed, because leeks have lots of dirt hidden inside. (This is a good tip, I found a little worm in one of my leaves. Gross.) Cut off the top inch of the leeks and discard. Then place the entire leek (leaves uncut) into the pot and cover again.

How To Make Dr. Joel Fuhrman's Eat To Live Anti Cancer Split Pea Mushroom Soup Peel and Juice Carrots

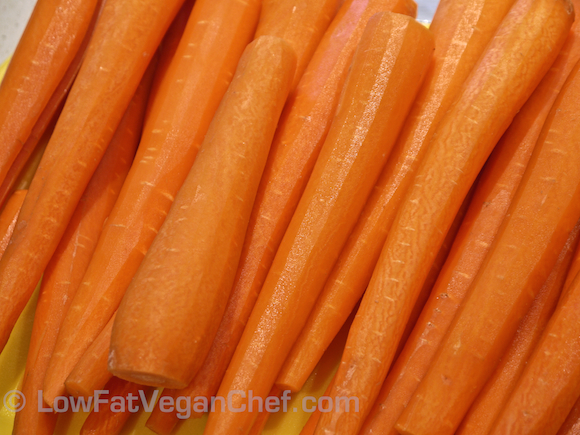
Oh, so THAT’S what 5 pounds of carrots look like…

How To Make Dr. Joel Fuhrman's Eat To Live Anti Cancer Split Pea Mushroom Soup Peeled Carrots

Peel the carrots. (If they are organic, this is optional) Whew that was hard…


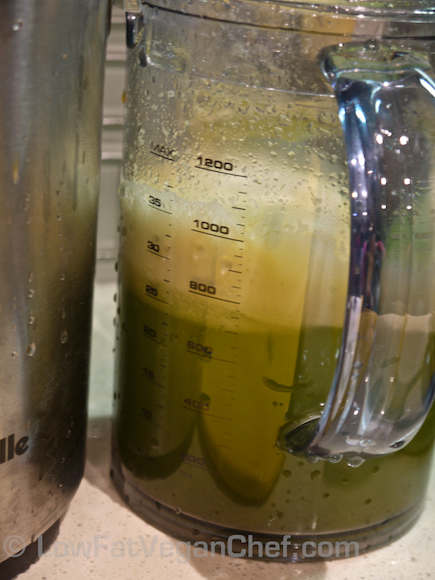
How To Make Dr. Joel Fuhrman's Eat To Live Anti Cancer Split Pea Mushroom Soup Carrot Juice

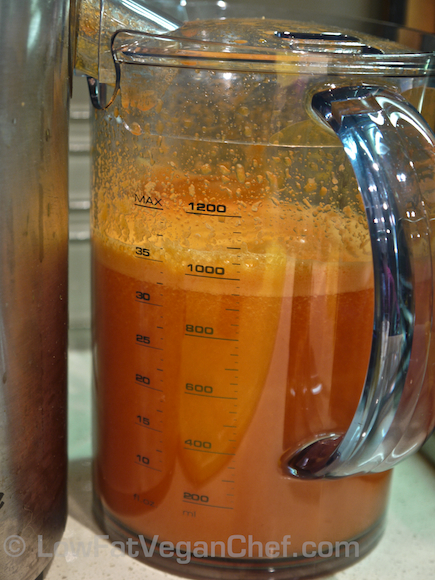
That’s a lot of juice! About 32 ounces worth

Juice the carrots in a juicer.

How To Make Dr. Joel Fuhrman's Eat To Live Anti Cancer Split Pea Mushroom Soup Celery

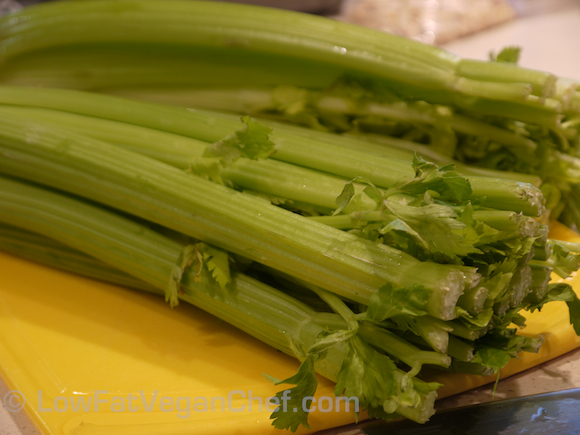
Wash the celery and cut off the tops and bottoms.

How To Make Dr. Joel Fuhrman's Eat To Live Anti Cancer Split Pea Mushroom Soup Celery Juice

Makes about 22-23 ounces

Juice celery in a juicer.


How To Make Dr. Joel Fuhrman's Eat To Live Anti Cancer Split Pea Mushroom Soup

(Ok now this is starting to look like witches’ brew….)

Add the juices to the pot.

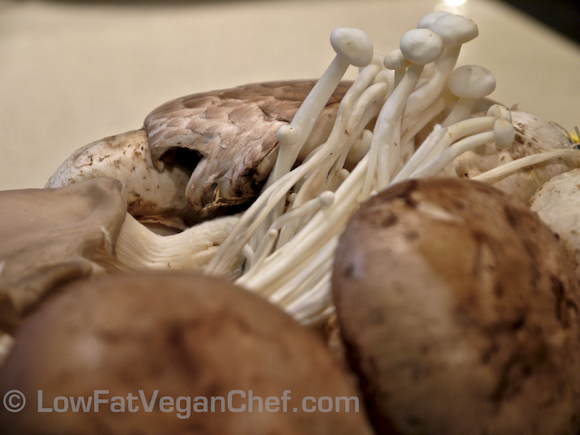
How To Make Dr. Joel Fuhrman's Eat To Live Anti Cancer Split Pea Mushroom Soup Mixed Mushrooms
I got a 1 lb pack of mixed mushrooms for variety. Really it was just a few different mushrooms on top of a layer of dirty white mushrooms… Marketing can be deceptive!
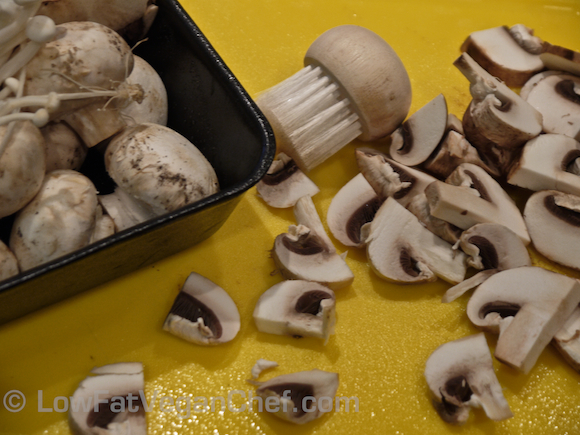
How To Make Dr. Joel Fuhrman's Eat To Live Anti Cancer Split Pea Mushroom Soup Cleaning And Chopping Mushrooms

While the soup is simmering, clean the mushrooms with a mushroom brush. Cut and slice up the mushrooms. By the time you get to this stage, the zucchini, leeks, onions should be soft. If they aren’t just keep cleaning and chopping the mushrooms.

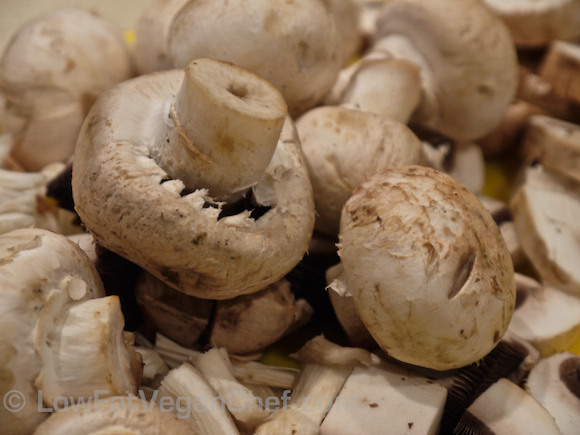
How To Make Dr. Joel Fuhrman's Eat To Live Anti Cancer Split Pea Mushroom Soup Cleaned Mushrooms

Pretty mushrooms…

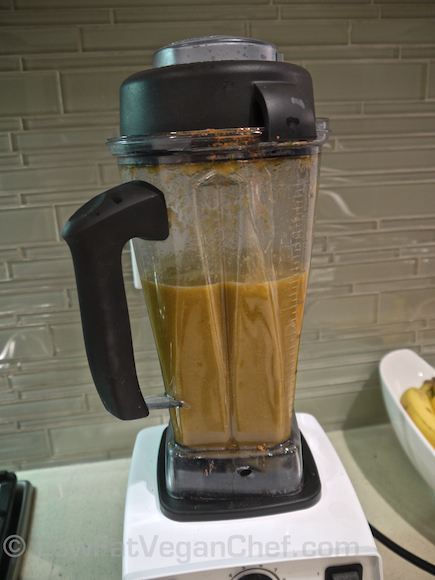
How To Make Dr. Joel Fuhrman's Eat To Live Anti Cancer Split Pea Mushroom Soup Blending Soup in Vitamix


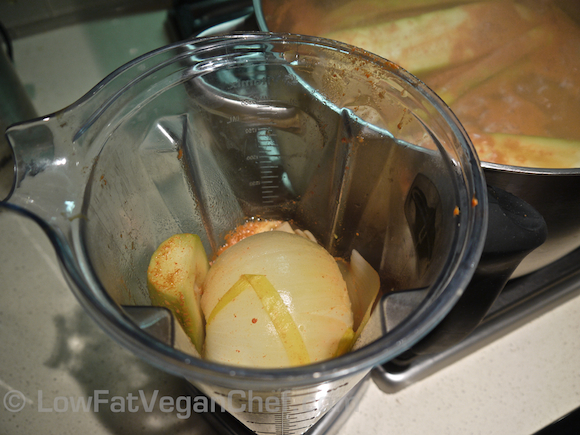
Ladle some of the liquid from the pot into a Vitamix or food processor. Use tongs to remove the soft onions, zucchini, and leeks. Be careful to leave the split peas or beans in the bottom of the pot.

How To Make Dr. Joel Fuhrman's Eat To Live Anti Cancer Split Pea Mushroom Soup Blending Soup In Vitamix

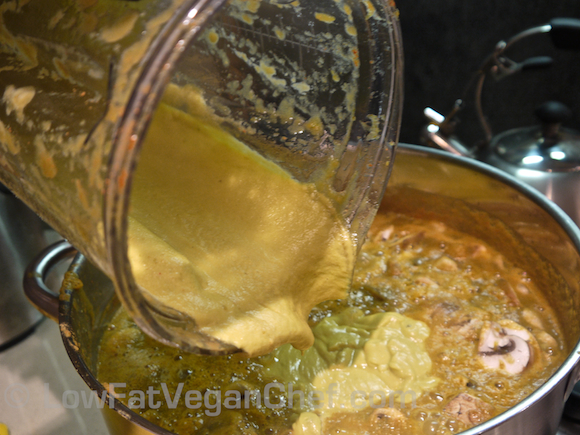
In a few separate batches, completely blend together the onions, zucchini, and leeks. Pour the blended mixture back into the pot.

How To Make Dr. Joel Fuhrman's Eat To Live Anti Cancer Split Pea Mushroom Soup Blending Soup In Vitamix

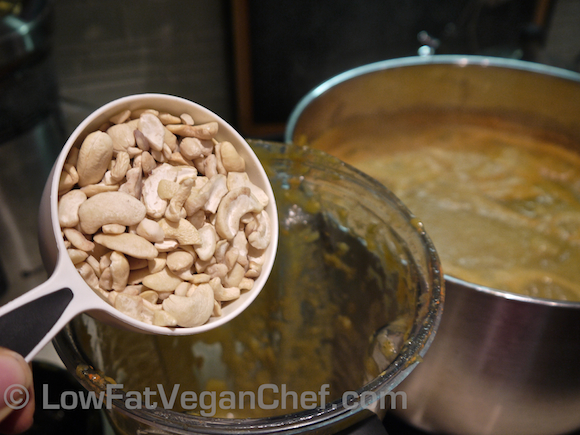
How To Make Dr. Joel Fuhrman's Eat To Live Anti Cancer Split Pea Mushroom Soup Adding Cashews To The Soup

Add a lot of liquid to blend the cashews, don’t make the same mistake I did or it will become thick like cashew butter.


Add more soup liquid (lots) and cashews to the mixture, and blend in.

How To Make Dr. Joel Fuhrman's Eat To Live Anti Cancer Split Pea Mushroom Soup Adding Cashews To The Soup

Return the blended, creamy mixture back to the pot.

How To Make Dr. Joel Fuhrman's Eat To Live Anti Cancer Split Pea Mushroom Soup Adding The Mushrooms

Add the sliced mushrooms and bay leaves. Simmer another 20-30 minutes until mushrooms are tender.

(This time I used to cleaned my kitchen, which now looked like a soup bomb went off in it! The funny part is, this is EXACTLY what Dr. Fuhrman and his wife do too. See how this recipe is obviously designed by a man? Very practical. haha)
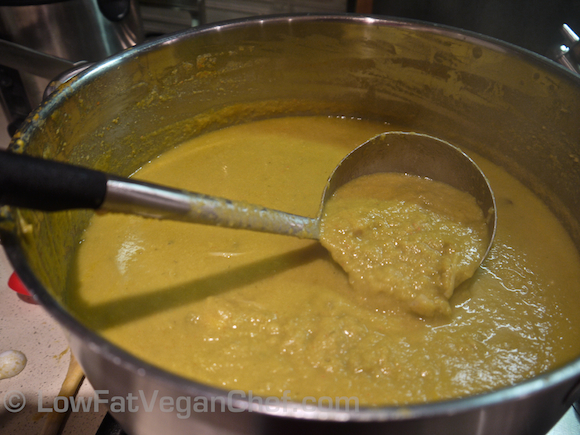
How To Make Dr. Joel Fuhrman's Eat To Live Anti Cancer Split Pea Mushroom Soup Blended


Season to taste with granulated garlic and Herbamare or other salt free seasonings if desired.

How To Make Dr. Joel Fuhrman's Eat To Live Anti Cancer Split Pea Mushroom Soup

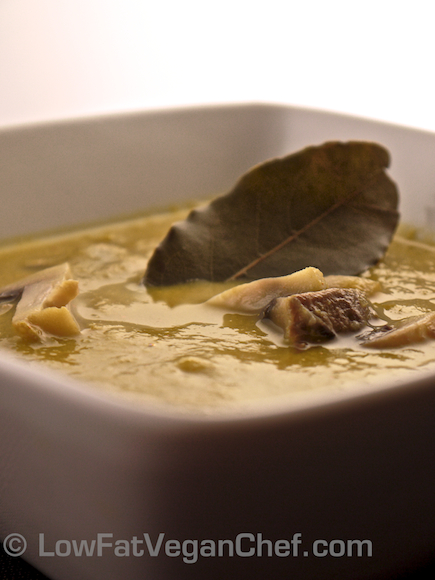
Remove bay leaves and serve. (Now that your kitchen is clean you can sit down, relax and enjoy!)

How To Make Dr. Joel Fuhrman's Eat To Live Anti Cancer Split Pea Mushroom Soup

If you LOVED this recipe you’ll love my new ebook Comfort Soups To Keep You Warm:

You WILL have lots of leftovers from Dr. Fuhrman’s “Anti Cancer Soup”. Save the rest in containers and use for lunches for the next week. Might I add that this was probably the hardest soup I’ve had to make look delicious in a photo. I tried really hard. It tastes better than it looks!

Nutritional Information: 12 Servings

Amount Per Serving: Calories 179.2 Total Fat 1.0 g Sat. Fat 0.2 g Poly Fat 0.5 g Mono Fat 0.1 g Cholesterol 0 g Sodium 593 mg Potassium 1,577.9 mg Carbs 40.0 g Fiber (unknown due to carrot and celery juice data unavailable) Sugars 12.7 g Protein 7.1 g


Filed Under: Eat To Live - Dr. Fuhrman Recipes, How To, One Pot Meals, Soups and Stews Tagged With: Carrots, celery, Eat To Live, Fuhrman, gluten-free, Leeks, mushrooms, soy-free, split-peas

  • Page 1
  • Page 2
  • Go to Next Page »

Primary Sidebar

Follow Us:

Newsletter

Get The Low Fat Vegan Starter Kit

natural organic skin care line

Free Skincare Samples

Earn Free Crypto At Binance

Earn Free Bitcoin on Gemini Exchange

Earn $10 in Bitcoin With Gemini Exchange
Dr. Fuhrman
Dr. Fuhrman
Dr. Fuhrman

Tags

80/10/10 apple avocado banana blueberries breakfast broccoli Carrots celery chickpeas cilantro corn cucumber Curry dill dinner easy Eat To Live fat-free gluten-free how-to Indian Dishes lemon low-fat mango mexican mushrooms nut-free oil-free pasta pineapple plant-based raw raw vegan rice smoothie soup soy-free spinach tofu tomato tomatoes vegan vegetarian vitamix

Secondary Sidebar

Recipes:

  • Cooked Vegan Recipes
  • *My Recipe Books
  • Breads and Baked Goods
  • Breakfast
  • Brunch
  • Burgers
  • Casseroles
  • Curries
  • Desserts
  • Dinner
  • Dips for Veggies or Chips
  • Eat to Live-Dr. Fuhrman Recipes
  • Engine2Diet
  • Ethiopian Dishes
  • Greek
  • Green Dishes
  • Holiday
  • Indian Dishes
  • Mexican
  • One Pot Meals
  • Pasta
  • Pizza
  • Quinoa
  • Salads
  • Sandwiches and Wraps
  • Raw Vegan Recipes
  • 80/10/10
  • Raw Breakfast
  • Raw Desserts
  • Raw Dips
  • Raw Dressings
  • Raw Entrees
  • Raw Juices
  • Raw Salads
  • Raw Smoothies
  • Raw Snacks
  • Raw Soups
  • Sauces
  • Side Dishes
  • Slow Cooker Recipes
  • Snacks
  • Soups and Stews
  • Spices/Seasonings
  • Sushi
  • Thai
  • Vietnamese

Copyright © 2025 · Foodie Pro & The Genesis Framework