• Skip to primary navigation
  • Skip to main content
  • Skip to primary sidebar
  • Skip to secondary sidebar

Plant Based U

Fat-Free and Low Fat Vegan Plant Based Recipes

  • Home
  • Recipes
    • Raw Vegan Recipes
    • Cooked Vegan Recipes
    • Eat to Live Dr. Fuhrman Recipes
  • Products
  • Coaching
  • Videos
  • Articles
  • About
    • What Is Low Fat Vegan/Whole Foods Plant Based
    • Resources
  • Contact

Side Dishes

Fb-Button

Plant Based Tzatziki Farfalle Pasta Salad With Sun-dried Tomatoes and Artichoke Hearts (Vegan and Oil-Free)

September 20, 2019 by Veronica Grace 3 Comments

Fb-Button

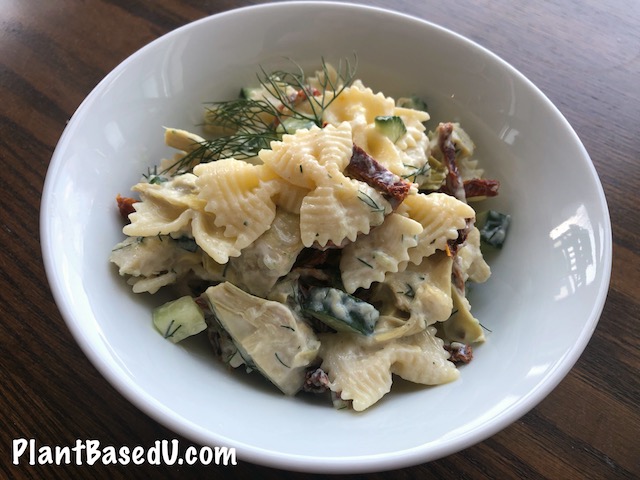
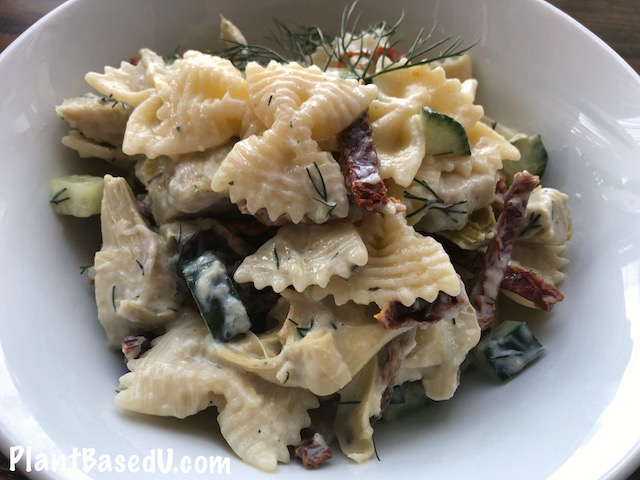
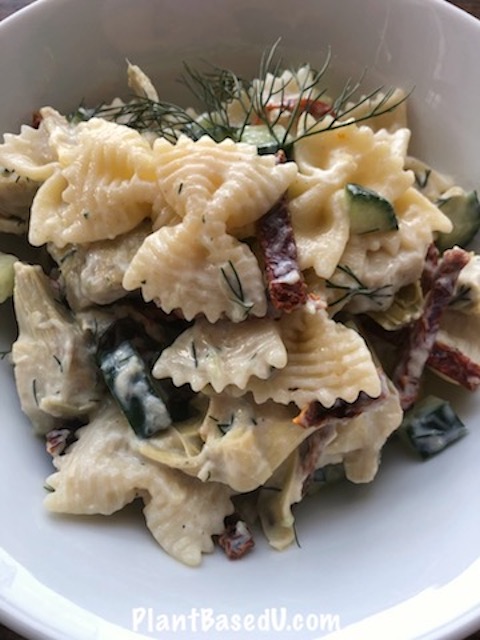
Silken Tofu Tzatziki Farfalle Pasta Salad Vegan, Dairy and Oil Free

FTC Notice: This blog post contains affiliate links which go towards supporting the blog. 

Pasta salad is such a great meal for picnics or lunches that can be made ahead of time and eaten for a few days. For today’s recipe I used farfalle (bowtie) pasta because it has a nice texture and chew when eaten cold and goes well with the size of the other chopped veggies. You might be wondering what I’ve used for the base of the plant based tzatziki sauce and instead of processed coconut/soy yogurt I’m using silken tofu.


With silken tofu it’s just soy milk that has been curdled and formed and instead of separating the soy curds from the whey they are set together so it’s softer and creamier. It also doesn’t have added fillers, binders, or sugar. Quite often you’ll find silken tofu cheaper than a tub of plant based yogurt as well. You can find it at any Asian market, most health food stores and of course on Amazon depending where you live. I like to keep a few on hand for make plant based “cream” sauces like my Fettuccini Alfredo from my cookbook Vegan Comfort Foods From Around The World.
Silken Tofu Tzatziki Farfalle Pasta Salad Vegan, Dairy and Oil Free

Of course you can use whatever other type of pasta you like for this salad as well, just make sure that it’s bite sized and cooked to the perfect tenderness so it’s not too al dente or too soft so it doesn’t fall apart. The farfalle shape works well because it doesn’t tend to get as stuck together in the fridge or break when made ahead of time for meals later on.


This also works great for traveling. I often have people asking me what they can bring on a road trip or flight besides dried snacks. Since this pasta salad is dairy and egg free you don’t have to worry about it being food safe and it will be fine out of the refrigerator for a few hours packed in a cooler or a bag. I’ve never had an issue eating pasta salad on a plane or bringing it through security. The sauce sticks to the pasta and isn’t liquid in the bottom so it’s not a concern.

So why not give it a try? Maybe you’ll find some new lunch ideas and you’ll probably want to make the silken tofu tzatziki again and again for using as a dip, salad dressing or sauce for wraps or pitas as well!

Silken Tofu Tzatziki Farfalle Pasta Salad

Ingredients:

1 recipe of Silken Tofu Tzatziki
1/2 English cucumber, chopped or a few dill pickles chopped/diced
1/2 cup packed sundried tomato halves, sliced (mine were dried not packed in oil)
1 can artichoke hearts packed in water, sliced (6 cooked artichoke hearts, sliced)
454g/1 lb bag of farfalle or other pasta (you can use gluten free if you like)
Fresh dill for garnishing (if you have any left from the Tzatziki recipe)


Directions:

        1. Make Silken Tofu Tzatziki and set aside
        2. Bring a large pot of water to a boil and add salt if desired. For cold pasta it will make it more flavourful.
        3. Prepare vegetables and set aside.
        4. Cook Farfalle for approximately 14 minutes or to desired tenderness in boiling salted water. You still want it to be a bit chewy but not tough or too soft and falling apart.
        5. Drain and rinse pasta in cold water when at desired tenderness until cool.
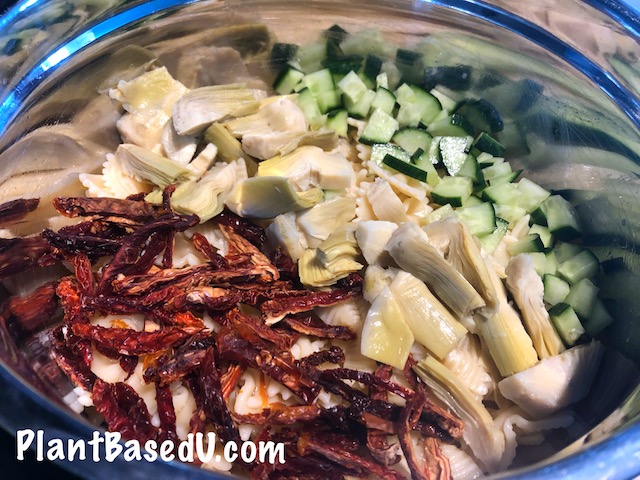
        6. Add farfalle pasta to a bowl and make sure it’s cooled down before adding remaining ingredients.
      Silken Tofu Tzatziki Farfalle Pasta Salad Vegan, Dairy and Oil Free

      1. Add vegetables and sauce and toss to combine.
      2. Taste test and add any additional salt or pepper now if desired
      3. Serve or portion out into containers. Best eaten within 3-4 days due to fresh ingredients in the tzatziki sauce.


      What are you favorite ingredients to add to pasta salad?


Filed Under: Cooked Vegan Recipes, Forks Over Knives, Greek, Lunch, McDougall Program, One Pot Meals, Pasta, Salads, Side Dishes, Snacks Tagged With: artichoke hearts, cucumber, dill, lemon, pasta, sun-dried tomatoes, tofu, tzatziki

Creamy Vegan and Plant-Based Avocado Dill Potato Salad

September 7, 2015 by Veronica Grace


Fb-Button

Plant Based Avocado Dill Potato Salad Vegan Oil Free

Sometimes you get a craving for a creamy salad, especially potato salad – but how do you make it creamy, oil-free and whole food based at the same time? Simple! I switch out the vegan mayo (not a condiment I use in my kitchen!) and substitute a fresh ripe avocado and mash it up and season my plant-based potato salad it just like I would any other.


Except that my version is ultimately tastier than what you’re probably used to. I like to give it more kick and I up the seasonings in it so it’s truly a dish you can enjoy on it’s own or pair with a light soup or wrap. This recipe is also oil free, soy free, gluten free and nut free as well so it’s great for allergy friendly households.

So get ready to try the best whole foods potato salad you’ve never had! And please tell me how much you enjoyed it once you have 🙂

Vegan/Plant-Based Avocado Dill Potato Salad

Serves 4-6 side servings

Ingredients:

2 lbs/908 g small baby red skinned potatoes (or other potato of choice)
3 stalks celery, trimmed and sliced
1/2 white onion sliced and diced
1 Large ripe avocado (should be soft and give to pressure)
2 tsp lemon juice
1 1/2 tsp honey, maple syrup or liquid sweetener *optional to balance the acidity in the lemon and spiciness in the mustard
1 tbsp dijon mustard
1/4 tsp smoked paprika
1/2 teaspoon herbamare or salt *or to taste as desired
Freshly ground black pepper to taste
1/3 cup dill, packed and then chopped
1/2 bunch green onions/spring onions, sliced (top green parts only)

Directions:

1. Wash potatoes and cut out any bad spots or eyes.
2. Steam, or pressure cook the potatoes gently until they are just fork tender through the centre, but al dente. Immediately run the potatoes under cold water to prevent them from cooking further.
3. For best results, refrigerate cooked potatoes for about an hour until cool. (This ensures they don’t fall apart when slicing)
4. Quarter the potatoes and peel if desired.
5. Peel and mash the avocado in a small bowl. Add lemon juice, and seasonings (except fresh herbs) and stir into avocado to create a dressing.
6. Turn potatoes into a large bowl. Add the fresh herbs and avocado dressing. Toss gently until everything is coated. Taste test and adjust seasonings if desired.
7. Serve or refrigerate until needed. Best consumed same day, or next day (as the avocado changes color and breaks down quickly)

What’s your favorite addition to potato salad and what type of potatoes do you like to use? 

Filed Under: Cooked Vegan Recipes, Forks Over Knives, Salads, Side Dishes Tagged With: avocado, dill, gluten-free, mustard, potato

Creamy Vegan Avocado Dill Baby Potato Salad (Plant Based and Oil Free)

February 16, 2014 by Veronica Grace 13 Comments


Fb-Button

Plant Based Avocado Dill Potato Salad Vegan Oil Free

Sometimes you get a craving for a creamy salad, especially potato salad – but how do you make it creamy and whole food based at the same time? Simple! I switch out the vegan mayo (not a condiment I use in my kitchen!) and substitute a fresh ripe avocado and mash it up and season my vegan potato salad it just like I would any other.


Except that my version is ultimately tastier than what you’re probably used to. I like to give it more kick and I up the seasonings in it so it’s truly a dish you can enjoy on it’s own or pair with a light soup or wrap. This recipe is also oil free, soy free, gluten free and nut free as well so it’s great for allergy friendly households.

So get ready to try the best plant based potato salad you’ve never had! And please tell me how much you enjoyed it once you have 🙂

Vegan Avocado Dill Potato Salad

Serves 4-6 side servings

Ingredients:

2 lbs/908 g small baby red skinned potatoes (or other potato of choice)
3 stalks celery, trimmed and sliced
1/2 white onion sliced and diced
1 Large ripe avocado (should be soft and give to pressure)
2 tsp lemon juice
1 1/2 tsp honey, maple syrup or liquid sweetener *optional to balance the acidity in the lemon and spiciness in the mustard
1 tbsp dijon mustard
1/4 tsp smoked paprika
1/2 teaspoon herbamare or salt *or to taste as desired
Freshly ground black pepper to taste
1/3 cup dill, packed and then chopped
1/2 bunch green onions/spring onions, sliced (top green parts only)

Directions:

1. Wash potatoes and cut out any bad spots or eyes.
2. Steam, or pressure cook the potatoes gently until they are just fork tender through the centre, but al dente. Immediately run the potatoes under cold water to prevent from cooking further.
3. For best results, refrigerate cooked potatoes for about an hour until cool. (This ensures they don’t fall apart when slicing)
4. Quarter the potatoes and peel if desired.
5. Peel and mash the avocado in a small bowl. Add lemon juice, and seasonings (except fresh herbs) and stir into avocado to create a dressing.
6. Turn potatoes into a large bowl. Add the fresh herbs and avocado dressing. Toss gently until everything is coated. Taste test and adjust seasonings if desired.
7. Serve or refrigerate until needed. Best consumed same day, or next day (as the avocado changes color and breaks down quickly)

What’s your favorite addition to potato salad and what type of potatoes do you like to use? 

Filed Under: Cooked Vegan Recipes, McDougall Program, Salads, Side Dishes Tagged With: avocado, gluten-free, nut-free, potatoes, soy-free

What do I bring for vegan camping?

August 4, 2013 by Veronica Grace 41 Comments


Fb-Button

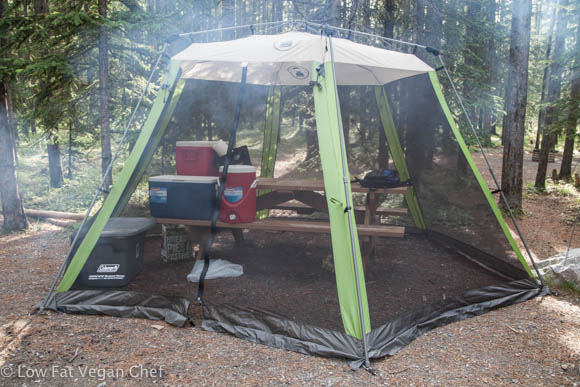
I went camping for the past 2 weekends this summer in the Rocky Mountains and although it’s a lot of work packing and setting everything up, it is fun getting out of the house, away from the computer and offline for a little while to just relax. Here’s some photos of our tent site to start.

Campingtent2

I will admit I was a little concerned with ravenous mosquitoes and rain so I got an eating tent as well, which was handy as it did indeed rain pretty hard twice over the weekend so at least some of the stuff was protected and we could sit under the tent and wait for the rain to pass. The funny thing is we were the ONLY people tenting in this area, everyone else had trailers and toy haulers to hide in. It’s definitely more work tenting, but it’s more affordable and still kind of fun. Although it is quite chilly each morning!

Campingtent

Oh and we also went to do some dirt biking….

Um yeah so I’m apparently trying out dirt biking, even though I have no experience riding dirt bikes or motorcycles in general. It’s probably the scariest thing I’ve ever done, but I got all this second hand gear to try it out. And I’m super glad I did!

Dirtbiking2

Let’s just say that I came home with 8 bruises (2 big ones on my legs) and a smashed thumb from dropping the bike on myself and falling over several times going up and down steep rocky hills. It’s not easy learning how to to shift a manual transmission bike and steer and not be scared of crashing going down a giant hill at the same time lol. I’ll be trying it again, but I have to say I’ve never been so sore in my life. I could barely move the next day after coming home because of the bruises on my legs, and my arms and shoulders were exhausted from picking up and pushing the 250 lb bike up and off me and up and down the hills I couldn’t do.


Dirtbiking

I feel ridiculous in this outfit. The pants are very high waisted and so thick and bulky they make me sweaty.  I also feel like I’m wearing space boots and an astronaut’s helmut!


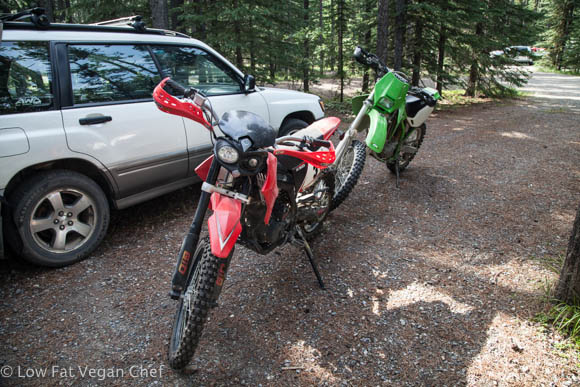
Dirtbikes


Here’s our dirt bikes, my bf so lovingly built this little red one for me. I can’t imagine riding anything more powerful, it already feels beastly enough for me… lol

And now you’re probably thinking I’m insane and wondering what the point of this post was, well I want to show you what I brought for food camping, because a few of you wanted to know if I had any “camping recipes” on Facebook. Well I wouldn’t say recipes, but quick meal ideas because honestly spending time prepping, cooking and cleaning WHILE camping in a tent isn’t my kind of idea of fun. I needed a break from food prep and clean up, so I tried to make everything super simple to prepare. The last thing you want to be is hungry and cranky trying to start a camp fire and reach for snacks instead of a healthy meal.

So here’s my list of the top 6 things I brought for vegan camping to keep things simple and healthy for the weekend

Fruitplate

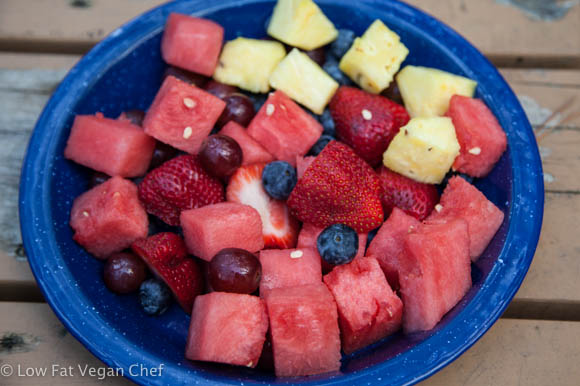
1. The first thing I bring camping is pre washed and cut up fruit, each packaged in their own individual containers. (Ex. watermelon cubes in a giant container, pineapple chunks in a medium container etc.) This ensures that the fruit stays fresher longer so juicy fruits such as watermelon and pineapple don’t speed up the ripening process of berries or change their flavor. I brought watermelon, pineapple, red grapes, blueberries and strawberries. I always do my fruit this way and store it separately as I like fresh tasting fruit and not mushy muddled flavors. Whenever I want some fruit I can just grab a plate and a fork and plate some up for breakfast, a side for lunch or a snack. Almost half of my cooler is packed with large containers of prepared fruit to keep me eating fresh and healthy even in the great outdoors.

Veggiekabobs

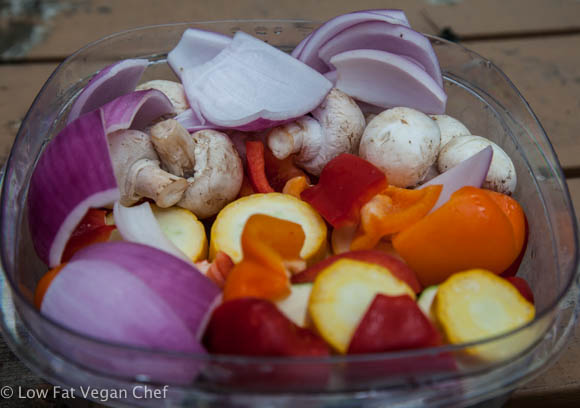
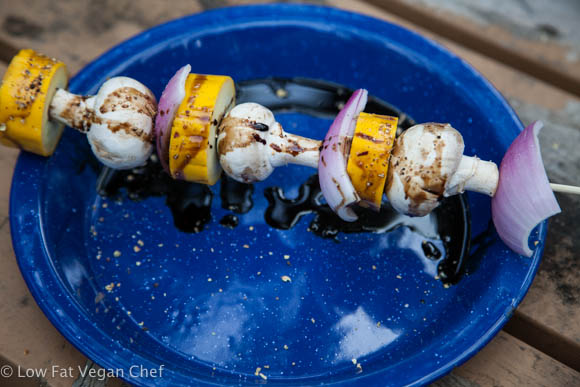
2. Veggie kabobs are next on my list because I don’t make them at home very often and it’s kind of fun to cook over the fire or a camp stove. I pre wash and slice up all of my veggies and place them in a container and can easily assemble as many as you like for your side dishes. For my kabobs I used yellow and green zucchini, bell pepper, red onion, and mushrooms. I used a metal grate like this to place over the camp stove or fire to cook them.

Veggiekabobs2

Instead of brushing the veggie kabobs with oil, I like to drizzle or marinate them in balsamic vinegar and sprinkle a salt and pepper grinder mix over top of them for roasting. If you really like the veggies to absorb flavor I suggest using a little bag or container to toss and marinate them in balsamic vinegar. I was making mine very quickly and just drizzled a bit on top before grilling.

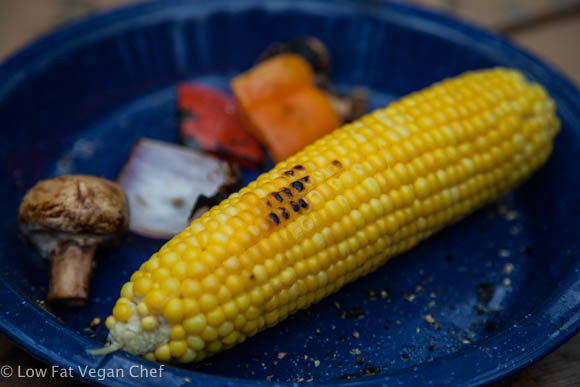
RoastedCorn

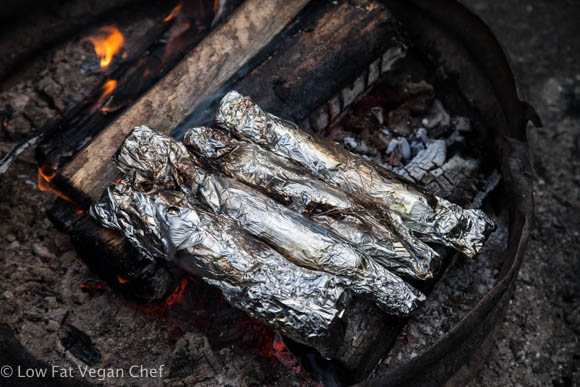
3. Fresh corn is another fun food to bring camping. I got some fresh corn on the cob (you can find this organic and gmo free from farmer’s markets and some health food stores so please don’t freak out) and put it in the cooler along with my ice. When I went to take it out it was actually soaked in water, and this was quite helpful. Pre soaking your whole corn cobs helps them retain moisture while cooking.

RoastedCorn2

Next peel off just the outer layers of the corn husk, leaving the thin inner layers, wrap the cobs tightly in tinfoil and then place directly on a low fire or hot coals for about 20 minutes just until tender. This was the first time I’ve ever put corn directly on a fire and it turned out great! Camping food doesn’t have to be anything complicated, I just keep it really simple and let me tell you my friends were certainly jealous of my fresh and tasty meals I made!

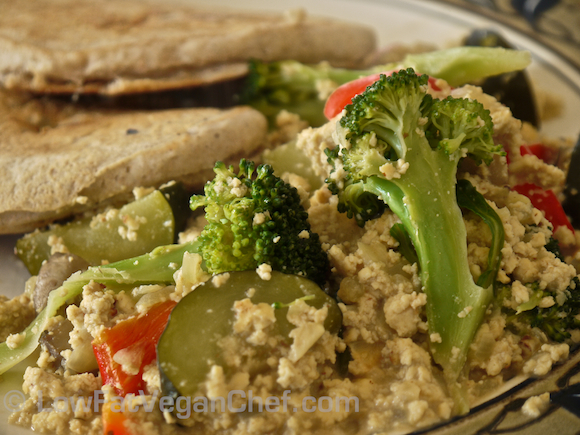
Deluxe Dijon Tofu Scramble With Mushrooms, Broccoli, Pepper and Zucchini

4. For hearty breakfasts I made a double batch of my Deluxe Dijon Tofu Scramble and kept the seasoned tofu in one container and the sliced veggies in little bags separately so I could cook as much as I needed each day over the camp stove. Super easy and nice to have a hot breakfast when it’s cold every morning.

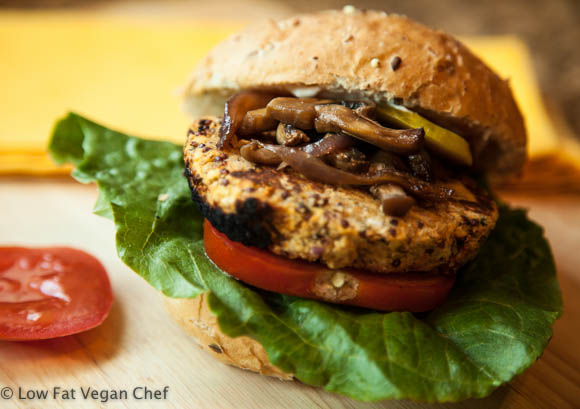
Vegan Chickpea Quinoa Burger with Lemon and Thyme

5. For fun I also bring some veggie hot dogs and veggie burgers (see my chickpea quinoa burgers, yam black bean burgers and spicy Mexican black bean burgers). You can also get vegan marshmallows as well to roast over the fire.

credit theartfulgourmet.com

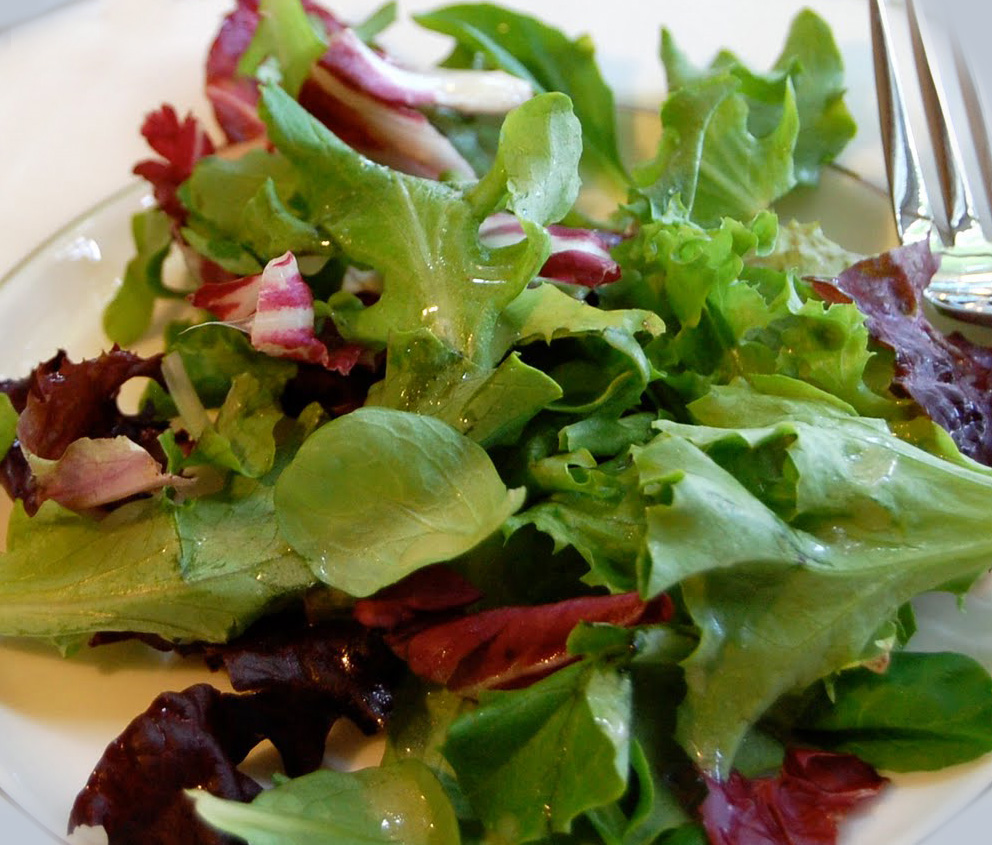
6. To round out my veggie offerings I also brought mixed salad in little ziploc bags for easy serving and used balsamic vinegar as a quick dressing.

So there you have it, a little insight to my vegan camping adventures and what I bring to keep it simple and healthy in the great outdoors. What do you think? What do you like to bring camping and where do you go camping?

Filed Under: Articles, Cooked Vegan Recipes, Dinner, Side Dishes Tagged With: balsamic vinegar, blueberries, dirt biking, grapes, mushroom, onion, pineapple, red pepper, salad, strawberries, tent, tofu scramble, vegan camping, watermelon, zucchini

Vegan Avocado Dill Potato Salad

May 19, 2013 by Veronica Grace 12 Comments


Fb-Button

Plant Based Avocado Dill Potato Salad Vegan Oil Free

Now that it’s Spring and some of us are thinking about barbecuing, picnics and potlucks, I thought it was the perfect time to dig out this recipe I haven’t yet shared with you. It’s a delicious twist on potato salad using avocados instead of mayonnaise. I’m sure many of you have loved potato salad and often enjoyed it in the summer with your families. But traditional potato salads are really rich and not very healthy because of the mayonnaise and sometimes eggs they contain.

This version of potato salad is much better for you and is packed full of flavour. I particularly love the addition of celery and dill to this potato salad recipe. In fact, I’m sure it will become a family favorite and you’ll no longer crave the store bought kind.

I like to use baby red skinned potatoes for this, but you can use whatever waxy potatoes you like. Leave them skinned, or peel them your choice! Since mashed avocado is perishable you’ll want to eat this recipe the same day or the next day for best results. Enjoy!

Vegan Avocado Dill Potato Salad

Serves 4-6 side servings

Ingredients:

2 lbs/908 g small baby red skinned potatoes (or other potato of choice)
3 stalks celery, trimmed and sliced
1/2 white onion sliced and diced
1 Large ripe avocado (should be soft and give to pressure)
2 tsp lemon juice
1 1/2 tsp honey, maple syrup or liquid sweetener *optional
1 tbsp dijon mustard
1/4 tsp smoked paprika
1/2 teaspoon herbamare or salt *or to taste as desired
Freshly ground black pepper to taste
1/3 cup dill, packed and then chopped
1/2 bunch green onions/spring onions, sliced (top green parts only)

Directions:

1. Wash potatoes and cut out any bad spots or eyes.
2. Steam, or pressure cook the potatoes gently until they are just fork tender through the centre, but al dente. Immediately run the potatoes under cold water to prevent from cooking further.
3. For best results, refrigerate cooked potatoes for about an hour until cool. (This ensures they don’t fall apart when slicing)
4. Quarter the potatoes and peel if desired.
5. Peel and mash the avocado in a small bowl. Add lemon juice, and seasonings (except fresh herbs) and stir into avocado to create a dressing.
6. Turn potatoes into a large bowl. Add the fresh herbs and avocado dressing. Toss gently until everything is coated. Taste test and adjust seasonings if desired.
7. Serve or refrigerate until needed. Best consumed same day, or next day (as the avocado changes color and breaks down quickly)

What’s your favorite addition to potato salad and what type of potatoes do you like to use? 

Filed Under: Cooked Vegan Recipes, McDougall Program, Salads, Side Dishes Tagged With: avocado, dill, gluten-free, green onion, nut-free, onion, potato salad, red potatoes, soy-free, vegan

Pomegranate Apple Green Salad With Raspberry Walnut Vinaigrette

December 10, 2012 by Veronica Grace 5 Comments


Fb-Button

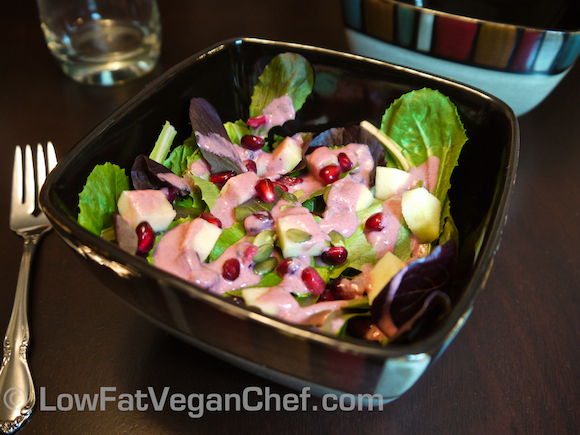
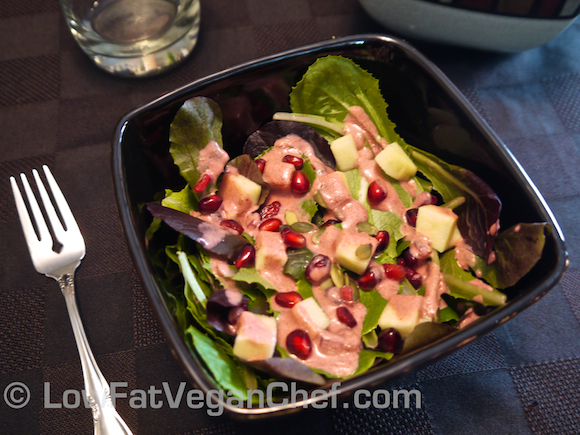
The other day I went to a raw food potluck in Calgary and someone made this delicious salad that had a bunch of mixed vegetables and pomegranate seeds and it was quite delicious. So I thought why not make my own pomegranate salad for the holiday season?

To easily peel a pomegranate, you can cut it in half and fill a large bowl or sink full of water. Start peeling off the outer peel. The seeds will sink and the white parts will float so you can scoop them out and discard them. Once you’re done peeling everything apart you can drain the water and you’re left with pomegranate seeds.

(Or you can go to Costco and buy packages of fresh pre peeled pomegranate seeds in the refrigerated produce section if you don’t want to peel one.)

This is a really lovely salad that I designed to be really simple to make yet seem a little fancier. It’s got antioxidants from the pomegranate and the raspberries and omega 3’s from the walnuts (in the dressing).

I prefer to make all of my own salad dressings and not use any oil in them at all. So I used walnut pieces for healthy fats in this dressing. If you don’t have fresh raspberries right now, you can also use frozen. Just let them sit out for a few minutes to defrost a little first.

So let’s check out the recipe:

Raw Vegan Pomegranate Apple Green Salad

(With Raspberry Walnut Vinaigrette)

Serves 2 side salads or 1 medium/large salad

Salad:

4-6 cups mixed greens
1-2 apples peeled and sliced
1-2 tbsp raw pumpkin seeds (pepitas)
3 tbsp fresh pomegranate seeds

Raspberry Walnut Vinaigrette

Ingredients:

1/2 cup raspberries (fresh or frozen)
1/4 cup mandarin orange juice (2 oranges)
1/4 cup water
2 tbsp broken walnut pieces
2 large medjool dates, pitted
1 tbsp Trader Joe’s orange muscat champagne vinegar/other fruit vinegar/apple cider vinegar
1/8 tsp Herbamare or salt *optional

Directions:

  1. Arrange the salad ingredients in side salad bowls or a large serving bowl.
  2. Place the salad dressing ingredients into a Vita-Mix or a blender and process until smooth.
  3. Drizzle dressing overtop of salad.
  4. Serve.

Additional Tips:

Feel free to double this recipe if you’re entertaining.

What’s your favorite holiday salad? Have you ever used pomegranates in a recipe? 

Filed Under: 80/10/10, Raw Dressings, Raw Salads, Raw Vegan Recipes, Salads, Side Dishes Tagged With: apple, gluten-free, lettuce, mixed greens, oil-free, omega-3, orange, pomegranate, raspberry, raw vegan, salad, salad dressing, soy-free, walnut

Vegan Quinoa Chickpea Pilaff

November 26, 2012 by Veronica Grace 18 Comments


Fb-Button

Quinoa is all the rage now, and so are quinoa salads and pilaffs. There are hundreds of ways to season quinoa and you don’t have to just eat it plain on the side. If you find cooking quinoa properly still a challenge, check out my post How To Cook Quinoa Perfectly to make sure your next batch turns out amazing.

This time I decided to mix things up and make my quinoa a little different. A heartier side filled with chickpeas, carrots, onions and celery. This would work as a warm side dish, a cold salad, or you can make it a meal by adding some sautéed tofu, tempeh or soy curls on top as well.

To get those pretty colours I used both white and red quinoa in this dish. Feel free to use either, I just like the look of multicoloured quinoa for some variety. This recipe makes a lot so it’s great for leftovers you can keep in the fridge or freezer for a quick meal or snack later on as well.

Quinoa Chickpea Pilaf

 
Serves 6

Ingredients:

1 1/2 cups quinoa (I used 1 cup white and 1/2 cup red)
3 cups/709.76 ml low sodium vegetable broth
1 large onion, diced
2 cloves of garlic, minced
1 large carrot, diced
1 stalk of celery, diced
1 15 oz./425g can of chickpeas
2-3 tbsp low sodium soy sauce (or GF tamari)
2 tsp roasted cumin (ground)
1/2 tsp roasted coriander (ground)
1/4 tsp chipotle chili powder
2 tsp Trader Joe’s 21 Seasoning Salute (or other salt free seasoning mix) *optional

Directions:

1. Sauté the onions, carrots and celery in 1/2 cup of broth for 5 minutes. Add the garlic and sauté for a minute and add the chickpeas.

2. Add remaining broth to a medium pot, quinoa, seasonings and saucepan ingredients. Bring to a boil and then reduce heat to medium low (about 3 on the burner) and cook covered for 25 to 30 minutes until quinoa is cooked. (If you put it on very low, or 1, it probably won’t have enough heat to cook the quinoa because of the other ingredients.)

3. Stir as required to prevent sticking at the bottom.

4. Fluff with a fork before serving.

Have you ever had a quinoa pilaff? What’s your favorite way to season quinoa?

Filed Under: Cooked Vegan Recipes, Dinner, Eat To Live - Dr. Fuhrman Recipes, McDougall Program, Side Dishes Tagged With: Carrots, celery, chickpea, fat-free, gluten-free, pilaf, quinoa, salad, side dish, soy-free, sugar-free

How To Cook The Perfect White Basmati Rice

October 3, 2012 by Veronica Grace 6 Comments


Fb-Button

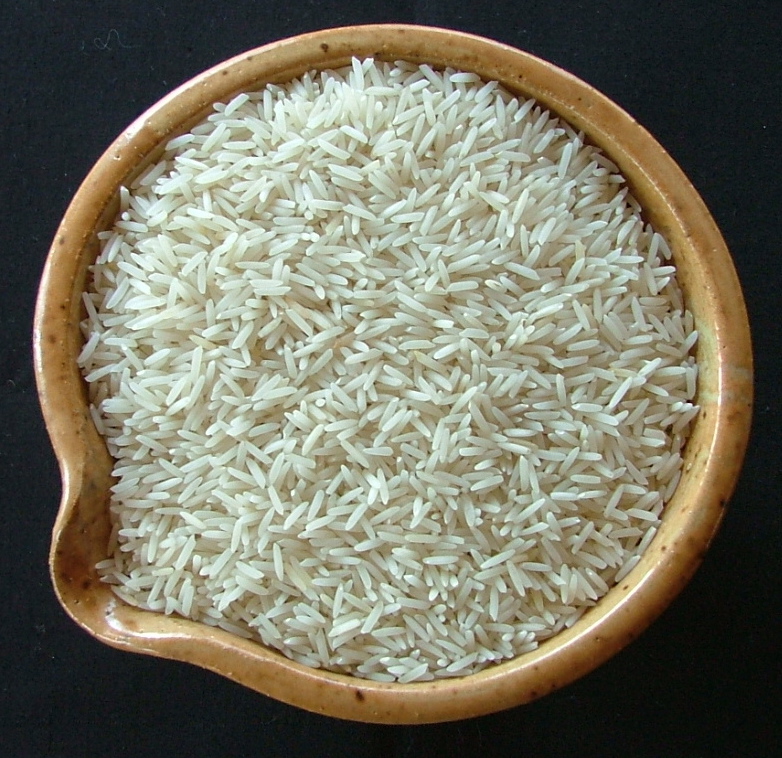
How To Cook The Perfect White Basmati (Indian Rice)


Long grain Indian Basmati rice is a little different from the typical white rice. It is long and thin and, if cooked properly, can be light and fluffy and delicious. Quite often it can be overcooked and turn out sticky and mushy. Follow these directions for the best white Indian Basmati rice.

Stove top directions for white basmati rice:

1. Measure rice and add to a bowl or mesh strainer. Rinse with cold water 3 times moving the grains around with your hands.
2. Add rice to a bowl and soak with 1-½ times as much cold water for firm rice and double the water for softer rice. Add ½ tsp. of salt for every cup of rice. (This is optional, it helps the grains stay firmer and not stick together.) Let the rice sit for 30 minutes to 2 hours. This helps stop the grains from breaking and sticking together.
3. Transfer rice and water to a heavy bottomed pot and cover with a fitted lid. If it has a steam vent cover it with a small cloth.
4. Turn to high heat and bring to a boil.
5. When it’s at a rolling boil, turn the heat down to a simmer and cook for 12-14 minutes. DO NOT PEEK OR OPEN THE LID.
6. Turn off the heat and let the rice steam for 5-10 minutes.
7. Fluff with a fork and serve.

Rice cooker directions for white basmati rice:

1. Measure rice and add to a bowl or mesh strainer. Rinse with cold water 3 times moving the grains around with your hands.
2. Add rice to a bowl and soak with double the cold water as rice. Add ½ tsp. of salt for every cup of rice. (This is optional, it helps the grains stay firmer and not stick together.) Let the rice sit for 30 minutes.
3. Transfer rice and soaking water to rice cooker pan and set the white rice/regular cook setting.
4. Allow rice to steam for 5-10 minutes when cooking cycle is complete.
5. Fluff with a fork and serve.
For firmer more al dente rice, at the beginning, just rinse in cold water and skip the soaking time. Combine water and rice in a rice cooker and cook on the white rice/regular cook setting.

For cooking brown basmati rice over the stove, use 2 cups of water for every cup of rice. Bring to a boil and cook it covered over a simmer for 35-40 minutes. Let it stand 10-20 minutes after done cooking to finish steaming.

For brown basmati rice in the rice cooker set it to the brown rice setting.
Tip: You can also add any additional Indian spices such as cumin seeds, cardamom pods, mustard seeds, whole cloves, cinnamon sticks, turmeric etc. to the soaking water to flavor your rice.

Filed Under: Articles, How To, Indian Dishes, Side Dishes Tagged With: fat-free, gluten-free, Indian Dishes, nut-free, rice, soy-free

Low Fat Vegan Greek Stuffed Eggplant With Brown Rice

October 1, 2012 by Veronica Grace 22 Comments


Fb-Button

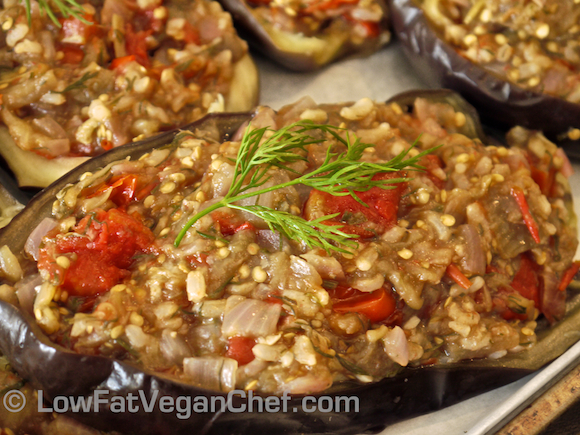
Greek Stuffed Eggplant (Little Shoes)

This summer I had some girl friends over for an end of summer vegan dinner party. I wanted to make something special and I decided on stuffed eggplant. Many people have tried stuffed peppers, but few have had stuffed eggplant, let alone delicious succulent Greek stuffed eggplant.

When I was traveling around the world I fell in love with rustic Greek cuisine. It’s nothing like you find in North America and it’s not all about souvlaki and rack of lamb. Many classic Greek dishes are vegan or vegetarian in nature, so it was a pleasant surprise to find delicious homemade dishes at local tavernas. These are called Melitzanes Papoutsakia or “Little Shoes”. They are often served luke warm or room temperature as is customary in Greece.  They believe that room temperature food is the best for health and this may be why their mezze platters are so popular, where a variety of items can be eaten together at the same temperature.

This is my vegan spin on Greek Little Shoes and you can find it with and without rice. Since this was a main entree I decided to add rice to it and I had some delicious pre cooked brown rice from Hinode in the cupboard so this was pretty easy to throw together.

I have found that it makes a difference in cooking time to precook the eggplant before baking and this way the flesh can soften without having to be cooked with oil. It’s got all the flavor you need by adding fresh herbs without any of the fat.

I served this with salad and my Tuscan Roasted Tomato Chickpea Soup that’s featured in my Comfort Soups To Keep You Warm recipe ebook.

Greek Stuffed Eggplant (Little Shoes)

Serves 8

Ingredients:

4 medium eggplants/aubergine
1 cup vegetable broth (low sodium or homemade)
1 large red onion, diced small
5 large cloves of garlic, minced
4 cups of fresh tomatoes, diced small
1 1/2 cups cooked brown rice (I used Hinode)
3 tsp lemon juice
1 1/2 tbsp fresh oregano or 1 1/2 tsp dried
1/2 cup of fresh dill or parsley, chopped
2 -3 tsp of honey/maple syrup or pureed dates
1/2 tsp salt
Fresh ground pepper
olive oil for greasing pan and sprinkling on eggplant

Directions:

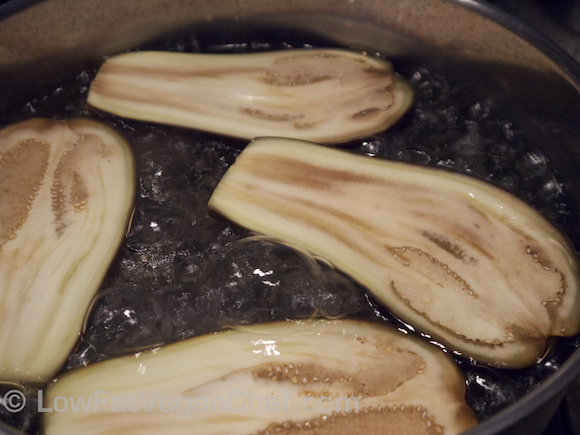
Step #1: Cut tops off of eggplant and slice in half. Bring a large pot of water to a boil and boil eggplant skin side down for 15 minutes. Depending on how large your pot mouth is and your eggplant you may have to boil 4 halves at a time.

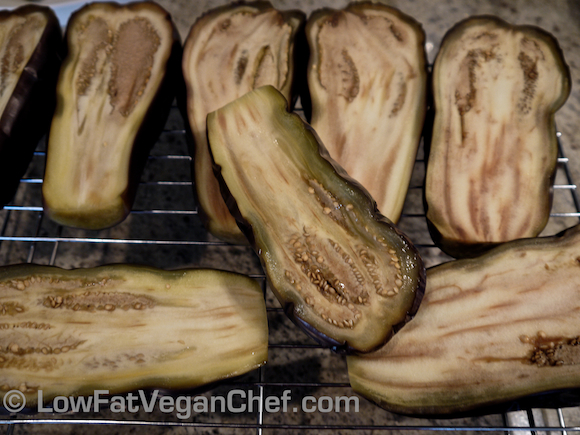
Step #2: Once done, take out eggplant and set aside to cool before handling.

Step #3: Preheat oven to 350 F/177 C. Scoop eggplant out of shell carefully and leave a small layer of flesh inside to prevent skin from tearing.

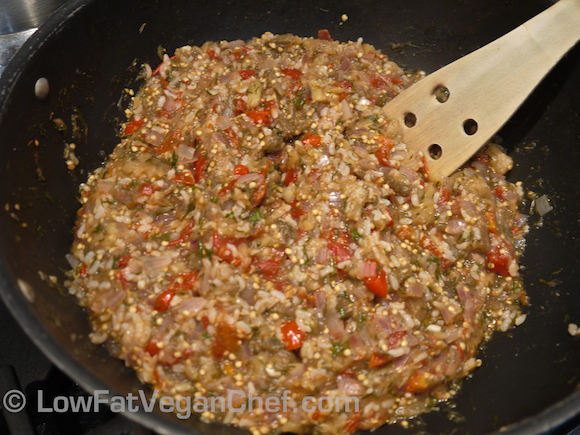
Step #4: Heat a large wok or frying pan over medium heat and add the vegetable broth. Add the onions and sauté for 4-5 minutes. Add the garlic and tomatoes and sauté for 5 minutes.

Step #5: Cut the chunks of eggplant into smaller pieces or mash them. Add to tomatoes and onions and continue cooking.

Step #6: Meanwhile, chop the dill or parsley into small pieces.

Step #7: Add cooked rice, dill/parsley, oregano, lemon juice and salt and pepper to eggplant and tomatoes. If your tomatoes are a little acidic, add honey or sweetener to balance the taste as desired.

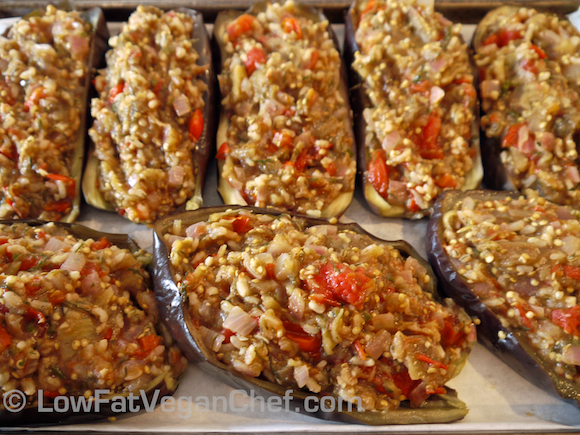
Step #8: Place a sheet of parchment paper on a baking sheet and place the eggplant shells skin side down. Fill with tomato eggplant mixture evenly.
Bake eggplant in oven until heated through, about 20 minutes.

Greek Stuffed Eggplant (Little Shoes)

Serve warm with salad, potatoes, or pita and hummus.


Have you ever had eggplant before? What’s your favorite eggplant recipe?

Filed Under: Cooked Vegan Recipes, Dinner, Eat To Live - Dr. Fuhrman Recipes, Greek, Side Dishes Tagged With: Eat To Live, eggplant, fat-free, gluten-free, Greek, nut-free, rice, soy-free, tomatoes

How To Cook The Perfect Brown Rice

September 20, 2012 by Veronica Grace 10 Comments


Fb-Button

How To Cook The Perfect Brown Rice


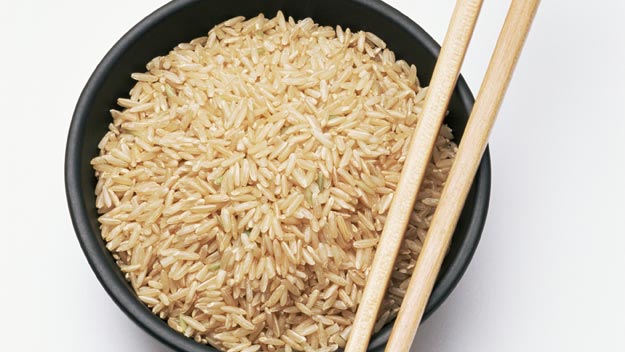
Brown rice takes much longer to cook than white rice and sometimes it can be confusing why your brown rice didn’t turn out if you have never cooked it before. Brown rice is a whole grain and still contains the outer layer of bran. White rice has just been de-hulled and reveals the white endosperm inside. Any rice that contains the outer layer of bran will look brown and can be called brown “rice”.

So let me show you how to cook brown rice in 2 easy ways, on the stovetop or in a rice cooker.

Stove Top Directions For Cooking Brown Rice:

  1. Measure out rice using a measuring cup. Usually it’s 1/3 cup for a small single serving and 1 cup for several servings. You can always make a big batch in advance and reheat it later or use to make rice salad.
  2. Place rice in a mesh strainer or a bowl and rinse with cool water to remove any debris and excess starch.  Drain.
  3. Add rinsed rice to a pot and add 1 ½ times the amount of rice you have in fresh water. For 1 cup of rice, add 1 ½ cups of water.
  4. Put the pot on the stove uncovered and turn the heat to high and bring it to a boil.
  5. Once your water is boiling, turn the heat to a simmer and cover with a lid. If your lid has a hole or steam valve cover it with a little cloth. Let the rice cook at a simmer for about 20 minutes.
  6. Turn off the heat and let the rice sit and steam for another 10 minutes.
  7. Fluff with a fork and serve.
My favorite rice cooker is the Zojirushi 5 1/2 cup (dry amount) rice cooker. It’s designed in Japan and is like the Mercedez of rice cookers. You can program it to cook rice at any hour of the day, but I personally enjoy being able to set it the night before to cook steel cut oats for whole grain oatmeal in the morning. It also has settings for brown rice, white rice, mixed rice, sweet rice, porridge, cake and steaming vegetables. So if you’re looking for an awesome all in 1 grain cooker I recommend this one. If you’re just a single or looker for a cheaper one there’s also the Zojirushi 3 cup (dry amount) rice cooker. 

Rice Cooker Directions For Cooking Brown Rice:

  1. Measure out rice using the measuring cup that comes with rice cooker. Usually it’s 1/3 cup for a small serving and 1 cup for several servings. You can always make a big batch in advance and reheat it later or use to make rice salad.
  2. Place rice in a mesh strainer or in rice cooker pan and rinse with cool water to remove any debris and excess starch.  Drain.
  3. Add rinsed rice back to rice cooker pan and add water to the corresponding water level for brown rice. If your rice cooker pan does not have a brown rice and white rice water line, use 1 ½ times the amount of rice for water. For example: 1 cup of dried brown rice will need 1½ cups of water.
  4. Turn rice cooker on and select brown rice setting. If your rice cooker does not have a brown rice setting, select white rice or just press on/start.
  5. Once cooking is complete and the rice cooker turns to the keep warm setting, let the rice sit and steam for 5-10 minutes before opening. (This helps your grains stay separated and not stick together when you scoop it out.)
  6. Fluff with a fork and serve.

I suggest setting your rice cooker to cook 1 to 2 hours before your main dish is ready to ensure that it is ready on time. For basic rice cookers it’s about 1 hour of cook time, for the Zojirushi it’s about 2 hours because it adds a soaking cycle (and produces better brown rice.)

Filed Under: Articles, Cooked Vegan Recipes, How To, Side Dishes Tagged With: brown rice, cooked recipes, fat-free, gluten-free, how-to, nut-free, soy-free

  • Page 1
  • Page 2
  • Go to Next Page »

Primary Sidebar

Follow Us:

Newsletter

Get The Low Fat Vegan Starter Kit

natural organic skin care line

Free Skincare Samples

Earn Free Crypto At Binance

Earn Free Bitcoin on Gemini Exchange

Earn $10 in Bitcoin With Gemini Exchange
Dr. Fuhrman
Dr. Fuhrman
Dr. Fuhrman

Tags

80/10/10 apple avocado banana blueberries breakfast broccoli Carrots celery chickpeas cilantro corn cucumber Curry dill dinner easy Eat To Live fat-free gluten-free how-to Indian Dishes lemon low-fat mango mexican mushrooms nut-free oil-free pasta pineapple plant-based raw raw vegan rice smoothie soup soy-free spinach tofu tomato tomatoes vegan vegetarian vitamix

Secondary Sidebar

Recipes:

  • Cooked Vegan Recipes
  • *My Recipe Books
  • Breads and Baked Goods
  • Breakfast
  • Brunch
  • Burgers
  • Casseroles
  • Curries
  • Desserts
  • Dinner
  • Dips for Veggies or Chips
  • Eat to Live-Dr. Fuhrman Recipes
  • Engine2Diet
  • Ethiopian Dishes
  • Greek
  • Green Dishes
  • Holiday
  • Indian Dishes
  • Mexican
  • One Pot Meals
  • Pasta
  • Pizza
  • Quinoa
  • Salads
  • Sandwiches and Wraps
  • Raw Vegan Recipes
  • 80/10/10
  • Raw Breakfast
  • Raw Desserts
  • Raw Dips
  • Raw Dressings
  • Raw Entrees
  • Raw Juices
  • Raw Salads
  • Raw Smoothies
  • Raw Snacks
  • Raw Soups
  • Sauces
  • Side Dishes
  • Slow Cooker Recipes
  • Snacks
  • Soups and Stews
  • Spices/Seasonings
  • Sushi
  • Thai
  • Vietnamese

Copyright © 2025 · Foodie Pro & The Genesis Framework