• Skip to primary navigation
  • Skip to main content
  • Skip to primary sidebar
  • Skip to secondary sidebar

Plant Based U

Fat-Free and Low Fat Vegan Plant Based Recipes

  • Home
  • Recipes
    • Raw Vegan Recipes
    • Cooked Vegan Recipes
    • Eat to Live Dr. Fuhrman Recipes
  • Products
  • Coaching
  • Videos
  • Articles
  • About
    • What Is Low Fat Vegan/Whole Foods Plant Based
    • Resources
  • Contact

rice

Fb-Button

Slow Cooker – Plant Based Chickpea, Potato, Pea Coconut Curry (Vegan and Dairy Free)

November 23, 2017 by Veronica Grace

Fb-Button

Hey everyone!

Today I have a new recipe for you that I threw together from what I had in the fridge and cupboard as I was craving a warm curry with the cool weather we’re having in Toronto right now. This is one you can make in your slow cooker (I have a Ninja cooking system which can do a few more fancy things than a regular slow cooker) or on the stove if you have time to watch it.

As always it’s oil free and I used dried chickpeas and soaked them overnight before tossing them in the slow cooker. You can use drained canned chickpeas if you like, but be sure to read the label and see if you can find some that are oil free and low in salt if you’re looking for a healthier option. Another note if you’re looking to avoid BPA in canned goods, select ones that say BPA free or that have a metal as opposed to a white plastic lining on the inside of the can (Eden Organics for beans and Muir Glen Organics for tomatoes for example).


This slow cooker curry can either be made the night before and to have it ready in the morning to pack up for lunch or you can start it on a weekend and have a few nights of meals for the next week. For those looking for a meal within the hour you can either use canned chickpeas or pressure cook dried/soaked chickpeas in a pressure cooker and then toss everything else in a large pot and cook over the stove until the potatoes are tender.

I happened to have some sweet potatoes and white potatoes that were getting a little bit soft and salvaged them with this curry, I also love chickpeas in any kind of curry and added the peas for some color and a nice tasty pop. You could also use other root vegetables on hand, or peppers or eggplant to change it up instead of potatoes or chickpeas. If you’re looking for an even lower fat version you can skip the coconut milk altogether or add a touch of almost milk instead if desired.
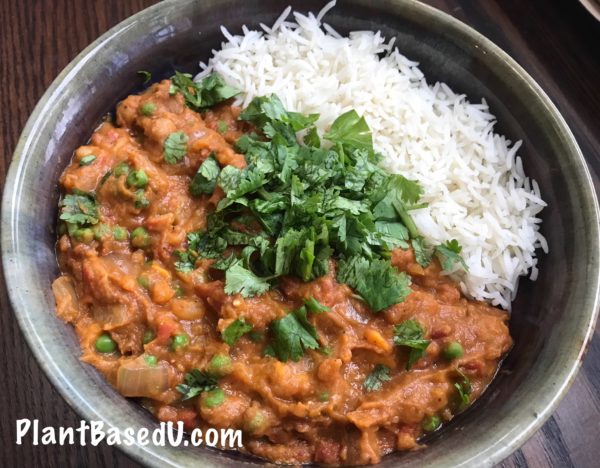
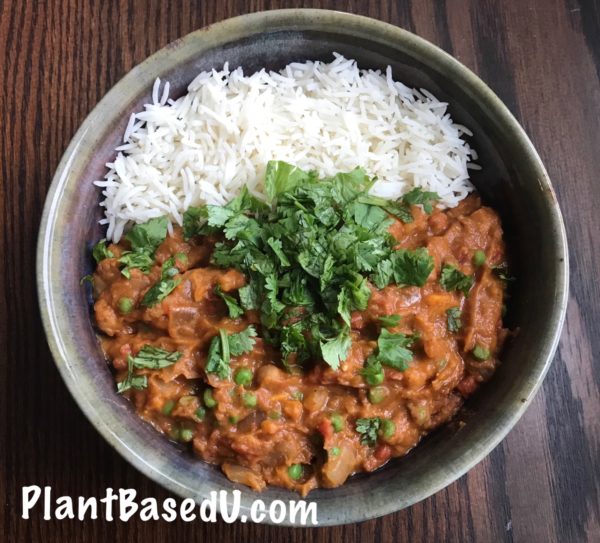
Plant Based Creamy Chickpea Potato Pea Coconut Slow Cooker Curry

Ingredients:
3 15oz/425g cans of chickpeas drained and rinsed or 3-4 cups of dried chickpeas, previously soaked and drained
3 large potatoes, peeled and diced
1-2 sweet potatoes, peeled and diced (optional)
2 large 28oz/793g cans of diced tomatoes
1 15oz can low fat coconut milk
3” of ginger, peeled and minced
8 garlic cloves, minced
1 large onion, diced
2 tsp roasted ground cumin
2 tsp roasted ground coriander
1 tsp turmeric
2 tsp garam masala (Garam masala means hot spices and can vary in flavour in different regions)
1/2 tsp chili
1-2 tsp salt (or to taste)
Ground pepper to taste

Add after cooking:
2 cups frozen sweet peas
1 bunch of fresh cilantro, chopped for garnish

Slow Cooker Instructions:

  1. Layer the ingredients from first to last in your slow cooker so the chickpeas are on the bottom and the spices are on top. You can give it a little stir lightly to get the tomatoes and coconut milk down into the cracks if you want.
  2. Set the slow cooker for 4 hours on high or 6-8 hours on low.
  3. When the potatoes are tender, stir the pot and add in the frozen peas and let sit for a few minutes to warm through.
  4. Adjust for taste if you need more salt, pepper or chilli if desired.
  5. Serve with white or brown basmati rice or flat bread and garnish with cilantro. (I cook my rice in a Zojirushi rice cooker)


Stove Top Instructions:

*If using soaked dried chickpeas you can either pressure cook or stove top cook them beforehand if you want to make this recipe faster, or else you may need to cook this for an hour or two on medium low on the stove until the chickpeas are soft.

  1. Add all of the ingredients except the peas and cilantro to a large pot and bring to a boil.
  2. Reduce heat to medium and stir regularly to ensure nothing sticks to the bottom and burns.
  3. Once the chickpeas and potatoes are tender, adjust seasonings if desired and stir in the frozen peas.
  4. Heat through until the peas are warm.
  5. Service with rice or flat bread and garnish with cilantro.

Have you ever made a slow cooker curry? What was in it?

Filed Under: Casseroles, Cooked Vegan Recipes, Curries, Slow Cooker Recipes Tagged With: chickpeas, cilantro, Curry, Indian Dishes, peas, potatoes, rice, sweet potatoes, tomatoes, yams

Plant-Based Holiday Stuffed Acorn Squash with Wild Rice, Mushrooms and Cranberries (Vegan)

October 15, 2013 by Veronica Grace 13 Comments

Fb-Button


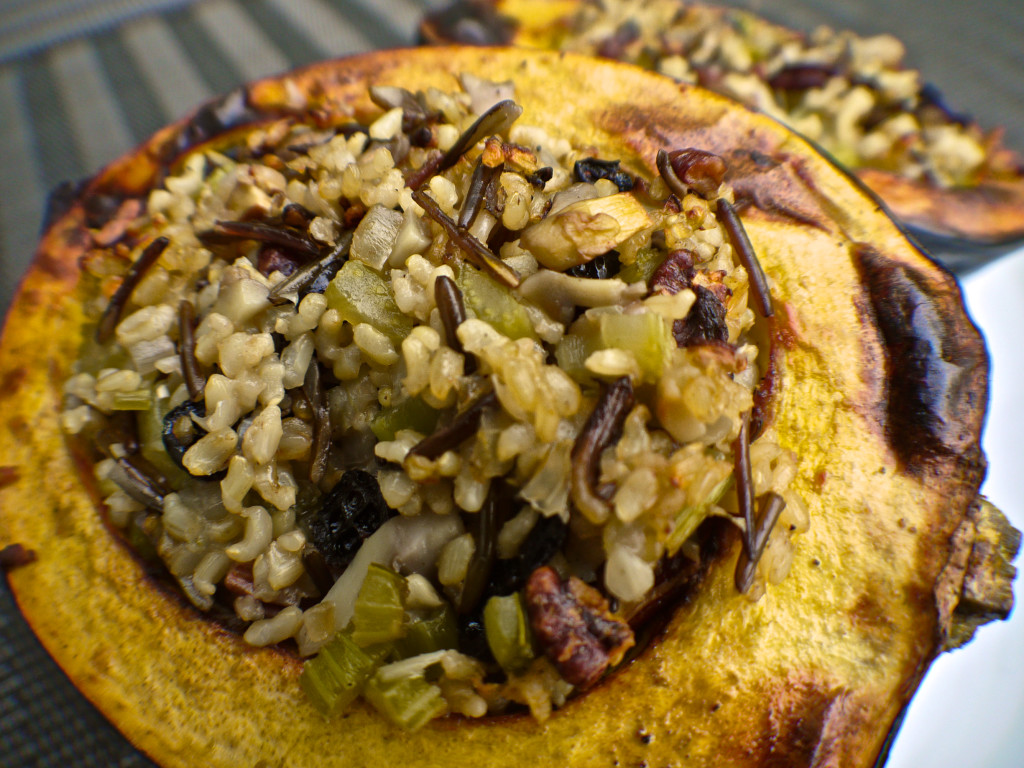
StuffedAcornSquashLarge

You guys loved my Pumpkin Raisin Muffin recipe last week so how about another fall favourite? Acorn squash! I’m see it now in stores and it reminded me of this recipe I just LOVE in my Vegan Comfort Foods From Around The World recipe book (which by the way is jam packed full of recipes to use at Thanksgiving or Christmas…) It’s Holiday Stuffed Acorn Squash!

I was first inspired to make a recipe like this by watching Forks Over Knives and saw them serving a lovely version for their holiday plant based meal. I decided to make a recipe and cram in as many goodies as possible to make it burst with flavor, there’s mushrooms, celery, pecans, cranberries, wild rice and brown rice in these stuffed squash halves. Instead of butter or margarine I glaze them with a nice balsamic vinegar so those the flavor explode in your mouth with sweet, savory and tangy. When I serve these for holiday meals they are a huge hit!


If you are trying to think of a plant-based centrepiece to your holiday meals this year why not try a stuffed vegetable? I also have several others for you to check out as well Quinoa Veggie Stuffed Zucchini Boats, Greek Vegetable and Rice Stuffed Peppers, Greek Rice Stuffed Eggplant. A fat free stuffed vegetable is a great way to pack in all the flavor without extra calories and show your omnivore friends and delicious holiday entree they wouldn’t otherwise get. 🙂

Plant-Based Holiday Stuffed Acorn Squash With Wild Rice, Mushrooms & Cranberries

Makes 4 -6 stuffed acorn squash halves

Ingredients:

¾ cup dried brown rice, rinsed and cooked
¼ cup dried wild rice, rinsed and cooked
2-3 cups vegetable broth (homemade or low sodium), divided
1/3-1/2 cup dried mushrooms
3 medium or 2 large acorn squash
1 Tbsp. maple syrup or brown sugar
Cooking spray
1 medium onion, finely diced
4 celery stalks, diced
¼ cup dried cranberries (no sugar added variety or sweetened with apple juice)
½ -1 tsp. Herbamare or salt
½ tsp. pepper
½ cup raw pecans, toasted – see Note

NOTE: To toast raw pecans, preheat oven to 350° F/177° C. Place pecans on baking sheet and toast for about 4-5 minutes. Watch carefully to prevent burning.

Directions:

1. If using a rice cooker (I use a Zojirushi), cook your rice 1 hour before you start making the squash. Rinse rice and place in rice cooker. Fill to appropriate line with vegetable stock, not water. Add chopped and rinsed dried mixed mushrooms. Add a little salt and pepper if desired. Stir to combine and cook on mixed rice/white rice setting (depending what kind of rice cooker you have). Let steam 10 minutes after done cooking and fluff with a fork.
2. Heat the oven to 400° F / 204° C and place a rack in the middle position.
3. Cut squash in half with a sharp knife and de-seed. Make sure to get out all the stringy bits inside.
4. Place the squash -hollow side up – on a baking sheet, and spray some cooking spray lightly on the tops and insides of the squash halves. Brush maple syrup on the tops and insides as well, and season with salt and fresh pepper. Roast in the oven for about 30 minutes, until ‘fork tender’.
5. Pour the vegetable broth or water into a pan and when it’s hot, add the onion, and celery. Cook this for 5-6 minutes, stirring occasionally, until just softened.
6. Remove from heat and stir in the cooked rice, pecans, and cranberries. Add salt and fresh pepper if desired.
7. Scoop the rice filling into the roasted squash halves (about ¾ cup for each if 4 halves, ½ cup if 6 smaller halves)
8. Continue roasting the squash for 20 to 30 minutes more – until it’s completely tender, the edges have started to brown a little, and the filling is hot in the middle.
9. Serve the squash warm, with balsamic vinegar on the side as a dip, and a nice salad.

Filed Under: Cooked Vegan Recipes, Holiday Tagged With: acorn squash, Christmas, cranberries, fat-free, gluten-free, holiday, rice, soy-free, stuffed squash, Thanksgiving

Fat Free Vegan Greek Rice Stuffed Peppers Recipe

June 9, 2013 by Veronica Grace 14 Comments

Fb-Button

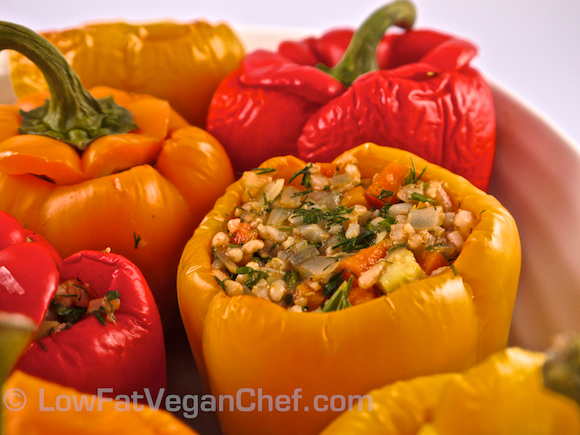
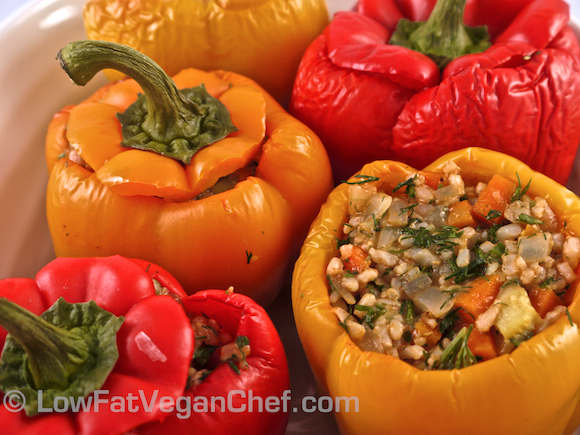
I have done A LOT of travelling in the past few years (visiting over 30 countries around the world), and Greece was one of my favorite places I visited. (Greek rice stuffed peppers were a favorite I found) Greece was pretty incredible and unexpected as I had never seen anything other than photos of ancient ruins or the white and blue houses of Mykonos on postcards. I went on a 2 1/2 week journey back in August and September of 2010 and visited many different places in Greece.

I saw the ruins of Athens, the rocky shorelines and picturesque houses of Mykonos, the rolling hills and mountains of Naxos, The Palace of the Grand Masters of Knights in Rhodes, the mesmerizing Balos Lagoon and Palace of Knossos on Crete, and the Tholos of Athena Pronaia Sanctuary and Oracle at Delphi.

I also took a ton of photos and wrote about that journey here. (I wrote about it on an old blog of mine and have moved it to this one). So if you are a travel bug like me or just love gorgeous landscape photography definitely check it out!

In my time in Greece I learned that there was much more than just olive oil and seafood to Greek cuisine. Traditionally the Greeks and Cretans ate vegetables, grains, fruits, seafood and olives. In fact their diet was vastly healthier eating homemade unprocessed food, unlike what they do now (which is more like a SAD Westernized diet drenched in copious amounts of olive oil and wine).

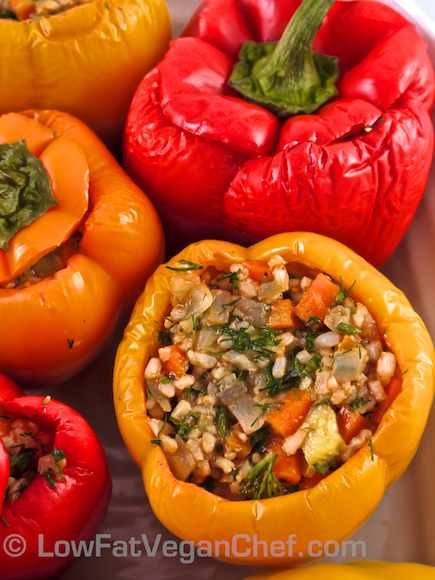
So what I took from my travels was using vegetables, grains and herbs in a way that complimented each other to bring out the full flavor of simple vegetable based dishes. The Greek rice stuffed peppers served in Greece are generally stuffed with ground meat as well, but occasionally I found some that were vegan without meat. Mykonos served some at the beach cafes and a Taverna in Delphi had some as well. But these versions used white arborio rice (Italian risotto rice) and were drenched in olive oil.

For my version I decided to switch to whole grain brown rice and remove the olive oil (for health purposes dousing all vegetables in olive oil isn’t recommended). So while it’s not “traditional” it is still very rustic and delicious. I’ve packed it full of dill, parsley and lemon juice so you get all the flavor of the full fat version but without the extra calories.

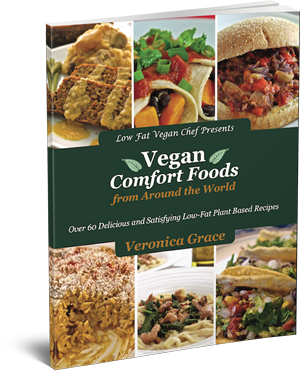
This recipe is featured in my cookbook Vegan Comfort Foods From Around The World which is available in a digital or physical version wherever you are in the world.

In fact it’s probably my family’s favorite recipe, my mom and even my friends make this recipe regularly as an entree for omnivores and they always receive rave reviews. So it makes me happy that something so simple can be delicious and satisfying to people on a wide variety of diets.

So scroll down for the recipe and get cooking!

Fat Free Vegan Greek Rice Stuffed Peppers Recipe

When I traveled in Greece I sampled several vegan versions of stuffed vegetables. Greek rice stuffed peppers was one of my favorites. I switched out the traditional Arborio rice for brown rice to make this a whole grain version. If you like the combination of lemon and dill, you’re going to love these.
Prep Time: 30 min Total Time: 1 hour 20 min

Yield:Serves 3-4 for entrées or 6-8 as a side dish

Ingredients

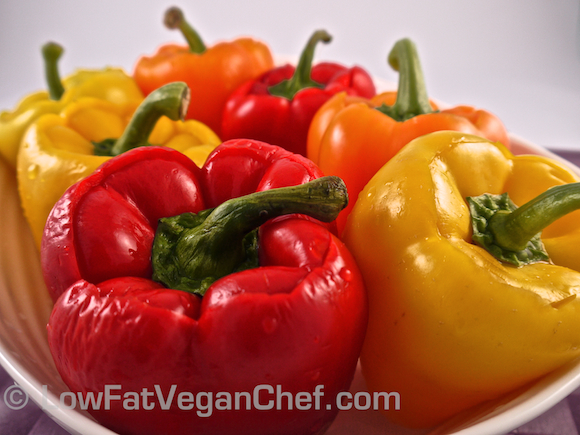
6 large or 8 small bell peppers (any color but green)
1 large onion, diced
3 medium carrots, peeled and diced
3 small zucchinis, peeled and diced
1 cup / 236 ml. low sodium vegetable broth
3 cups cooked brown rice (or other rice or grain of choice)
5 Tbsp. tomato paste
3/4 cup whole fresh parsley, de-stemmed and chopped
3/4 cup whole fresh dill, de-stemmed and chopped
Half to a full lemon, juiced (depending on how lemony you like it)
1/4 tsp. fresh ground pepper
3/4 tsp. Herbamare or Sea salt (or to taste)
1 lemon—cut into wedges (optional for garnish)

Directions

  1. Preheat oven to 350 F /175 C. Cut tops off of peppers like you would a jack-o-lantern,
    remove seeds, and wash thoroughly.
  2. Place in an oven safe dish arranged upright and put tops back on. Bake for 30 minutes.
  3. Meanwhile, in a large pan, saut. onions, carrots and zucchini in vegetable broth for 5-6 minutes.
  4. Stir in the rice and tomato paste and coat thoroughly.
  5. Add parsley, dill, lemon juice, pepper, and Herbamare or salt and stir to combine.
  6. When peppers are ready, remove from oven and fill with stuffing.
  7. Place tops back on peppers and bake for an extra 30-40 minutes until peppers are soft.
  8. Serve additional wedges of lemon if desired.

Additional Tips:

I don’t suggest using green peppers. Green peppers are actually an unripe pepper and much firmer. They will not be done in time if you cook them along with red, yellow or orange peppers. To freeze: cut them in half lengthwise and freeze in airtight containers or freezer bags and lay gently in the freezer until frozen. Due to the rice these are best eaten within 3 days, please freeze any leftovers if you won’t finish them within that time. Rice can grown bacteria in a moist environment so it’s best eaten freshly cooked or reheated from frozen. Enjoy!

Variations:

If you don’t like the taste or texture of brown rice, you can use white rice or quinoa instead. Try different vegetables too, you can dice up mushroms, asparagus, celery or greens instead if you don’t have carrots or zucchini on hand.

Nutrition Facts: 6 Servings

Amount Per Serving

  • Calories 170.9
  • Total Fat 1.4 g
  • Saturated Fat 0.3 g
  • Sodium 325.7 mg
  • Total Carbohydrate 37.1 g
  • Dietary Fiber 5.6 g
  • Sugars 3.6 g
  • Protein 4.4 g
For more delicious Oil-Free and Low Fat Plant Based Recipes, check out my new cookbook Vegan Comfort Foods From Around The World:

                          On Sale $21.95 plus shipping!

Or get the Ebook version for $17.95 to download and read now!

Have you ever made stuffed peppers before? What are your favorite ingredients?

Filed Under: Casseroles, Cooked Vegan Recipes, Greek, Green Dishes Tagged With: Authentic, bell pepper, dill, fat free vegan, gluten-free, Greece, Greek, lemon, low-fat, peppers, rice, soy-free, stuffed, tomatoes, traditional

Soy Curls With Chickpeas In Tomato Sauce

October 30, 2012 by Veronica Grace 10 Comments

Fb-Button

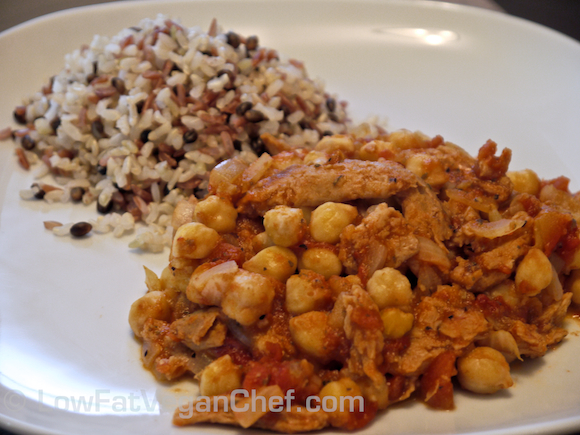
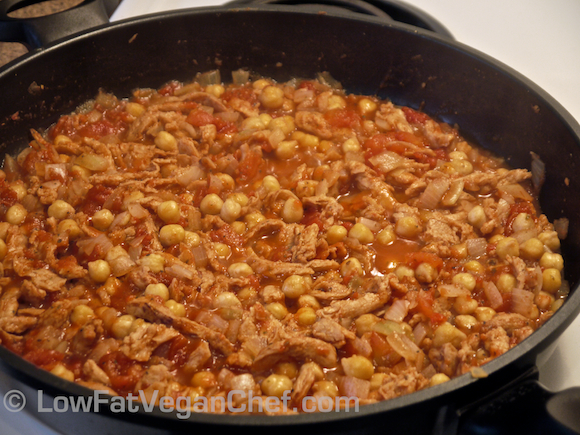
Soy Curls with Chickpeas and Tomato Sauce

I would say this recipe reminds me a bit of chicken cacciatore and it’s one of my favorite ways to make Soy Curls. I find Soy Curls need to be seasoned well and it’s nice to have a sauce to cook them in for better flavor. Sometimes I add sautéed eggplant to this recipe, but I didn’t have any today, so it’s just onions, soy curls and chickpeas in tomato sauce. I served mine with multigrain rice from Trader Joe’s but you can also serve this over pasta, couscous, quinoa or another rice of your choice.

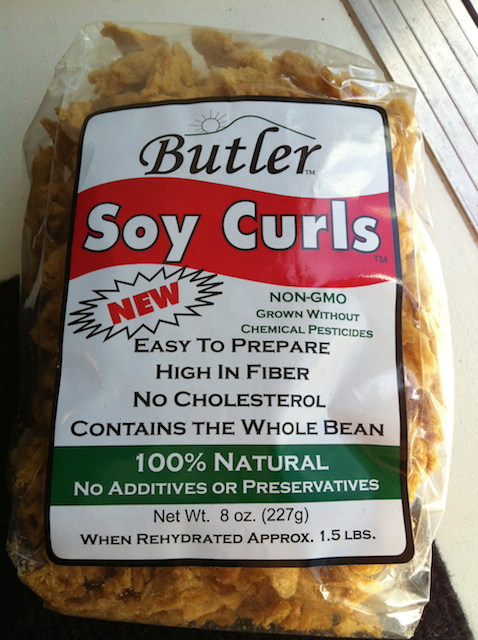
Soy Curls are a non-GMO product made by Butler Foods and come from Portland, Oregon. So if you’re in Portland you will find them at Food Fight Vegan Grocery, Whole Foods and other health food stores. You can also sample them in dishes at places like Homegrown Smoker Food Cart, A N D Cafe, Blossoming Lotus Restaurant and many more.

There are a lot of different ways you can prepare Soy Curls. I like that they are a dry product that you can keep in the cupboard as opposed to having to refrigerate it or freeze it and it’s unflavored so you can season it however you want.

Here is what the package looks like. One package will make 3-4 recipes for 4 servings.

If you don’t live in Portland you can buy Soy Curls online and have them shipped anywhere in the continental USA (my mom orders these and has them shipped to her place in Texas).

I prefer to not use the chicken style seasoning they sell as it contains hydrolized soy protein which is another term for MSG. (For more info on food ingredient terms that contain or mean MSG check out http://www.truthinlabeling.org/hiddensources.html)

Here is one of my favorite ways to prepare Soy Curls. You can use this recipe or adapt it to contain whatever seasonings you desire. You can even turn it into a curry if you want to add cayenne pepper or hot chilies too.

 Soy Curls With Chickpeas In Tomato Sauce


Serves 4

Ingredients:

1 onion, diced
2-3 cloves of garlic, minced
2 14.5 oz cans fire roasted diced tomatoes (I use Muir Glen Organic)
1 15 oz can chickpeas, drained (I use Eden Organics Salt-Free)
1 – 1 1/2 cups Soy Curls (buy on Amazon here)
Trader Joe’s 21 Seasoning Salute to taste (or other salt free herb seasoning)
Herbamare or salt to taste
Fresh ground pepper to taste

Directions:

1. Soak Soy Curls in a large bowl of warm water and sprinkle in some salt and 21 Seasoning Salute. Adding some salt will help give the soy curls some flavor. Leave for 8-10 minutes while you chop your onion and garlic.

2. In a large non-stick skillet or wok sauté onion and garlic dry for 4-5 minutes until soft.

3. Drain the Soy Curls, season with more 21 Seasoning Salute or salt free seasoning and add to the pan and sauté until the soy curls dry out a bit (4-5 minutes.)

4. Add tomatoes and drained chickpeas, and stir. Break up the tomatoes and season to taste with Herbamare or salt and pepper and any other desired seasonings.

5. Cook until tomatoes are soft.

6. Serve with rice, quinoa or pasta.

Have you ever tried Soy Curls before? What’s your favorite way to cook them?

Filed Under: Casseroles, Cooked Vegan Recipes, Dinner, One Pot Meals Tagged With: chickpeas, fat-free, gluten-free, nut-free, protein, rice, sauce, soy curls, tomatoes

How To Cook The Perfect White Basmati Rice

October 3, 2012 by Veronica Grace 6 Comments

Fb-Button

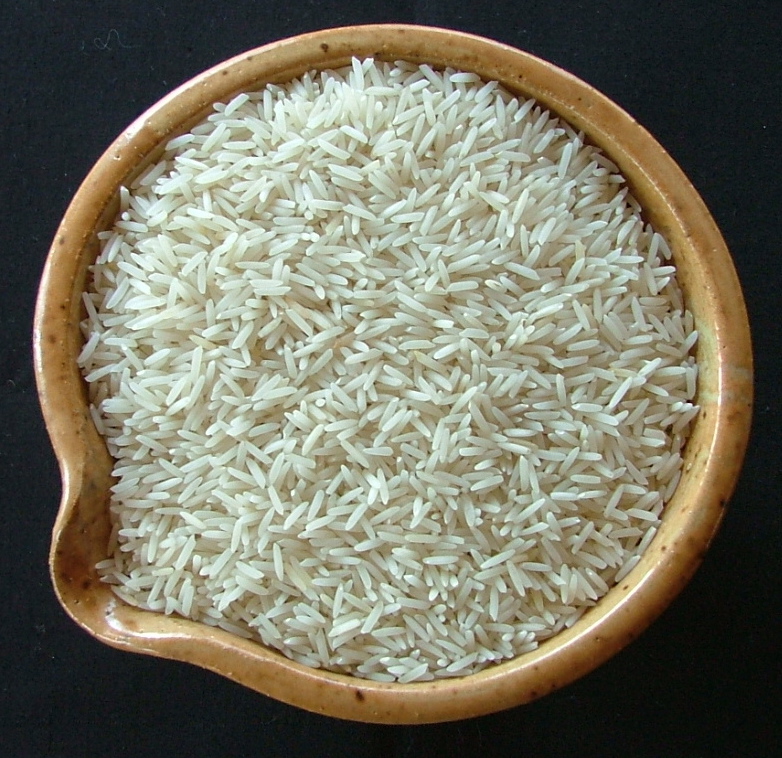
How To Cook The Perfect White Basmati (Indian Rice)


Long grain Indian Basmati rice is a little different from the typical white rice. It is long and thin and, if cooked properly, can be light and fluffy and delicious. Quite often it can be overcooked and turn out sticky and mushy. Follow these directions for the best white Indian Basmati rice.

Stove top directions for white basmati rice:

1. Measure rice and add to a bowl or mesh strainer. Rinse with cold water 3 times moving the grains around with your hands.
2. Add rice to a bowl and soak with 1-½ times as much cold water for firm rice and double the water for softer rice. Add ½ tsp. of salt for every cup of rice. (This is optional, it helps the grains stay firmer and not stick together.) Let the rice sit for 30 minutes to 2 hours. This helps stop the grains from breaking and sticking together.
3. Transfer rice and water to a heavy bottomed pot and cover with a fitted lid. If it has a steam vent cover it with a small cloth.
4. Turn to high heat and bring to a boil.
5. When it’s at a rolling boil, turn the heat down to a simmer and cook for 12-14 minutes. DO NOT PEEK OR OPEN THE LID.
6. Turn off the heat and let the rice steam for 5-10 minutes.
7. Fluff with a fork and serve.

Rice cooker directions for white basmati rice:

1. Measure rice and add to a bowl or mesh strainer. Rinse with cold water 3 times moving the grains around with your hands.
2. Add rice to a bowl and soak with double the cold water as rice. Add ½ tsp. of salt for every cup of rice. (This is optional, it helps the grains stay firmer and not stick together.) Let the rice sit for 30 minutes.
3. Transfer rice and soaking water to rice cooker pan and set the white rice/regular cook setting.
4. Allow rice to steam for 5-10 minutes when cooking cycle is complete.
5. Fluff with a fork and serve.
For firmer more al dente rice, at the beginning, just rinse in cold water and skip the soaking time. Combine water and rice in a rice cooker and cook on the white rice/regular cook setting.

For cooking brown basmati rice over the stove, use 2 cups of water for every cup of rice. Bring to a boil and cook it covered over a simmer for 35-40 minutes. Let it stand 10-20 minutes after done cooking to finish steaming.

For brown basmati rice in the rice cooker set it to the brown rice setting.
Tip: You can also add any additional Indian spices such as cumin seeds, cardamom pods, mustard seeds, whole cloves, cinnamon sticks, turmeric etc. to the soaking water to flavor your rice.

Filed Under: Articles, How To, Indian Dishes, Side Dishes Tagged With: fat-free, gluten-free, Indian Dishes, nut-free, rice, soy-free

Low Fat Vegan Greek Stuffed Eggplant With Brown Rice

October 1, 2012 by Veronica Grace 22 Comments

Fb-Button

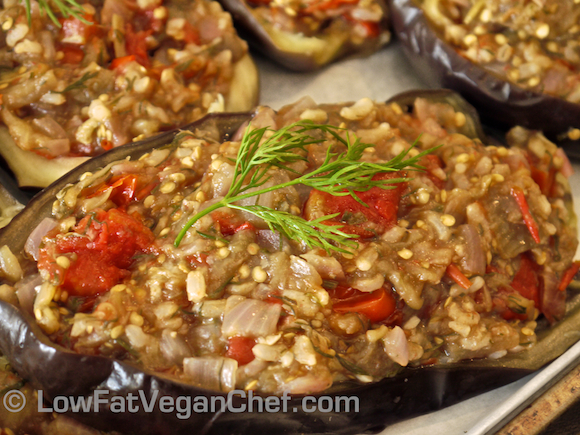
Greek Stuffed Eggplant (Little Shoes)

This summer I had some girl friends over for an end of summer vegan dinner party. I wanted to make something special and I decided on stuffed eggplant. Many people have tried stuffed peppers, but few have had stuffed eggplant, let alone delicious succulent Greek stuffed eggplant.

When I was traveling around the world I fell in love with rustic Greek cuisine. It’s nothing like you find in North America and it’s not all about souvlaki and rack of lamb. Many classic Greek dishes are vegan or vegetarian in nature, so it was a pleasant surprise to find delicious homemade dishes at local tavernas. These are called Melitzanes Papoutsakia or “Little Shoes”. They are often served luke warm or room temperature as is customary in Greece.  They believe that room temperature food is the best for health and this may be why their mezze platters are so popular, where a variety of items can be eaten together at the same temperature.

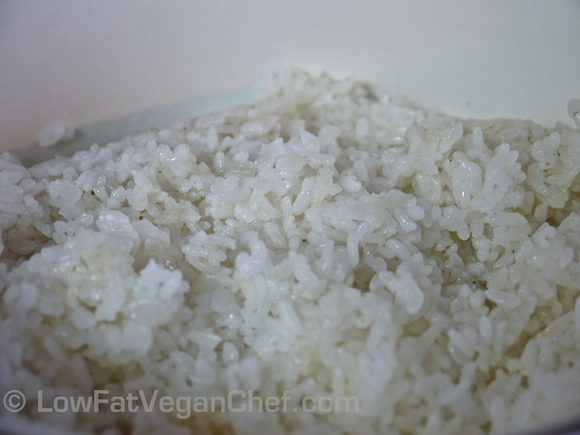
This is my vegan spin on Greek Little Shoes and you can find it with and without rice. Since this was a main entree I decided to add rice to it and I had some delicious pre cooked brown rice from Hinode in the cupboard so this was pretty easy to throw together.

I have found that it makes a difference in cooking time to precook the eggplant before baking and this way the flesh can soften without having to be cooked with oil. It’s got all the flavor you need by adding fresh herbs without any of the fat.

I served this with salad and my Tuscan Roasted Tomato Chickpea Soup that’s featured in my Comfort Soups To Keep You Warm recipe ebook.

Greek Stuffed Eggplant (Little Shoes)

Serves 8

Ingredients:

4 medium eggplants/aubergine
1 cup vegetable broth (low sodium or homemade)
1 large red onion, diced small
5 large cloves of garlic, minced
4 cups of fresh tomatoes, diced small
1 1/2 cups cooked brown rice (I used Hinode)
3 tsp lemon juice
1 1/2 tbsp fresh oregano or 1 1/2 tsp dried
1/2 cup of fresh dill or parsley, chopped
2 -3 tsp of honey/maple syrup or pureed dates
1/2 tsp salt
Fresh ground pepper
olive oil for greasing pan and sprinkling on eggplant

Directions:

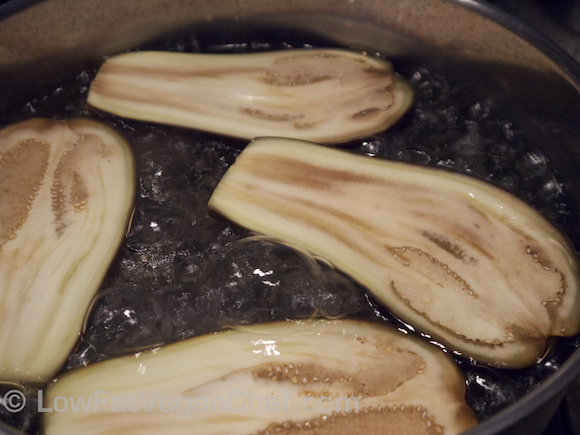
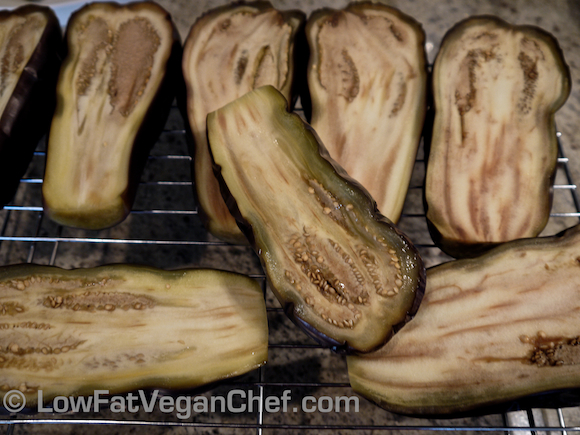
Step #1: Cut tops off of eggplant and slice in half. Bring a large pot of water to a boil and boil eggplant skin side down for 15 minutes. Depending on how large your pot mouth is and your eggplant you may have to boil 4 halves at a time.

Step #2: Once done, take out eggplant and set aside to cool before handling.

Step #3: Preheat oven to 350 F/177 C. Scoop eggplant out of shell carefully and leave a small layer of flesh inside to prevent skin from tearing.

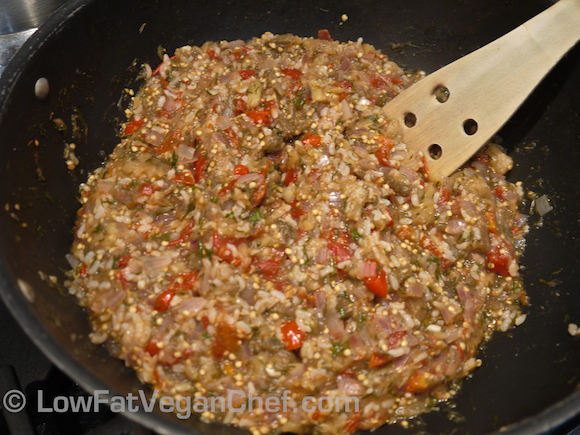
Step #4: Heat a large wok or frying pan over medium heat and add the vegetable broth. Add the onions and sauté for 4-5 minutes. Add the garlic and tomatoes and sauté for 5 minutes.

Step #5: Cut the chunks of eggplant into smaller pieces or mash them. Add to tomatoes and onions and continue cooking.

Step #6: Meanwhile, chop the dill or parsley into small pieces.

Step #7: Add cooked rice, dill/parsley, oregano, lemon juice and salt and pepper to eggplant and tomatoes. If your tomatoes are a little acidic, add honey or sweetener to balance the taste as desired.

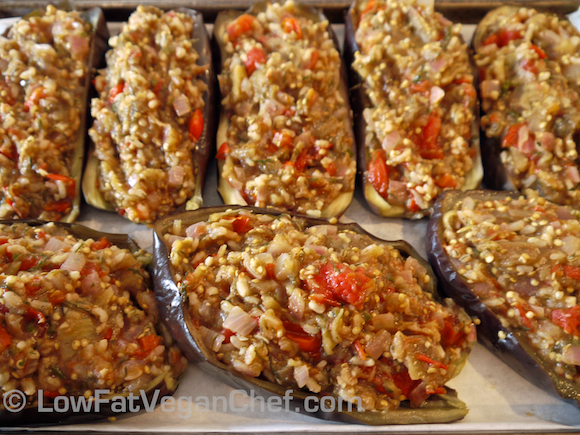
Step #8: Place a sheet of parchment paper on a baking sheet and place the eggplant shells skin side down. Fill with tomato eggplant mixture evenly.
Bake eggplant in oven until heated through, about 20 minutes.

Greek Stuffed Eggplant (Little Shoes)

Serve warm with salad, potatoes, or pita and hummus.


Have you ever had eggplant before? What’s your favorite eggplant recipe?

Filed Under: Cooked Vegan Recipes, Dinner, Eat To Live - Dr. Fuhrman Recipes, Greek, Side Dishes Tagged With: Eat To Live, eggplant, fat-free, gluten-free, Greek, nut-free, rice, soy-free, tomatoes

How To Make Perfect Sushi Rice For Vegan Sushi Rolls With Photos!

January 8, 2012 by Veronica Grace 12 Comments

Fb-Button

Sushi rice is called sumeshi in Japanese. It is essential to making sushi, and contrary to what you may think it is not just plain white rice that is used. It is cooked and then seasoned to have a tangy sweet taste.

This page will tell you how to make the perfect sushi rice for sushi. Check out my recipe for Vegan California Rolls when you’re done.

How To Make Perfect Sushi Rice With Step By Step Photo Instructions

To make this recipe you will need:

2 cups sushi rice (short grain)
2 cups filtered water
3 tbsp rice vinegar
2 tbsp sugar
1 tsp herbamare or salt (You can use more if you wish, but you’re going to dip the sushi in soy sauce anyways which is very salty)

Tools needed:

Fine mesh strainer or sieve
Rice paddle or wooden spoon
Large Wooden/Glass/Ceramic/Plastic bowl (not metal)

Step 1: Measure out 2 cups dried sushi rice (short grain white or brown rice. It must be short grain!) You can double if desired, but this will make enough sushi for at least 4 large rolls and a small roll or two. Enough for 2 adults for dinner, or two single lunches.

Step 2: Rinse your rice through a fine metal sieve until the water runs clear, OR soak in a large bowl of water and mix around by hand to get the excess starch off. Rinse and soak a few times until the water is clearer. This is important and will make your rice turn out better.

Step 3: (Optional) Let your rice soak for 30 minutes.

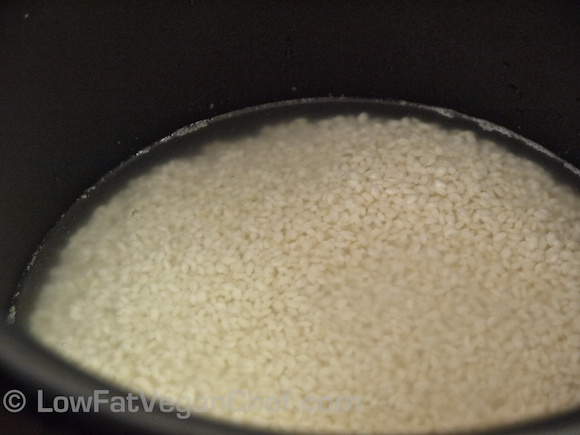
Step 4: Place rice and 2 cups water into rice cooker or pot. (If using more rice, always use a 1:1 (same) ratio of rice and water)

Rinsed sushi rice in rice cooker

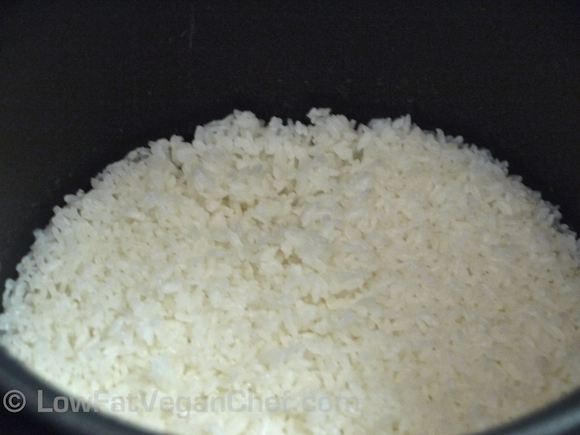
Step 5: Rice cooker instructions: Set the white rice program and let it cook. My favourite rice cooker is my Zojirushi 5 1/2 cup rice cooker because it has settings for white rice, brown rice, mixed rice, porridge and cake. Yes you can even cook cake in this rice cooker! It’s wicked. Check it out. If fancy rice cookers aren’t of any use to you, check out this Hamilton Beach rice cooker (for $45 with free shipping) I use frequently when cooking at my mom’s house. It’s great too for basic rice and has never overcooked or burned the rice. I used to use those $10 rice cookers with just an on off button, but often times they would turn off before the rice was done, overheat and cause overcooked or crusty rice. If cooking for a family, I highly suggest getting a decent rice cooker to free you up from the stove and the guesswork of making perfect rice. When the rice is done cooking and the buzzer goes off, leave the rice for 10 minutes to let steam. Don’t open it and don’t touch it.

Stove top instructions: In a pot, place the rinsed rice and equal parts of water and bring to a boil. Stir the rice occasionally to prevent any grains from sticking to the bottom of the pot. Once it reaches a boil, turn down the heat to medium low, cover with a lid and steam. Do NOT open the lid until the rice is done steaming. You will lose your moisture and heat and jeopardize your rice being cooked evenly. Use a clear glass lid if you can. The rice is done cooking when the water disappears, this happens between 8 and 10 minutes depending on the type of stove you have. Remove the rice from heat.

Perfectly cooked sushi rice

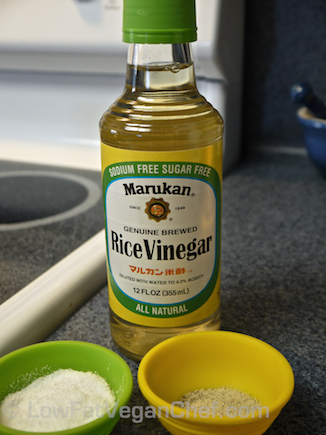
Step 6: Measure 3 tbsp rice vinegar, 2 tbsp granulated sugar and 1 tsp herbamare or salt. You can use more salt if you want, but really its not necessary if you’re going to be dipping your sushi in soy sauce which is super salty anyway.

Rice vinegar, sugar and herbamare (salt)

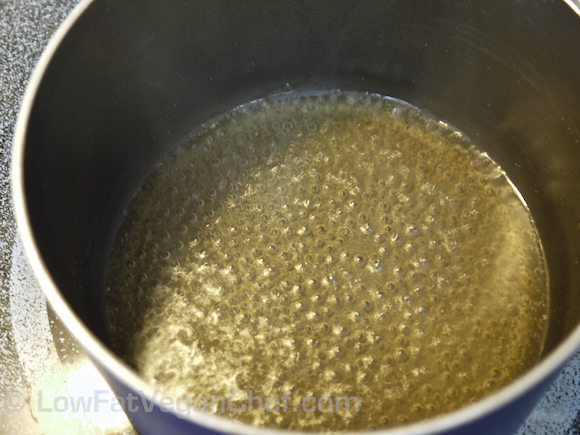
Step 7: Make sushi vinegar. Heat a small pot (not metal) over medium heat and add vinegar, sugar and herbamare (or salt). Stir.

Combine vinegar, sugar and salt in pot

Sushi vinegar is ready

When it is bubbling and everything is dissolved remove from heat and let cool.

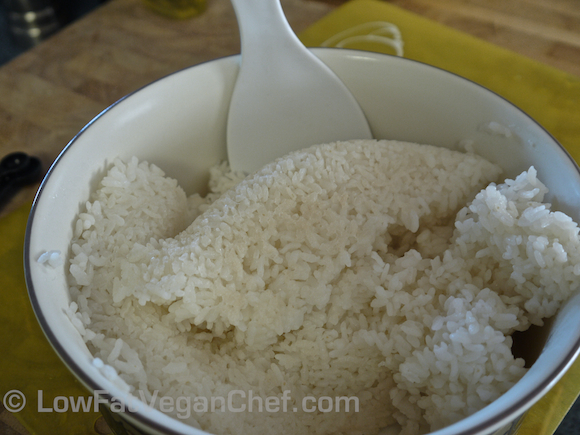
Step 8: Remove rice from pot or rice cooker with a wooden spoon or that plastic rice scoop you have. You basically want to scrape the bottom and dump the rice in 1 or 2 strokes so that you don’t damage the sushi rice too much and mash it. Pour it out into a wooden, glass or plastic bowl. If you put it in a metal mixing bowl, you risk the chance of ruining the flavour when pouring vinegar on it and it reacting with the metal. Don’t do it. Only scoop out perfectly cooked rice, if any is stuck or undercooked, leave it in the pot.

Sushi rice removed from pot

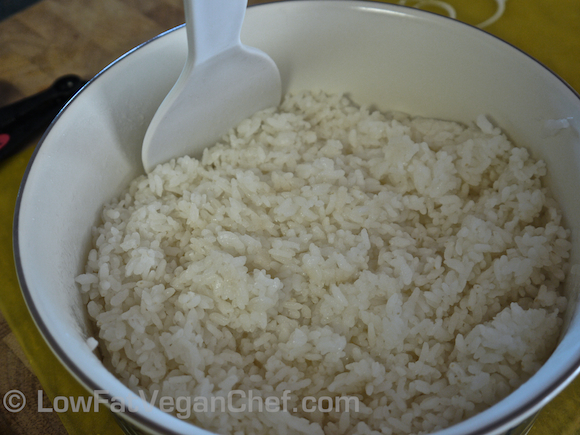
Step 9: Gently cut into sushi rice with paddle to break up.

Perfect seasoned sushi rice

Step 10: Season sushi rice by drizzling sushi vinegar evenly across rice. Cut into rice gently again to combine and spread out the seasoning.

Let your perfect sushi rice cool off before making sushi. If it’s too warm it can stick to the sushi mat and be hard to work with. Now you are ready to prep your veggies or filling for sushi rolls!

Filed Under: How To, Sushi Tagged With: gluten-free, how-to, nut-free, rice, rice cooker, soy-free, sushi

Primary Sidebar

Follow Us:

Newsletter

Get The Low Fat Vegan Starter Kit

natural organic skin care line

Free Skincare Samples

Earn Free Crypto At Binance

Earn Free Bitcoin on Gemini Exchange

Earn $10 in Bitcoin With Gemini Exchange
Dr. Fuhrman
Dr. Fuhrman
Dr. Fuhrman

Tags

80/10/10 apple avocado banana blueberries breakfast broccoli Carrots celery chickpeas cilantro corn cucumber Curry dill dinner easy Eat To Live fat-free gluten-free how-to Indian Dishes lemon low-fat mango mexican mushrooms nut-free oil-free pasta pineapple plant-based raw raw vegan rice smoothie soup soy-free spinach tofu tomato tomatoes vegan vegetarian vitamix

Secondary Sidebar

Recipes:

  • Cooked Vegan Recipes
  • *My Recipe Books
  • Breads and Baked Goods
  • Breakfast
  • Brunch
  • Burgers
  • Casseroles
  • Curries
  • Desserts
  • Dinner
  • Dips for Veggies or Chips
  • Eat to Live-Dr. Fuhrman Recipes
  • Engine2Diet
  • Ethiopian Dishes
  • Greek
  • Green Dishes
  • Holiday
  • Indian Dishes
  • Mexican
  • One Pot Meals
  • Pasta
  • Pizza
  • Quinoa
  • Salads
  • Sandwiches and Wraps
  • Raw Vegan Recipes
  • 80/10/10
  • Raw Breakfast
  • Raw Desserts
  • Raw Dips
  • Raw Dressings
  • Raw Entrees
  • Raw Juices
  • Raw Salads
  • Raw Smoothies
  • Raw Snacks
  • Raw Soups
  • Sauces
  • Side Dishes
  • Slow Cooker Recipes
  • Snacks
  • Soups and Stews
  • Spices/Seasonings
  • Sushi
  • Thai
  • Vietnamese

Copyright © 2025 · Foodie Pro & The Genesis Framework