• Skip to primary navigation
  • Skip to main content
  • Skip to primary sidebar
  • Skip to secondary sidebar

Plant Based U

Fat-Free and Low Fat Vegan Plant Based Recipes

  • Home
  • Recipes
    • Raw Vegan Recipes
    • Cooked Vegan Recipes
    • Eat to Live Dr. Fuhrman Recipes
  • Products
  • Coaching
  • Videos
  • Articles
  • About
    • What Is Low Fat Vegan/Whole Foods Plant Based
    • Resources
  • Contact

soy-free

Fb-Button

Plant-Based Holiday Stuffed Acorn Squash with Wild Rice, Mushrooms and Cranberries (Vegan)

October 15, 2013 by Veronica Grace 13 Comments

Fb-Button


StuffedAcornSquashLarge

You guys loved my Pumpkin Raisin Muffin recipe last week so how about another fall favourite? Acorn squash! I’m see it now in stores and it reminded me of this recipe I just LOVE in my Vegan Comfort Foods From Around The World recipe book (which by the way is jam packed full of recipes to use at Thanksgiving or Christmas…) It’s Holiday Stuffed Acorn Squash!

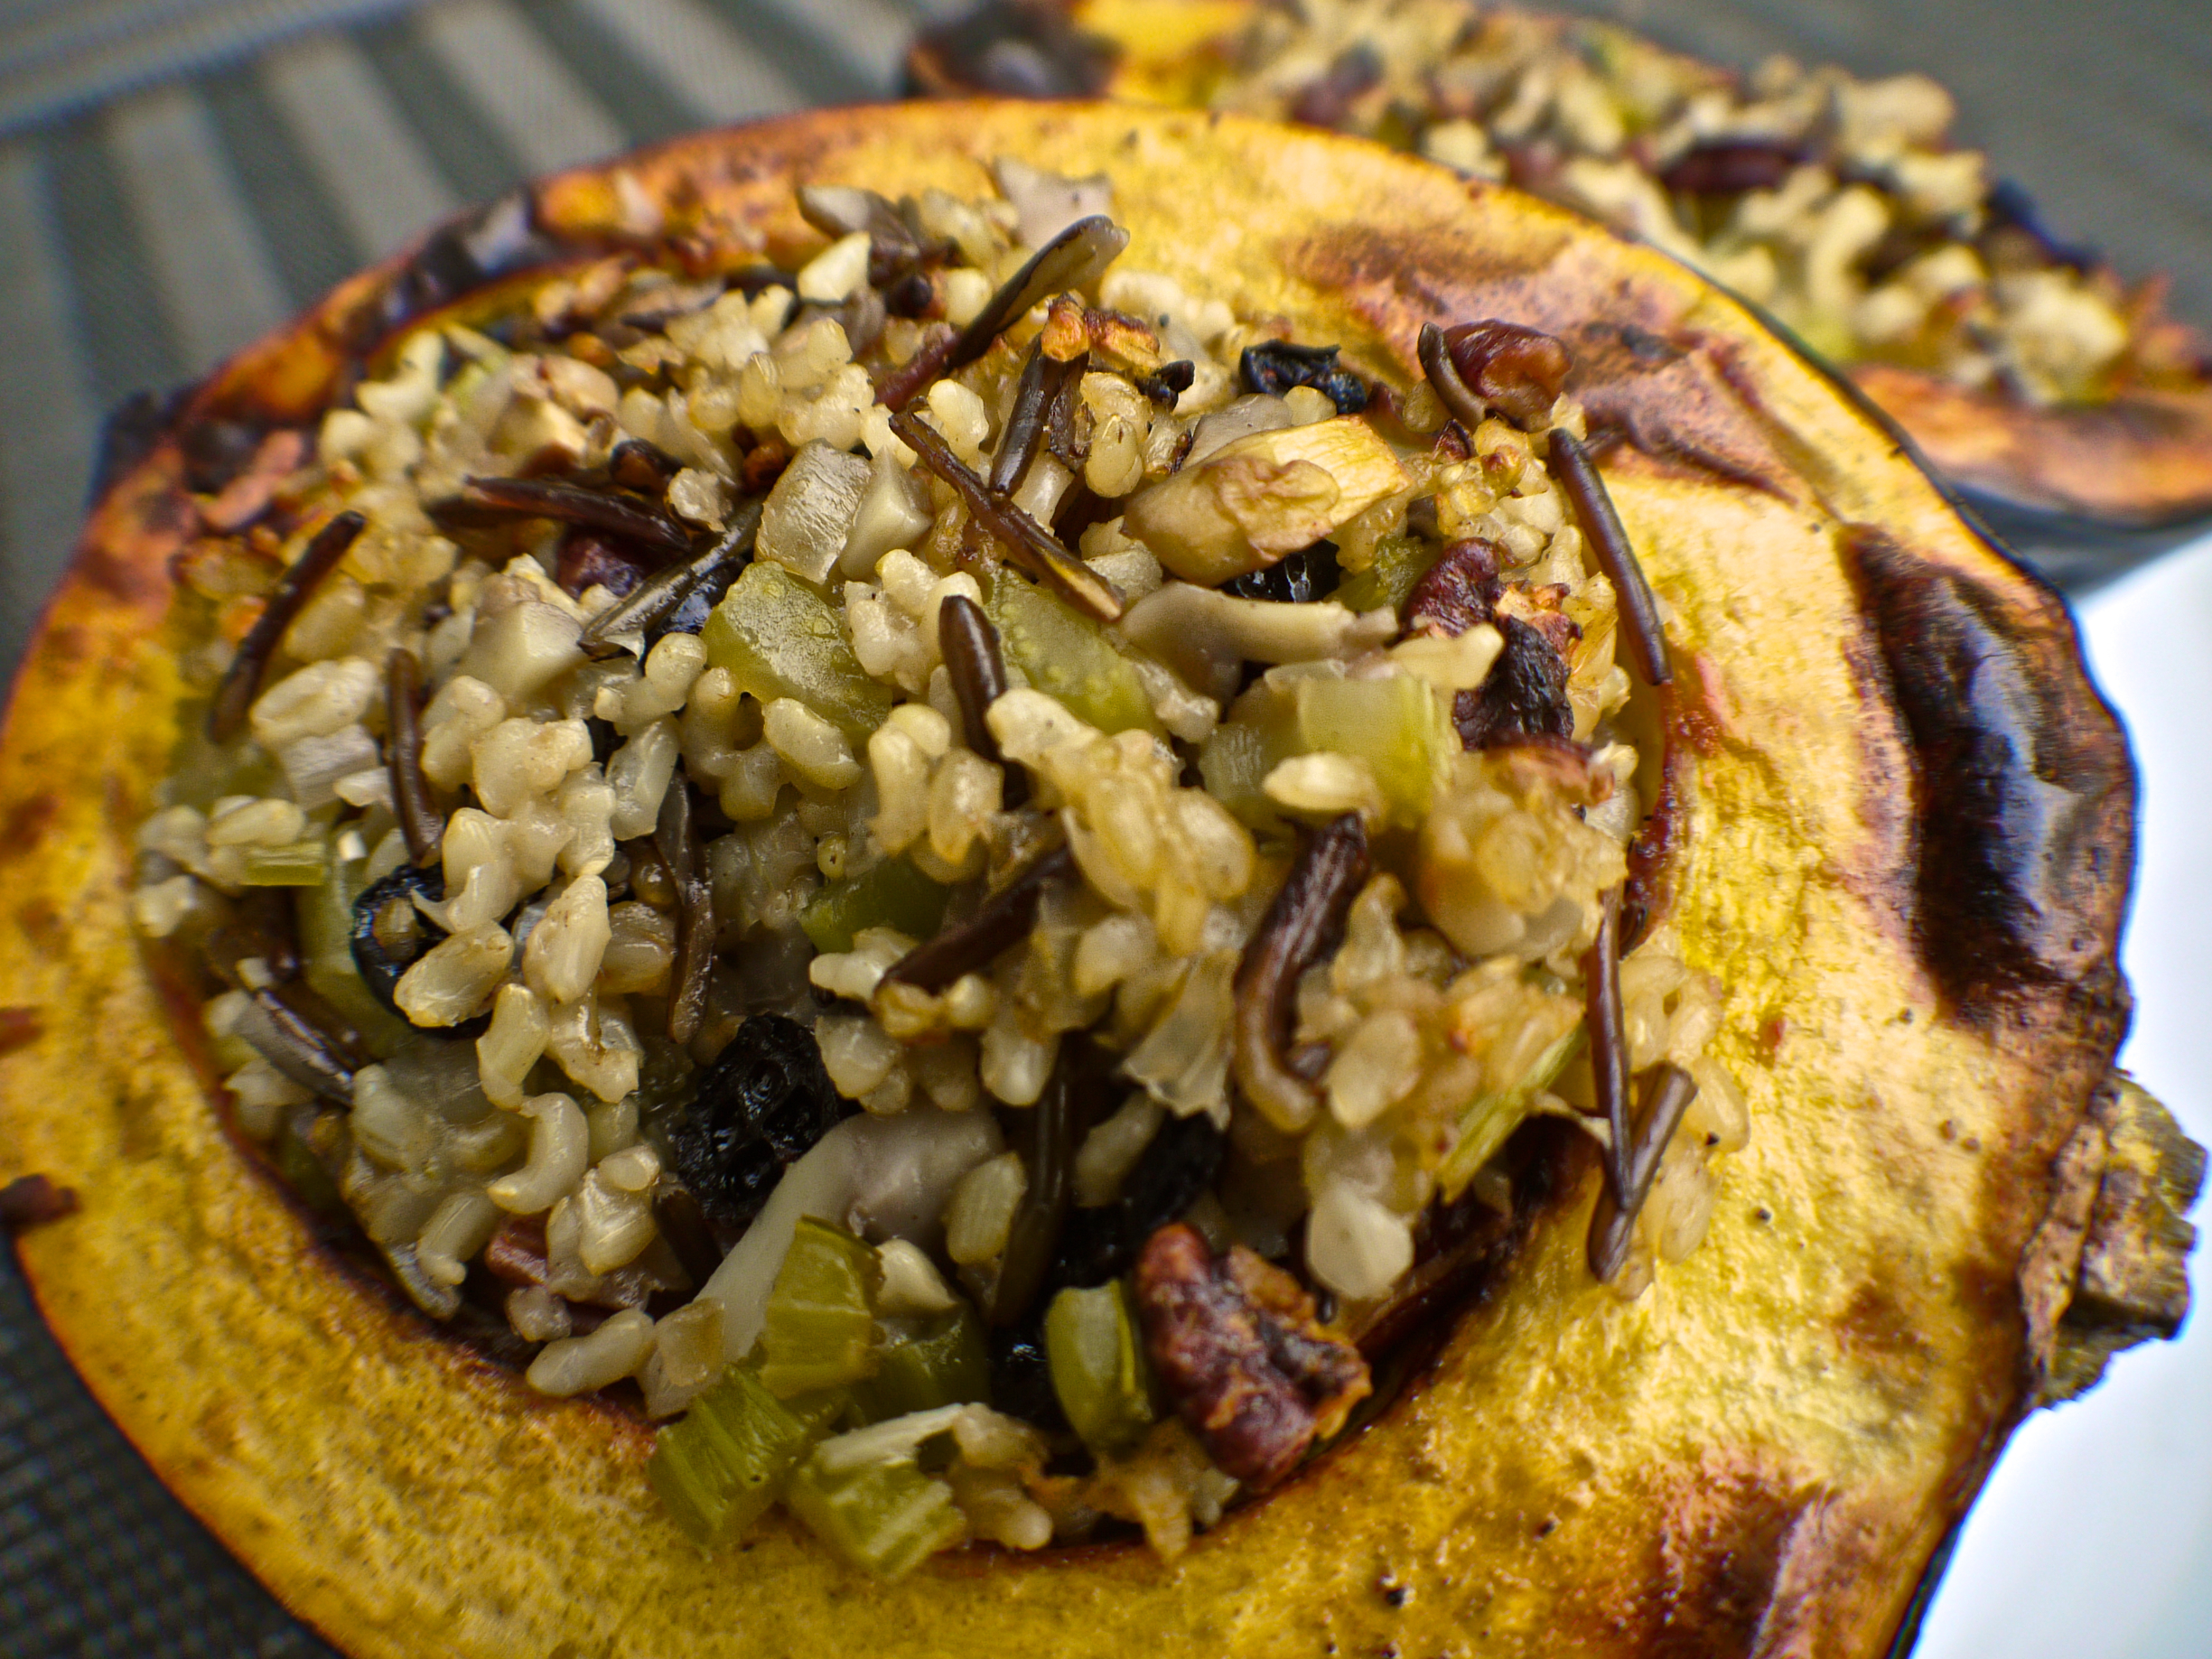
I was first inspired to make a recipe like this by watching Forks Over Knives and saw them serving a lovely version for their holiday plant based meal. I decided to make a recipe and cram in as many goodies as possible to make it burst with flavor, there’s mushrooms, celery, pecans, cranberries, wild rice and brown rice in these stuffed squash halves. Instead of butter or margarine I glaze them with a nice balsamic vinegar so those the flavor explode in your mouth with sweet, savory and tangy. When I serve these for holiday meals they are a huge hit!


If you are trying to think of a plant-based centrepiece to your holiday meals this year why not try a stuffed vegetable? I also have several others for you to check out as well Quinoa Veggie Stuffed Zucchini Boats, Greek Vegetable and Rice Stuffed Peppers, Greek Rice Stuffed Eggplant. A fat free stuffed vegetable is a great way to pack in all the flavor without extra calories and show your omnivore friends and delicious holiday entree they wouldn’t otherwise get. 🙂

Plant-Based Holiday Stuffed Acorn Squash With Wild Rice, Mushrooms & Cranberries

Makes 4 -6 stuffed acorn squash halves

Ingredients:

¾ cup dried brown rice, rinsed and cooked
¼ cup dried wild rice, rinsed and cooked
2-3 cups vegetable broth (homemade or low sodium), divided
1/3-1/2 cup dried mushrooms
3 medium or 2 large acorn squash
1 Tbsp. maple syrup or brown sugar
Cooking spray
1 medium onion, finely diced
4 celery stalks, diced
¼ cup dried cranberries (no sugar added variety or sweetened with apple juice)
½ -1 tsp. Herbamare or salt
½ tsp. pepper
½ cup raw pecans, toasted – see Note

NOTE: To toast raw pecans, preheat oven to 350° F/177° C. Place pecans on baking sheet and toast for about 4-5 minutes. Watch carefully to prevent burning.

Directions:

1. If using a rice cooker (I use a Zojirushi), cook your rice 1 hour before you start making the squash. Rinse rice and place in rice cooker. Fill to appropriate line with vegetable stock, not water. Add chopped and rinsed dried mixed mushrooms. Add a little salt and pepper if desired. Stir to combine and cook on mixed rice/white rice setting (depending what kind of rice cooker you have). Let steam 10 minutes after done cooking and fluff with a fork.
2. Heat the oven to 400° F / 204° C and place a rack in the middle position.
3. Cut squash in half with a sharp knife and de-seed. Make sure to get out all the stringy bits inside.
4. Place the squash -hollow side up – on a baking sheet, and spray some cooking spray lightly on the tops and insides of the squash halves. Brush maple syrup on the tops and insides as well, and season with salt and fresh pepper. Roast in the oven for about 30 minutes, until ‘fork tender’.
5. Pour the vegetable broth or water into a pan and when it’s hot, add the onion, and celery. Cook this for 5-6 minutes, stirring occasionally, until just softened.
6. Remove from heat and stir in the cooked rice, pecans, and cranberries. Add salt and fresh pepper if desired.
7. Scoop the rice filling into the roasted squash halves (about ¾ cup for each if 4 halves, ½ cup if 6 smaller halves)
8. Continue roasting the squash for 20 to 30 minutes more – until it’s completely tender, the edges have started to brown a little, and the filling is hot in the middle.
9. Serve the squash warm, with balsamic vinegar on the side as a dip, and a nice salad.

Filed Under: Cooked Vegan Recipes, Holiday Tagged With: acorn squash, Christmas, cranberries, fat-free, gluten-free, holiday, rice, soy-free, stuffed squash, Thanksgiving

Plant-Based Broccoli Mushroom Rotini Casserole (Vegan Pasta)

September 15, 2013 by Veronica Grace 17 Comments

Fb-Button


BroccoliMushroomBake (3)

I had some leftover broccoli florets and mushrooms in the fridge I needed to use up and thought of baking them into pasta casserole. Then I thought, what if I were to chop these up super super small and HID them in a cheezy sauce? Then I would have a fantastic recipe for those who have a hard time getting their children or spouses to eat their vegetables!

So that’s why this recipe was designed and it’s not quite as indulgent as just pasta in cheezy sauce. It has some delicious veggies hiding in it too!

BroccoliMushroomBake (2)

I like to use rotini pasta because the spirals hold onto the sauce and really grab it, plus it has a nice texture to it too. I recommend following these directions, but if you don’t have a food processor you can chop the veggies into very very small pieces instead so they don’t overwhelm the pasta. Also make sure not to use too much broccoli or you will end up with a more pungent pasta creation (as broccoli contains sulfur it can be strong smelling).


So give this healthy pasta bake a try and let me know what you think!

BroccoliMushroomBake (1)

Vegan Broccoli Mushroom Pasta Bake

Serves 6

Ingredients:

1 cuo/150 grams of broccoli
8 oz. sliced mushrooms
1 medium onion, peeled and quartered
3 large cloves of garlic
16 oz. whole wheat rotini, elbows or spirals
1/4 cup panko bread crumbs
1/2 tsp dried basil
1/2 tsp dried oregano
Paprika to garnish
White pepper to garnish
Herbamare or salt to garnish

Cheezy Sauce:

2 cups almond milk
1/4 cup cashews
1 large clove of garlic
1/3 cup nutritional yeast
5 tsp Genmai brown rice miso paste
1 tbsp cornstarch
1 tsp smoked paprika

Directions:

Preheat oven to 350 F.

1. Bring a large pot of water to a boil. Add salt if desired. Cook rotini or spirals for about 6 minutes just until al dente. (Do not overcook)

2. Pulse, broccoli, mushrooms, onions and garlic separately in a food processor (unless you have a very large one) until broken into tiny pieces. Add to a large wok or sauté pan and cook for 7 minutes until soft. Add a little water or vegetable broth as necessary to cook.

3. Blend cheezy sauce ingredients in a blender and taste test. Adjust seasonings if desired with more salt and pepper or smoked paprika.

4. Drain rotini and add to sauté pan and pour sauce over (or combine in a large pot if you don’t have a lot of room). Toss to coat.

5. Pour into a large casserole pan. Top with panko breadcrumbs and smoked paprika.

6. Bake for 20-25 minutes.

7. Serve and enjoy!

Additional Tips:

This recipe is best served fresh, but if you need to reheat it rebake it or else the panko bread crumbs will be mushy.

Have you ever made a plant-based baked pasta casserole before? What do you put in it? 

Filed Under: Casseroles, Cooked Vegan Recipes, Pasta Tagged With: basil, broccoli, cheese sauce, mushroom, oregano, pasta, rotini, soy-free

20 Minutes To The Table Episode 5: Zucchini Rotini Marinara with Vegetables

August 25, 2013 by Veronica Grace 14 Comments

Fb-Button

It’s been a long day, you’re tired, you’re hungry and you have no imagination for what to make for dinner. – I know this feeling and what to make for dinner when I have no inspiration. This vegan Zucchini Rotini Marinara is something that I make quite often because it’s easy to throw together and it’s great for using up vegetables in the fridge. Sometimes I’ll add in some mushrooms, broccoli, or carrots, but I really love this version with zucchini, bell peppers and peas. I use whole grain rotini and I like this style of noodle because it holds onto the sauce well, has a nice texture and looks really pretty on the plate. I got a giant box of this at Costco for a good deal. It lasted me forever and made quick meals really easy.

I actually prefer a spiral type of noodle compared to spaghetti or fettucini as well. This way I can add more veggies and have a little less pasta. Most of the time I make my own pasta sauce each time with just canned tomatoes and season it and blend it up, but I wanted to show you a quick version of this recipe. I know most of you are probably used to buying pasta sauce in a jar.

When I went shopping in Canada there weren’t too many brands of pasta sauce available that didn’t contain olive oil, canola oil or soy bean oil, but I did find 2 different brands. Just look for one that has a low fat, or light description on the front and then check the back to see if it has any oil. I really try to make sure everything I buy is oil-free, it just doesn’t need the extra calories and I don’t enjoy eating slick or greasy food anymore.

Vegan pasta marinara is one of the easiest dishes you can make, but you can make it delicious and special by jazzing it up with some fresh veggies, cooking them perfectly and seasoning your sauce to your liking. I always like to add some fresh chopped onions for more flavor. The recipe video is below.

If you enjoy  my video please click on it to view it in youtube so you can click the like icon and subscribe to my channel so you can get more recipe videos.   Thank you for the support!

Recipe follows below.

20 Minutes to The Table Episode 5: Zucchini Rotini Marinara with Vegetables

ZucchiniRotiniMarinara-1

 Serves 6

Pasta Ingredients:

1 onion, diced
2 zucchinis sliced
1 red bell pepper, sliced
1 cup frozen peas
300g/4 cups dried whole wheat rotini (or GF)
1 700 ml/ 24 oz. jar of pasta sauce (look for oil free and low in sodium)
1 tbsp. fresh parsley
Salt to taste
Fresh ground pepper to taste

Directions:

1. Bring a large pot of water to a boil. Add salt if desired.

2. When water is boiling add the pasta, bring it back to a boil and then begin timing it as per the directions on the package.

3. Saute onion in a non-stick pan, dry for 4-5 minutes.

4. Add the zucchini and bell peppers. Cook until just tender.

5. Add the tomato sauce and stir to combine, when hot add the frozen peas.

6. Test the pasta for desired doneness. Drain in a colander.

7. Add drained pasta to pasta sauce in a large saute pan (or a pot if you don’t have one large enough).

8. Marry the flavors together for a minute or two to help the pasta absorb the sauce.

9. Add the fresh parsley and salt and pepper to taste.

10. Serve!

Cranberry Walnut Salad

Ingredients:

4 cups Spring Mix salad
2 tbsp dried cranberries
2 tbsp walnuts, chopped
Balsamic vinegar to drizzle

Directions:

1. Assemble salad in a bowl or on plates.

2. Drizzle with dressing and serve along with pasta.

What is your favorite type of pasta and vegetables to cook together? 

Filed Under: 20 Minutes To The Table, Cooked Vegan Recipes, Videos Tagged With: 20 Minutes To The Table, bell pepper, fat-free, gluten-free, italian, low-fat, marinara, pasta, peas, rotini, soy-free, tomatoes, vegan, zucchini

20 Min To The Table: Rainbow Black Beans and Rice with Garlicky Citrus Kale

August 18, 2013 by Veronica Grace 16 Comments

Fb-Button

Beans and rice are and eaten throughout the Caribbean and Latin America and it’s easy to see why! Beans are so easy and versatile to use in many dishes and can absorb all kinds of delicious flavors when seasoned with delicious spices and herbs. It’s also an extremely affordable and satisfying dish that pretty much anyone can make!

This Rainbow Black Beans and Rice is my take on an old staple, but it will also work for pinto beans or kidney beans so feel free to get creative and use what you have.

And aren’t you cooking fresh beans weekly by now with your EZ Bean Cooker or Digital Pressure Cooker? Aren’t you? I hope so. With weekly fresh beans you have to put them to use and start incorporating them in new recipes! Hopefully 🙂

Also if you’d prefer to just buy pre cooked brown rice to always have on hand you can check out Uncle Ben’s Ready Rice Pouch or Steamed Brown Rice Bowls and use it for this recipe.

Video below:

For more delicious recipes please check out my cookbook Vegan Comfort Foods From Around The World here (and pick up an apron while you’re at it too!) To subscribe to my Youtube channel please click on the video to open it in a new browser and hit the subscribe button beside LowFatVeganChef just under the video. Likes are always appreciated as well! The recipe follows below.

RainbowBlackBeansAndRicephoto

Vegan Rainbow Black Beans and Rice

Serves 4

Ingredients:

1 onion chopped
4 cloves of garlic minced or pressed
1 tomato, diced
2 stalks of celery, chopped
1/2 bell pepper, chopped
2 15 oz can black beans or 3 1/2 cups fresh cooked in a little bean liquid
2 1/2 tsp cumin
1 1/2 tsp Trader Joe’s 21 Seasoning Salute or Mrs. Dash (salt free seasoning)
1 1/2 tsp smoked paprika
1/2 tsp chipotle chili powder
1/2-3/4 tsp Herbamare or salt *or to taste
Fresh ground pepper to taste
handful cilantro, chopped
3 cups pre cooked brown rice (about 1 1/2 bags)
8 Corn tortillas *optional

Garlicky Citrus Kale

Ingredients:

1 large bunch of kale, stems removed
4 cloves of garlic, minced or pressed
1/4-1/2 lime juiced
Pinch of salt
Fresh ground pepper to taste

Directions:

1. Add the onions, tomatoes and garlic to a pan over medium high heat and cook for 2-3 minutes.

2. Add the bell pepper and celery and cook for about 5-7 minutes just until the  celery is just tender.

3. Add the beans, a little bean liquid and the seasonings and let cook 2-3 minutes.

4. Meanwhile, gently steam the kale and minced garlic in a little boiling water for 2-3 minutes just until cooked and set aside.

5. Add the cooked brown rice to the beans and veggies. Stir gently and heat for a minute. Taste test and adjust seasonings if desired.

6. Drain the kale and season with lime juice, salt and pepper.

7. Quickly heat the tortillas in a microwave (30 seconds) or in a flat pan just until warm and pliable.

8. Serve and Enjoy!

Have you ever made rice and beans? What are your favorite seasonings to add?  

Filed Under: 20 Minutes To The Table, McDougall Program, Videos Tagged With: bell pepper, black beans, brown rice, celery, fat-free, garlic, gluten-free, kale, latin, lime, nut-free, rice and beans, soy-free, tomato, tortillas

Lower Fat Vegan Chocolate Pudding (Stove Top)

July 23, 2013 by Veronica Grace 37 Comments

Fb-Button

Although there are many ways to make your own vegan pudding such as blending avocados and cacao together (for a very high fat raw pudding) or combining silken tofu and melted chocolate (still high fat and has soy and oil) I wanted to make a less “sinful” way to make chocolate pudding. This vegan chocolate pudding recipe is a “better for you” version that I promise will fully satisfy your chocolate or pudding cravings! Anyone can make this recipe, you just need a handful of ingredients and you can also use whichever non dairy milk you like. I used unsweetened original almond milk as I prefer the taste of it versus soy milk, but it’s up to you.

Watch my instructional video below (it’s not very long) and the recipe follows.

Low Fat Vegan Chocolate Pudding Dairy Free Gluten Free

Lower Fat Vegan Chocolate Pudding Stove Top Recipe

Serves 4  (1/2 cup servings)

Ingredients:

2 cups unsweetened original almond milk, or other unsweetened non dairy milk
3 tbsp corn starch
1/4 cup cocoa powder
1/3 cup plus 2 tbsp maple syrup or sweetener of choice
1/2 tsp vanilla extract (I used my own homemade from fresh vanilla beans)

Directions:

1. Take 1/2 cup of the measured almond milk and combine it with the cornstarch and whisk together until there are no clumps.
2. add the maple syrup, cocoa and vanilla to a medium sauce pan over medium heat and gradually add the almond milk and whisk in.
3. Continue whisking and bring to a gentle boil. This will take up to 10 minutes.
4. Stir in the cornstarch slurry and mix well.
5. Reduce heat and continue cooking until thickened into a thin pudding.
6. Remove from heat and pour into serving dishes.
7. Cover bowls with saran wrap and refrigerate until chilled and set (at least 30 minutes).

Enjoy!

I bet you didn’t realize it was so easy to make vegan chocolate pudding did you? I was very impressed with this recipe. It has all of the decadence of a melted chocolate bar, but it much lower in fat. It’s also easy to adjust the flavoring to your liking by adding more or less cocoa and more or less maple syrup. You also can’t taste the maple syrup in this recipe either. I prefer to use maple syrup as my sweetener because it’s more natural. I don’t use agave syrup as it gives me headaches just like high fructose corn syrup does (some argue it’s even worse than HFCS for you as well.)

Oh P.S. You can also use this recipe for hot chocolate and just omit the corn starch! Heat until boiling and serve. Mmm. 🙂

So there you have it. Are you ready to make vegan chocolate pudding? Come to think of it I want some more right now…. 

Filed Under: Cooked Vegan Recipes, Desserts, Videos Tagged With: almond milk, chocolate pudding, cocoa, cornstarch, dairy-free, gluten-free, low-fat, maple syrup, soy-free, vanilla, vegan pudding

20 Minutes To The Table: Mexican Black Bean Corn Tacos & Costa Rican Cabbage Salad Video

July 21, 2013 by Veronica Grace 50 Comments

Fb-Button

20 Minutes To The Table: Mexican Black Bean Corn Tacos & Costa Rican Cabbage Salad

Hi everyone! I had an idea the other day of putting together quick delicious meals for those of you short on time. This recipe is a great midweek recipe, if you can open a can and use a knife you can make this recipe very easily! I’ll start off by showing you how to make the raw Costa Rican Cabbage Salad recipe, and then the Mexican Black Bean Corn Tacos (this is a variation on my recipe in Vegan Comfort Foods From Around The World.)

If you’d like order one of my cooking aprons or my cookbook my store is here: http://lowfatveganchef.storenvy.com

I’d like to point out that I used canned ingredients in my first video to show how anyone, no matter where you are, can make this recipe. You can also use home cooked beans and fresh corn (or frozen) if desired and using organic foods is your choice as well. This new series is going to show easy plant based recipes that absolutely everyone can make with ease, when pressed for time. That’s why I list the short cuts. Most of the time I cook from scratch, but I know this is not feasible for everyone, especially on a week night after work. Please of course feel free to use fresh cooked beans, organic fresh corn and your own homemade corn tortillas if you are a scratch cooker, but of course this will add to the prep time and take much longer than 20 minutes. Enjoy 🙂

Recipes follow below.

Raw Vegan Costa Rican Cabbage Salad

Serves 4

Ingredients:

1/2 green cabbage shredded (or 5 cups bagged slaw mix)
1 medium (ripe) tomato, diced
1/2 white onion, chopped
1 glove garlic, pressed or minced
1 handful fresh cilantro/coriander roughly chopped (or to taste)
1 – 1 1/2 large limes juiced (use your discretion to balance with salt)
1/4-1/2 tsp Herbamare or salt (use your discretion to balance with the lime)
1/4 tsp fresh ground pepper (or to taste)

Directions:

1. Toss ingredients into a large salad bowl (mine was a little small but I used it as it was clear to show you) and massage well for a minute or two, scrunching the cabbage to help soften it.

2. Adjust lime, salt and pepper to your tastes. If it’s perfectly seasoned it should taste neither of just salt or lime, but a nice mix between the two.

3. Place in refrigerate to marinate until needed.

To spice things up: Add a sliced fresh jalapeno or chili pepper.

Based on my recipe in Vegan Comfort Foods From Around The World

Vegan Mexican Black Bean & Corn Tacos

Serves 2-4 (depending how ravenous you are!)

Ingredients:

19 oz. can no sodium black beans or pinto beans (or 2 1/3 cups cooked fresh)
12 oz. can no sodium/no sugar corn or 1.5 cups frozen or fresh cut
4 cloves of garlic, pressed or minced
3/4 tbsp maple syrup, maple sugar or honey – I don’t use agave (*optional to add flavor to the unsalted beans)
1.5 tsp roasted cumin (or regular, but roasted is much more flavorful)
1/4-1/2 tsp Herbamare or salt (or to taste)
Pinch of fresh ground pepper
1/4-1/2 lime juiced (or to taste)
8-12 corn tortillas (depends how full you load your tacos)
Salsa of choice (I always look for the lowest sodium on the shelves, you’d be surprised how much sodium is in salsa)

Directions:

1. Heat a pot over medium heat. Drain the corn (if applicable), add some black bean juice to the pot and the garlic and cook for 3-4 minutes.

2. Add the black beans, corn and seasonings (leave the lime juice until the end) and heat for 5-7 minutes to let the flavors meld together.

3. Meanwhile heat your corn tortillas over medium heat in a crepe pan, griddle or frying pan just until warm and place in a tortilla warmer, tinfoil or tea towel to insulate. Alternatively you can heat them over a gas flame until slightly charred or microwave just at the end all together for 30 seconds. (Any longer and it won’t be good…)

4. Add the lime juice to the beans and corn and taste test. Adjust seasonings to taste.

5. Assemble tacos, starting with a layer of black beans and corn, some salsa and then top with your marinated Costa Rican Cabbage Salad. Sometimes I like to add some fresh guacamole for variety as well.

6. Enjoy!

Make it spicy: add some chipotle chili powder, cayenne or a sliced jalapeno to the black bean and corns. Use your discretion.

Corn tortillas are fairly common in the USA and easy to find at most grocery stores and health food stores. I use corn tortillas because they usually have only 3-4 ingredients (but read the label to make sure there is no oil or lard) and are lower calorie than wheat tortillas. Wheat tortillas are more for burritos. If you’re in Canada check your health food store or google mexican/latin groceries in your area. I found several in my city of Calgary that had homemade corn tortillas. I will post a video later on show you how to make your own corn tortillas with masa (corn flour).

This makes a fairly light meal, if you’re family or dinner guests are ravenous I would recommend serving some fresh seasoned rice on the side to round it out, or double wrapping your tacos (use 2 tortillas) and load them up with beans and corn. 🙂

I hope you enjoyed my first episode of 20 minutes To The Table. I filmed this in my kitchen with a camera, a tripod and a lot of books lol.  Let me know what you think by posting below!

Filed Under: 20 Minutes To The Table, Cooked Vegan Recipes, Dinner, Videos Tagged With: 20 Minute Meals, 20 Minutes To The Table, black bean, corn, Costa Rica, Dr, Fuhrman, gluten-free, low fat vegan chef, low-fat, McDougall, mexican, nut-free, oil-free, soy-free, tacos, vegan tacos

Vegan Chickpea Quinoa Burgers with Lemon and Thyme (Gluten Free)

July 7, 2013 by Veronica Grace 22 Comments

Fb-Button

Summer is here and it’s the perfect time to be enjoying outdoor barbecues and picnics. Everyone wants to enjoy a freshly grilled hamburger or veggie burger. But making your own is quite easy and insanely tasty without using oils or refined soy products. My chickpea quinoa burgers are soy-free, nut-free and gluten-free so they will work for everyone no matter how they eat. If you’ve ever made homemade hamburgers or wanted to, you can make these.

A simple food processor is such a versatile tool for making your own chickpea quinoa burgers. Mine isn’t anything fancy, just a basic mid sized one and it’s perfect for pulsing various ingredients to use in veggie burgers.

I like to top my veggie burgers with some fresh hummus (see my chickpea hummus here or my yam/sweet potato hummus here), sautéed mushrooms and onions (I use a little soy sauce and maple syrup to flavor them), lettuce, tomatoes and pickles. Cucumbers also work well in place of tomatoes for this chickpea quinoa burger as well as spicy mustard.

Find a nice whole grain bun or roll, toast the insides and top your veggie burger with all your favorite toppings. I also highly recommend some of my Summer salad recipes to go along with it such as Avocado Dill Potato Salad, Strawberry Spinach Salad, Shaved Asparagus Salad, Costa Rican Cabbage Salad, Sweet and Savory Asian Salad, or Rock my Broccoli Salad. So now that your head is spinning with delicious Summer recipes let’s get grillin’! Mmm hmm.

Vegan Chickpea Quinoa Burgers with Lemon and Thyme

 
Makes 10-12 patties (depending on size)

Ingredients:

1 cup mashed yam/sweet potato, cooled (1 medium yam, cooked)
4 cloves garlic
3/4 cup chopped red onion
2 cans chickpeas, drained and patted dry
2 tbsp fresh thyme leaves (stems removed)
2 tbsp lemon zest
2 tbsp lemon juice
1 cup cooked quinoa, cooled (I used 1/2 cup dry mix of white and red)
1 tsp white pepper
1 tsp Herbamare or salt *or to taste

Directions:

1. Poke holes in your yam and bake at 400 F for an hour or until tender inside. Set aside until cool.

2. Cook quinoa with a 1:1 ratio of vegetable broth or water in a pressure cooker or on the stove. (See my directions here)

3. In a food processor, add the garlic and onion and pulse until chopped finely. Add the chickpeas, thyme, lemon zest and juice and pulse until chopped and well combined. Scoop out flesh from yam (discard peel) and to food processor along with quinoa, pepper and salt. Pulse until well combined.

4. Form into equal sized balls and place on a non stick sheet or plate lined with parchment paper. Refrigerate until needed.

5. Pre heat a pan or barbecue and press patties gently until slightly flatted and cook for 4-5 minutes per side, flipping once. Be careful to move gently so they don’t fall apart.

6. Serve on buns or lettuce wraps. (I find using a bun slightly bigger than the patty works best as they will squish a bit when eaten.

7. Store any patties in an air tight container and refrigerate or freeze until needed. (Leaving them uncooked is best).

Variations:

You can also use fresh dill instead of thyme if you wish for variety.

Also check out my Smoky Yam Black Bean Burger Recipe.

Have you ever made your own veggie burgers? What do you like to top your burgers with?

Filed Under: Burgers, Cooked Vegan Recipes, Dinner, McDougall Program, Quinoa Tagged With: chickpea burger, chickpeas, cooked vegan, fat-free, garbanzos, gluten-free, lemon, low fat vegan, nut-free, plant-based, quinoa, quinoa burger, soy-free, sweet potato, thyme, yam

Whole Food Rainbow Watermelon Fruitsicles (Popsicles)

June 19, 2013 by Veronica Grace

Fb-Button

I’m really excited to share this watermelon popsicle recipe with you today. It’s been a long time since I made popsicles (I think the last time I did, I was a kid) and they turned out so pretty! I also just got a new (used) camera to play with and am really impressed with the quality of photos it produces (and the much faster shutter speed).

I had a heck of a time finding some popsicle molds here in Canada. I happened to see a small basic set for at Canadian Tire, but just as I was checking out I found 4 sets of these cute larger style popsicles and quickly snapped them up. I haven’t been able to find the exact popsicle molds I have online, but there are similar types with drip catches and straws available here.

I also got to try out a new natural product. I received some samples of Habitall – All Natural Sugar Replacement, which is aspartame-free, sugar-free, and calorie-free. It’s made with monk fruit, erythritol and polydextrose. Normally I never use sugar replacements such as Splenda or aspartame as they give me headaches and I don’t feel so well after. But for those looking for a calorie free sweetener (that doesn’t have the awful aftertaste of stevia) I think Habitall can be quite useful and best of all there’s no negative side effects. I added a little bit to my all fruit popsicles just to enhance the watermelon flavor, as when they’re frozen it can taste really icy and less fruity.

My watermelon popsicles actually turned out really yummy! Habitall can be used cup for cup as a sugar replacement so I can also see other uses for it such as lemonade, muffins, cupcakes or cookies for those who are looking to reduce calories, are diabetic or are trying to get off sugar in general.

Want A Free Bag of Habitall To Try?

The company also gave me some samples to give away to 2 lucky people. So if you’re interested in receiving a bag to try, just comment below and let me know what you’d like to use it for and 2 comments will be randomly selected to win.

Right now they are doing an Indiegogo campaign to raise funds to help get Habitall into stores at an affordable price for everyone. You can only get it through the campaign for now, but if enough funds are raised in the next few weeks you might see Habitall available soon near you.

Whole food watermelon popsicles are really easy to make and you can use pretty much any fruit juice or puree as the base and diced fruit for added color and texture. Next I think I might try mango puree popsicles with sliced strawberries!

Whole Food Rainbow Watermelon Fruitsicles (Popsicles)

Makes 16-20 popsicles (depending on size) I made 16 90 ml popsicles.

Ingredients:

4 cups blended watermelon puree (about 1/4 medium watermelon) You can also use cantaloupe if desired
1 tbsp Habitall natural sweetener or cane sugar *optional
1 medium ripe ataulfo mango, diced or 2 ripe peaches peeled and diced
1 cup pitted cherries, sliced in half (I used frozen) or raspberries
1/2 cup blueberries (I used wild blueberries)

Directions:

1. Prepare the watermelon puree for the popsicles. Seedless watermelon works best. Blend watermelon and optional Habitall natural sweetener or sugar in a Vitamix or food processor on high until smooth. Set aside. (You can leave out the sweetener if desired.)
2. Dice the mango or peaches (make sure they are ripe or they will be too sour)
3. Portion out the cherries and the blueberries.
4. Assemble watermelon popsicles. Place mango or peach in bottom of popsicle molds, next layer in the cherries halves (or raspberries) and then blueberries.
5. Pour the watermelon puree into the popsicle molds until they are full. Place popsicle sticks on top.
6. Freeze for 6-7 hours.
7. Before serving run the popsicle try under warm to hot water to loosen popsicles from mold.

Enjoy!

Disclosure: I was not paid or given any compensation to promote Habitall. I received free samples to review and to give away to blog readers. I paid for shipping myself. 

What is your favorite flavor of popsicle or what combination would you like to try?

Contest is closed! Winners were Lavisha and Brooke. Congratulations!

Filed Under: Cooked Vegan Recipes, Raw Snacks, Raw Vegan Recipes, Snacks Tagged With: blended watermelon, blueberry, cherry, fruit popsicles, fruitsicles, gluten-free, habitall sweetener recipe, mango, nut-free, raw vegan popsicles, soy-free, sugar-free, watermelon, watermelon popsicles, whole food popsicles

Fat Free Vegan Greek Rice Stuffed Peppers Recipe

June 9, 2013 by Veronica Grace 14 Comments

Fb-Button

I have done A LOT of travelling in the past few years (visiting over 30 countries around the world), and Greece was one of my favorite places I visited. (Greek rice stuffed peppers were a favorite I found) Greece was pretty incredible and unexpected as I had never seen anything other than photos of ancient ruins or the white and blue houses of Mykonos on postcards. I went on a 2 1/2 week journey back in August and September of 2010 and visited many different places in Greece.

I saw the ruins of Athens, the rocky shorelines and picturesque houses of Mykonos, the rolling hills and mountains of Naxos, The Palace of the Grand Masters of Knights in Rhodes, the mesmerizing Balos Lagoon and Palace of Knossos on Crete, and the Tholos of Athena Pronaia Sanctuary and Oracle at Delphi.

I also took a ton of photos and wrote about that journey here. (I wrote about it on an old blog of mine and have moved it to this one). So if you are a travel bug like me or just love gorgeous landscape photography definitely check it out!

In my time in Greece I learned that there was much more than just olive oil and seafood to Greek cuisine. Traditionally the Greeks and Cretans ate vegetables, grains, fruits, seafood and olives. In fact their diet was vastly healthier eating homemade unprocessed food, unlike what they do now (which is more like a SAD Westernized diet drenched in copious amounts of olive oil and wine).

So what I took from my travels was using vegetables, grains and herbs in a way that complimented each other to bring out the full flavor of simple vegetable based dishes. The Greek rice stuffed peppers served in Greece are generally stuffed with ground meat as well, but occasionally I found some that were vegan without meat. Mykonos served some at the beach cafes and a Taverna in Delphi had some as well. But these versions used white arborio rice (Italian risotto rice) and were drenched in olive oil.

For my version I decided to switch to whole grain brown rice and remove the olive oil (for health purposes dousing all vegetables in olive oil isn’t recommended). So while it’s not “traditional” it is still very rustic and delicious. I’ve packed it full of dill, parsley and lemon juice so you get all the flavor of the full fat version but without the extra calories.

This recipe is featured in my cookbook Vegan Comfort Foods From Around The World which is available in a digital or physical version wherever you are in the world.

In fact it’s probably my family’s favorite recipe, my mom and even my friends make this recipe regularly as an entree for omnivores and they always receive rave reviews. So it makes me happy that something so simple can be delicious and satisfying to people on a wide variety of diets.

So scroll down for the recipe and get cooking!

Fat Free Vegan Greek Rice Stuffed Peppers Recipe

When I traveled in Greece I sampled several vegan versions of stuffed vegetables. Greek rice stuffed peppers was one of my favorites. I switched out the traditional Arborio rice for brown rice to make this a whole grain version. If you like the combination of lemon and dill, you’re going to love these.
Prep Time: 30 min Total Time: 1 hour 20 min

Yield:Serves 3-4 for entrées or 6-8 as a side dish

Ingredients

6 large or 8 small bell peppers (any color but green)
1 large onion, diced
3 medium carrots, peeled and diced
3 small zucchinis, peeled and diced
1 cup / 236 ml. low sodium vegetable broth
3 cups cooked brown rice (or other rice or grain of choice)
5 Tbsp. tomato paste
3/4 cup whole fresh parsley, de-stemmed and chopped
3/4 cup whole fresh dill, de-stemmed and chopped
Half to a full lemon, juiced (depending on how lemony you like it)
1/4 tsp. fresh ground pepper
3/4 tsp. Herbamare or Sea salt (or to taste)
1 lemon—cut into wedges (optional for garnish)

Directions

  1. Preheat oven to 350 F /175 C. Cut tops off of peppers like you would a jack-o-lantern,
    remove seeds, and wash thoroughly.
  2. Place in an oven safe dish arranged upright and put tops back on. Bake for 30 minutes.
  3. Meanwhile, in a large pan, saut. onions, carrots and zucchini in vegetable broth for 5-6 minutes.
  4. Stir in the rice and tomato paste and coat thoroughly.
  5. Add parsley, dill, lemon juice, pepper, and Herbamare or salt and stir to combine.
  6. When peppers are ready, remove from oven and fill with stuffing.
  7. Place tops back on peppers and bake for an extra 30-40 minutes until peppers are soft.
  8. Serve additional wedges of lemon if desired.

Additional Tips:

I don’t suggest using green peppers. Green peppers are actually an unripe pepper and much firmer. They will not be done in time if you cook them along with red, yellow or orange peppers. To freeze: cut them in half lengthwise and freeze in airtight containers or freezer bags and lay gently in the freezer until frozen. Due to the rice these are best eaten within 3 days, please freeze any leftovers if you won’t finish them within that time. Rice can grown bacteria in a moist environment so it’s best eaten freshly cooked or reheated from frozen. Enjoy!

Variations:

If you don’t like the taste or texture of brown rice, you can use white rice or quinoa instead. Try different vegetables too, you can dice up mushroms, asparagus, celery or greens instead if you don’t have carrots or zucchini on hand.

Nutrition Facts: 6 Servings

Amount Per Serving

  • Calories 170.9
  • Total Fat 1.4 g
  • Saturated Fat 0.3 g
  • Sodium 325.7 mg
  • Total Carbohydrate 37.1 g
  • Dietary Fiber 5.6 g
  • Sugars 3.6 g
  • Protein 4.4 g
For more delicious Oil-Free and Low Fat Plant Based Recipes, check out my new cookbook Vegan Comfort Foods From Around The World:

                          On Sale $21.95 plus shipping!

Or get the Ebook version for $17.95 to download and read now!

Have you ever made stuffed peppers before? What are your favorite ingredients?

Filed Under: Casseroles, Cooked Vegan Recipes, Greek, Green Dishes Tagged With: Authentic, bell pepper, dill, fat free vegan, gluten-free, Greece, Greek, lemon, low-fat, peppers, rice, soy-free, stuffed, tomatoes, traditional

Soy-Free Vegan Tropical Acai Berry Bowl Recipe

June 9, 2013 by Veronica Grace 1 Comment

Fb-Button

Whipping up acai bowl recipes are pretty easy. I like to use whatever fresh and frozen fruits I had on hand. This one is similar to my Acai Banana Berry Bowl Recipe , but it’s perfect for summer with fresh mango and berries. Acai bowls can be topped with your favorite fruits, but I know some of you have never had one before and are unsure how to make them at home.

Acai is usually sold in a frozen puree for use in smoothies, acai bowls and frozen desserts. You can also buy acai juice, powder and supplements, but I stick with the puree because it’s delicious and a little less processed.

Acai bowls are made up of frozen acai puree, apple juice or soy milk, frozen fruit, granola, fresh fruit and sometimes honey. If you do not have acai frozen puree in your country (I found it at the health food store in Canada and the USA) you can substitute about 1 cup of frozen blueberries.

This is a soy-free version which uses apple juice instead of soy milk to blend it together. You can also use fresh pressed apple juice if desired as well.

Soy-Free Vegan Tropical Acai Berry Bowl Recipe

 
Serves 1

Bowl Ingredients:

4 oz/ 1/2 cup apple juice (unsweetened if desired)
2 100g packets of frozen Acai (I used Sambazon Original Smoothie Packs)
3/4 cup frozen mango (sub a fresh mango if you do not have a high powered blender such as a VitaMix or Blendtec)

Garnish Ingredients:

1/3-1/2 cup low fat granola of choice (I like Galaxy Granola as it’s oil free)
1/2 -1 ripe banana, peeled and sliced
1/2 cup fresh ripe ataulfo mango, diced
1/2 cup diced strawberries
Small handful of blueberries
Drizzle of honey or agave *optional (I don’t find I need this in mine)

 Directions:

1. Remove packets of acai and frozen bananas from freezer.

2. Slice the mango, slice the banana and wash the blueberries and set aside.

3. Add apple juice to your blender. Break up the frozen acai into smaller pieces and cut the plastic open and pour into blender. Add the mango. Blend on low or pulse to break up the frozen fruit. If you have a VitaMix use the tamper to puree into a soft serve. If you have another type of blender you may have to stop and stir and keep pulsing to combine. Stop blending when smooth.

4. Scrape acai mixture into a bowl.

5. Top acai with granola.

6. Top with diced mango, bananas, strawberries and blueberries.

7. Serve.

Have you ever had an Acai bowl? What’s your favorite topping?

Filed Under: Breakfast, Cooked Vegan Recipes, Raw Breakfast, Raw Smoothies, Raw Vegan Recipes Tagged With: acai bowl, banana, blueberries, breakfast, gluten-free, healthy, low-fat, mango, nut-free, smoothie, soy-free, strawberries, vegan

  • « Go to Previous Page
  • Page 1
  • Page 2
  • Page 3
  • Page 4
  • Interim pages omitted …
  • Page 11
  • Go to Next Page »

Primary Sidebar

Follow Us:

Newsletter

Get The Low Fat Vegan Starter Kit

natural organic skin care line

Free Skincare Samples

Earn Free Crypto At Binance

Earn Free Bitcoin on Gemini Exchange

Earn $10 in Bitcoin With Gemini Exchange
Dr. Fuhrman
Dr. Fuhrman
Dr. Fuhrman

Tags

80/10/10 apple avocado banana blueberries breakfast broccoli Carrots celery chickpeas cilantro corn cucumber Curry dill dinner easy Eat To Live fat-free gluten-free how-to Indian Dishes lemon low-fat mango mexican mushrooms nut-free oil-free pasta pineapple plant-based raw raw vegan rice smoothie soup soy-free spinach tofu tomato tomatoes vegan vegetarian vitamix

Secondary Sidebar

Recipes:

  • Cooked Vegan Recipes
  • *My Recipe Books
  • Breads and Baked Goods
  • Breakfast
  • Brunch
  • Burgers
  • Casseroles
  • Curries
  • Desserts
  • Dinner
  • Dips for Veggies or Chips
  • Eat to Live-Dr. Fuhrman Recipes
  • Engine2Diet
  • Ethiopian Dishes
  • Greek
  • Green Dishes
  • Holiday
  • Indian Dishes
  • Mexican
  • One Pot Meals
  • Pasta
  • Pizza
  • Quinoa
  • Salads
  • Sandwiches and Wraps
  • Raw Vegan Recipes
  • 80/10/10
  • Raw Breakfast
  • Raw Desserts
  • Raw Dips
  • Raw Dressings
  • Raw Entrees
  • Raw Juices
  • Raw Salads
  • Raw Smoothies
  • Raw Snacks
  • Raw Soups
  • Sauces
  • Side Dishes
  • Slow Cooker Recipes
  • Snacks
  • Soups and Stews
  • Spices/Seasonings
  • Sushi
  • Thai
  • Vietnamese

Copyright © 2026 · Foodie Pro & The Genesis Framework