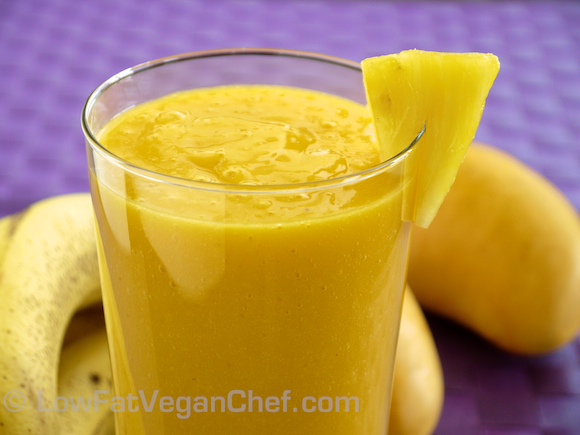
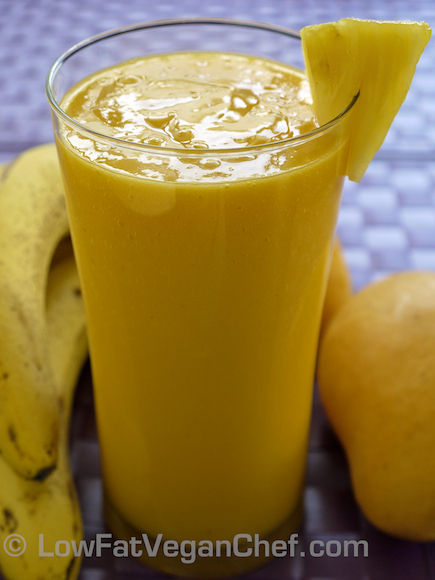
80/10/10 Recipe: Raw Vegan Pineapple Mango Delight Smoothie

This delicious breakfast smoothie kind of reminds me of a Pina Colada but gets it’s creaminess from bananas instead of coconut. I was going to throw some other fruit into it, but once I tasted it, it was too delicious to mess around with so I left it with just 3 simple ingredients and it’s definitely one of my favourite smoothies.

The best smoothies are made with fresh ripe produce, so I always make sure to select the best sweetest pineapples, (See my video on How To Select and Cut A Pineapple) and let my mangoes fully ripen on the counter until they are soft and wrinkly (this is when they are at their peak flavour and sweetness).

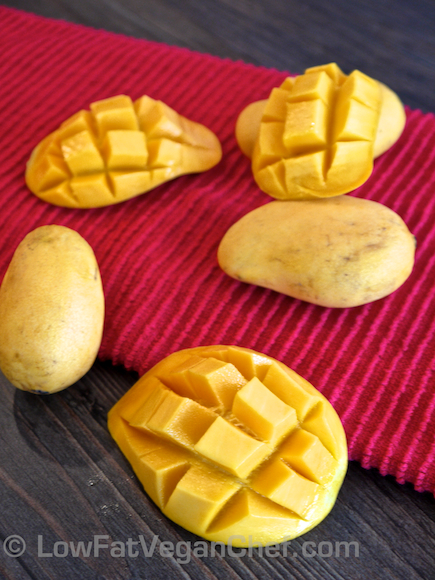
My favourite mangoes are ataulfo mangoes and right now they are in season until June or so. Generally April-June is prime ataulfo mango season so I always pop down to China Town and get a case or two as these are my favourite. They’re stringless, creamy and the best. You can see part of one in my picture above, it’s on the right. Ataulfo mangoes also have some cousins called the champagne mango, Filipino mango, Thai mango or Indian/Pakistani honey mango. So wherever you are keep an eye out for these yellow skinned (orange inside) mangoes they have a much better flavour than the red and green Tommy mangoes and frozen mango at the store.

We’re actually moving today to a new place today changing from an apartment to a bigger house (in the suburbs), so I wanted to post a recipe on the blog before I get really busy this weekend. I still have some packing to do! So I should get on that…. (who likes packing? I think it’s one of my least favourite things…)

On to the recipe!

Raw Vegan Pineapple Mango Delight Smoothie (Fat Free Pina Without The Colada!)

Serves 1

Ingredients:

1 ripe ataulfo mango
1 1/2 cups fresh pineapple (or frozen if needed)
1 medium ripe banana
handful of ice cubes (or none if using frozen fruit)
1/3-1/2 cup water to blend

Directions:

Place ingredients into blender in the order listed and blend until smooth. Serve with a pineapple wedge if desired and enjoy!

Wow that was easy wasn’t it! For variations you could also scoop in some fresh young coconut meat, or add some coconut water instead of the water for a really raw Pina Colada!

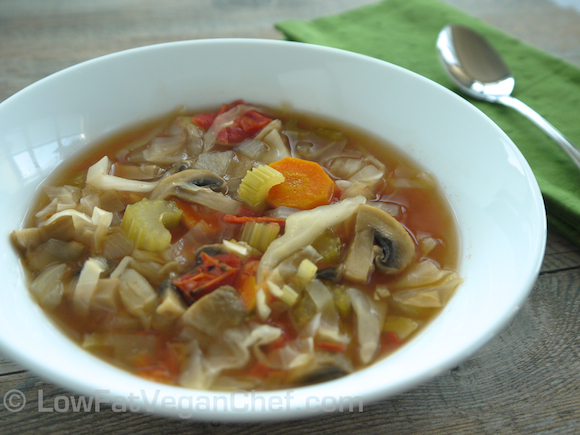
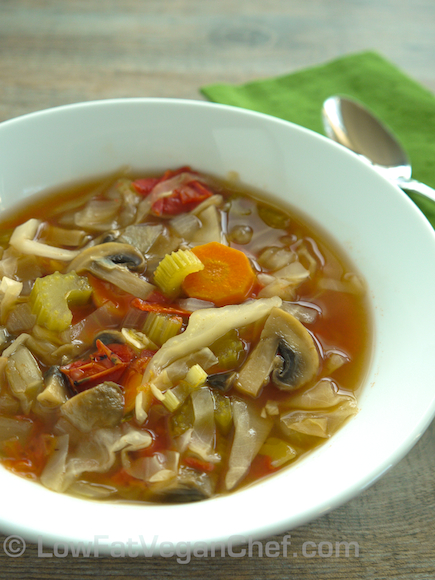
Fat Free Vegan Cabbage Soup (Cabbage Soup Diet Recipe For Weight Loss)

Today I have a really healthy and easy recipe for you, especially if you’re interested in losing some weight, feeling better and eating more home cooked food. It’s a delicious spin on cabbage soup.  No this is not the recipe from the Cabbage Soup Diet (which after looking at makes me think it kinda sucks…) Mine features whole homemade ingredients without any packages of soup seasoning, V8 or chemical flavour enhancers.

The point of the cabbage soup in the cabbage soup diet is to fill you up on broth and vegetables in place of one meal a day so that you can lose weight fairly easily without crash dieting or being hungry.

A Healthier Alternative To The Cabbage Soup Diet

If you wanted a healthy guideline to lose some weight a safe and manageable way it would be to just eat fruits, lots of vegetables (even baked potatoes, sweet potatoes and squash are ok) and homemade vegetable soup (should be oil/cream free). You want to fill up on lower calorie high fibre nutrient dense foods. You could also have some beans or homemade hummus to go with your meals if desired as well. People gain weight because they eat too many rich foods like fried foods, meat, cheese, cream, butter, pastries, and bread products with oil in/on them. Even eating a diet of just potatoes wouldn’t cause you to gain weight, but if you slathered every potato in butter, sour cream and bacon it would become far too rich to achieve weight loss.

Actually I put a friend of mine on a fat free (and also no bread or flour products) diet back in September and she’s lost 50 lbs already just by eating more homemade meals and making sure they were based on foods like potatoes, vegetables and even rice instead of meat, bread, pastries and dairy products. She’s doing great and still enjoys eating this way every day.

One thing people think when it comes to alternative “healthier” lifestyles it that they will always hate it, never be able to do it or even starve to death (maybe even get bored to death too!). Let me tell you that is not the case. I started eating more raw and vegan for health reasons, not because I didn’t like how steak or chicken tasted.  (Hey I’m being honest!) But now I’ve been eating vegetable based dishes for so long that I actually don’t miss or crave any animal foods at all. I really couldn’t imagine eating them again. I actually enjoy the food I eat now even more than the food I used to eat. (Whatever you do most often now, you tend to like even more than what you used to do back then. It’s just the way the brain perceives things. Recent events tend to be better than past events a lot of the time because their more clear in our minds.) I like vegetables so much that if I go to a regular restaurant and get a pasta dish or soup that has hardly any vegetables in it, I get sad and want more vegetables! I could never just eat a big plate of plain spaghetti and sauce anymore, I love putting vegetables or lentils in it to give it more flavour.

People may think all vegans eat are carrots, broccoli and celery, but that is simply not true. In fact I eat a much wider variety of ALL plant foods now than I ever did before. I can’t even say I have a favourite fruit or vegetable. I love many of them like cherries, mangoes, watermelon, white peaches, Hawaiian papayas, pineapple, blackberries, blueberries, raspberries, eggplant, sweet potatoes, butternut squash, Thai pumpkin, broccoli, asparagus, mushrooms and more. I wouldn’t be able to choose any of those as my favourite.  I eat an even bigger variety than these, but these are some foods I really enjoy eating regularly and never get sick of eating. (This doesn’t even includes all the beans, legumes and whole grains I enjoy as well!)

I made 2 batches of vegetable broth and 2 batches of this cabbage soup last week, it was that good. One day I had 3 bowls of it for dinner! At 108 calories a bowl there’s really nothing to worry because you couldn’t possibly gain weight by eating this soup.

Fat Free Vegan Cabbage Soup Recipe

Serves 8

Ingredients:

2 medium sweet onions, diced (like Vidalia, Walla Walla etc. They have light coloured skin and a slightly flattened top and bottom)
5 cloves of garlic, minced
10 oz./283 g package of mushrooms, sliced
2 tsp fresh thyme (or 1 tsp dried)
6 large stalks of celery, leaves removed and sliced
4 large carrots, peeled and sliced
1 lb/454 g (1/2 head) of green cabbage, shredded or cut with mandolin
28 oz/793 g (or 2 16oz cans) fire roasted diced tomatoes (I use Muir Glen Organics)
10 cups/2.5 qtss/2.3 L fresh vegetable broth (my recipes are here) or low sodium packaged vegetable broth
Herbamare/Sea salt and pepper to taste

Directions:

  1. Saute onions, garlic and mushrooms in 2-3 cups of vegetable broth for 5-6 minutes until the onions are tender. (Mushrooms take longer to cook than the rest of the veggies, so we’re cooking them first.)
  2. Add the rest of the vegetables, the thyme, the canned tomatoes, and the vegetable broth.
  3. Cook the vegetables over medium heat for 30-40 minutes or low heat for 1.5-2 hours until the vegetables are tender.
  4. Season to taste with Herbamare or salt and pepper. Add a little cayenne or chili pepper if you like the soup spicy. If you like your soup a little thinner you can add a little more vegetable broth or water if desired. But don’t add too much or you will dilute the flavour.
  5. Serve!


Additional Tips:

This soup is almost like a cabbage stew because it’s so full of vegetables. I prefer to have lots of veggies in my soup and a little less broth. You can add a little more broth if you like really watery soups. (But this is already so low calorie you don’t really need to water it down if you’re looking for a diet-friendly meal.)

I found I didn’t need to add much salt to my soup as I made homemade broth that was naturally sweet from the sweet onions, carrots and thyme and the fire roasted tomatoes have enough salt in them already.

This is a great recipe that you can use for a soup base and just change out some of the veggies for different ones for variety. You can also experiment with different salt free seasoning blends. Just make sure you always add a little, let it cook for a few minutes and taste test before adding more, so you don’t end up with an over seasoned soup!

If you use a bowl or two of this soup with some fruit or a salad every day instead of your normal meal it will help you lose weight just like any other meal replacement plan.  But this is much more nutritious because it’s homemade and packed full of vitamins and minerals from the veggies. Even more so if you make your own vegetable broth.  There is no comparison for me between store bought and homemade broth, so give it a try sometime and you will enjoy homemade soups even more!

Even if you changed a few of the vegetables in this soup it would be around the same calories. Overall it’s a very low calorie nutrient dense soup.

Nutrition Facts
  Servings Per Recipe: 8
  Serving Size: 1 serving
Amount Per Serving
  Calories 104.0
  Total Fat 0.4 g
    Saturated Fat 0.1 g
    Polyunsaturated Fat 0.2 g
    Monounsaturated Fat 0.0 g
  Cholesterol 0.0 mg
  Sodium 254.9 mg
  Potassium 562.3 mg
  Total Carbohydrate 17.8 g
    Dietary Fiber 6.3 g
    Sugars 7.8 g
  Protein 3.8 g
 
  Vitamin A 97.3 %
  Vitamin B-12 0.0 %
  Vitamin B-6 9.9 %
  Vitamin C 69.2 %
  Vitamin D 6.7 %
  Vitamin E 2.0 %
  Calcium 10.3 %
  Copper 9.9 %
  Folate 12.6 %
  Iron 10.5 %
  Magnesium 5.5 %
  Manganese 9.9 %
  Niacin 10.4 %
  Pantothenic Acid     7.9 %
  Phosphorus     7.1 %
  Riboflavin 11.7 %
  Selenium 6.2 %
  Thiamin 6.6 %
  Zinc 3.3 %


 Have you ever made cabbage soup before or tried the Cabbage Soup Diet?

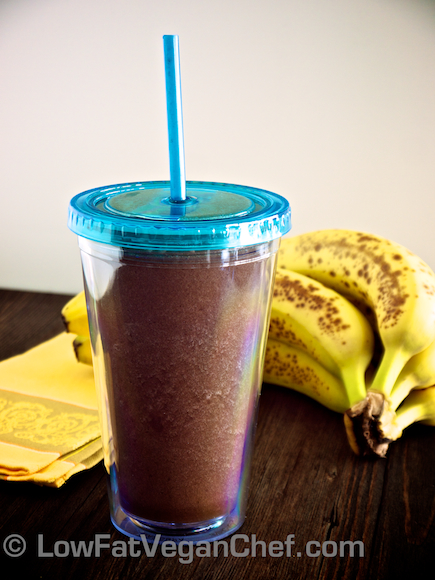
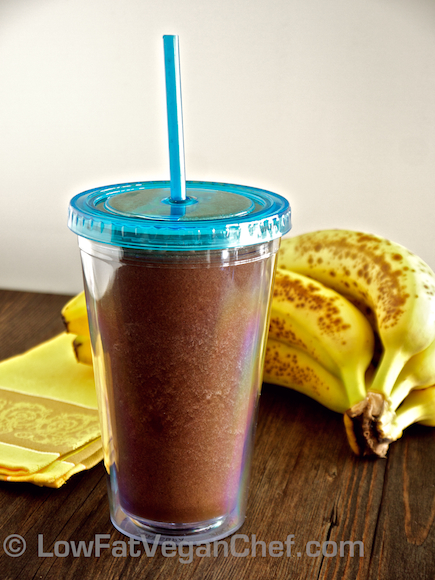
Sinless Fat Free Vegan Chocolate Banana Shake Recipe

I don’t usually eat a lot of chocolate or use cocoa or cacao in my smoothie recipes, but I’m sure some of you out there have cravings for a chocolate milk shake or smoothie once in a while and I thought I’d make a little treat for us!

There are few things more delicious than the combination of bananas with chocolate and even without the traditional ice-cream, this shake is still delicious. The key to making it creamy and naturally sweet is to use fully ripe (lots and lots of spots) bananas. To make this recipe truly fat free I just use a little water, but you can use some soy or almond milk if desired instead.

Although the bananas in my smoothie picture do have lots of spots on them, I still prefer mine slightly riper (by a day or two with even more spots) and no green at all on the stems of my bananas for the absolute best tasting smoothie recipes. The bananas are still firm (not mushy or over ripe) and are even sweeter this way  and then you don’t need to add any additional sweetener. The best smoothies always start with quality fully ripe fruit, so it’s best to taste test things before tossing them in a smoothie if you are unsure if they are sweet or tart.

Fat Free Vegan Chocolate Banana Shake

Serves 1

Ingredients:

2 ripe bananas (see my post on ripe bananas)
1/4 cup water or as needed for your type/size of blender
1 tbsp cocoa powder
Handful of ice cubes (or sub 1 fresh banana for a frozen banana)

Directions:

Place ingredients into Vitamix or Blendtec or other blender in the order listed aboove and blend until smooth. If your bananas aren’t quite sweet enough add a teaspoon or two of liquid sweetener of choice and blend again.

Serve in your favourite smoothie cup or in a glass with a glass straw!

Variations:

If you’d prefer raw cacao powder you can use that instead. I find I don’t like it as much as cocoa personally and I find it less stimulating. You can also substitute carob powder if you’re looking for a caffeine/chocolate-free option.

To get some greens in this recipe you can throw in a handful or two of fresh spinach.

What’s your favourite chocolate smoothie or shake recipe?

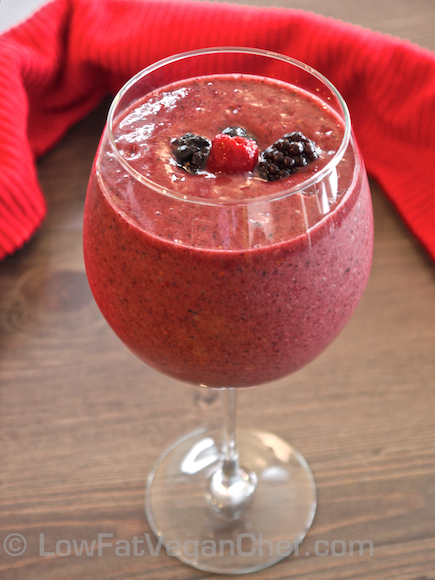
80/10/10 Recipe: Raw Vegan Berrylicious (Banana Mango Berry) Smoothie Recipe

Happy Friday everyone!

I’m back home in Vancouver after spending 2 weeks in Oahu and Kauai. Hawaii is still one of my top favourite places in the world. Probably because as an island state it has many more amenities than most smaller tropical islands I’ve been to (and loads of fresh fruit and veggie friendly restaurant options).

It’s rather chilly and rainy here right now as we’re getting a late start on warm sunny weather, but it’s the perfect time to start eating more fresh fruits and vegetables now that summer is approaching.

Smoothies are something that there is no standard recipe for, and generally what you get when you purchase one is a lot of added sugar, processed juice or milk (for the base) an unripe banana and a little sour frozen fruit. Generally I don’t like smoothies at smoothie bars, unless they are from places that don’t use processed juice or added sugar.

I actually never have to add sugar or milks to my smoothies because I make sure my fruit has completely ripened before using it. Vegetables generally come ripe when you buy them from the store (except for tomatoes and peppers are they are fruit-vegetables and need to ripen.)

How To Make Great Vegan Smoothies Every Time

The key to making a delicious whole food and sugar free smoothie is to use fully ripe and quality ingredients. Also you don’t have to throw a lot of things into it like some witch’s brew. I prefer to use only 2-4 ingredients to make a fruit smoothie and I generally start with a base of ripe (very spotted) bananas or ataulfo/champagne (yellow skinned) mangoes and then I add other things like ripe papaya, pineapple, berries, peaches, plums, spinach, etc. Whatever is ripe and sweet tasting can go into a great tasting smoothie.

The biggest crime at smoothie bars is probably using underripe yellow bananas or even worse yellow bananas with green still on them. Bananas contain a lot of starch and the enzymes in the bananas have to process the raw starch and convert it into natural sugars for it to taste sweet instead of sticky and pasty. To compensate they put in sugar, when it’s really not necessary.

The best tip for having quality ripe produce every day  for smoothies or recipes is to make sure you are buying it at least a week in advance. I always have bananas and mangoes or papayas (when in season) ripening on the counter. It generally takes 4-8 days to ripen (I’m in Canada and it’s not hot or humid right now) on the counter in cooler climates. In tropical and subtropical places fruit can ripen in 3-4 days and then be stored in the refrigerator when it’s ripe. Frozen berries or bags of pineapple or mango are great additions to a base of ripe bananas or even fresh papaya.

How To Select And Ripen Mangoes

Mangoes can be hard to understand for those new to tropical fruits. They often don’t know how to select them, when they are ripe, or know how to cut them. Generally I buy the yellow skinned ataulfo/champagne style mangoes because they don’t have a stringy flesh and are very sweet and creamy when ripe. Most people buy the Tommy green/red type mangoes. When ripe these can be good too but they are much stringier and have a larger woody core in them.

Mangoes will take 5-10 days to ripen depending on when they were picked and what kind of climate you live in. You can tell a mango is ripe when it is starting to wrinkle on the skin and get soft. (Just like an avocado gets soft to the touch when ripe.) It should not have any hard spots on it and should be slightly soft and juicy inside and not taught and rock hard. The inside colour will change from light yellow to dark yellow or orange depending on the variety. Unripe mangoes don’t make for tasty recipes, and when it doubt leave it another day or two. Even I sometimes get impatient and open a mango too early and am disappointed that it’s not at it’s peak ripeness yet.

Another tip I have to getting good mangoes is to NOT buy them at the regular grocery or mainstream grocery stores. I find that their supplies are often poor, they are picked super early and don’t always ripen properly. This is a terrible place to buy mangoes. Bananas can generally be bought anywhere and will ripen, but not mangoes or papayas. Buy your mangoes from fruit markets, farmers markets, China Town/Asian fruit markets, Indian markets, Whole Foods, health food stores or Costco. (Costco’s ataulfo mangoes are usually fine, but the red/green mangoes when bought out of season often don’t ripen so I avoid those until the spring/summer.)

If you live in tropical places or states like California, Hawaii or Florida you may be able to get mangoes at the regular grocery stores that are fine, but this is usually because they were shipped shorter distances and thus did not need to be picked so hard and unripe or gassed. If you live in the northern states, Canada or northern European countries, you’ll want to avoid the regular grocery stores for tropical fruit purchases because of their bulk suppliers and slow turn around times.

Now onto my smoothies. I make raw smoothies because they are the tastiest and are completely whole food based. I don’t like adding supplements or super foods (especially cacao and maca as they are too addicting and stimulating) so my goal is to show you how to enjoy a simple delicious whole food fruit based smoothie. Many people don’t get enough servings of fruit in their diet, including vegans who tend to eat more packaged foods. But breakfast is the perfect time for a juicy water rich easy to digest fruit meal whether it is a smoothie or a large fruit salad. Often I only feel like eating fruit in the morning because it’s so hydrating and a great choice for eating before or after a workout. My smoothies are also enough for a whole meal, so I’m not having a little glass of smoothie and a bunch of toast or heavy breakfast foods. If you’re a woman with a small stomach or not used to eating smoothies you may only use half of this recipe, but you will soon be hungry again and probably want something again, so you can take the other half with you or keep in the fridge. If your an active man you may need to add a few more bananas to this recipe to accommodate for your higher caloric needs. When I have a smoothie this size it’s all I need for breakfast and it will hold me over until lunch. So with this information you can decide how to accommodate your needs with breakfast smoothies.

Also for those new to my site I do have a print button option on the top of every post so you can decide exactly what information to print and print with or without pictures if necessary.

(80/10/10 Style) Raw Vegan Berrylicious (Banana Mango Berry) Smoothie Recipe

Makes 2 medium glasses

Ingredients:

2 ripe bananas (see my post on ripe bananas)
2 ataulfo/champagne mangoes (cut around the inner woody seed and scoop out the flesh from the skin)
1 cup frozen mixed berries (I used raspberry, blackberry, blueberry and strawberry)
1/3 cup water

Directions:

Add ingredients to your Vitamix or blender starting with the mangoes and bananas at the bottom, add the water and place the frozen fruit on top. Blend until smooth.

Drink and enjoy!

Variations:

You can also use frozen cherries, just raspberries, or just blackberries instead of the mixed berries if desired.

If you don’t have bananas just add another mango, if you don’t have mangoes add another banana.

You can easily make this a green smoothie by throwing in a handful or two of baby spinach or chopped kale (remove the stems first though).

Have you ever eaten an ataulfo/champagne mango before?

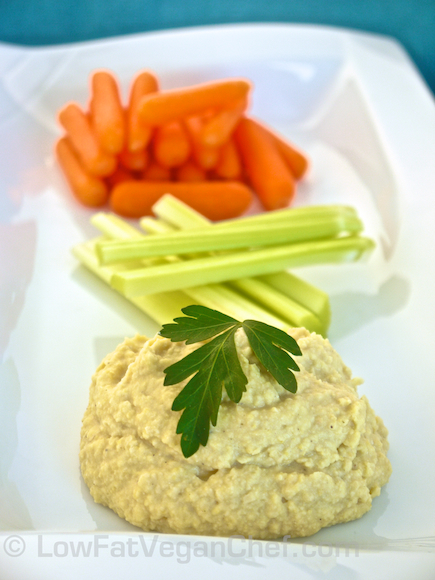
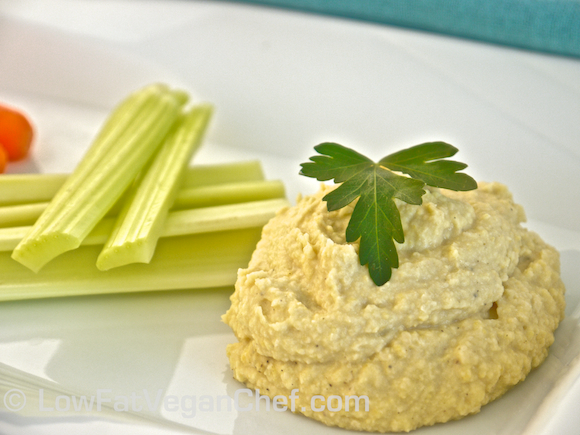
(Oil-Free) Low Fat Vegan Chickpea Hummus Recipe

Ah hummus! The classic Mediterranean staple dip (and staple of many vegan sandwich lovers). I usually always make my own hummus at home as the store-bought ones are #1 usually expensive for the amount you get, and #2 have a lot of oil and salt in them and make each tablespoon higher calorie than necessary.

Hummus is basically cooked chickpeas, pureed with tahini (sesame seed butter), garlic, lemon, salt and sometimes olive oil. Babaghanoush (Eggplant Hummus) is very similar but it has roasted eggplant in it for a slightly different flavour. If you’ve never seen tahini before it’s generally in the nut butter/peanut butter section of the health food store, or some grocery stores. Tahini also available at ethnic markets and Indian and Middle Eastern stores. You can also find tahini on Amazon.


If you’ve made your own homemade hummus before you probably use olive oil in it too, but I want to show you a way to make a much lower fat hummus that is great if you REALLY like hummus and put it on everything. This way you’ll cut out excess calories you won’t even miss and still get that delicious creamy hummus flavour.

So I got into the kitchen and made this chickpea hummus using canned chickpeas, as that’s what most of you are going to do. (I use the salt free variety.) BUT you are more than welcome to use fresh cooked chickpeas. I prefer them and cook them with some kombu (seaweed) and bay leaves to give them a delicious flavour.

If you’re into really decadent high fat dips, you should try switching to my hummus recipe to have a new better for you dip to serve to your friends and family with fresh pita, veggies or chips.

For this recipe you’re going to need a food processor. I use an 8 cup Cuisinart that I bought in Costa Rica (when I lived there) and it’s not a recent model or anything but it does the job. A hand crank food processor will probably not be good enough as this is quite a thick dip. You can get a basic Hamilton Beach food processor fairly cheap on Amazon like this one.


BTW this recipe is featured in my Vegan Comfort Foods From Around the World recipe ebook. So check it out! It’s got over 60 deliciously savory and satisfying recipes you’re going to love!

(Oil-Free) Low Fat Vegan Chickpea Hummus

From Comfort Foods From Around The World 

Ingredients:

1 15 oz./425 g can chickpeas (no salt) or 1 3/4 cup of fresh cooked chickpeas
1-2 small cloves of garlic (depending on how spicy you like it)
1 1/2 tbsp filtered water (this is replacing the oil)
3-4 tbsp lemon juice (depending on how lemony you like it)
1 1/2 tbsp tahini (sesame seed butter)
1/4 tsp Herbamare (original) or salt (or none if you are using salted canned chickpeas)
Fresh ground pepper to taste *optional

Directions:

  1. Drain and rinse the chickpeas (only drain if fresh cooked) and set aside.
  2. Add the garlic clove(s) to the food processor and pulse until chopped up. Stop the food processor.
  3. Add the chickpeas, filtered water, lemon juice (start with less and add more if desired) and pulse the chickpeas until they are fairly broken up. Depending on how strong your food processor is when they are broken up you can let it run for a few seconds or just keep pulsing until it’s a little smooth. Stop the food processor. Taste test and add more lemon if desired.
  4. Add the tahini, Herbamare (if desired) and a little fresh ground pepper. Let it run until everything is creamed up. Taste test and adjust any additional salt, pepper, lemon or water (for consistency). Your hummus should be creamy with no chunks left.
  5. Serve with veggies, pita or baked chips if desired.


Generally people will not be able to tell there is no oil in this dip. It will be creamy and tangy, it will just seem lighter and fluffier to them. Skipping the oil in recipes is a great way to trim that waist line and satisfy your desire for savory dishes without the guilt!

Do you like hummus? What do you serve it with? Have you ever made oil free hummus before? 


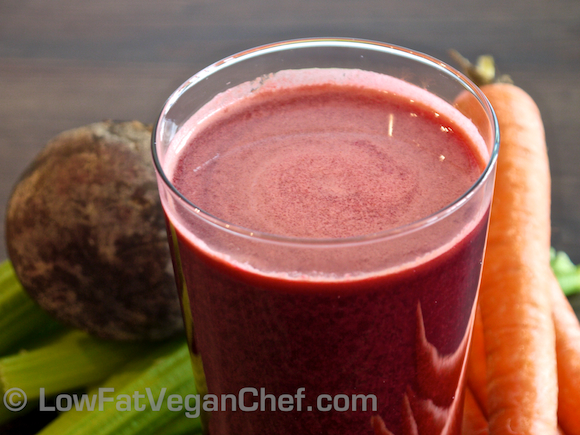
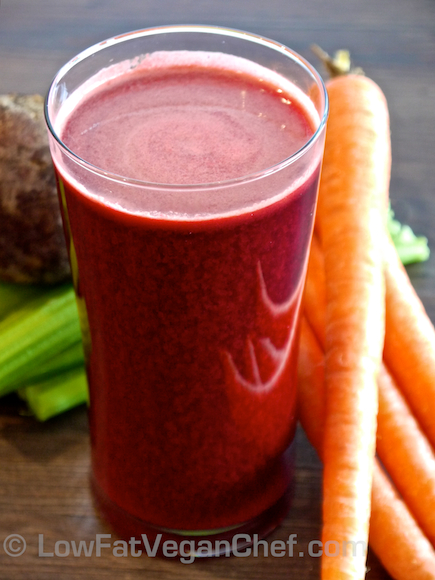
Raw Vegan Antioxidant Rich Apple Celery Carrot Beet Juice

Happy Friday everyone! I hope you’ve enjoyed your week so far. I know I have. I’m still in Kauai for a few more days and have been doing some kayaking, hiking, and snorkelling and taking lots of photos. If you’re curious to see what it’s like on Kauai (the oldest Hawaiian island) check out my Kauai Travel Pics post. It’s the end of their rainy season here so we’ve been getting a little bit of rain but nothing like what they get in the winter time. It’s about 82-84 F (27-29 C) a day here so it’s quite nice!

We’ve been eating a TON of Maui Gold pineapple here along with Hawaiian papayas, bananas, watermelon, cantaloupe, salads and veggies. Just keeping things pretty simple as I’m not really making specific recipes while I’m here. The Maui Gold pineapple is really out of this world, it’s so sweet and not acidic at all. I get the mini ones and I eat a whole one for breakfast and it doesn’t bother my tongue. Some of the larger pineapples we’ve got were pale yellow inside and not ripe enough and too acidic to eat, ripe dark yellow (inside) pineapples are really the best. We always smell the bottoms of our pineapples to see if they seem sweet or ripe. If your fresh pineapple smells like nothing chances are it’s been picked too early and isn’t ripe enough and will burn your tongue and taste tart.

Today I wanted to share with you one of my favourite veggie juice recipes. I don’t generally buy juices from juice and smoothie bars because #1 they are far to expensive and small for the price and #2 they are usually super foamy on top, and I can make them better at home. The juicer I have is a Breville and has this nice jug that has a foam blocker in it so when you pour the juice it skims off the top portion of foam before it goes into your glass. So this is nice. Especially for people new to drinking fresh juices (vs. something lie V8) who might be turned off by the natural occurring foam when you juice with a centrifugal juicer.

I love putting apples and beets together in juice the flavour is really rich and energizing. Apple and beets, carrots and beets, carrots and celery, and celery and apples all go great together flavor-wise, so when you combine them all you get a really tasty vitamin and mineral rich juice!

Raw Vegan Apple Celery Carrot Beet Juice

Serves 2

Ingredients:

3 medium apples, peeled (unless organic)
1 large beet, peeled and cut if necessary
8 large stalks of celery (leaves removed)
3 medium carrots, peeled (unless organic)

Directions:

Prepare vegetables, peel apples if desired. Cut veggies into chunks if required for your type of juicer. Run everything through a juicer and serve immediately.

Additional Tips:

Feel free to 1/2 the recipe if you’d only like a small juice. I usually make a big one after a work out.

You may enjoy serving this juice over ice. Depending on your tastes you can add more or less apple, carrot or beets. People new to drinking fresh juices may enjoy more of an apple flavour for the base. If you are trying to juice all at once and want to save some juice for later, it should only be stored in a glass airtight mason jar. Fresh juice spoils quite quickly because it is raw and uncooked. It will not keep in the fridge unless it’s completely sealed and airtight. So make sure to use a jar of the appropriate size to ensure it’s filled to the top and sealed.

What do you think of this juice? What’s your favourite fruit+veggie juice recipe?

Also check out my photos of Kauai if you missed them.

Mobic

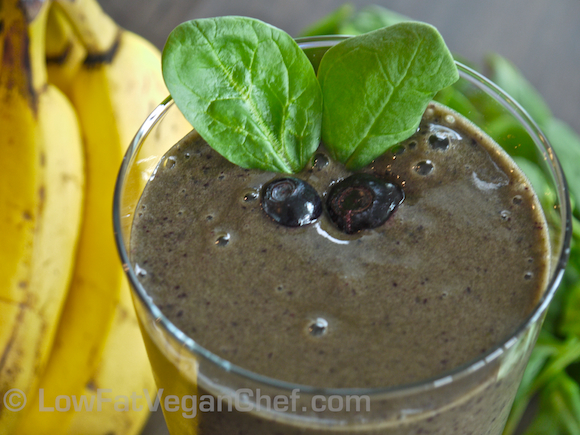
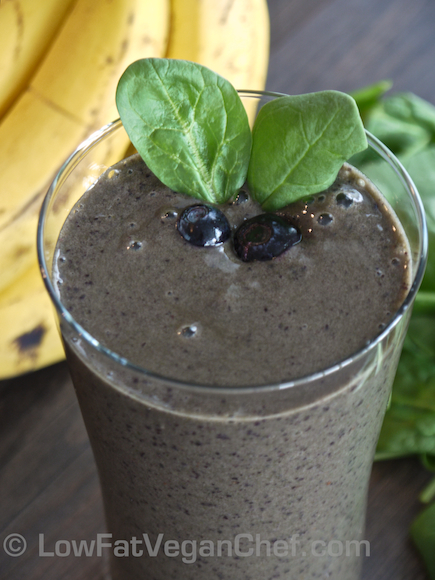
80/10/10 Recipe: Beginner’s Green Smoothie Banana Blueberry Spinach

For some of you green smoothies might be something new, or something you’ve heard of but never tried. Others may make green smoothies regularly and enjoy them. I wanted to share a really easy green smoothie recipe with you today. Something I would call a “basic” or “beginner’s green smoothie”.

#1. Because it’s not too frightening looking and you can tell it has berries in it (this may seem a little normal looking). This may also appeal to people who are afraid of drinking something that looks like green grass!

#2. It tastes very nice and you cannot detect any greens in it at all. Baby spinach is probably the best green to start with when dipping your toes (and taste buds) into making a green smoothie.

Green smoothies are basically just a mixture of fresh ripe fruits, some mild greens, maybe some frozen berries and a little water. They need not be complicated, and they don’t need any kind of protein powders, raw pseudo “super foods” or oils like coconut or flax oil. The goodness of a simple green smoothie comes from whole foods. Whole fruit and whole greens is all I put into my smoothies.

Green smoothies can also help get some more greens into your diet (especially since they don’t need dressing) and can be good for children or people with a compromised ability to chew their food really well.

I only blend my smoothies for about 30-45 seconds in my Vitamix. I don’t like to let it run on too long and get too thin, or warm.

Another good thing to do is to not gulp your smoothie but drink it and chew it a bit. I don’t recommend sipping on smoothies for hours at a time or all day (this can cause dental problems and weaken your enamel from feeding the carries and bacteria in your mouth sugar all day) though. Consuming a smoothie in 10-20 minutes should be fine, and then you can wait 30 minutes before brushing your teeth and rinse your mouth with water if you desire. When using berries that have little seeds I like to use a water pik as well as there can be little pieces that are hard to get out between your teeth.

To make a basic green smoothie you want to start out with a base of either ripe bananas or ripe mangoes (I like ataulfo mangoes) or even a mixture of both. Then you can use 2 cups of mild greens like baby spinach, lettuce, mache (lambs lettuce/corn salad), or 2-3 leaves of kale or Swiss chard (remove the big stems). If desired you can add another fruit like berries, pineapple, mango, papaya, grapes, even watermelon. Depending on what blender you have you may need to add a little water as well, just enough to blend or to get the consistency you like. I like really thick smoothies so I chew them. Some people like only very thin ones so it’s like fruit juice. It’s up to you. Always stack the smoothie in your blender with water at the bottom, then bananas, then greens, and then frozen fruit. Use a tamper (if you have a Vitamix) or break up the chunks of banana before blending to get everything to combine easily. If you have a basic blender you may want to blend the banana, water and greens first, and then add a little additional fresh or frozen fruit and blend again.

Ok, now that I’ve shared some tips on green smoothies, let’s go on to the recipe.

80/10/10 Recipe: Banana Blueberry Green Smoothie

Serves 1

Ingredients:

3 ripe bananas (see my post on how to tell if your bananas are ripe enough)
2 cups baby spinach, packed
2 cups fresh or frozen blueberries
1/4-1/2 cup water (as desired)

Directions:

  1. Place ingredients into blender in the order above putting the bananas on the bottom. Add a little water if desired to help it liquify.
  2. Blend for 30-45 seconds if you have a Vitamix. (If you have a regular blender you may need to break up the banana pieces into smaller chunks and blend with a little more water or a little longer depending on how strong the motor is.)

I find that having frozen fruit gets the smoothie cool enough without the need to add ice. Unless you have a Vitamix adding ice to a smoothie can make it too gritty and not very smooth to drink.

Have you ever made a green smoothie before? If so what’s your favourite?


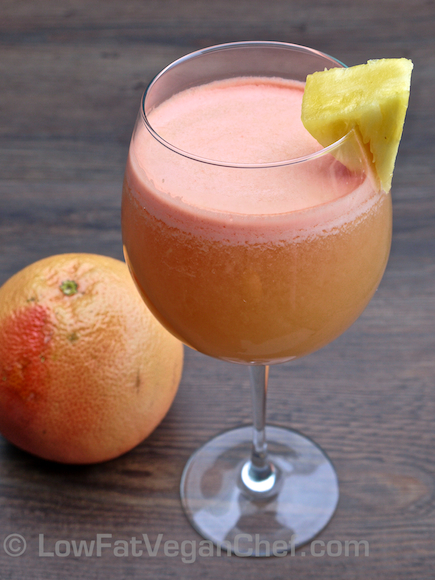
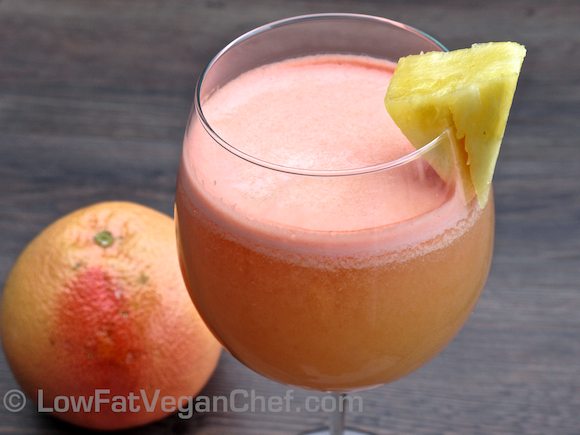
80/10/10 Recipe: Morning Sunrise (Pineapple Grapefruit Ginger) Juice

This is a really delicious juice recipe  that combines red grapefruits with fresh pineapple that I wanted to try. I really love Texas Star grapefruits as they are sweeter and even nice to eat on their own.

Did you know that the reason people used to put sugar on their grapefruit halves is because grapefruits used less sweet? Even sour compared to today? The scary thing is I still notice people putting sugar on their grapefruit halves thinking they are “sour” and that’s what you’re supposed to do. They have no idea how sweet and delicious grapefruits are now and they don’t need any additional sugar. Generally people who eat a lot of processed foods, don’t enjoy raw fruits and vegetables because they aren’t sweet or salty enough compared to their favourite packaged foods.

The key to enjoying grapefruit is to eat it before you eat anything else. When you eat grapefruit or grapefruit juice on it’s own it will taste more naturally sweet than if you ate it with sugary coffee, cereal, muffins, pastries, sweet fruits like mango and other sugary foods.

For instance if you ate a bite of mango and then went to eat some grapefruit it would taste very sour in comparison because your tastebuds had to adjust to the sweet taste of mango. A tip I have for you is to eat mangoes last if you’re having a few fruits for breakfast, as everything will taste less appetizing in comparison. Similarly eat your grapefruit first, and then everything you eat later will taste it’s best. I don’t recommend putting grapefruits in fruit salad either, as they will taste sour in comparison.

Now I don’t drink a lot of juice myself, I only drink homemade juice and never store bought bottled juice. But it is nice to have fresh pressed juice before or after a workout or on days that you will be traveling or being inside an air conditioned building for long periods of time. I like to drink fresh fruit and vegetable juice before traveling on a plane as it’s a good way to get some extra hydration and use up whatever’s left in the fridge before we leave!

Having a small glass of this juice for breakfast will brighten your day and the little bit of ginger adds another layer of flavour to it. I don’t like really gingery juices, but this is just right. You can also leave it out, or add more ginger depending on how much you like the flavour.

It’s best to use fresh sweet pineapple for this recipe. See my video on How To Select And Cut a Ripe Pineapple. If you’re buying pre-cut pineapple from the store, look for one that was packed recently, and has the darkest yellow colour you can find. If it is really pale and mostly white with only a little tinge of yellow it isn’t a ripe pineapple and won’t be sweet enough. You can also use defrosted frozen pineapple if you let it sit overnight in the fridge or out on the counter for a half hour on a tray, but generally frozen pineapple is not as sweet as fresh ripe pineapple.

Also did you know you can peel ginger very easily with a spoon? Check out my post How To Peel Ginger With A Spoon.

Morning Sunrise (Pineapple Grapefruit Ginger) Juice

Serves 1-2

Ingredients:

2 large Ruby Red or Texas Star grapefruits (or use a sweeter less tart variety available in your country)
4 cups pineapple chunks (fresh is best)
1 knob of ginger the size of your thumb, peeled (use more or less to your tastes)

Directions:

  1. Juice the grapefruit in a citrus juicer or handheld citrus juicer. (This way you get more juice than putting it through a centrifugal juicer).
  2. Run the pineapple chunks and ginger through a centrifugal  or Green Star style juicer.
  3. Combine juices and pour into glasses.
  4. Garnish with pineapple chunk if desired.
  5. Serve.

What do you think of this breakfast juice? Do you enjoy the taste of fresh red grapefruits?

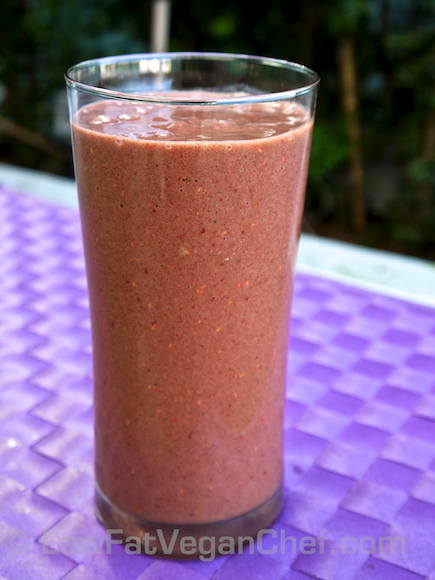
80/10/10 Recipe: Banana Raspberry Pineapple Smoothie

Raw Banana Raspberry Pineapple Smoothie


Spring is coming! I know it! We’re getting a few sunny days in between the rain here in Vancouver. So sometimes I can take my pictures outside. Yay!

I really love pineapple and raspberries in smoothies, I think they make almost as good of a combination as pineapple and black cherries.

This is a smoothie I regularly make as it has creaminess from the bananas, the tartness from raspberries, and a tropical pineapple twist to it. As long as you’re using fully ripe, spotted bananas as the base you can pretty much throw any frozen fruit into the blender with it and make a delicious smoothie.

80/10/10 Banana Raspberry Pineapple Smoothie

Serves 1-2

Ingredients:

2-3 bananas (ripe with lots of brown spots)
1 cup of frozen raspberries
1 cup of frozen pineapple
a little water to blend

Directions:

Add ingredients to blender starting with the bananas at the bottom and the water and frozen fruit on top. Blend until smooth.

Drink and enjoy!

Variations:

You can easily make this a green smoothie by adding a few handfuls of spinach or kale (destemmed of course)

——-

What smoothie combination have you been wanting to try but have never had before? What fruits are you excited about coming into season again?