• Skip to primary navigation
  • Skip to main content
  • Skip to primary sidebar
  • Skip to secondary sidebar

Plant Based U

Fat-Free and Low Fat Vegan Plant Based Recipes

  • Home
  • Recipes
    • Raw Vegan Recipes
    • Cooked Vegan Recipes
    • Eat to Live Dr. Fuhrman Recipes
  • Products
  • Coaching
  • Videos
  • Articles
  • About
    • What Is Low Fat Vegan/Whole Foods Plant Based
    • Resources
  • Contact

Sandwiches and Wraps

Fb-Button

Oil-Free Vegan Tofu Eggless “Egg” Salad Recipe (Plant Based)

August 17, 2019 by Veronica Grace Leave a Comment

Fb-Button

Vegan Tofu Egg Salad Recipe (Oil Free and Plant Based)

Sometimes I get asked what do oil free plant based eaters do  for lunches or healthy sandwiches now when giving up lunch meat, mayo and other processed ingredients. Of course you could always make a vegetable sandwich or wrap, but sometimes you want something that can look a little more covert or are craving an old comfort food.

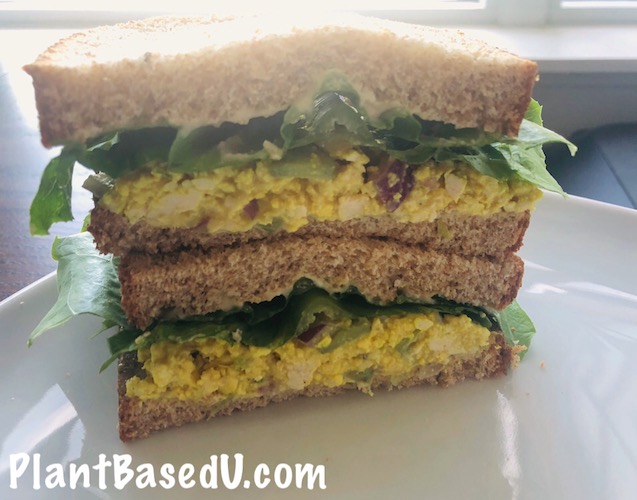
These tofu eggless “egg salad” sandwiches look and taste great and are really easy to make so you have enough for sandwiches or snacks for the week. Not looking for a sandwich? You can eat it with a spoon for a high protein snack, or serve with veggies on top of crackers too.


Many vegans and plant based eaters will use store bought mayo but I just can’t bring myself to buy it. It’s literally all oil, and just there to moisten the bread and add a little flavour. So that’s why I’ve made my own mayo as well with white beans, cashews and seasonings. It works awesome with this recipe and can be used for other sandwiches or wraps as well when you’re looking for something different than hummus or avocado. It is creamy and a really good substitute as well and not as dry and thick as hummus if you miss having a spread that will melt into the bread.

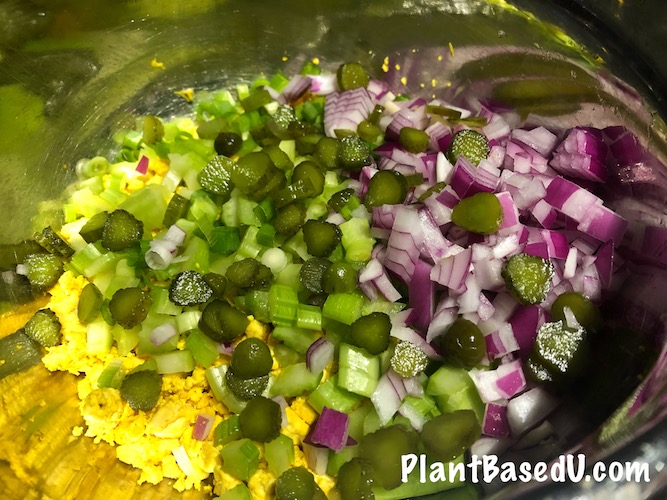
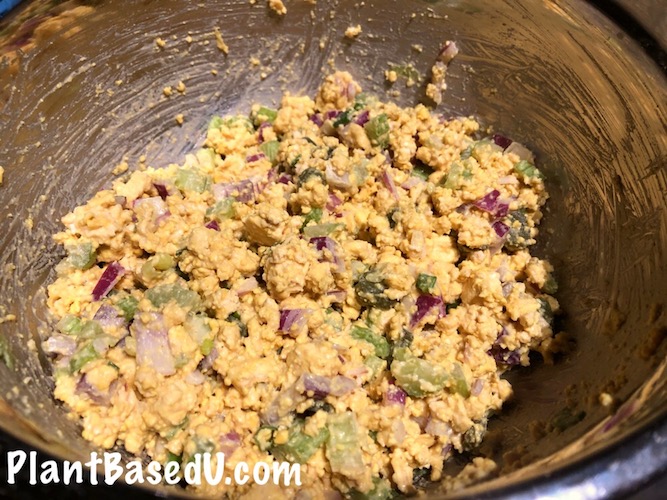
You can add whatever veggies or additional add ons to your tofu eggless “egg salad” that you want, but I really wanted to pump up the flavour and crunch so I added chopped red onion, celery, pickles and green onions. I find the texture just more appealing when I have a mix of soft and crunchy together so it’s not too wet or mushy.

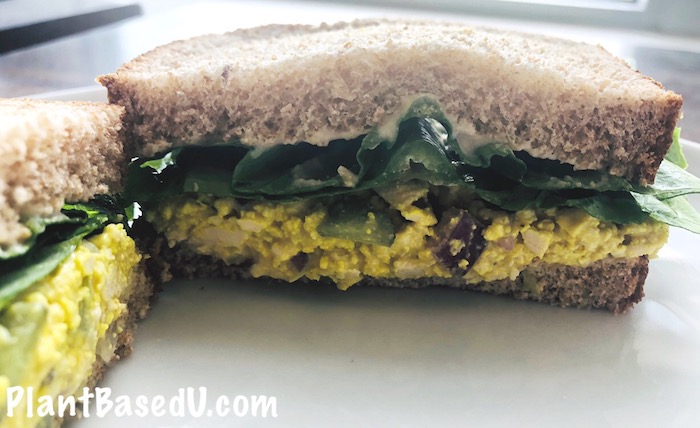
I would dare anyone who says they don’t find tofu appealing to try this sandwich, because honestly it is very similar  in texture to hardboiled eggs and with seasonings it looks really convincing  as well. I would never eat just plain slabs of tofu in a sandwich, but served like this with veggies  and homemade mayo is  really delicious and refreshing.

Want more recipes? Make sure to sign up for my newsletter below

FTC Notice: This blog post contains some affiliate links which go to supporting the blog.


Vegan Tofu Egg Salad Recipe (Oil Free and Plant Based)

Oil-Free Vegan Tofu Eggless “Egg” Salad  (Plant Based)

1 350 g/12 oz package of Organic non-gmo firm or extra firm tofu, pressed
1/2 tsp turmeric powder
1 tsp garlic powder
1 tsp onion powder 
1/4 tsp kala namak (black salt) or Herbamare or Sea Salt
2 celery ribs, sliced into small  pieces
6 sweet gherkin or other mini pickles of choice, sliced
1/2 red onion, chopped
1 green onion, sliced 
1 cup of oil free vegan white bean cashew mayo or other homemade mayo

Directions:

1.Press the tofu in a tofu press or place in towels or paper towel in a baking dish with heavy weights on top of it to squeeze out excess water. I use the EZ tofu press. This helps disperse  the water inside the tofu so it can become more sponge like and absorb marinades instead of being bland and watery. Stick the drained tofu into the tofu press and crank down the springs until it’s really squished and let it drain excess water out for a few minutes in the sink or a large bowl while you prep your veggies.

2. When tofu is pressed slice it in half on a cutting board. Slice one half of the tofu into small cubes, and crumble the other half of the tofu with your hands and place into a dry non stick frying pan.

3. Turn on the heat to medium and sprinkle on the turmeric, garlic powder, and kala namak or salt. Stir with a wood spoon to combine well  so the colour is evenly yellow. If necessary add a splash of water to get seasonings dispersed. Cook just until tofu is a little dry and not soggy.Vegan Tofu Egg Salad Recipe (Oil Free and Plant Based)

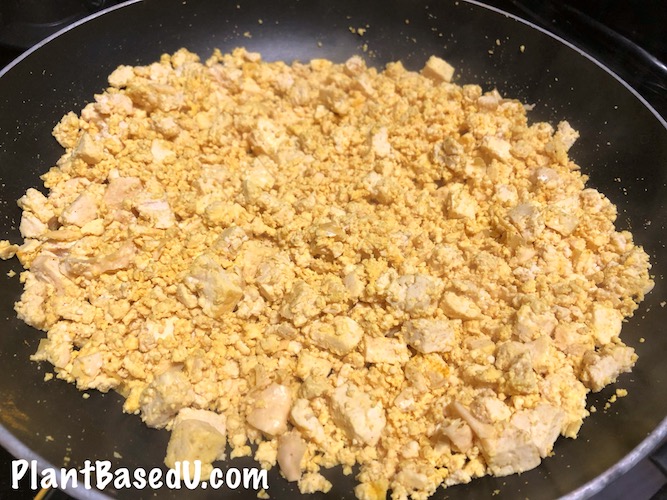
4. Scrape tofu into a medium sized mixing bowl. Add celery, pickles, and onions to the bowl. Spoon in at least 1 cup of vegan bean cashew mayo or other mayo of choice and stir to combine.

Vegan Tofu Egg Salad Recipe (Oil Free and Plant Based)

5. Taste test and add any extra seasonings like salt, mayo, mustard etc. if desired. Since my vegan bean cashew mayo already has mustard in it I didn’t add any extra.

Vegan Tofu Egg Salad Recipe (Oil Free and Plant Based)


Use to make sandwiches, wraps or lettuce wraps for lunch or as a dip for a quick veggie snack. This recipe makes enough for about 8-10 sandwiches depending on the size of your bread slices.  I spread some additional vegan white bean cashew mayo onto the bread, spoon on the tofu mixture and top with fresh lettuce.

Have you ever had homemade vegan mayo before? Or tried making tofu eggless egg salad before?


Filed Under: Cooked Vegan Recipes, Lunch, Sandwiches and Wraps Tagged With: bread, cashew, lunch, sandwich, tofu, white bean

Instant Pot Plant Based Jackfruit Carnitas (Oil Free Vegan Pulled Pork Tacos)

August 30, 2018 by Veronica Grace 4 Comments

Fb-Button

Instant Pot Plant Based Jackfruit Carnitas Vegan Pulled Pork

Jackfruit tacos are something that are probably a lot more popular now than when I first wrote this recipe. I remember years ago watching The Great Food Truck Race and there was a vegan truck on it that had deep fried avocado tacos and flat top fried jackfruit tacos. When I started using green jackfruit (in brine from a can, not the fresh ripe stuff) I found that it really needs a lot of flavor and cooking time to become a delicious moist faux pulled pork like dish.


I’ve seen some people on blogs and on Facebook complaining about how bad canned jackfruit in brine is, but they actually just opened a can and took a bite of it as is. I definitely don’t recommend it. It’s like a briney cooked non descript vegetable. It’s not appealing so don’t do that. Pressure cooking or slow cooking is what I recommend, as well as rinsing and chopping your jackfruit very fine like you see above in my photo. Add whatever seasonings and delicious sauce you want to it and you will fall in love. The method plus your sauce choice are imperative for enjoying. You can find this Arroy-D brand at most Asian and Caribbean markets, and Trader Joe’s and Whole Foods have their own versions as well now too.

I also want to make another point: PLEASE DON’T USE FRESH RIPE WHOLE JACKFRUIT. I see so many people on social media these days talking about buying an entire jackfruit at the asian market wanting to make a ton of “pulled pork” and freeze it. They’ve never used the canned jackfruit in brine, and they’ve never eaten whole fresh ripe jackfruit before. It’s a totally different thing!


A Warning About Fresh Jackfruit

If you buy a fresh jackfruit from an Asian market it will likely already be ripe, it’s not picked green and unripe for cooking typically. Even at Asian markets you might seen green mango or green papaya separately for salad dishes compared to the standard mangoes and papaya that are mature and will ripen on the counter.

If you want to break down a jackfruit I suggest you get some disposable gloves, a knife you don’t mind ruining, and some oil. Jackfruit comes from a type of rubber tree and the sap inside the jackfruit in between the pith and the fruit is very very sticky and will not come off without oil. You will need several hours likely to break down and section off a whole jackfruit by yourself for the first time. So unless you want to eat a lot of it fresh, or you live somewhere that ripe jackfruit is fairly inexpensive you probably won’t want to go this route. Sometimes the markets will have small sections of ripe jackfruit you can buy and it’s a bit easier to break down for a quick fresh jackfruit snack. This goes without saying but if you are allergic to latex or rubber you should avoid eating jackfruit as well.

Here’s a video for an idea

Fresh ripe jackfruit is green on the outside and bright yellow and sweet on the inside. Perfect for eating fresh like pineapple or mango. Jackfruit was the inspiration for Juicy Fruit Gum actually as well. So don’t use this type for making your tacos, you probably won’t like it and will have spent a lot of time and money as well.

If you want a “chicken” substitute for something like butter chicken or another type of curry you can also do that too instead of tacos and just switch out the sauce/seasonings and pressure cook/slow cook that as well. It does benefit from a long cooking time so I wouldn’t just add a can of jackfruit to a stovetop curry that I was cooking in only 15 minutes or so.

This recipe and my Black Bean and Corn Tacos are featured in my Vegan Comfort Foods From Around The World cookbook and is currently on sale with all of my other recipe programs for Cyber Monday Sale here.


Instant Pot Plant Based Jackfruit Carnitas Vegan Pulled Pork

Jackfruit Carnitas (‘Pulled’ Jackfruit Tacos)

Serves 4

Ingredients:

1 20 oz. / 567 g can green jackfruit in brine (Arroy – D or other brand)
1 large sweet onion, sliced thinly
4 large cloves of garlic sliced
1 tsp. Chipotle Chili Powder
1 tsp. Smoked Spanish Paprika
½ tsp. Frontier Mexican Fiesta powder or other Mexican blend spice*optional
¼ tsp. Roasted Ground Cumin
¾ tsp. Herbamare or salt (or less if using salted bouillon) 
½ cup / 118 ml. mild or medium salsa (Trader Joe’s tomatillo, Mild salsa, Newman’s Own Mango salsa etc. all work well)
1 cup / 237 ml. vegetable broth (or bouillon in water) for stovetop *see NOTE
1- 1½ cups / 237-355ml. water if needed for stovetop *see NOTE
2 Tbsp. maple syrup
12 corn tortillas (look for oil free low sodium ones) 

NOTE: Check your pressure cooker directions for the number of half cups of water you need for each 5 minutes of cooking time. Make sure the broth / water content is sufficient. Stove top pressure cookers need much more water, while digital electric pressure cookers AKA Instapots use a much smaller amount; – around only ½ cup of broth / water total. The onions release enough water to keep it from burning. *If you’re using an Instapot/Digital pressure cooker only use 1/2 cup broth/water and skip the rest.

Pressure Cooker Directions:

1.  Drain and rinse the jackfruit and slice very thinly.
2. Place the above ingredients into a pressure cooker.
3.  Pressure cook on high for 25 minutes. Check it at 15 or 20 minutes, if it’s your first time cooking over the stove, to ensure there’s enough liquid in the bottom.  You don’t want it to burn, but you need to cook the jackfruit well so it’s very tender and has a soft texture like pulled pork. If you use a digital pressure cooker, it should be fine left alone for 25 minutes. Use Quick Release method when done cooking.
4.  Serve with your favorite sides like corn tortillas, guacamole, salsa, black beans, refried beans, or rice. 

Slow Cooker Directions: 

Place the ingredients in a slow cooker for 5-6 hours on low, but use only ½ cup broth or water in total and skip the rest. (In the pressure cooker the excess water turns into steam, unlike the slow cooker, which traps in moisture.)

Additional Tips:

You will have to go to an Asian market or Amazon.com to get canned green Jackfruit. Make sure it says in brine and not in syrup. You don’t want sweetened jackfruit for this dish. I found Arroy-D canned jackfruit in the tiny city of Corpus Christi, Texas so if I can find it there, I’m confidant you can find it in most states and countries. Sometimes I mix it up and add sliced mushrooms and/or zucchini as well to make the recipe go even farther. I’ve also doubled this recipe for potlucks with no problem as well.

Nutrition Facts: 4 Servings (3 tacos), Amount Per Serving: Calories 309.7 Total Fat 1.8 g Saturated Fat 0.0 g Sodium 444.2 mg Total Carbohydrate 68.0 g Dietary Fiber 5.4 g Sugars 6.5 g Protein 4.4 g

Have you ever had green jackfruit before? What did you think?

Filed Under: Cooked Vegan Recipes, Dinner, Forks Over Knives, Instant Pot, Mexican, One Pot Meals, Sandwiches and Wraps Tagged With: dinner, jackfruit, mexican, oil-free, salsa, tacos, tortillas

Slowcooker Vegan White Bean Cassoulet by SkinnyMs

March 16, 2014 by Veronica Grace 8 Comments

Fb-Button


I love using white beans, especially in plant-based Mediterranean cuisine. They are a delicious addition to soups, stews, chillis, salads or even in place of chickpeas in hummus. They have a mild creamy taste and pair well with almost any herb. I instantly liked this recipe for vegan white bean cassoulet because is jam packed and filled with veggies and flavor without all the meat and cheese of the classic French dish. And once you see how beautiful it is when it comes together it’s sure to please all of your family’s senses.

So before you put away your slow cooker for the season, why not try this hearty dish when you are craving something “different” yet still budget friendly and super filling. I’d also pair this veggie cassoulet with a nice light salad with a homemade vinaigrette. (Check out my quick dijon dressing in this video)


Vegetarian White Bean Cassoulet

A cassoulet is a French dish that is very complicated to prepare and is usually very meat-heavy. Traditionally it is a dish filled with fatty meats, white beans, and vegetables topped with savory bread crumbs and cheese. This version is not nearly as complicated, and it is a healthy cassoulet that is full of veggies. It’s a slow cooker recipe unlike any other. So, if you’re looking for a vegetarian white bean cassoulet recipe that is satisfying, rich, and filling, this one is sure to be a hit.

Vegan White Bean Cassoulet

Recipe provided by SkinnyMs.com

Yields: 6 servings | Serving Size: 1 cup|Calories: 432| Previous Points: 9| Points Plus:  10| Total Fat: 10 g | Saturated Fat: 2 g | Trans Fat: 0 g | Cholesterol: 0 mg | Sodium: 171 mg | Carbohydrates: 67 g | Dietary Fiber: 21 g | Sugars: 9 g | Protein: 20 g |

Ingredients:

Cassoulet:
    • 3 leeks, white parts, sliced
    • 2 stalks celery, diced
    • 2 large carrots, sliced
    • 4 cloves garlic, minced
    • 1 15 ounce can diced tomatoes
    • 2 cups vegetable stock
    • 1 bay leaf
    • 1 tablespoons Italian seasoning
    • 2 15 ounce cans white beans of your choice, rinsed and drained
Breadcrumbs:
  • 1 cup good quality coarse bread crumbs
  • 2 tablespoons olive oil
  • 1 clove garlic, minced (or garlic powder)
  • Zest of 1 lemon
  • 1/4 cup finely chopped fresh parsley

Directions:

Heat a large skillet over medium heat with a little vegetable broth or water. Add the leeks and celery and cook until soft. Add the carrots and cook until lightly browned. Add more water or broth as necessary. Add the garlic and cook for 1 more minute. Season with salt and pepper.

Add the mixture to the slow cooker, followed by the rest of the cassoulet ingredients. Cook on low heat for 4-6 hours, until vegetables are tender. Lightly mash some of the beans to thicken the cassoulet.

Make the toasted breadcrumbs by tossing the breadcrumbs with the garlic (or garlic powder). Lay in an even layer on a baking sheet and lightly toast in a 350 F degree oven, about 10 minutes. Allow to cool and combine with the parsley and lemon zest.

To serve, spoon the cassoulet into individual ramekins and sprinkle with bread crumbs. Alternatively, sprinkle breadcrumbs directly on the cassoulet in the slow cooker and serve from there.

Notes:

This recipe has been edited to omit the olive oil to be in line with the needs of the readers of this blog.

Have you ever made a cassoulet recipe? What did you put in it?

Filed Under: Cooked Vegan Recipes, Dinner, Sandwiches and Wraps, Slow Cooker Recipes Tagged With: Carrots, celery, fat-free, nut-free, Slow Cooker, soy-free, tomatoes, white beans

Engine2 Inspired Tempeh Mushroom Panini Melts

February 10, 2013 by Veronica Grace 33 Comments

Fb-Button

I was watching Engine 2 Kitchen to the Rescue on Netflix the other day and got a hankering for a homemade panini melt like Rip was showing in the recipe section of the film. This recipe is DELICIOUS! I’m definitely going to be making this regularly because the combination of mushrooms and caramelized onions is one of my favorites.

Hummus is a great cheese-free way to make an ooey gooey panini melt because it adds some nice flavor and moisture to it and gets all melty when heated. So make sure to slather it on thick! For a healthier oil free version of hummus be sure to check out my recipe link below.

This is an adaptation of Engine2’s recipe and I’ve added more ingredients to the panini.  🙂

Vegan Hummus Mushroom Tempeh Panini Melts

Makes 2 panini

Ingredients:

4 slices whole wheat bread (look for oil free) *use GF if desired
low fat hummus (see my recipe)
4-6 strips of tempeh (I used sesame garlic tempeh)
6-8 oz mushrooms, sliced
1 slice of onion cut into strips
1 tsp soy sauce or gluten free tamari
1 tsp maple syrup *optional
handful of baby spinach
2 pieces of fresh cilantro

Directions:

1. In a small non stick pan, cook the tempeh strips over medium heat until lightly browned on both sides. Set aside. (You do not need any oil.)

2. Sauté the mushrooms and onion slices in a non-stick pan in soy sauce and maple syrup for 5-6 minutes until soft. Set aside.

3. Spread all 4 slices of bread with a thick layer of hummus (you don’t want it to be too dry!) and top 2 slices with tempeh, mushrooms and onions. Lay some spinach leaves on top and sprinkle on a few bits of cilantro. Top with the other slice of bread.

4. In a non stick or cast iron skillet place the sandwiches one at a time over medium low heat. Top with something heavy such as a cast iron skillet, pot or plate with a weight on it. Cook on each side for 3-4 minutes until browned being careful to not let them burn. *Alternatively you can use a sandwich press (cut it in half first) or a panini press and cook for 4-5 minutes.

place the sandwich on a non stick pan with something heavy on top of it

*Or use a sandwich maker or panini press and close the top down on the sandwiches

5. When done slice in half and serve.

panini made in the sandwich maker

panini made in the pan with weight on top

Variations:

If you don’t want to include the tempeh, feel free to leave it out. I like adding it so it’s a little higher in protein and more filling.

You can also mix up your panini by using a different flavored hummus, adding roasted bell peppers, jalapeños, artichokes or smoked tofu instead of the original ingredients.

What’s your favorite vegan grilled sandwich or panini?

Filed Under: Breads and Baked Goods, Cooked Vegan Recipes, Dinner, Engine2Diet, Sandwiches and Wraps, Snacks Tagged With: Engine2, hummus, lunch, melt, nut-free, onions, panini, sandwich, sauteed mushrooms, spinach, Tempeh

Primary Sidebar

Follow Us:

Newsletter

Get The Low Fat Vegan Starter Kit

natural organic skin care line

Free Skincare Samples

Earn Free Crypto At Binance

Earn Free Bitcoin on Gemini Exchange

Earn $10 in Bitcoin With Gemini Exchange
Dr. Fuhrman
Dr. Fuhrman
Dr. Fuhrman

Tags

80/10/10 apple avocado banana blueberries breakfast broccoli Carrots celery chickpeas cilantro corn cucumber Curry dill dinner easy Eat To Live fat-free gluten-free how-to Indian Dishes lemon low-fat mango mexican mushrooms nut-free oil-free pasta pineapple plant-based raw raw vegan rice smoothie soup soy-free spinach tofu tomato tomatoes vegan vegetarian vitamix

Secondary Sidebar

Recipes:

  • Cooked Vegan Recipes
  • *My Recipe Books
  • Breads and Baked Goods
  • Breakfast
  • Brunch
  • Burgers
  • Casseroles
  • Curries
  • Desserts
  • Dinner
  • Dips for Veggies or Chips
  • Eat to Live-Dr. Fuhrman Recipes
  • Engine2Diet
  • Ethiopian Dishes
  • Greek
  • Green Dishes
  • Holiday
  • Indian Dishes
  • Mexican
  • One Pot Meals
  • Pasta
  • Pizza
  • Quinoa
  • Salads
  • Sandwiches and Wraps
  • Raw Vegan Recipes
  • 80/10/10
  • Raw Breakfast
  • Raw Desserts
  • Raw Dips
  • Raw Dressings
  • Raw Entrees
  • Raw Juices
  • Raw Salads
  • Raw Smoothies
  • Raw Snacks
  • Raw Soups
  • Sauces
  • Side Dishes
  • Slow Cooker Recipes
  • Snacks
  • Soups and Stews
  • Spices/Seasonings
  • Sushi
  • Thai
  • Vietnamese

Copyright © 2026 · Foodie Pro & The Genesis Framework