• Skip to primary navigation
  • Skip to main content
  • Skip to primary sidebar
  • Skip to secondary sidebar

Plant Based U

Fat-Free and Low Fat Vegan Plant Based Recipes

  • Home
  • Recipes
    • Raw Vegan Recipes
    • Cooked Vegan Recipes
    • Eat to Live Dr. Fuhrman Recipes
  • Products
  • Coaching
  • Videos
  • Articles
  • About
    • What Is Low Fat Vegan/Whole Foods Plant Based
    • Resources
  • Contact

5 Secrets For Making Quick And Healthy Vegan Meals At Home

September 1, 2012 by Veronica Grace 21 Comments

Fb-Button
I want to share with you some more helpful hints on how cooking low fat vegan and plant based meals at home can fit into your schedule and help you on your way to losing weight without too much fuss. If you’re new to the lifestyle and want to reach your goals faster, check out my Low Fat Vegan Starter Kit which covers meals for breakfast, lunch AND dinner!

image credit: thesurvivorsclub.org


5 Secrets For Making Quick Healthy Meals At Home

 
1. Plan in advance what you will be eating (at least 5 days a week) breakfast and lunch and then 4 or 5 nights for dinner if you like.
Take a few minutes to write down some ideas for what you enjoy eating (that is healthy and nutritious) and what you think you can manage preparing for the week. It is very hard to stick to a healthy diet if you don’t do this crucial first step in figuring out your meal options. 
 
2. Shop once a week on a weekend for all the food you will be eating throughout the week. 
Know how many fruits, veggies and bags of salad you will need for the week and keep it on hand. If you have healthy items in the fridge you are more likely to eat them than if you have nothing around when you’re short on time and having hunger pangs. Also cleaning out your fridge regularly and keeping it organized will help you see not only what you have to work with but also prevent you from letting food go to waste by spoiling or freezing if it’s stuck at the back of the fridge. 
 
3. Eat the same (or very similar) thing for breakfast and lunch during the week to keep things simple. 
Studies have shown those who eat the same healthy breakfast or lunch every day have an easier time sticking to their diet plans and reaching their goal weight. Control temptation for eating on the go and grabbing takeout by planning in advance and eating meals you love every day during the week. 
 

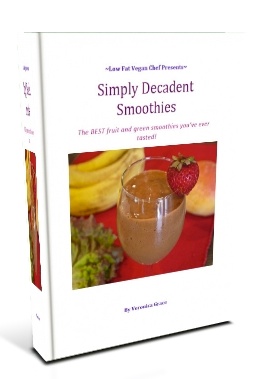
Breakfast ideas during the week: large fruit smoothie, large green smoothie, steel cut oats with dried fruit and nuts, fruit salad with toast and jam and/or peanut butter, fruit salad with coconut or almond yogurt (available at the health food store), fruit salad and a whole grain muffin etc. See my ‘Simply Decadent Smoothies’ recipe ebook for delicious ideas.  

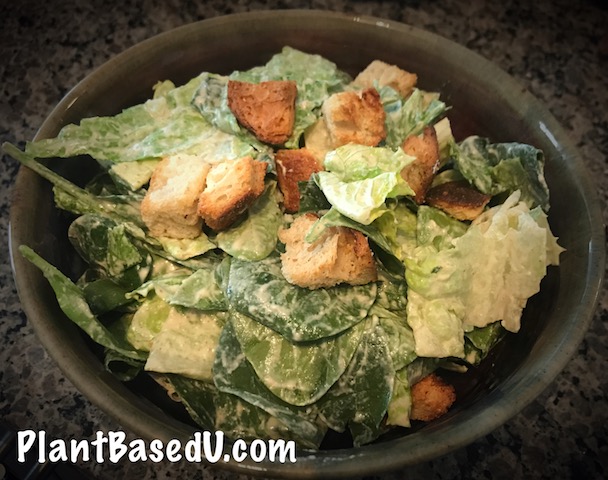
Lunch ideas during the week: large salad with fruit, vegetables and homemade nut based dressing (oil-free of course), steamed vegetables and/or lentils and rice with a homemade or low fat store bought sauce, baked potato with hummus and a side salad, homemade soup, stew or chili, roasted vegetable sandwich on whole grain bread with fruit, etc. See my ‘Comfort Soups To Keep YouWarm’ recipe ebook for hot lunch ideas. 
 
4. For hot meals (or salads) do your cooking (or prepping) once or twice a week. 
Make a big batch or double batch of soup, stew, casserole, curry etc. that you can easily pair with a whole grain such as rice or quinoa and a salad or veggies. For salads use large tupperware containers and portion out your lettuce and assorted veggies, dried fruit and toppings. Make a homemade dressing or find a tasty oil-free dressing you enjoy and have little containers to take with your salad each day. For delicious dinner recipes the whole family will enjoy I recommend my “Vegan Comfort Foods From Around The World” recipe ebook. 
 
5. Use cooking devices such as slow cookers or pressure cookers to save active cooking time in the kitchen.
 
With a slow cooker you can prep everything on a Sunday morning or afternoon and then by dinner time you will have a hot meal ready to eat and you can save any leftovers for meals throughout the rest of the week. With a pressure cooker you can easily make homemade vegetable broth, soup, or fresh beans in only a fraction of the time so you don’t have to hang around watching the stove for an hour while things cook. 
 
The most important aspect to sticking to a healthy diet and lifestyle is planning ahead. Life can get hectic at times and we can feel rushed and make a lot of excuses for eating unhealthy snacks and meals on the go, but if you master the art of shopping in advance and learn how to make a few healthy recipes you like to eat every week you will be well on your way to success. 
 
Just schedule yourself some time every week for shopping and preparing a few healthy recipes, a little effort in these areas can make a big difference to your health and not to mention your waistline…
 
I hope I’ve inspired you to take the next step and get back into the kitchen. 
 
You can do it, I believe in you!

Filed Under: Articles, How To Tagged With: article, cooking, Cooking Tips, dinner, easy, eat healthy, get organized, low fat vegan, menu ideas, secrets, smoothies, soups

Fermented Food Recipe: Applekraut by Cherie Soria

August 17, 2012 by Veronica Grace 1 Comment

Fb-Button

Today I have a delicious recipe to share with you from my friend Kevin Gianni’s new ebook Cultured: Learn How To Make Healthy Fermented Foods At Home.

This is a really neat recipe that everyone will be able to make no matter where they live. Apples are such an awesome ingredient to use in recipes because they work well in both sweet and savory dishes. I pretty much love apples in everything!

This recipe comes from Cherie Soria of The Living Light Culinary Institute in California. This is what she has to say about her recipe:

“This kraut is sensational!

The apple and ginger create a wonderful combination of sweetness and tang. For variety, add spices such as anise seed, curry powder,
caraway, or cardamom.

These krauts are easy to make and very health promoting. Use your imagination and see how many great flavors you can create!”

Applekraut by Cherie Soria

(Makes 1 1/2 quarts)

Ingredients:

1 medium-sized cabbage, finely shredded or ground
(reserve several outer leaves and pieces of cabbage to cover the Applekraut)
2 tart, firm apples, peeled, cored, and shredded
1 tsp freshly grated ginger root
1 tsp Himalayan crystal salt

Instructions:

  1. Put the shredded cabbage in a bowl and sprinkle with salt and massage the cabbage until it becomes very juicy. Add the remaining ingredients and mix well. Firmly pack the mixture into a deep glass bowl or crock.
  2. Place the reserved leaves over the top, allowing them to extend partially up the side of the crock; put a small saucer (plate) on top.
  3. Fill a clean plastic bag with grains or beans to act as a weight; place it on top of a saucer and put it on top of the leaves. Allow some space around the sides to ensure a good air supply.
  4. Cover the top with a clean dish towel. Place the mixture in a warm, dark closet for 3-4 days. (It will ferment sooner in warmer weather.)
  5. Store your Applekraut in a glass jar in the refrigerator. It will last two weeks or more, but it is best eaten soon to ensure live lactobacillus bacteria.

This recipe is just one of the 70+ found in Kevin Gianni’s fermented foods recipe book called “Cultured: Make Healthy Fermented Foods at Home.” I highly recommend it!

I know what I’ll be making today! How about you?

Filed Under: Eat To Live - Dr. Fuhrman Recipes, Raw Salads, Raw Vegan Recipes Tagged With: applekraut, apples, cabbage, fat-free, gluten-free, raw, saurkraut, soy-free

5 Good Reasons to Include Fermented Foods In Your Diet

August 16, 2012 by Veronica Grace 3 Comments

Fb-Button

photo credit: openjourney.com

Today I want to talk to you about something new and exciting that I’m experimenting with…

Cultured foods!

My good friend Kevin Gianni from Renegade Health absolutely loves including homemade healthy cultured foods in his diet. And for good reason.Many of us have or have had impaired digestion at one time or another in our lives. Maybe it was from a processed foods diet, frequent use of antibiotics, or even a run in with a parasite while traveling.Or you may have a more serious condition like chronic constipation, irritable bowel syndrome, celiacs disease, Crohn’s disease or colitis.

If any of these situations resonate with you, then keep reading. I’m going to share with you the benefits of eating homemade cultured foods and why you should consider adding them to your diet.

Proper digestion is crucial when it comes to building and maintaining a healthy body and immune system. So when your digestion is out of whack you can experience a lot of pain, bloating and discomfort and possibly even end up with some absorption problems depending on the severity of your issue.

If you need some help with building more beneficial bacteria in your system you should check out Kevin’s new book called

Cultured: Learn To Make Healthy Fermented Foods At Home

Let’s take a look at some other reasons you may want to include cultured foods in your diet:

5 Good Reasons to Include Fermented Foods In Your Diet

1. Cultured Foods are Easy to Make at Home and Taste Great

We all know how much people love the taste of fermented foods like cheese, yogurt, kefir, sourdough bread, sauerkraut, miso, and traditional pickles. They have an interesting tangy and complex flavour that ads zip to whatever you’re eating.

Even if you’re vegan there are many delicious cultured foods to experiment with and try making at home. Almost any vegetable can be turned into a delicious fermented food!

2. Fermenting Vegetables Increases Their Nutritional Profile

On top of the existing vitamins and minerals vegetables provide naturally, the beneficial bacteria in cultured foods produce new enzymes and additional minerals which increases their nutrition content. So fermented foods can be a great “good for you” condiment for any meal.

3. Fermented Foods Can Aid In Healing Your Digestive Tract

Processed and refined foods can damage the sensitive villi in your digestive tract and kill off the beneficial bacteria that resides in them. By bringing in new cultured and fermented foods you can help repopulate your intestinal flora with beneficial bacteria and help restore your natural PH balance.

4. Homemade Fermented Foods Are Better Than Supplements

Probiotics generally only contain 1 or 2 main strains of beneficial bacteria, but homemade fermented foods can develop many more strains of good bacteria and diversify the flora in your digestive tract.

5. Fermented Foods Can Promote Good Oral and Dental Health

Many oral and dental health issues such as gingivitis, halitosis, and cavities occur because of a proliferation of bad bacteria in the mouth. When you eat fermented foods that are rich in lactic acid and other beneficial bacterias they can reduce the levels of harmful bacteria in your mouth and keep them in check.

Some of the delicious fermented foods included in Kevin Gianni’s recipe ebook are:

  • sauerkraut
  • applekraut
  • pickles
  • coconut and water based kefirs
  • almond and coconut yogurts
  • vegan cheeses and sour cream
  • rejuvelac
  • miso
  • tempeh
  • gluten free breads with teff and lentils
  • popsicles
  • and many more

If fermented foods sound like something you’re considering including in your diet check out Kevin’s ebook Cultured: Learn To Make Healthy Fermented Foods At Home:

http://www.1shoppingcart.com/app/?Clk=4818804

What’s your favorite cultured food to eat? 


Filed Under: Articles Tagged With: article, cultured, fermented

80/10/10 Recipe: Raw Vegan Strawberry Banana Green Smoothie

August 13, 2012 by Veronica Grace 14 Comments

Fb-Button

So last week I launched my new ebook ‘Simply Decadent Smoothies’ as part of my combo recipe package with ‘Savory Raw Dinner Recipes’ and ‘Comfort Soups To Keep You Warm’ and gave it away as a free bonus.

The combo package was incredibly popular, but a few of you wanted to know if you could get just my smoothie ebook if you had already purchased one or more of the other products before. So I just wanted to let you know that  ‘Simply Decadent Smoothies’ is now available at a special discounted price here.

Today I’m going to share with you a tasty new green smoothie recipe that is featured in the recipe ebook. Often people have a hard time finding enough green smoothie recipes that they like and that contain different greens so they are not just eating the same ones all the time like baby spinach.

So because I have a few greens growing in my garden (like leaf lettuce, Swiss chard, kale and spinach) I like to at least rotate through those ones and think up new combinations that work well while masking the taste of the greens with sweet fruit.

This green smoothie recipe features banana, mangoes, strawberries and red leaf lettuce and looks more of a burnt orange color than green for a typical green smoothie recipe.

So let’s check it out:


Raw Vegan Strawberry Banana Mango Green Smoothie

Serves 1

Ingredients:

2 ripe bananas
1 ripe mango (flesh only)
2 cups whole strawberries (fresh or frozen)
1 handful of red leaf lettuce or other mild green
1/2 cup of water

Directions:

Place ingredients into VitaMix or blender in order listed. Blend on medium speed and use the tamper (if necessary) to push the lettuce down until they are incorporated. (If you have a regular blender you may want to chop the lettuce first into smaller pieces.)

Garnish with a fresh strawberry and serve!

What do you think of this smoothie recipe? Have you ever used red leaf lettuce in a green smoothie?

For more delicious smoothie recipes check out:

Simply Decadent Smoothies

Over 50 raw fruit and green smoothie recipes

simply<br /><br /><br /><br /><br /><br /><br /><br />
                  decadent smoothies

In this 46 page ebook, you will discover:

  • What tools are necessary to create the best tasting smoothies
  • How to tell if your fruit is ACTUALLY ripe
  • How to design your own fruit smoothies that taste great every time
  • How to design your own green smoothies that taste great every time
  • How to make your green smoothies more appetizing and attractive
  • 25 delicious raw and vegan fruit smoothie recipes
  • 26 delicious raw vegan green smoothie recipes


                        Order Now

Filed Under: 80/10/10, Raw Breakfast, Raw Smoothies, Raw Vegan Recipes Tagged With: 80/10/10, banana, breakfast, fat-free, gluten-free, green smoothie, greens, lettuce, mango, nut-free, smoothie, soy-free, strawberry

The Best Raw Vegan Caesar Salad Dressing Recipe! (Plant Based and Oil-Free)

August 6, 2012 by Veronica Grace 57 Comments

Fb-Button

*Plantbasedu.com was formerly LowFatVeganChef.com

Today I have the PERFECT savory salad recipe that I want to share with you. This raw vegan Caesar salad dressing probably my most requested dressing recipe. My friends and family cannot get enough of it. Whenever I make it for potlucks (even for omnivorous barbecues) it’s the FIRST salad to be devoured and people can’t stop raving about it.


They don’t care that my dressing is oil-free, dairy free, or vegan, they just know it’s freaking delicious and they want to know how they can get the recipe!

Well I don’t usually give away my top secret recipes, aside to my close friends, but I wanted to share this recipe with you today.

I don’t know if you’ve ever made your own Caesar salad dressing at home before, but there’s one ingredient in traditional Caesar dressing that just grosses me right out.

Do you know what it is?

Anchovies!

I know… who wants to eat blended fish in a salad dressing…

But this recipe is very close to tasting like a traditional Caesar salad dressing. There is one key ingredient that makes my version very tasty and savory.

It’s miso paste and this gives it that strong tangy flavour that vegan Caesar dressings are sometimes missing.


You can buy miso paste at the health food store or asian markets. There are many different types of miso, but my favourite for salad dressings and gravies is Genmai (Soy and Brown Rice) Miso Paste. You can also use miso paste to make Japanese miso soup or other sauces. If you don’t have access to miso locally, you can also get it from Amazon, so don’t worry. *For a soy free version I have now seen CHICKPEA based miso sold in glass jars at the health food store. So definitely check that out too.

Check it out below. I know you are going to love it 🙂

Raw vegan Caesar Salad

The Best Raw Vegan Caesar Salad Dressing/Dip


Yields about 1 cup, which covers more than 2 heads of romaine hearts chopped.

Ingredients:

1/4 cup raw cashews (or raw sunflower seeds)
1/8 cup raw sesame seeds (or raw pine nuts) or 2 tbsp tahini
1/8-1/4 cup sunflower seeds (depending how thick you want it)
3-4 tbsp freshly squeezed lemon juice
1-2 medium cloves garlic, chopped
1 1/2 tsp mild miso (I use Genmai soy and brown rice miso)
1/4 tsp kelp granules or other seaweed seasoning *optional
1/2 tsp of dried dill
2 dates or 1-2 tsp agave or other liquid sweetener
1/2-2/3 cup filtered water (to thin as desired)
freshly ground black pepper to taste

Directions:

  1. Using a hand blender or in a regular blender, combine all ingredients(starting with 1 date or 1/2 tsp agave nectar) and purée until very smooth.
  2. Taste test. Add additional dates or agave nectar, garlic or lemon if desired to achieve the taste you are looking for.
  3. Add additional water to thin dressing if desired.

Additional Tips:

This dressing will thicken after refrigeration; you can thin it by stirring in 2-3 tsp water if desired. When thick, this dressing can be used as a veggie dip.

Cashews are higher in fat than sunflower seeds, so it’s up to you which you would prefer to use. Cashews will yield a creamier dressing, but be higher in


calories.

Do you love Caesar salad? Have you ever tried a vegan version?


Filed Under: Eat To Live - Dr. Fuhrman Recipes, Raw Dressings, Raw Salads, Raw Vegan Recipes Tagged With: gluten-free, green, raw vegan, salad

How To Make Perfect Vegan Smoothies And Green Smoothies Every Time

August 5, 2012 by Veronica Grace 5 Comments

Fb-Button

How To Make Great Vegan Smoothies Every Time

Low Fat Vegan Chef's Beginner's Green Smoothie Blueberry Banana Spinach Smoothie

Tools Necessary For Making The Best Smoothies

There are a few tools that will help you make the best tasting smoothies. The most important is obviously a good blender. I recommend using a high power blender if you are serious about making delicious smoothies regularly and if it fits your budget.

My preferred blender of choice is a VitaMix because of the superior motor, warranty and large size (64 oz.) container. I use it almost daily, some days multiple times! It’s excellent for breaking down fruits and greens into tiny particles, which results in a very smooth and creamy end product. It’s also excellent for making blended soups, (raw or cooked), homemade salad dressings, sauces, and baby food. It is the first major kitchen gadget I suggest everyone invest in, as it is by far the most used in my kitchen.

If a high-powered blender seems a little out of reach for your budget at the moment, consider doing what many others do. Forgo that weekly (or even daily) gourmet coffee or shake and save that money towards getting a blender in 6-12 months. If you save just $10 a week you will be have enough to purchase any high-powered blender you desire in less than a year. I know many of you spend much more than that each week on beverages while you’re on the go our out dining!

Check out my YouTube channel where I demonstrate how to make smoothies with my VitaMix at home.

Another high-powered blender you may consider would be a Blend-Tec, which is a little different than the Vitamix in that it has preprogrammed settings, no tamper (which I use to make Banana Icecream from frozen bananas) and a smaller container.

For now though as long as you have a blender that works you can start making these smoothies recipes. Just know that the more items you put into the blender and the harder they are to blend the longer it will take to make and you could possibly burn out the motor. So take care when adding greens and frozen fruit to a regular blender. Either chop (or rip) the ingredients into smaller pieces or let the frozen fruit thaw on the counter for 5 minutes before adding to the blender. Adding more liquid than I specify in the recipe will help too.  The amount of liquid I use is what works in my VitaMix so you may need more for a regular blender to get things moving.

How To Make A Tasty Smoothie Every Time

The key to making a delicious whole food and sugar free smoothie is to use fully ripe and quality ingredients. Also you don’t have to throw a lot of things into it like some witch’s brew. I prefer to use only 2-4 ingredients to make a fruit smoothie and I generally start with a base of ripe (very spotted) bananas or ataulfo/champagne (yellow skinned) mangoes and then I add other things like ripe papaya, pineapple, berries, peaches, plums, spinach, etc. Whatever is ripe and sweet tasting can go into a great tasting smoothie.

The biggest crime at smoothie bars is probably using underripe yellow bananas or even worse yellow bananas with green still on them. Bananas contain a lot of starch and the enzymes in the bananas have to process the raw starch and convert it into natural sugars for it to taste sweet instead of sticky and pasty. To compensate they put in sugar, when it’s really not necessary.

Please see my post on How To Tell If A Banana Is Ripe for more details.

The best tip for having quality ripe produce every day  for smoothies or recipes is to make sure you are buying it at least a week in advance. I always have bananas and mangoes or papayas (when in season) ripening on the counter. It generally takes 4-8 days to ripen (I’m in Canada and it’s not hot or humid right now) on the counter in cooler climates. In tropical and subtropical places fruit can ripen in 3-4 days and then be stored in the refrigerator when it’s ripe. Frozen berries or bags of pineapple or mango are great additions to a base of ripe bananas or even fresh papaya.

How To Create Your Own Green Smoothies

Creating your own green smoothie recipe is much the same as creating your own fruit smoothie with a sweet fruit as the base, and then you just add in a handful or two of your desired greens.

Please note that a green smoothie does not mean adding tough green vegetables like broccoli, cabbage, green beans, etc. A green smoothie is essentially a fruit smoothie with LEAFY greens added.

Generally speaking if you are new to green smoothies or apprehensive about trying them you should start off with a mild tasting green like baby spinach, or leaf lettuce. These can be added in quantities of a cup or two (depending on your tastes) and you should not notice much flavor from them at all. Then once you are used to that you can venture into trying new greens.

When using a leafy green that has a tough stalk like kale or Swiss chard, remove the leaf from the stem and only use the leaves. Discard the stem, or steam or add to a stir-fry later.  They are harder to blend and don’t add a pleasant flavor to your green smoothie.

Generally you shouldn’t add sprouts to green smoothies, as they are quite bitter. You can add small quantities of mild sprouts like sunflower or pea shoots though if you like. But please do not add raw sprouted beans or sprouted grains to your smoothies.

You may know of some wild edibles (generally weeds that are edible) in your area, but make sure to always practice caution and be certain what plant you are eating if you pick it in the wild. For more information on wild edibles please check out Sergei Boutenko’s website.

Rotating your greens that you use in your smoothies each month is important. Try not to use the same green every week or every month. Some people can have an adverse reaction to using just baby spinach or kale in every single smoothie. Rotating your greens is something that Victoria Boutenko highly recommends. You can check out her books Green For Life and Green Smoothie Revolution.

The following greens should be added in small quantities at first so you get used to them:

  • Kale
  • Swiss Chard
  • Spring mix/mesclun mix
  • Celery
  • Collard greens
  • Dandelion greens
  • Mâche/corn salad
  • Beet greens
  • Turnip greens
  • Lambs quarters
  • Stinging nettle
  • Endive
  • Cactus, napal leaves
  • Mustard greens
  • Arugala/rocket
  • Escarole
  • Frisee
  • Radicchio
  • Radish tops
  • Wheat grass
  • Aloe vera
  • Parsley
  • Mint
  • Basil
  • Dill
  • Cilantro
  • Stevia
  • Fennel

How To Make Your Green Smoothies More Appetizing

If you want to serve green smoothies to your loved ones, or friends it might be a good idea to mask the color of the smoothie if they have never had one before. As soon as people see something green, they tend to think, “Hmm that probably doesn’t taste very good even though it’s good for me” and they may turn their nose up at it and decline.

First make sure you taste test the smoothie and use ripe fruit like banana or mango to ensure that it is naturally sweet enough. Secondly you may want to add some berries to the smoothie to hide the green color and turn it more of a blue or purple color. People seem to be more open to drinking smoothies that are red, purple or yellow and not green! And last of all you can add a pretty little garnish to your smoothie like a fresh berry, a pineapple wedge, an orange slice, or a small leafy green so that it looks pretty and presentable.

Filed Under: Articles, How To Tagged With: green smoothie, greens, how-to, smoothie, vitamix

How To Select And Ripen Mangoes For Recipes and Smoothies

August 5, 2012 by Veronica Grace 2 Comments

Fb-Button

What a ripe ataulfo mango looks like

Mangoes can be hard to understand for those new to tropical fruits. They often don’t know how to select them, when they are ripe, or know how to cut them. Generally I buy the yellow skinned ataulfo/champagne style mangoes because they don’t have a stringy flesh and are very sweet and creamy when ripe. Most people buy the Tommy green/red type mangoes. When ripe these can be good too but they are much stringier and have a larger woody core in them.

Mangoes will take 5-10 days to ripen depending on when they were picked and what kind of climate you live in. You can tell a mango is ripe when it is starting to wrinkle on the skin and get soft. (Just like an avocado gets soft to the touch when ripe.) It should not have any hard spots on it and should be slightly soft and juicy inside and not taught and rock hard. The inside colour will change from light yellow to dark yellow or orange depending on the variety. Unripe mangoes don’t make for tasty recipes, and when it doubt leave it another day or two. Even I sometimes get impatient and open a mango too early and am disappointed that it’s not at it’s peak ripeness yet.

Low Fat Vegan Chef Ripe Mini Ataulfo Champagne Mangoes

Another tip I have to getting good mangoes is to NOT buy them at the regular grocery or mainstream grocery stores. I find that their supplies are often poor, they are picked super early and don’t always ripen properly. This is a terrible place to buy mangoes. Bananas can generally be bought anywhere and will ripen, but not mangoes or papayas. Buy your mangoes from fruit markets, farmers markets, China Town/Asian fruit markets, Indian markets, Whole Foods, health food stores or Costco. (Costco’s ataulfo mangoes are usually fine, but the red/green mangoes when bought out of season often don’t ripen so I avoid those until the spring/summer.)

If you live in tropical places or states like California, Hawaii or Florida you may be able to get mangoes at the regular grocery stores that are fine, but this is usually because they were shipped shorter distances and thus did not need to be picked so hard and unripe or gassed. If you live in the northern states, Canada or northern European countries, you’ll want to avoid the regular grocery stores for tropical fruit purchases because of their bulk suppliers and slow turn around times. Going to Asian markets, Indian markets or other whole sale places will be a better bet for fresher produce.

Filed Under: Articles, How To Tagged With: how-to, mango

Raw Vegan Summer Piña Colada Recipe

July 29, 2012 by Veronica Grace 6 Comments

Fb-Button

“If you like piña coladas and being caught in the rain…” goes the song by Jimmy Buffett… I think almost everyone knows the lyrics to this song. Even when I was a kid we would sing the words to this song and we had never had a piña colada before haha!

But the song sure made them sound good, didn’t it?  I have to confess I never really liked regular piña coladas, I didn’t care much for their extra sugary, synthetic, milky flavour (or the alcohol).

What I have for you today is an exceptionally simple, yet amazingly delicious raw vegan AND much healthier version of a piña colada. It’s so good, you’ll never lament over those old creamy dairy based Summer beverages again. My piña colada is much better for you too!

photo credit: The Green Lean Bean

You can buy Thai coconuts at health food stores and Asian markets. These are young GREEN (not little brown) coconuts that have had their outer husks shaved off mechanically to reveal the white part surrounding the actual coconut. Thai coconuts contain a clear coconut water that is full of electrolytes and is very refreshing. They also contain either thin coconut jelly, or firmer coconut meat (this depends on how old the coconuts are, the older they are the thicker the inside coconut meat will be.)

Sometimes you can buy the coconuts with the very tips shaved off so you only need to poke a straw in the middle to be able to drink the coconut water. Others are full sealed so you will need to use a heavy knife to crack open around the top of the coconut.

Here is a youtube video showing just how easy it is to open a Thai coconut. (Not you do NOT have to buy a machete to do this, but you will need a heavy knife that has a sharp heel to it.)

I would say the recipe below can serve 2 people, but I’m not going to lie, I drank the whole thing! It’s that delicious. So I recommend buying at least 2 Thai coconuts if you plan on sharing your piña colada with others as well. 🙂


Raw Vegan Summer Piña Colada Recipe


Serves 1-2, yields about 3 cups

Ingredients:

1 medium Thai coconut – water and meat scooped out
2 cups pineapple chunks (about 1/2 small fresh pineapple)
1 large ripe banana (frozen is best)
1/2 cup of ice

Directions:

Place ingredients in the order listed into your VitaMix or blender. Blend until smooth and creamy.

Add more ice if desired. Serve with a fresh pineapple wedge and a straw.

Enjoy!

*Note that this is a high fat recipe, coconut meat is high in fat and contains saturated fat. So enjoy this treat, but you don’t need to eat coconut based foods every day.

Have you ever had a Thai coconut before? Have you ever used them in recipes?

Filed Under: Raw Breakfast, Raw Smoothies, Raw Vegan Recipes Tagged With: banana, coconut, gluten-free, mocktail, nut-free, pineapple, raw vegan, smoothie, soy-free

Want to Peek Inside a Successful Raw Fooder’s Kitchen and See What They Eat Every Day?

July 26, 2012 by Veronica Grace 2 Comments

Fb-Button
Have you ever wondered what exactly a raw foodist eats? Or more specifically what a successful LONG TERM raw foodist eats? I sure have. There are SO many different versions of a raw vegan diet that the differences from one person’s meals to the next is astonishing.
Well my good friend Nomi Shannon (author of the amazing raw recipe book The Raw Gourmet) has compiled day to day journals, recipes and dietary regimens of 48 long term raw and high raw food eaters.


The list includes well-known raw foodists such as:


  • Victoria Boutenko (author of “Green For Life“)
  • Dr. Doug Graham (author of “The 80/10/10 Diet“)
  • Cherie Soria (from the Living Light Culinary Arts Institute)
  • Matt Monarch (from the Raw Food World)
  • Dr. Jameth Sheridan (from Raw Food Research)
  • Dr. Ritamarie Loscalzo
Plus, a variety of people who eat a 50-90% (aka. high raw) raw diet such as:


  • Will Tuttle (author of “The World Peace Diet“)
  • Susan Schenck  (author of “The Live Food Factor“)
  • Trevor Justice (owner of The Vegetarian Health Institute)
Although you may not be able to bust in and check out their kitchen, but I’m going to let you in on the next best thing. Nomi Shannon’s new collection called  “What Do Raw Fooders Eat?” is now available and it’s going to blow your mind with just how jam packed full of fascinating information it is. Nomi had 48 raw fooders keep meticulous food journals for an entire week and submit them along with their personal dietary habits and health stories.


Nomi also compiled a MASSIVE number of bonus ebooks that she includes along with her “What Do Raw Fooders Eat?” collection. All in all you get hundreds and hundreds of new raw food recipes, everything from simple juices, smoothies and salads to gourmet raw food recipes for entertaining. It’s quite impressive.


Right now she’s doing a special promotion for me and my readers, and the first 300 people to order get all of these bonus recipe ebooks and videos absolutely free. (A $393.67 value!)


Insane right?


Check it out here:


http://rawgourmet.com/cmd.php?Clk=4787957


This special bonus offer of $393.67 worth of freebies ends as soon as it hits 300 orders. They’re going fast….

Filed Under: Articles, Product Reviews, Raw Vegan Recipes Tagged With: Nomi Shannon, Raw Gourmet, raw recipes, raw vegan

Things Every Bikram Yoga Newbie Should Know

July 26, 2012 by Veronica Grace 1 Comment

Fb-Button

I am a yoga novice… seriously novice.  I am not very flexible, I am much better at cardio and weight lifting and such. But apparently whatever sports you are not very good at are better for you physically than ones you’re already good at. Like the girls that already can every single yoga move with their eyes closed without breaking a sweat are NOT going to get as much out of a yoga class workout than those of us that are trying our hardest to make our bodies bend and move in ways that we wish we could…

Follow me?

I have done a few basic hatha yoga classes and some Yoga In Daily Life classes. I like these as they are not too impossible for me to do most of the moves. In fact if yoga weren’t so darn expensive I’d probably go more often.

Bikram yoga is a little different, it’s a type of “hot” yoga where you complete a set of 26 postures and 2 breathing exercises in a heated room for about 90 minutes. Depending where you go the rooms are heated at 40% humidity to about 104 F or 40 C. It’s hot!

I have never tried Bikram yoga before… frankly because I’m flat out too scared to do it on my own and I don’t know if I could handle the heat and the pressure of feeling like I want to fit in and not fall on my face. haha.

But Bikram yoga still intrigues me and I like to read about people’s experiences with it. Many people have had great results with becoming more flexible, losing weight, getting clearer skin, better sleep, lowering their stress levels and much more.

It’s one of those sports that people either LOVE it or they HATE it and couldn’t be more vocal and convincing about it.  It probably has a lot to do with people’s expectations, their fitness level and how helpful/intimidating their bikram yoga teacher is.

Everyone has good and bad experiences.

So I wanted to share this article I found online for those that are interested in trying bikram yoga for the first time, but are a little hesitant. You kind of wish you knew what to expect and if you’ll feel out of place if you can’t do some of the moves, or if you need to leave the room because you’re so hot etc.

The article is here: http://justherejustnow.wordpress.com/2012/07/24/bikram-yoga-beginner/

It’s got some great tips on what everyone should know as a bikram yoga beginner.  Apparently leaving the room because you are too hot is NOT a good idea, or you can pass out from getting up too quickly and trying to get out. It’s better to just lay back and relax and be calm if you cannot manage to do anymore of the postures. It’s not about finishing every single posture, it’s about staying in the room and training your body to be able to handle it.

Very interesting!

Let me know what you think.

Filed Under: Articles Tagged With: health, yoga

  • « Go to Previous Page
  • Page 1
  • Interim pages omitted …
  • Page 16
  • Page 17
  • Page 18
  • Page 19
  • Page 20
  • Interim pages omitted …
  • Page 28
  • Go to Next Page »

Primary Sidebar

Follow Us:

Newsletter

Get The Low Fat Vegan Starter Kit

natural organic skin care line

Free Skincare Samples

Earn Free Crypto At Binance

Earn Free Bitcoin on Gemini Exchange

Earn $10 in Bitcoin With Gemini Exchange
Dr. Fuhrman
Dr. Fuhrman
Dr. Fuhrman

Tags

80/10/10 apple avocado banana blueberries breakfast broccoli Carrots celery chickpeas cilantro corn cucumber Curry dill dinner easy Eat To Live fat-free gluten-free how-to Indian Dishes lemon low-fat mango mexican mushrooms nut-free oil-free pasta pineapple plant-based raw raw vegan rice smoothie soup soy-free spinach tofu tomato tomatoes vegan vegetarian vitamix

Secondary Sidebar

Recipes:

  • Cooked Vegan Recipes
  • *My Recipe Books
  • Breads and Baked Goods
  • Breakfast
  • Brunch
  • Burgers
  • Casseroles
  • Curries
  • Desserts
  • Dinner
  • Dips for Veggies or Chips
  • Eat to Live-Dr. Fuhrman Recipes
  • Engine2Diet
  • Ethiopian Dishes
  • Greek
  • Green Dishes
  • Holiday
  • Indian Dishes
  • Mexican
  • One Pot Meals
  • Pasta
  • Pizza
  • Quinoa
  • Salads
  • Sandwiches and Wraps
  • Raw Vegan Recipes
  • 80/10/10
  • Raw Breakfast
  • Raw Desserts
  • Raw Dips
  • Raw Dressings
  • Raw Entrees
  • Raw Juices
  • Raw Salads
  • Raw Smoothies
  • Raw Snacks
  • Raw Soups
  • Sauces
  • Side Dishes
  • Slow Cooker Recipes
  • Snacks
  • Soups and Stews
  • Spices/Seasonings
  • Sushi
  • Thai
  • Vietnamese

Copyright © 2026 · Foodie Pro & The Genesis Framework