Fat Free Raw Vegan Cabbage Slaw – Costa Rican Style

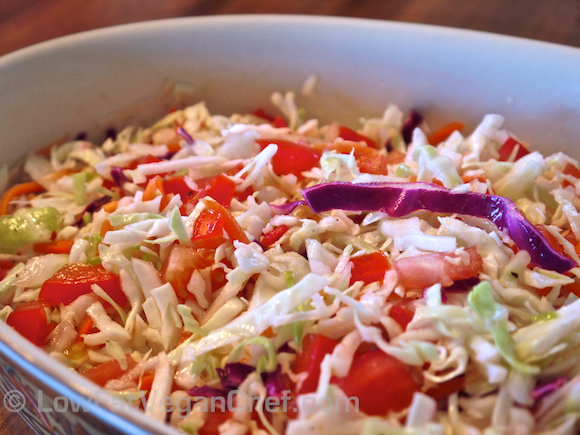
Raw Vegan Cabbage Slaw Costa Rican Style

This is a really easy and fast recipe that happens to be oil free, fat free and raw vegan. When we lived in Costa Rica we would eat this salad a lot and it’s a staple dish because cabbage is so abundant there. Most of the tender lettuces don’t last very long in the humidity down there even in the fridge, but cabbage never had a problem. So we ate a lot of cabbage while we were there. The Costa Ricans use VERY SIMPLE seasonings to flavour their dishes, this one only has a balance of lime juice and salt. You don’t have to add the salt, but it’s used to help wilt the cabbage and to cut the acidity of the lime and make it tangy. The tomato adds some juiciness to the recipe as well, so make sure you use a good tomato.

If you get store bought coleslaw mix you can have this salad ready in minutes and then put it in the fridge while you prep your main dish.

I’ve served this to raw foodies and non raw eaters and both love it as a tangy topping to latin style dishes. Typically this Costa Rican cabbage salad would be eaten with seasoned rice and black beans which is also called gallo pinto.

Cabbage has a very nice flavour and does not require any oil. Please don’t drown your healthy cabbage in olive oil or creamy dressing! Oil free coleslaw recipes are delicious.

Fat Free Raw Vegan Cabbage Slaw Costa Rican Style

Serves 4 as a side dish

Ingredients:

5 cups green cabbage, sliced (or slaw mix)
1 medium ripe tomato, diced
1/3 cup white onion, diced
1 -1 1/2 large limes, juiced
1/2 tsp herbamare or salt
1/4 tsp fresh ground pepper or to taste

Directions:

1. Place cabbage or slaw mix into a bowl. Add tomatoes and onions and seasonings. Roughly squeeze and massage the cabbage to wilt it and make the tomatoes release their juices.

2. Taste test and add more lime or salt if desired.

3. Let sit in the fridge for at least 30 minutes to soften before serving.

4. Serve with raw entrees or as a topping for vegan tacos or rice and beans.

Variations:

You can also add some chopped raw cilantro (coriander) or parsley if desired. Julienned carrot or celery, red cabbage, or jicama can be used to mix it up as well for more raw salad creations.

What do you think of this recipe? What did you serve it with?
Low Fat Vegan Tangy Collard Greens With Mushrooms, Onions and Coconut Milk

Tangy Collard Greens with Mushrooms, Onions and Coconut Milk

Here is my delicious low fat vegan collard greens recipe!

Reminder: Make sure to subscribe to my bi-weekly newsletter on the right to receive my newest raw and cooked vegan recipes each week! You can also follow me on Facebook, Twitter and Youtube. Link icons are above!

This is an easy oil free and super delicious side dish that you can prepare to accompany any meal! A lot of people know of collard greens, but have no idea how to prepare them healthily, or at all. Generally in the southern United States, it is fried or deep fried and this pretty much negates the benefits of eating collards for health, because your body is dealing with all the denatured carcinogenic fats and free radicals from the oil slathered on it.

To get the health benefits of greens they should be prepared simply. Some of them like baby spinach and tender lettuces can be eaten in raw salads. Collards can be used in raw sandwiches (burrito style rolls) or steamed or sautéed gently.

Depending where you live it may be easy or difficult to find collard greens. I’m in Texas right now, and they are abundant, it only costs about 88 cents (USD) for a giant bunch of them! In Canada, I can only get them in Whole Foods and it costs about $2.99 (CAD) per bunch. So we’re loading up on them here!

Collard Greens Lower Cholesterol Better Than Kale or Broccoli!

“In a recent study, steamed collard greens outshined steamed kale, mustard greens, broccoli, Brussels sprouts, and cabbage in terms of its ability to bind bile acids in the digestive tract. When this bile acid binding takes place, it is easier for the bile acids to be excreted from the body. Since bile acids are made from cholesterol, the net impact of this bile acid binding is a lowering of the body’s cholesterol level. It’s worth noting that steamed collards show much greater bile acid binding ability than raw collards.” Ambrosone CB, Tang L. Cruciferous vegetable intake and cancer prevention: role of nutrigenetics. Cancer Prev Res (Phila Pa). 2009 Apr;2(4):298-300. 2009.

Brief History of Collard Greens

Like kale, cauliflower and broccoli, collards are descendents of the wild cabbage, a plant thought to have been consumed as food since prehistoric times and to have originated in Asia Minor. From there it spread into Europe, being introduced by groups of Celtic wanderers around 600 B.C. Collards have been cultivated since the times of the ancient Greek and Roman civilizations. While collards may have been introduced into the United States before, the first mention of collard greens dates back to the late 17th century. Collards are an integral food in traditional southern American cuisine.

How to Select and Store Collard Greens

Look for collard greens that have firm, unwilted leaves that are vividly deep green in color with no signs of yellowing or browning. Leaves that are smaller in size will be more tender and have a milder flavor. They should be displayed in a chilled section in the refrigerator case to prevent them from wilting and becoming bitter.

Place collard greens in a plastic bag, removing as much of the air from the bag as possible. Store in the refrigerator where they should keep fresh for about three to five days.

Cooking Collard Greens

It is very important not to overcook collard greens. Like other cruciferous vegetables overcooked collard greens will begin to emit the unpleasant sulfur smell associated with overcooking. To help collard greens to cook more quickly, evenly slice the leaves into 1/2-inch slices and the stems into 1/4-inch pieces. You may boil or steam them up to 5 minutes and then season.

For more information on collard greens check out this website http://whfoods.org/genpage.php?dbid=138&tname=foodspice


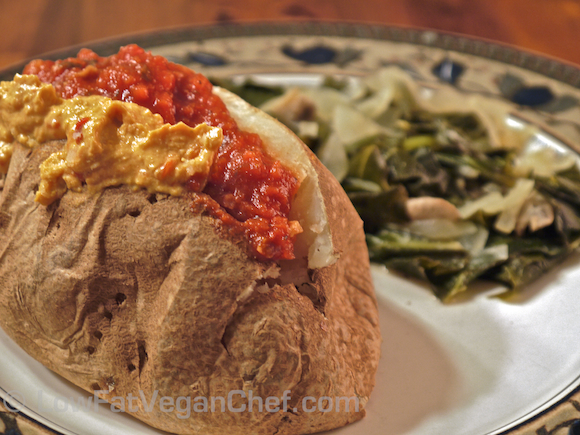
Giant baked potato with salsa, hummus and "Tangy Collard Greens"

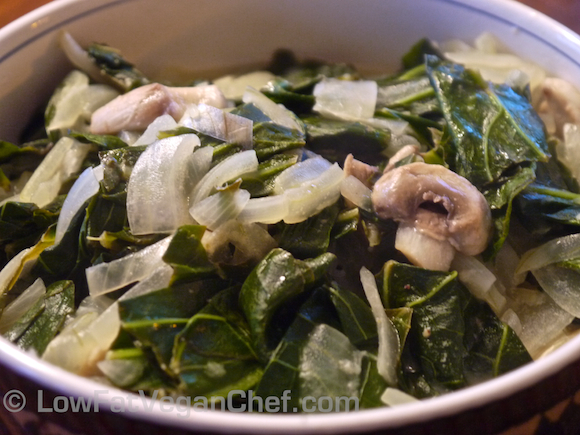
Low Fat Vegan Tangy Collard Greens with Mushrooms, Onions and Coconut Milk

This collard greens recipe is much lower in fat than traditional collard green recipes that call for frying onions in oil first and then adding the greens. I serve these with giant baked potatoes for a completely filling meal. (Yes, dinner can be this simple and delicious!)

Serves 2

Ingredients:

1 large bunch collard greens, washed
1/2-1 cup of sliced mushrooms of choice
1 medium onion, sliced thinly
1/2 cup light unsweetened coconut milk (So Delicious SugarFree Original is excellent for this, don’t use vanilla or sweetened for this recipe)
1/4 – 1/2 tsp herbamare or salt
1 tbsp of lemon juice (or more if desired)
1/2 tsp sugar or sweetener
1/2 tsp dijon mustard
1 tbsp nutritional yeast
fresh ground pepper to taste

Directions:

1. Take the stems off of the collard greens by turning them upside down and making a small circle with your pointer finger and thumb and squeezing the leaves down and off from the stem. Like you would straighten a pipe cleaner. Cut the remaining parts of the stem off the top if you miss any bits.

2. Bunch all the collards up together on a cutting board and cut into chunks.

3. In a large pot, bring salted water to a boil. When boiling, add the collard greens and cook for 2-3 minutes. Drain well.

4. In a large non stick skillet, turn to medium heat. When it’s hot add the onions and sauté dry for 5 minutes. (TRUST ME, it will NOT burn if you use a non stick pan, and no oil is necessary!) Add the mushrooms, collards, coconut milk and seasonings except for pepper and sauté for 8-10 minutes until collards are at desired tenderness.

5. Taste test and add fresh ground pepper and any additional seasonings like more lemon if desired.

6. Serve as a side dish with your meal. (I love serving these with baked jacket potatoes, beans, or rice.)

Variations:

You can also try this recipe with other greens like kale, mustard greens, turnip greens, beet greens etc.  If you use baby spinach, DO NOT boil it, you can just wilt it in the pan with the coconut milk in a few minutes. Make sure your onions and mushrooms are cooked first before adding the spinach.

If you don’t want to use coconut milk, feel free to use a low fat almond or soy milk instead. The coconut flavour is very mild in this and not essential to the overall taste.

Try other seasonings as well, add some spices like paprika, chili, cumin etc instead of the dijon and nutritional yeast.  Mix it up!

*If you don’t want to use a non stick pan, you can put the collards, onions and mushrooms into a steamer basket, steam for 5 minutes over boiling water and then drain. Season to taste with the coconut milk and seasonings and stir to combine.

See non stick pans – are there safety concerns http://lowfatcooking.about.com/od/healthandfitness/a/nonstickpans.htm  You should NOT worry about cooking oil free over medium heat in a non stick pan. If nothing is flaking off, or food is not being burned onto the pan on high heat for a few minutes this is not a concern.

Have you ever cooked collard greens before? What do you think of this recipe?

How To Make A Vegan Dragon Roll Sushi Roll (Uramaki) With Photos!

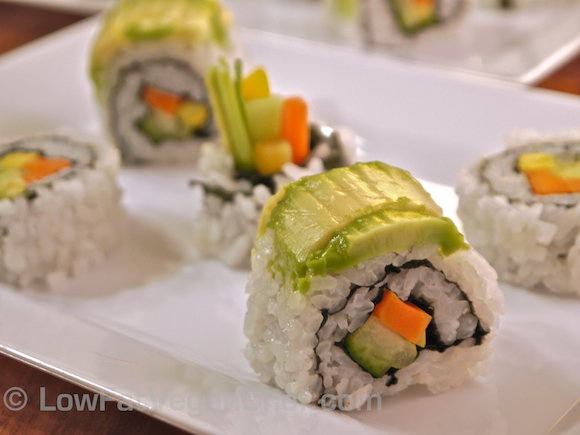
Vegan Dragon Sushi Roll

Dragon rolls are generally not vegan or vegetarian and filled with smoked eel and drizzled with eel sauce. But they look so pretty and are covered in avocado, which is vegan and delicious in sushi.

So here’s my version of a vegan Dragon Roll. It’s very similar to making my vegan California Roll, but we’re going to take the avocado out from the middle, and put it ontop of the roll instead and add some additional filling.

Makes 2 dragon rolls

You Will Need:

1/2 recipe of sumeshi aka sushi rice (found here)
2 pieces nori seaweed
4 sticks julienned cucumber (see my post on prepping veggies here)
4 sticks julienned carrots, steamed gently
4 sticks another vegetable of choice, I used julienned zucchini, steamed gently
4 strips sliced green onion (scallion)
1 small-medium avocado

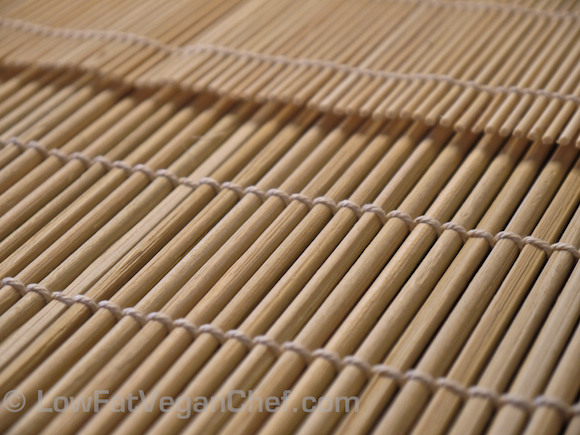
To make this vegan sushi roll we are going to use the thick style sushi mat. (The one on the bottom) It’s much stronger and will give a firm shape to the sushi. I bought a set of sushi mats in a cheap 2 pack on Amazon for about $7 with free shipping. You can also find a single mat for a few dollars on Amazon like this one . Asian stores will sell them as well.

How To Wrap Your Bamboo Sushi Mat For Uramaki – Inside Outside Rolls

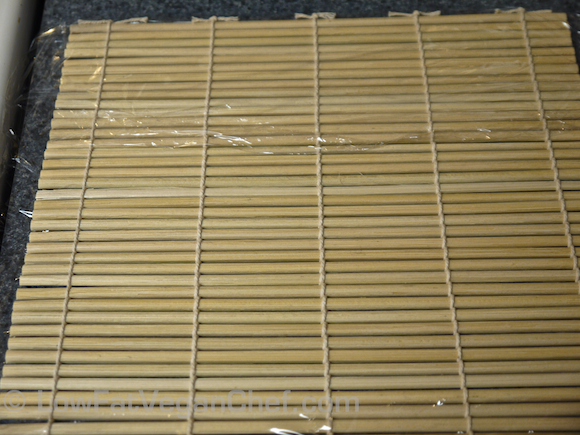
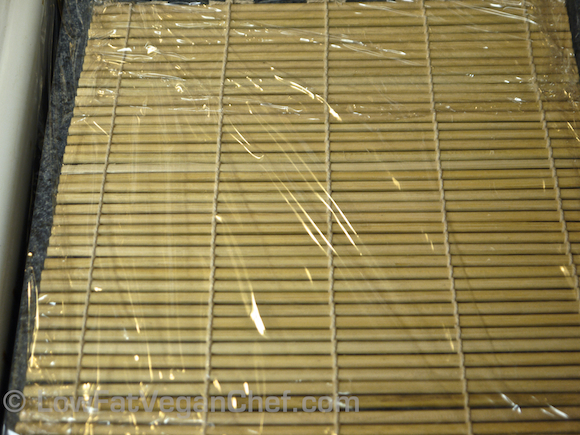
We’re going to wrap our sushi mat in plastic wrap/saran wrap. We do this because sushi rice is SUPER sticky and will make a mess on the bamboo mat, yet it comes off easily from the plastic wrap. Basically you’re going to wrap it like you would a present with wrapping paper, tucking in all the sides and the wrap should cling to itself to seal it.

Sushi mat wrapped on one side and sides tucked over

Take a piece of plastic wrap and put it on top of one side of the mat. Flip it over and then tuck in the side and top and bottom so that the back side is totally sealed.

Sushi mat with front side covered in wrap

Next, take another piece of plastic wrap and place it over the front side (that has the sides tucked in) and flip it over and tuck in the sides and top and bottom again.

Sushi mat covered on all sides and pulled tight

Now your sushi mat is ready to make vegan Dragon Rolls.

How To Make A Vegan Dragon Roll (Uramaki / Inside Outside)

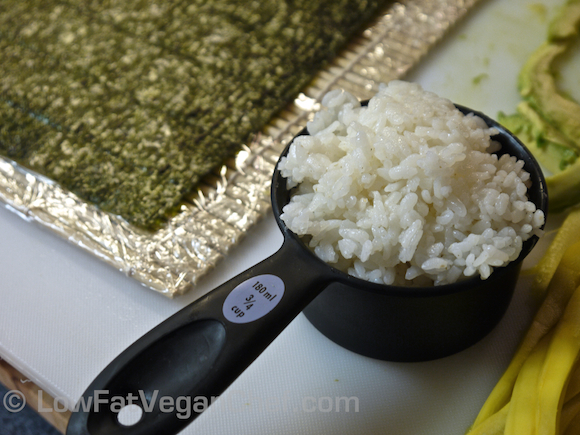
Step 1: Measure between 3/4 and 1 cup of sushi rice depending how much rice you want on your roll. (They are very filling, usually a person can only eat 2 of these rolls max because the rice is so filling.) I used a heaping 3/4 cup of rice and it was just enough for me.

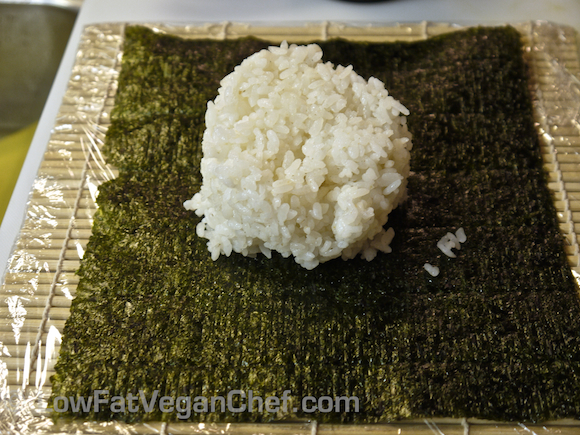
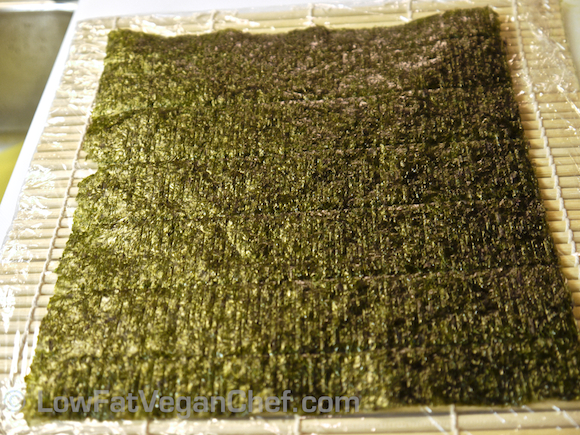
Step 2: Lay your nori sheet SHINY side up (with the dotted line side face down) This is the backside of your nori sheet and we’re going to cover it with rice. Dump your rice into the middle of the nori sheet.

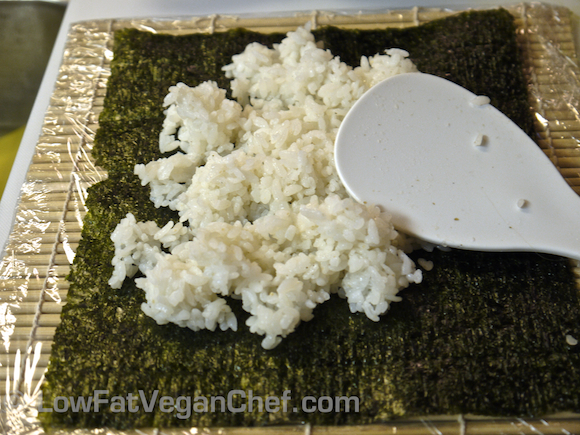
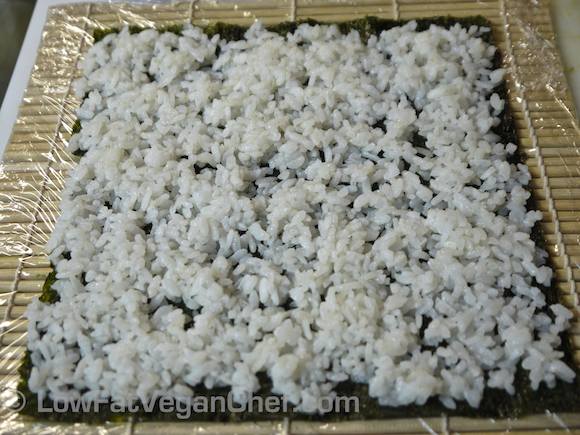
Step 3: Using your rice paddles (or very wet fingers) gently push the rice outwards and to the edges and the corners. This will take a while until you get the hang of it. You can leave a tiny space on the top and bottom of the sheet and this will make the roll easier to roll up.

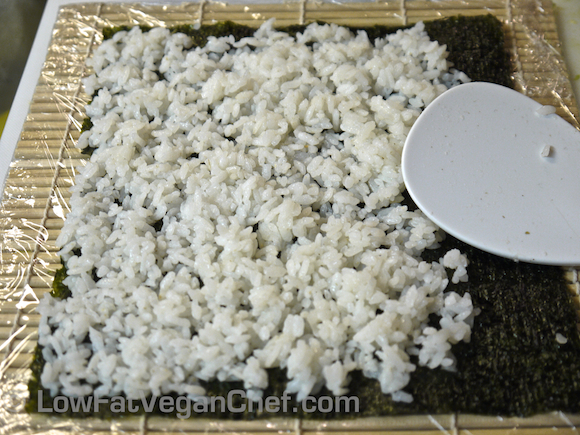
Continue spreading out the rice until you have a layer about 1-2 rice grains thick. It won’t be perfect, but as long as there are no big gaps it will be good.

Step 4: Press your rice down on your nori sheet so that no grains are sticking up and it’s level.

Step 5: Pick up your nori sheet from the bottom, holding tightly and flip it over away from you. Now the dotted section side should be facing you.

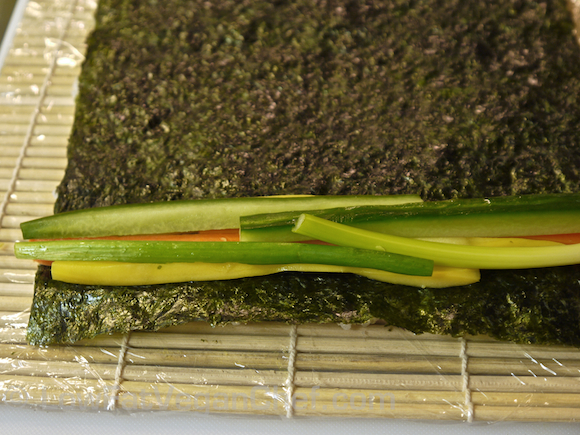
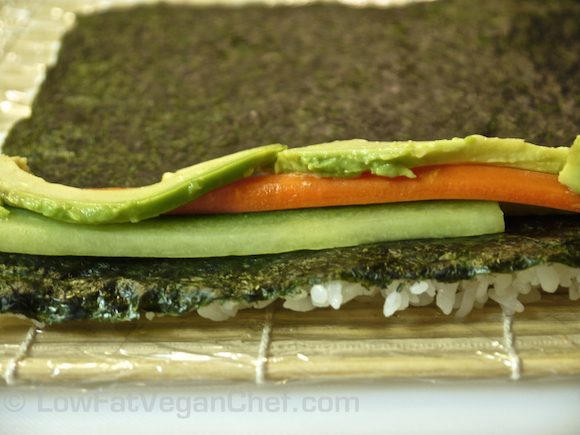
Step 6: Fill your nori sheet with desired filling. In this case for my vegan dragon roll, lay 2 strips of cucumber lengthwise, 2 strips of carrot, 2 strips of green onion and 2 strips of zucchini. Spread them out so they fill the entire roll. It can spill out a little over the side, but not too much. Your filling is going to lay in the first rectangular area of the sheet. After the little bottom bar.

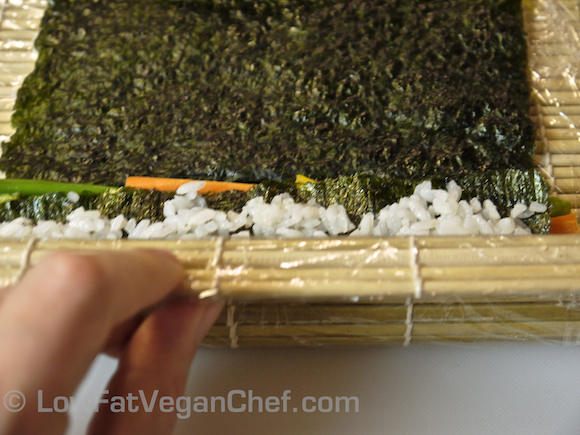
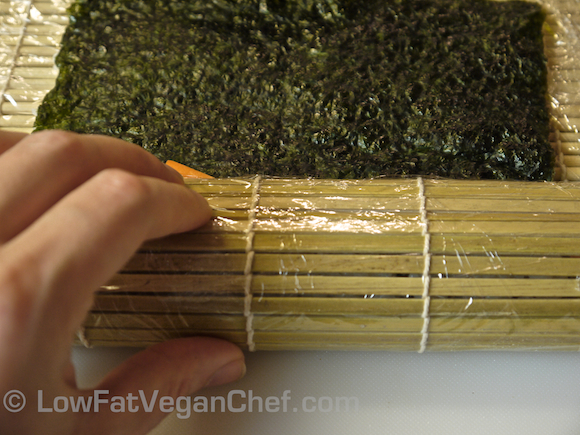
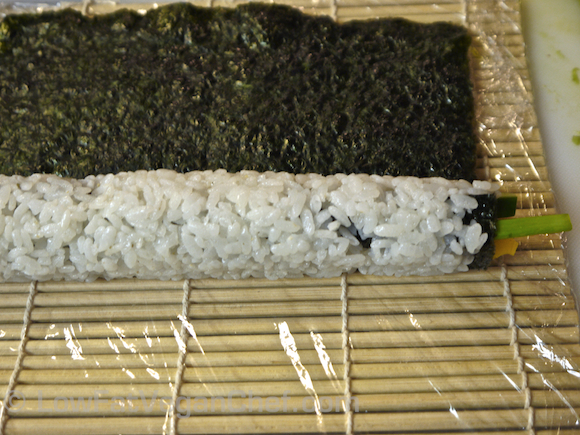
Step 7: Next we’re going to grab the bottom of the sushi mat and bring it up and over creating a tube. You want to make one roll so that you cannot see your filling anymore and tuck and squeeze it under with your hands and the sushi mat. You want to make each roll tight so that your sushi stays together and the filling won’t fall out of the middle when you slice it.

Continue rolling tightly up the nori sheet.

This is what it looks like when 1 full roll is done. Continue rolling.

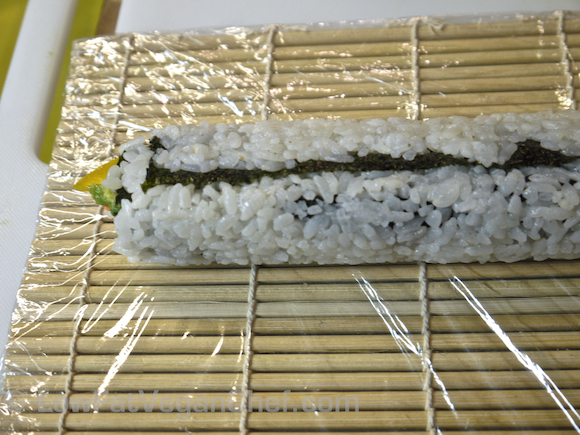
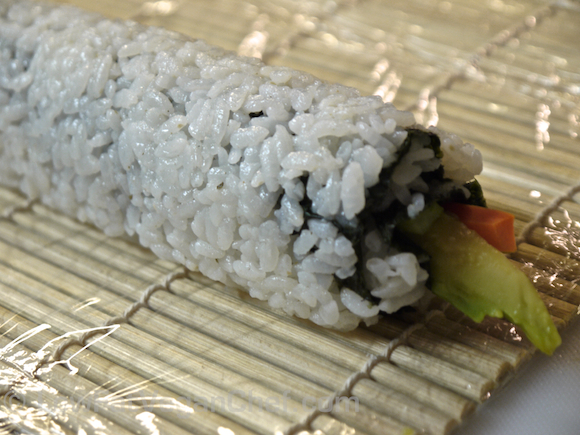
Roll your nori sheet up until the end. You shouldn’t have to wet the end of the nori to seal it. It has moisture from the sticky rice. You want to squeeze it firmly and evenly all across the mat when you get to the end to seal the roll evenly.

This is what your sushi roll looks like when it’s sealed.

Step 8: Flip your sushi roll over so the seam side is faced down.

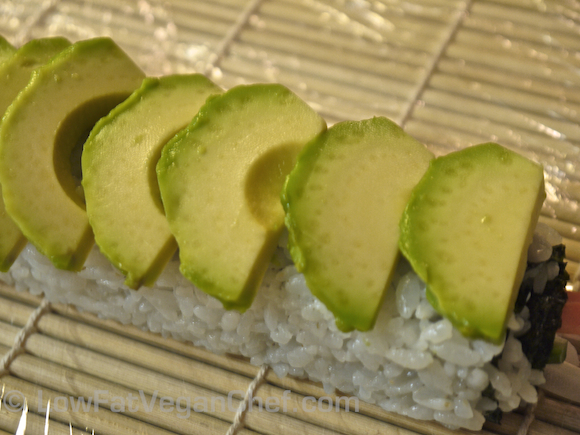
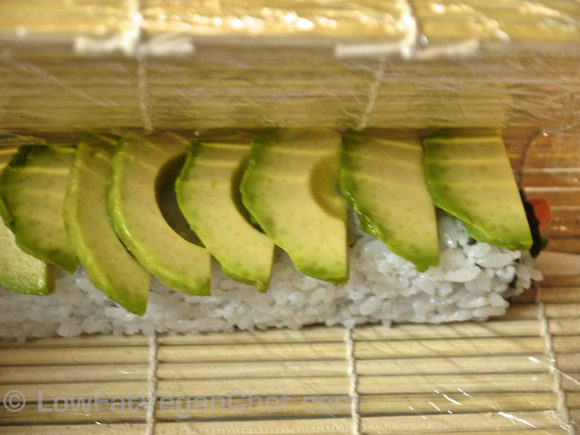
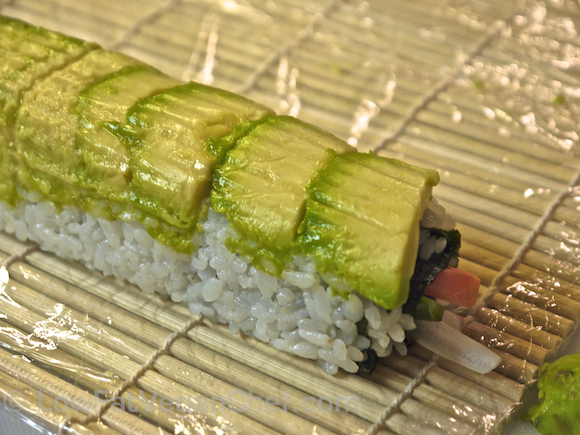
Step 9: Next slice your avocado thinly and lay each piece onto the top of your sushi roll.

Step 10: Bring your mat up over the roll and press down on the avocado on the top and sides. Just hard enough to crush it against the rice so it sticks.

Step 11: Get a very sharp knife, wet it thoroughly with water and make a 6-8 cuts to the sushi roll to create sushi pieces. This takes some time and patience. You must wet your knife between EACH cut because your knife will be covered in sticky starch from the rice. If you don’t keep the knife wet and clean before each cut you can tear and mangle your pretty sushi roll. I generally cut these ones into 6 pieces. But if you’re feeding children, it’d be better for 8 pieces so it’s not too big for them to bite into.

Vegan Dragon Roll

Next plate your sushi and serve with soy sauce or tamari and chopsticks! Enjoy your beautiful vegan Dragon Roll!

How To Make A Vegan California Sushi Roll (Uramaki / Inside Outside Roll)

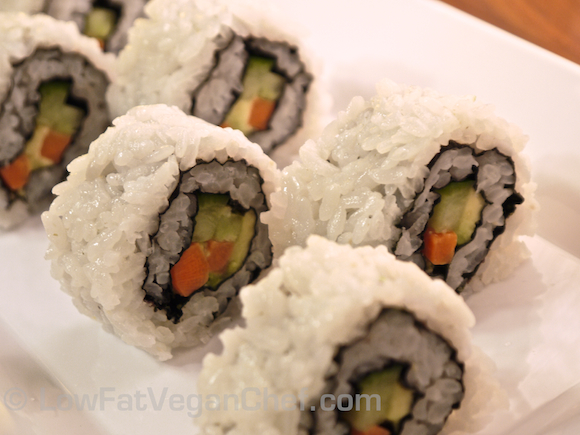
Vegan California Roll (Uramaki Style)

California rolls are not normally vegan, but you can make them that way at home! Who needs to buy expensive veggie sushi rolls at the store when you can make your own at home?

California rolls are probably the most familiar type of sushi roll to North Americans. It was designed by a Japanese chef in the 1970’s in California to hide the seaweed used for the roll inside and instead put the rice on the outside of the roll. Therefore being less intimidating and easier to stomach for those not accustomed to eating seaweed and enjoying it.

This Vegan California sushi roll is a Uramaki style, which means inside out or inside outside roll. It’s appealing to look at and can be topped with many things like avocado (like in a Dragon Roll) Sesame seeds (common on California Roll) or fish (like in a Rainbow Roll).

I’m going to show you how to make a basic vegan California roll. To veganize it, we’ve had to take out the basic ingredients of a California roll though, the crab stick (fake crab made from pollock fish) and the mayonnaise. Obviously crabstick is not vegan, so I omitting that.

I’m pretty against the idea of eating sushi with mayo as well, because it contains eggs and is basically all oil. Vegan mayo is more a transition food, and not a health food. In North America we use way too much mayo as it is, and this is not part of traditional sushi at all. It’s just a condiment used in California to entice Americans into eating sushi who wouldn’t consider otherwise. This roll tastes delicious without it and is creamy from the avocado.

You can scope out your local health food store or vegetarian-friendly Asian shop if you’re dying to get some vegetarian crab stick for the roll. I just personally don’t have a taste for fake meats and fake fish, and prefer vegetable fillings myself.

This is my version of a healthier California-esque sushi roll. (Because most people think inside out sushi rolls are always California rolls! lol)

Thin and Thick Style Sushi Mats

To make this roll we are going to use the thick style sushi mat. (The one on the bottom) It’s much stronger and will give a firm shape to the sushi. I bought a set of sushi mats in a cheap 2 pack on Amazon for about $7 with free shipping. You can also find a single mat for a few dollars on Amazon like this one . Asian stores will sell them as well.

How To Wrap Your Bamboo Sushi Mat For Uramaki – Inside Outside Rolls

We’re going to wrap our sushi mat in plastic wrap/saran wrap. We do this because sushi rice is SUPER sticky and will make a mess on the bamboo mat, yet it comes off easily from the plastic wrap. Basically you’re going to wrap it like you would a present with wrapping paper, tucking in all the sides and the wrap should cling to itself to seal it.

Take a piece of plastic wrap and put it on top of one side of the mat. Flip it over and then tuck in the side and top and bottom so that the back side is totally sealed.

Next, take another piece of plastic wrap and place it over the front side (that has the sides tucked in) and flip it over and tuck in the sides and top and bottom again.

Sushi mat covered on all sides and pulled tight

Now your sushi mat is ready to make vegan Uramaki sushi (Inside out) rolls.

How To Make A Vegan California (Uramaki style) Sushi Roll

Makes 4 Rolls

You Will Need:

1 recipe of sushi rice (found here)
4 pieces nori seaweed
8 sticks julienned cucumber (see my post on prepping veggies here)
8 sticks julienned carrots, steamed gently
8-12 slices of avocado

Step 1: Measure between 3/4 and 1 cup of sushi rice depending how much rice you want on your roll. (They are very filling, usually a person can only eat 2 of these rolls because the rice is so filling.) I used a heaping 3/4 cup of rice and it was just enough for me.

Step 2: Lay your nori sheet SHINY side up (which the dotted line side face down) This is the backside of your nori sheet and we’re going to cover it with rice. Dump your rice into the middle of the nori sheet.

Step 3: Using your rice paddles (or very wet fingers) gently push the rice outwards and to the edges and the corners. This will take a while until you get the hang of it. You can leave a tiny space on the top and bottom of the sheet and this will make the roll easier to roll up.

Continue spreading out the rice until you have a layer about 1-2 rice grains thick. It won’t be perfect, but as long as there are no big gaps it will be good.

Step 4: Press your rice down on your nori sheet so that no grains are sticking up and it’s level.

Step 5: Pick up your nori sheet from the bottom, holding tightly and flip it over away from you. Now the dotted section side should be facing you.

How To Make A Vegan California Sushi Roll With Avocado Carrots Cucumber Inside Out Uramaki Roll

Step 6: Fill your nori sheet with desired filling. In this case for my vegan California roll, lay 2 strips of cucumber lengthwise, 2 strips of carrot and 2-3 slices of avocado. Spread them out so they fill the entire roll. It can spill out a little over the side, but not too much. Your filling is going to lay in the first rectangular area of the sheet. After the little bottom bar.

Step 7: Next we’re going to grab the bottom of the sushi mat and bring it up and over creating a tube. You want to make one roll so that you cannot see your filling anymore and tuck and squeeze it under with your hands and the sushi mat. You want to make each roll tight so that your sushi stays together and the filling won’t fall out of the middle when you slice it.

Continue rolling tightly up the nori sheet.

This is what it looks like when 1 full roll is done. Continue rolling.

Roll your nori sheet up until the end. You shouldn’t have to wet the end of the nori to seal it. It has moisture from the sticky rice. You want to squeeze it firmly and evenly all across the mat when you get to the end to seal the roll evenly.

This is what your sushi roll looks like when it’s sealed. If you want to add sesame seeds to your sushi roll, now is the time to do it. Sprinkle sesame seeds over the top and bottom of the roll and use the sushi mat to press the sesame into the roll.

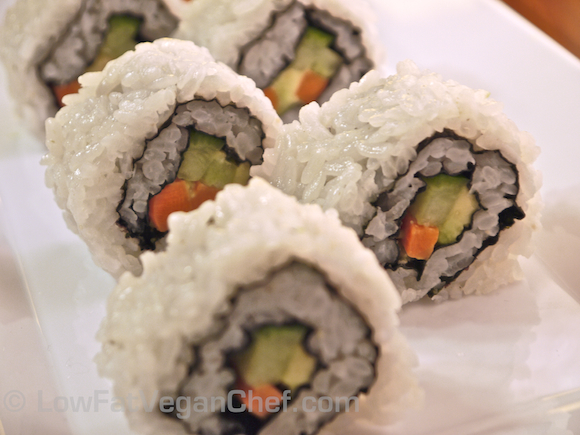
Step 8: Flip your sushi roll over so the seam side is faced down. Get a very sharp knife, wet it thoroughly with water and make a 6-8 cuts to the sushi roll to create sushi pieces. This takes some time and patience. You must wet your knife between EACH cut because your knife will be covered in sticky starch from the rice. If you don’t keep the knife wet and clean before each cut you can tear and mangle your pretty sushi roll. I generally cut these ones into 6 pieces. But if you’re feeding children, it’d be better for 8 pieces so it’s not too big for them to bite into.

How To Make A Vegan California Sushi Roll With Avocado Carrots Cucumber Inside Out Uramaki Roll

Next plate your sushi and serve with soy sauce or tamari and chopsticks!

How To Make Perfect Sushi Rice For Vegan Sushi Rolls With Photos!

Sushi rice is called sumeshi in Japanese. It is essential to making sushi, and contrary to what you may think it is not just plain white rice that is used. It is cooked and then seasoned to have a tangy sweet taste.

This page will tell you how to make the perfect sushi rice for sushi. Check out my recipe for Vegan California Rolls when you’re done.

How To Make Perfect Sushi Rice With Step By Step Photo Instructions

To make this recipe you will need:

2 cups sushi rice (short grain)
2 cups filtered water
3 tbsp rice vinegar
2 tbsp sugar
1 tsp herbamare or salt (You can use more if you wish, but you’re going to dip the sushi in soy sauce anyways which is very salty)

Tools needed:

Fine mesh strainer or sieve
Rice paddle or wooden spoon
Large Wooden/Glass/Ceramic/Plastic bowl (not metal)

Step 1: Measure out 2 cups dried sushi rice (short grain white or brown rice. It must be short grain!) You can double if desired, but this will make enough sushi for at least 4 large rolls and a small roll or two. Enough for 2 adults for dinner, or two single lunches.

Step 2: Rinse your rice through a fine metal sieve until the water runs clear, OR soak in a large bowl of water and mix around by hand to get the excess starch off. Rinse and soak a few times until the water is clearer. This is important and will make your rice turn out better.

Step 3: (Optional) Let your rice soak for 30 minutes.

Step 4: Place rice and 2 cups water into rice cooker or pot. (If using more rice, always use a 1:1 (same) ratio of rice and water)

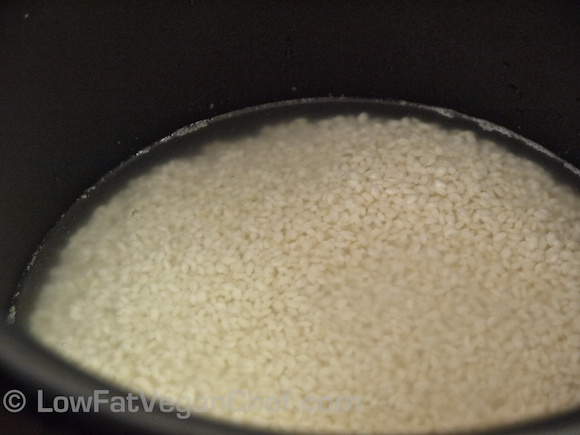
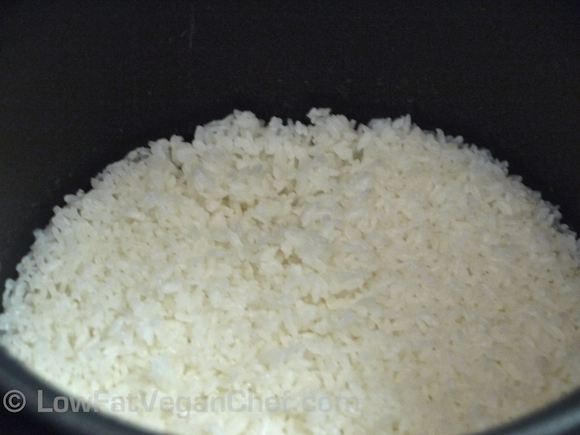
Rinsed sushi rice in rice cooker

Step 5: Rice cooker instructions: Set the white rice program and let it cook. My favourite rice cooker is my Zojirushi 5 1/2 cup rice cooker because it has settings for white rice, brown rice, mixed rice, porridge and cake. Yes you can even cook cake in this rice cooker! It’s wicked. Check it out. If fancy rice cookers aren’t of any use to you, check out this Hamilton Beach rice cooker (for $45 with free shipping) I use frequently when cooking at my mom’s house. It’s great too for basic rice and has never overcooked or burned the rice. I used to use those $10 rice cookers with just an on off button, but often times they would turn off before the rice was done, overheat and cause overcooked or crusty rice. If cooking for a family, I highly suggest getting a decent rice cooker to free you up from the stove and the guesswork of making perfect rice. When the rice is done cooking and the buzzer goes off, leave the rice for 10 minutes to let steam. Don’t open it and don’t touch it.

Stove top instructions: In a pot, place the rinsed rice and equal parts of water and bring to a boil. Stir the rice occasionally to prevent any grains from sticking to the bottom of the pot. Once it reaches a boil, turn down the heat to medium low, cover with a lid and steam. Do NOT open the lid until the rice is done steaming. You will lose your moisture and heat and jeopardize your rice being cooked evenly. Use a clear glass lid if you can. The rice is done cooking when the water disappears, this happens between 8 and 10 minutes depending on the type of stove you have. Remove the rice from heat.

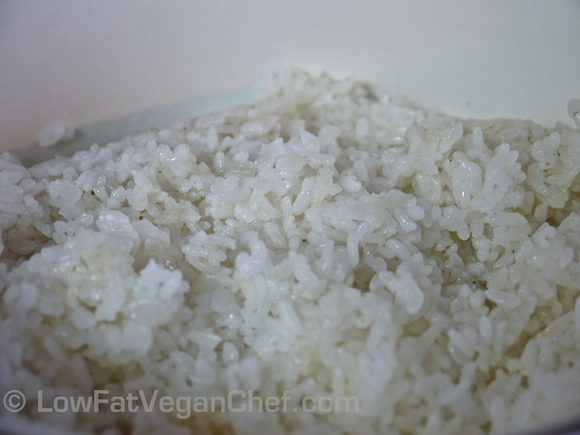
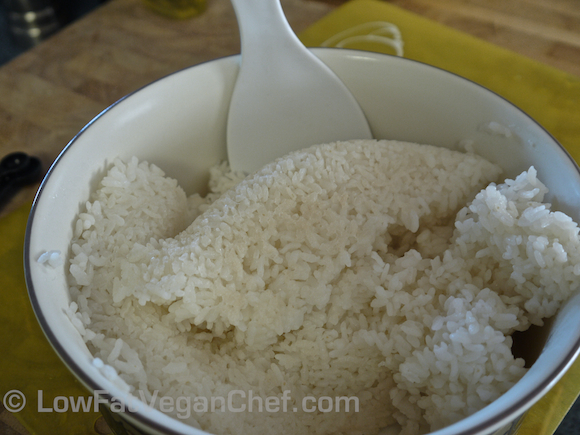
Perfectly cooked sushi rice

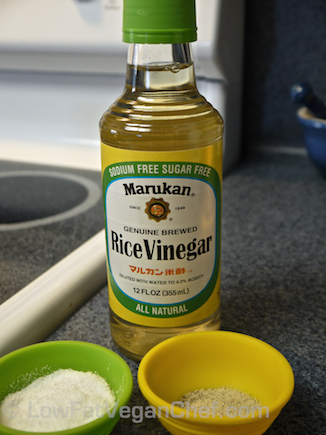
Step 6: Measure 3 tbsp rice vinegar, 2 tbsp granulated sugar and 1 tsp herbamare or salt. You can use more salt if you want, but really its not necessary if you’re going to be dipping your sushi in soy sauce which is super salty anyway.

Rice vinegar, sugar and herbamare (salt)

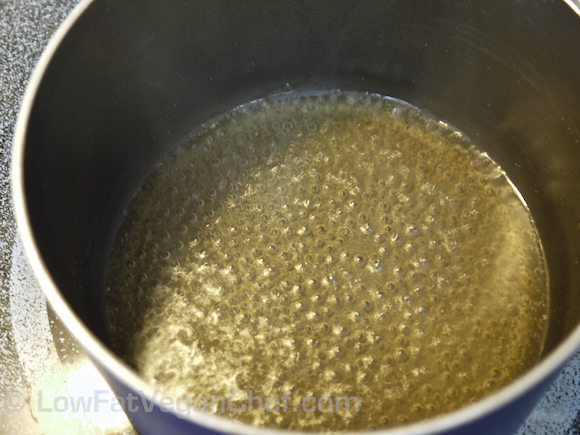
Step 7: Make sushi vinegar. Heat a small pot (not metal) over medium heat and add vinegar, sugar and herbamare (or salt). Stir.

Combine vinegar, sugar and salt in pot

Sushi vinegar is ready

When it is bubbling and everything is dissolved remove from heat and let cool.

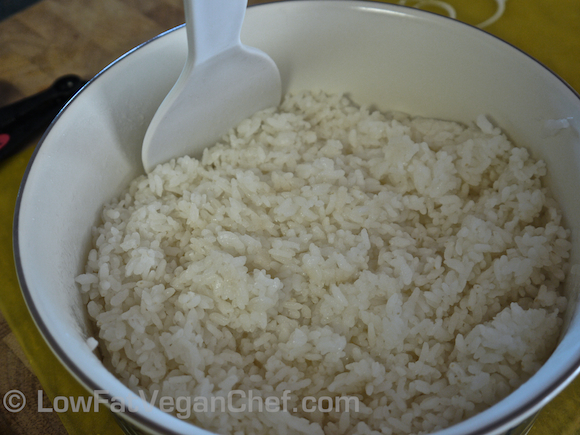
Step 8: Remove rice from pot or rice cooker with a wooden spoon or that plastic rice scoop you have. You basically want to scrape the bottom and dump the rice in 1 or 2 strokes so that you don’t damage the sushi rice too much and mash it. Pour it out into a wooden, glass or plastic bowl. If you put it in a metal mixing bowl, you risk the chance of ruining the flavour when pouring vinegar on it and it reacting with the metal. Don’t do it. Only scoop out perfectly cooked rice, if any is stuck or undercooked, leave it in the pot.

Sushi rice removed from pot

Step 9: Gently cut into sushi rice with paddle to break up.

Perfect seasoned sushi rice

Step 10: Season sushi rice by drizzling sushi vinegar evenly across rice. Cut into rice gently again to combine and spread out the seasoning.

Let your perfect sushi rice cool off before making sushi. If it’s too warm it can stick to the sushi mat and be hard to work with. Now you are ready to prep your veggies or filling for sushi rolls!

Low Fat Oil Free Vegan Baked Maple Yam Pecan Casserole

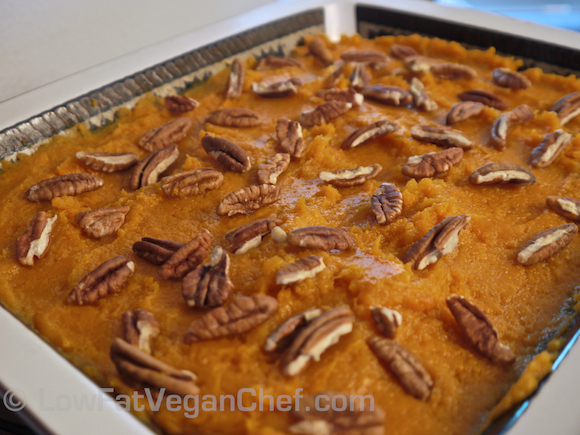
Low Fat Vegan Maple Yam and Pecan Casserole

Featured in my new recipe eBook: Vegan Comfort Foods From Around The World with other holiday favorites like Garlic Mashed Potatoes, Holiday Stuffed Acorn Squash, Cranberry Apple Pecan Stuffing, Cheezy Sauce For Steamed Vegetables and 5 different gravy recipes and more!

I want to  share some of my delicious Christmas dinner recipes I made last year with you. Baked Yam Pecan Casserole is super easy to make and one of my favorite Thanksgiving and Christmas dishes.

It was my extended family’s first “predominantly vegan” Christmas and holiday dinner.  My mom was so thrilled not to have to deal with a turkey, so she just had her husband pick up some pre cooked roast turkey for himself and my grandmother, and the rest of us just at vegan and loaded up on all the delicious sides!

We made my new Cranberry Apple Pecan Stuffing, mashed potatoes and 2 kinds of gravy, vegetables in cheezy sauce. I know some of you will be wanting the recipes, so here’s another one for you to save for special holidays, or whenever you have a serious Yam craving! (Or if you are obsessed with sweet potato casseroles, or sweet potato pie, like they are in the South. I’m in Texas right now lol)

Now these are actually yams, but Americans will still call them Sweet Potatoes. Pretty much anything that seems like a potato and tastes sweet, they call sweet potatoes. In Canada and the rest of the world, they are called yams (In Australia kumara).  Hence why I called the recipe a Yam Casserole. I think the name “sweet potato” is very ambiguous and confusing, as in the USA it encompasses basically any starchy root than is semi sweet, whether it’s golden yams, purple yams, orange yams (like above) etc.  Check out the Wiki on yams if you don’t believe me!

This recipe is SUPER easy and you can of course scale it down if you don’t want lots of leftovers.

This recipe is also oil-free, Earth Balance-free and guilt free! If you don’t have maple syrup, you can certainly use some agave, brown rice syrup or other preferred sweetener.

Low Fat Vegan Maple Yam Pecan Casserole (Sweet Potato Pie -ish)

(You can also half this recipe, if you don’t want leftovers)

Serves 8-10

Ingredients:

5 large yams (orange flesh sweet potatoes in the USA if you insist on calling them that 🙂 )
1/4 cup maple syrup
2 tbsp brown sugar
1 tsp herbamare
1/2 cup pecan halves

Directions:

1. Peel and slice yams into 2″ thick slices. (This is so they cook faster)

2. Steam yams or cook in a pressure cooker just until tender. As soon as you can poke easily with a fork and break them apart they are done.

3. Drain and turn into a bowl and mash with potato masher.

4. Add seasonings and stir gently.

5. Pour into a casserole pan, garnish with pecans and keep warm in the oven at 350 degrees for 20-30 minutes until needed.

6. Serve.

What’s your favourite Christmas or Thanksgiving side? What did you have this year for Christmas dinner? Sweet potatoes or yams?

Oil Free Low Fat Vegan Cranberry Apple Pecan Stuffing

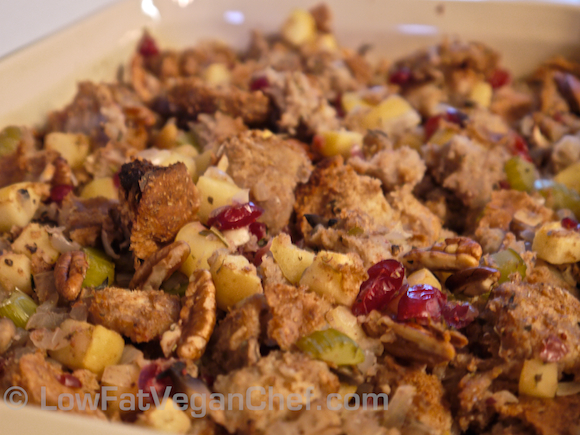
This is a very delicious and healthy, but decadent stuffing recipe you can use for Thanksgiving or Christmas! It contains no butter, margarine or earth balance, and you won’t even notice! It’s full of flavour and very moist and tasty with so many colours and textures to enjoy.

We ate it along with my Baked Maple Yam Pecan Casserole and Decadent Vegan Pecan Pie. Make sure to book mark this!

This photo above was my first time making it and it turned out very well and since then it has become the stuffing recipe that I use from now on. I wanted something with cranberry and pecan in it, and then threw in mushrooms, celery, apple and apple juice as well. In fact my family DEMANDS that I make this savory stuffing recipe each year and no one minds not having turkey flavoured stuffing at all!

This recipe makes a large casserole pan full, so definitely only do the full recipe if feeding a family. If you’re a small family or a single you could half the recipe if you’d like to make less. It definitely won’t disappoint and everyone will rave about how tasty this home made vegan stuffing is.

Fat Free Vegan Cranberry Apple Pecan Stuffing

Ingredients:

15 cups large cubes of bread
1 large onion, diced
2 stalks of celery, sliced
2 cups mushrooms, diced
1 cup cranberries
2 apples, diced
3 1/2 cups apple juice
1 tsp brown sugar
1/2 cup vegetable broth
2/3 cup pecans
1/2 tsp cinnamon
1 1/2 tbsp fresh thyme, chopped
1 1/2 tsp crushed dried rosemary
1/2 tsp dried margoram
1/2 tsp dried savory

Directions:

1. Toast bread crumbs at 350 degrees for 10-15 minutes until dry. Check after 10 minutes to prevent burning. Alternatively you can spread on a cookie sheet and dry out overnight.

2. Slice pecans halves in half. (This makes them spread farther and keeps the recipe lower in fat) Toast pecans at 350 for 5 minutes. Watch carefully to prevent burning.

3. Soak dried cranberries in 3 cups of apple juice for 30 minutes.

4. Saute onions, celery and mushrooms in vegetable broth over medium heat for 8-10 minutes until soft.

5. Saute diced apples in 1/2 cup apple juice, brown sugar and cinnamon until soft.

6. In a large bowl combine ingredients and mix thoroughly until all the herbs are spread out and the bread is moist. If your bread is still a little dry you can pour a little extra apple juice in the bottom of the roasting pan to prevent burning and drying out.

7. Spread out in a large lasagna size roasting pan and bake at 350 for 45 minutes or until heated through.


What do you think? What’s your favourite type of stuffing?

80/10/10 Recipe: Grapefruit Soup With Step By Step Pictures!

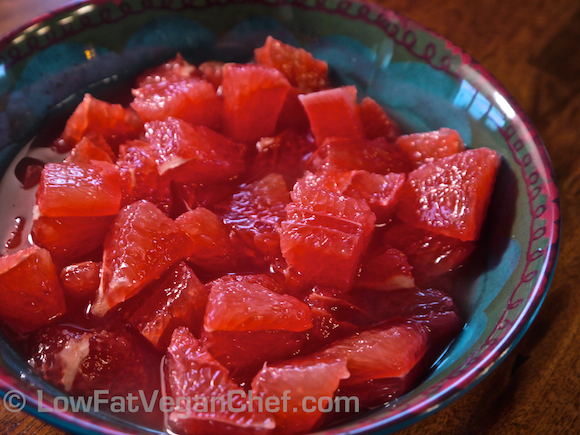
Grapefruit soup is an easy 1 ingredient (mono) meal you can have for a breakfast or a snack. It’s 80/10/10 friendly and fat free. They key is to use very sweet juicy grapefruits. My favourite are red grapefruits. Right now we’re in Texas for Christmas, so we are using the Texas Star Grapefruits here. They’re quite good. I wouldn’t suggest using this recipe for more sour white grapefruits.

My friend made this for me and I photographed him doing so, so you can easily see how to get an easy to eat grapefruit meal with no seeds or excess peel or skins.

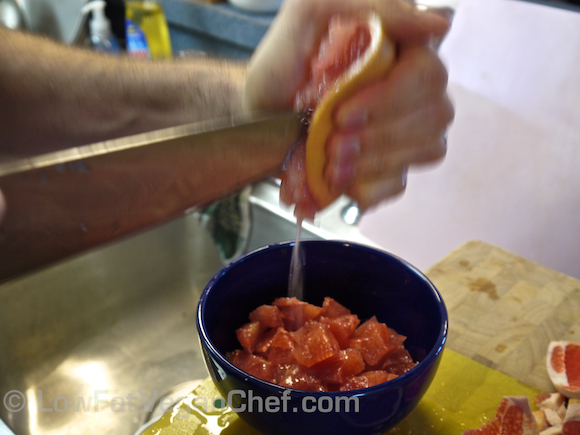
For this recipe I used 3 grapefruits. 2 to cut into chunks and 1 to juice over the chunks.

(Fat Free Raw Vegan) Grapefruit Soup

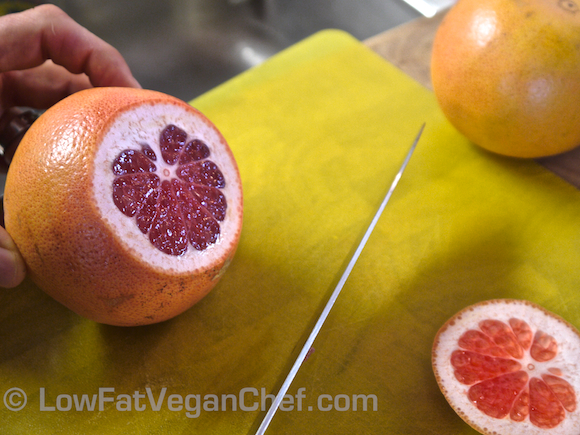
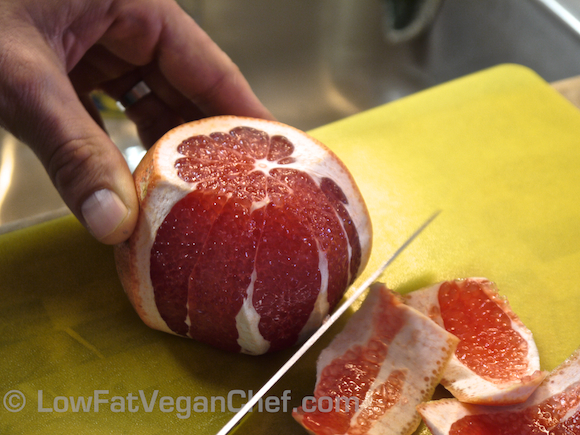
Using a sharp knife, cut off both ends of the grapefruit so you can see the flesh inside. Cut away enough that you don’t have any white pith or peel left.

Flip the grapefruit onto one of the cut ends and start cutting off the sides of the peel and pith all the way around.

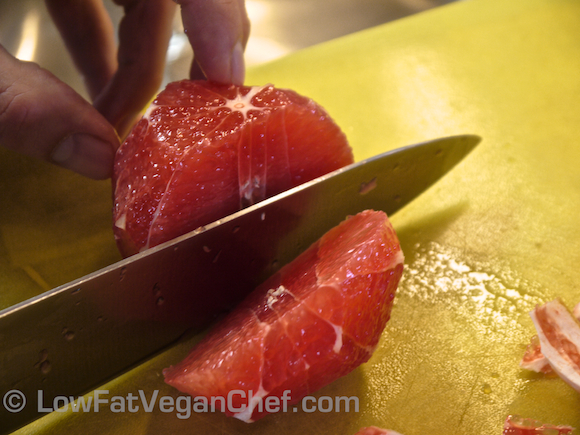
Now cut the grapefruit into 3 slices and remove any seeds you see.

Continue cutting into slices.

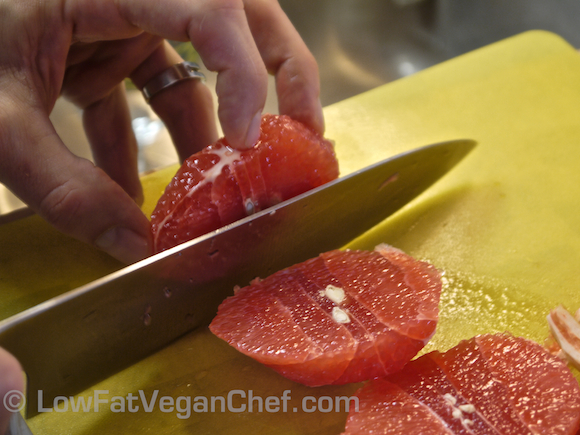
Stand up the centre piece and cut around the middle, like you would the core of an apple. Discard this piece.

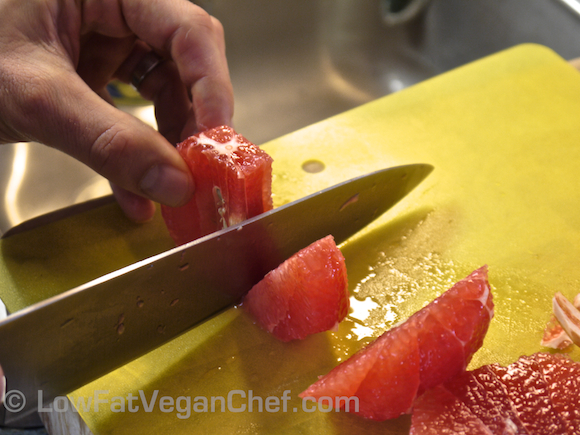
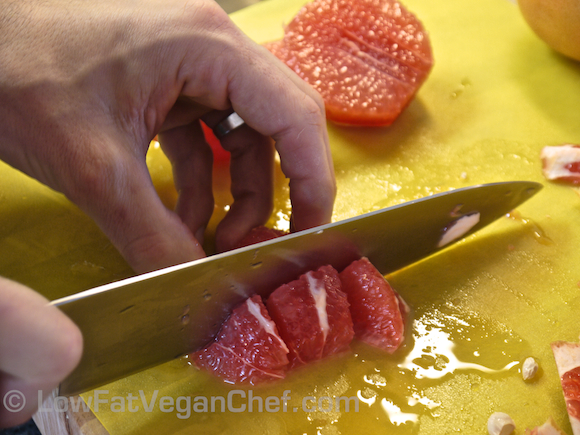
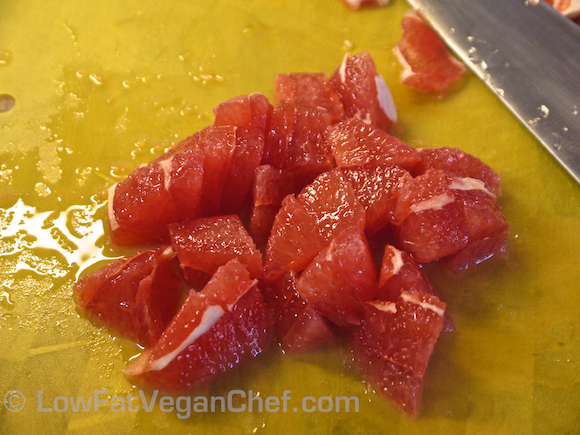
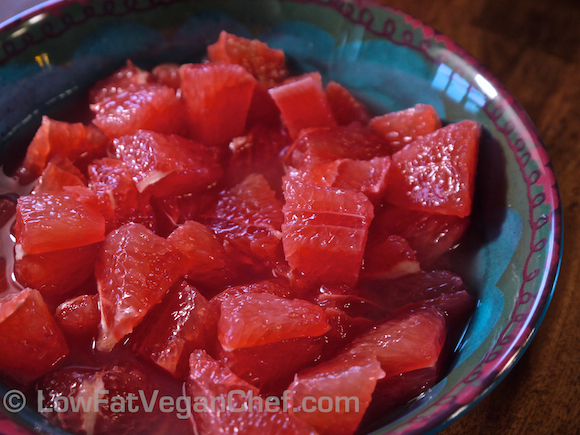
Line up your slices and now cut into bite sized chunks.

Your first grapefruit is done. Continue the same process with the second grapefruit and place the pieces into a bowl.

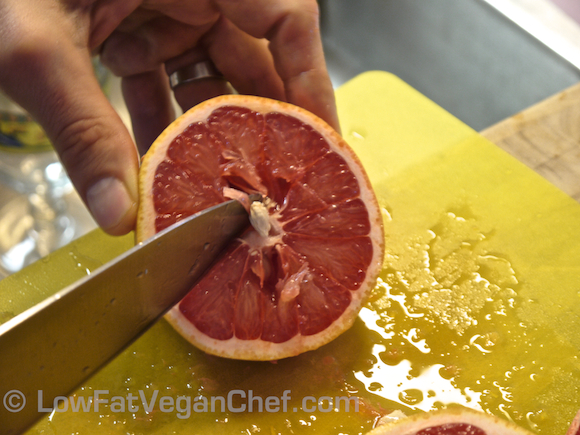
Slice the 3rd grapefruit in half. Remove the seeds.

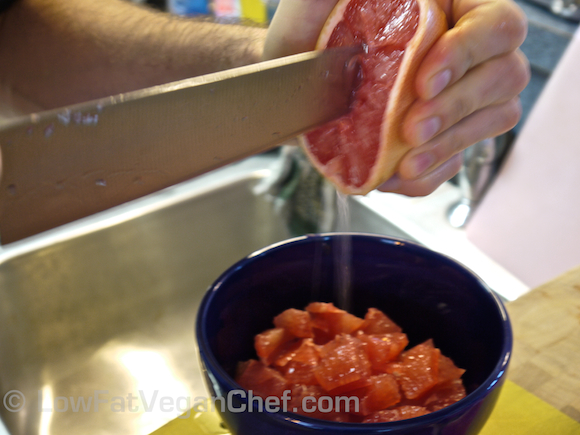
Using a knife or a citrus reamer squeeze the grapefruit and turn to release the juice. Alternatively you can use a citrus juicer.

Continue juicing the other side of the grapefruit.

Serve!

What do you think of this simple recipe? You can also do this with sweet oranges or pineapple. The key is to use sweet ripe fruit. Makes sure to eat this right away as the fresh juice will oxidize and go sour if you leave it out or in the fridge for a few days.