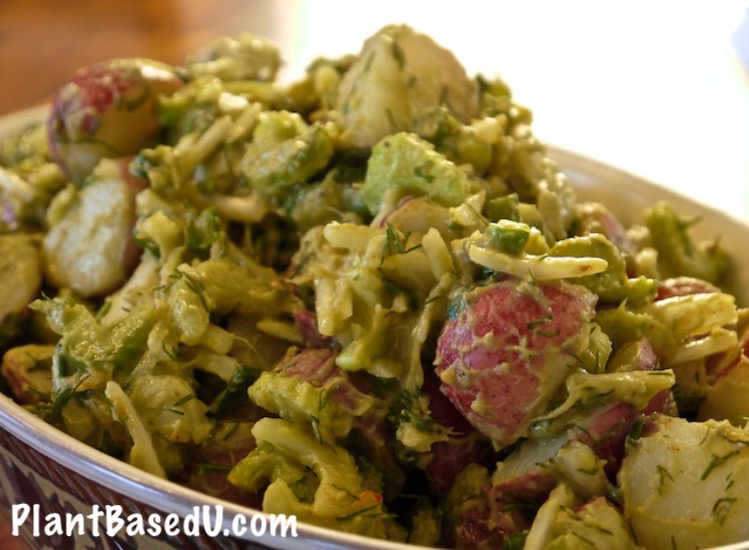
Sometimes you get a craving for a creamy salad, especially potato salad – but how do you make it creamy, oil-free and whole food based at the same time? Simple! I switch out the vegan mayo (not a condiment I use in my kitchen!) and substitute a fresh ripe avocado and mash it up and season my plant-based potato salad it just like I would any other.
Except that my version is ultimately tastier than what you’re probably used to. I like to give it more kick and I up the seasonings in it so it’s truly a dish you can enjoy on it’s own or pair with a light soup or wrap. This recipe is also oil free, soy free, gluten free and nut free as well so it’s great for allergy friendly households.
So get ready to try the best whole foods potato salad you’ve never had! And please tell me how much you enjoyed it once you have 🙂
Vegan/Plant-Based Avocado Dill Potato Salad
Serves 4-6 side servings
Ingredients:
2 lbs/908 g small baby red skinned potatoes (or other potato of choice)
3 stalks celery, trimmed and sliced
1/2 white onion sliced and diced
1 Large ripe avocado (should be soft and give to pressure)
2 tsp lemon juice
1 1/2 tsp honey, maple syrup or liquid sweetener *optional to balance the acidity in the lemon and spiciness in the mustard
1 tbsp dijon mustard
1/4 tsp smoked paprika
1/2 teaspoon herbamare or salt *or to taste as desired
Freshly ground black pepper to taste
1/3 cup dill, packed and then chopped
1/2 bunch green onions/spring onions, sliced (top green parts only)
Directions:
1. Wash potatoes and cut out any bad spots or eyes.
2. Steam, or pressure cook the potatoes gently until they are just fork tender through the centre, but al dente. Immediately run the potatoes under cold water to prevent them from cooking further.
3. For best results, refrigerate cooked potatoes for about an hour until cool. (This ensures they don’t fall apart when slicing)
4. Quarter the potatoes and peel if desired.
5. Peel and mash the avocado in a small bowl. Add lemon juice, and seasonings (except fresh herbs) and stir into avocado to create a dressing.
6. Turn potatoes into a large bowl. Add the fresh herbs and avocado dressing. Toss gently until everything is coated. Taste test and adjust seasonings if desired.
7. Serve or refrigerate until needed. Best consumed same day, or next day (as the avocado changes color and breaks down quickly)
What’s your favorite addition to potato salad and what type of potatoes do you like to use?


")